
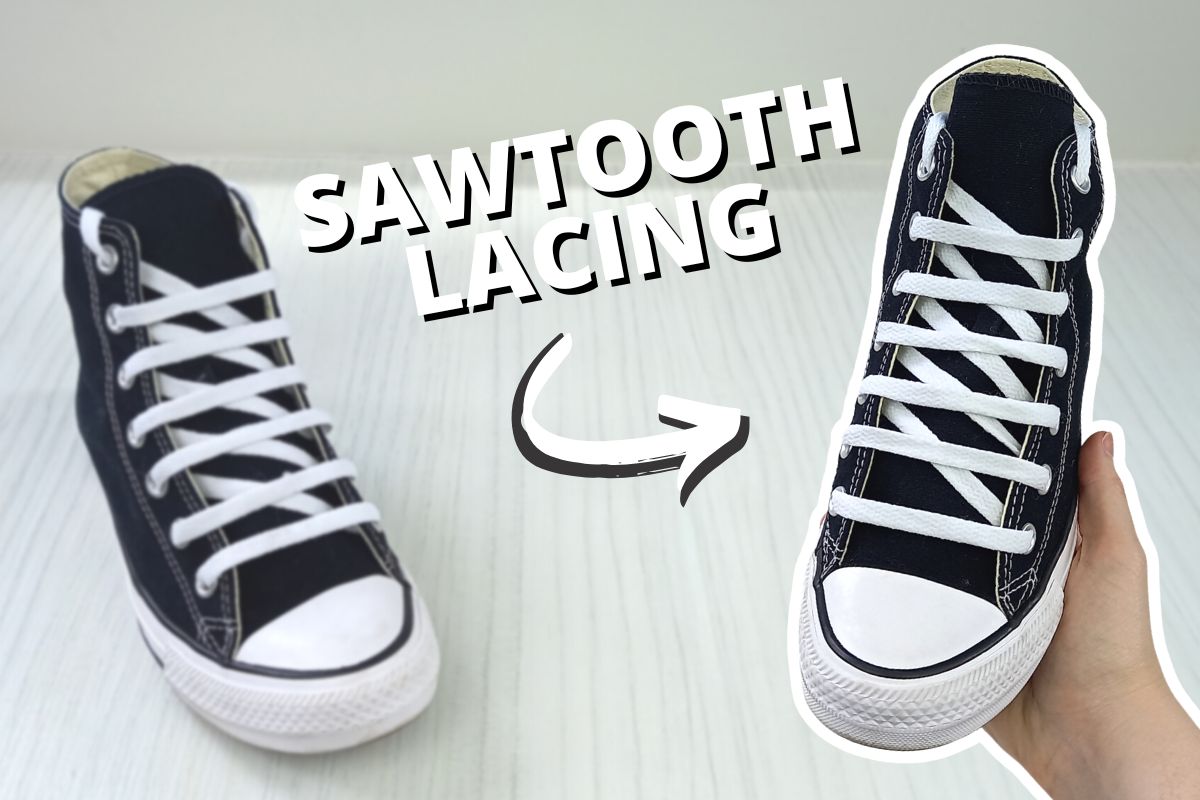
Sawtooth lacing is an impressive looking shoelace pattern, with a 3D effect. It’s surprisingly simple to do and looks a lot harder than it actually is.
Sawtooth lacing is a combination of inner and outer laces, one set running in sharp diagonal lines and the other crossing over the shoe tongue to form a ‘bar’ like effect.
The result is a secure fitting lacing style, that has its uses in the military, sporting and formal events (it’s also a favourite of skaters thanks to it’s cool look and practical use). The laces can be cut through easily, thanks to the ‘bars’ that sit on top of the design, allowing for fast removal of a shoe in the event of an injured foot.

Here is how to sawtooth lace your shoes including my step by step instructions, plus photos and a video to be as helpful as possible for you.
Sawtooth Lacing Method
Here is a video of me showing how to do the sawtooth lacing method on my Converse (I’ll be showing the photo steps on my Vans), if you would prefer to follow along with the steps:
Step 1.
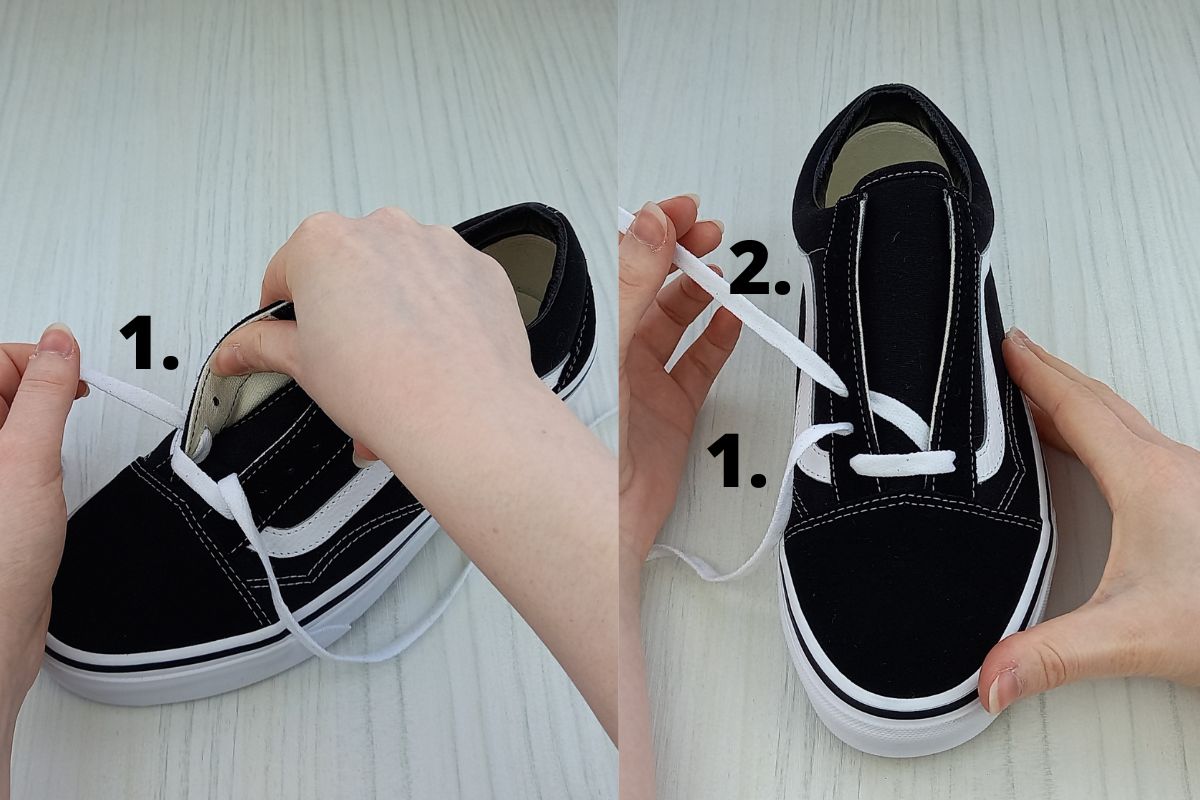

- Begin by slipping a pair of balled up socks underneath the shoe tongue to create resistance, for the pattern to lie on.
- Thread your lace ends through the two bottom eyelets of your shoe. Make sure they are going down into the eyelets from above, not coming up into them from underneath.
- Thread lace end 1. (as pictured above) into the second eyelet up from the bottom on the left hand side, from underneath.
- Then take lace end 2. and bring it across the shoe tongue, and up into the third eyelet from the bottom on the left. Double check your results against mine in the above image.
Step 2.


- Bring lace end 1. over to the right and thread it down into the second eyelet from the bottom, as pictured. This will create a ‘bar’.
- Then, continuing with lace end 1. bring it back over to the left and thread it up into the fourth eyelet from the bottom from underneath.
Step 3.

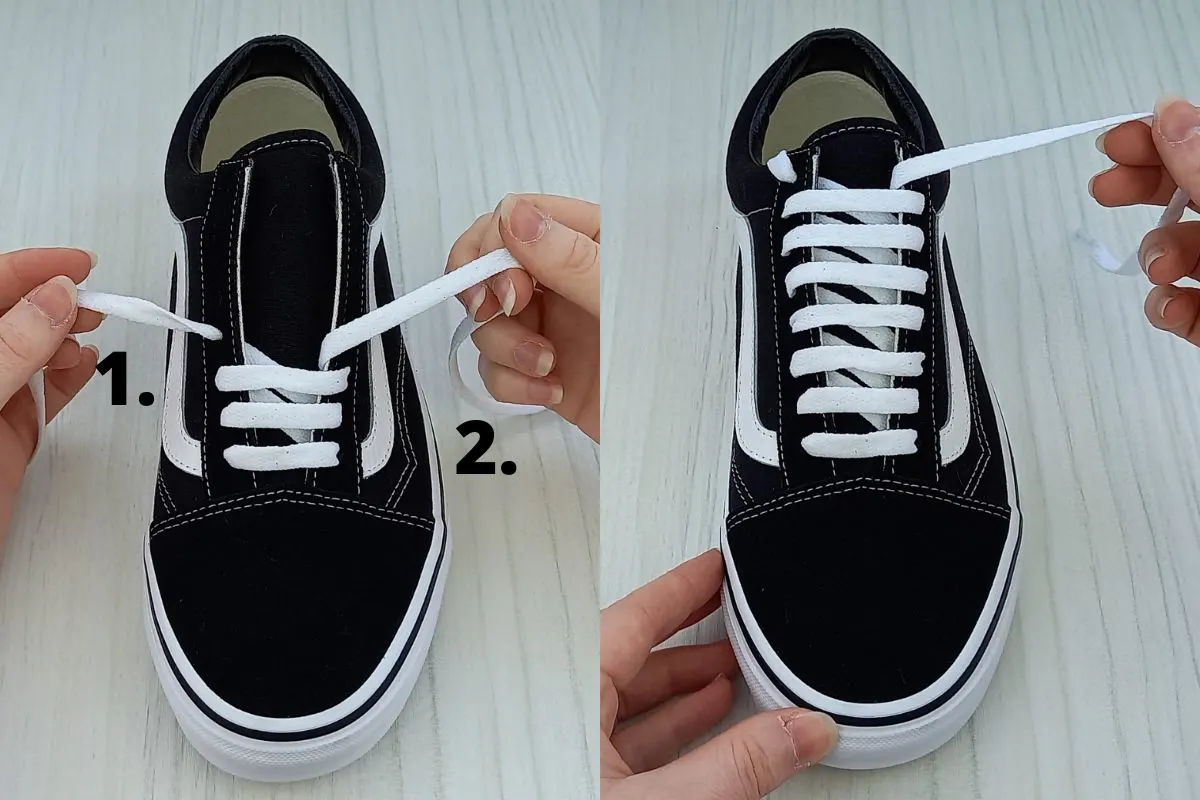
- Moving back to lace end 2. bring it across to the right and down into the third eyelet from the bottom, as pictured above, to create another ‘bar’.
- Continue with the pattern all the way up the shoe tongue. If you would like to follow along, click on the video earlier in the post!
You may also like: 15 Cool Ways To Lace Shoes: Shoelace Patterns Tutorial
Step 4.
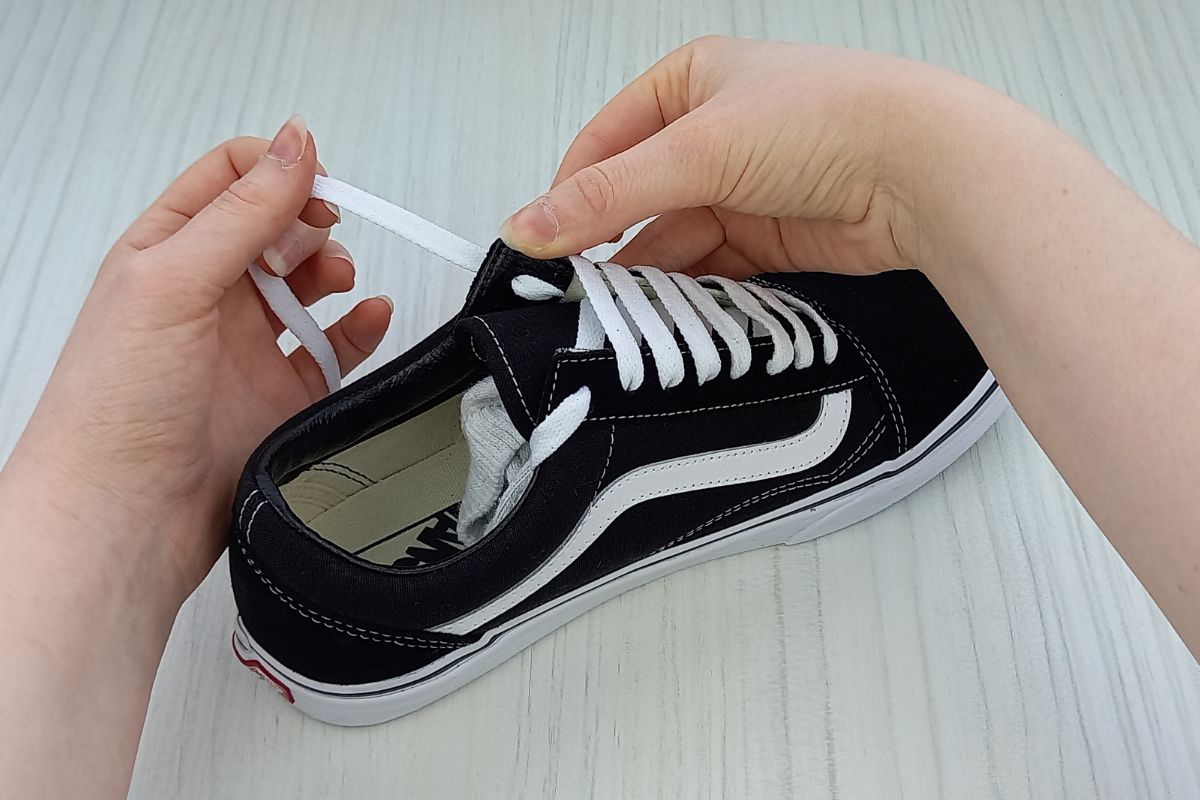

- Finish off the sawtooth pattern by lacing the lace end on the right hand side into the very top eyelet from underneath, as I am doing in the above image.
- At this stage you can bow your laces as normal and tuck them behind the shoe tongue for a crisp look. Alternatively you can read this post, for different methods: How To Hide Shoelaces: 5 FAST Hacks.
Your final result should look like mine below:


Ideal Shoelace Lengths For Sawtooth Lacing
Depending on the number of eyelet pairs your shoes have, different shoelace lengths will work best.
Here is a table showing the ideal shoelace lengths for this design:
| Number of eyelet pairs | Shoelace length (inches) |
|---|---|
| 5 | 40 |
| 6 | 40 |
| 7 | 45 |
| 8 | 54 |
Related Posts
Thank you for reading this post on sawtooth lacing, I hope you feel confident to give the style a go for yourself!
For more lacing content check out:
Lattice Lacing Shoes Tutorial (With Photos)
Ladder Lacing Shoes: EASY Tutorial (Photos)
Diamond Lacing Shoes: EASY Guide With Photos
Straight Lacing Tutorial: EASY Guide (With Photos)
Star Lacing Shoes: EASY Tutorial With Photos

Lorna is a footwear geek and the founder of Wearably Weird. She created a YouTube channel in 2021 for fellow footwear fanatics, dedicated to detail-rich footwear reviews and info. She has a fashion media qualification (awarded in 2011).