
Diamond lacing is a super cool lacing technique that can breath new life into a plain pair of shoes or sneakers. This lacing style looks so impressive and is a definite conversation starter. It’s a popular look among skaters.
This style looks particularly awesome on sneakers like Vans and Converse (I’ll be using my Converse in this tutorial), but it also looks really cool on boots.
Here’s how it looks on my Vans for reference:
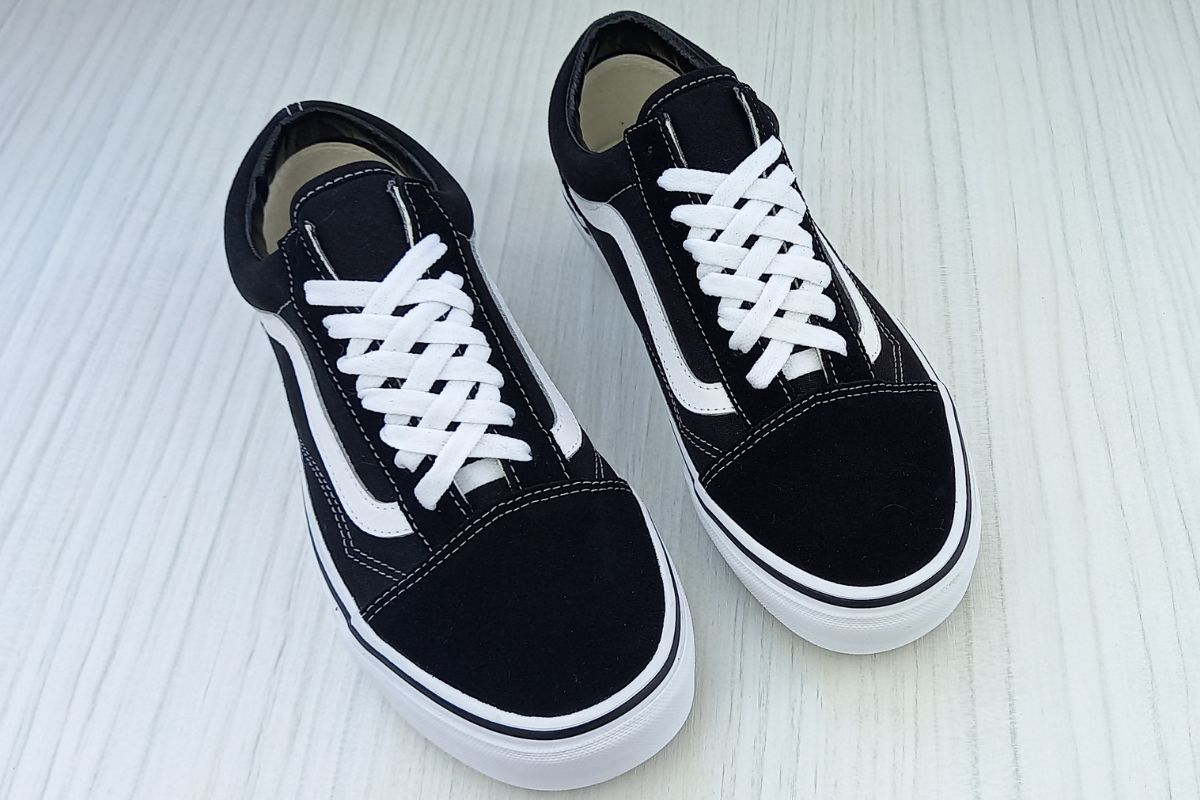
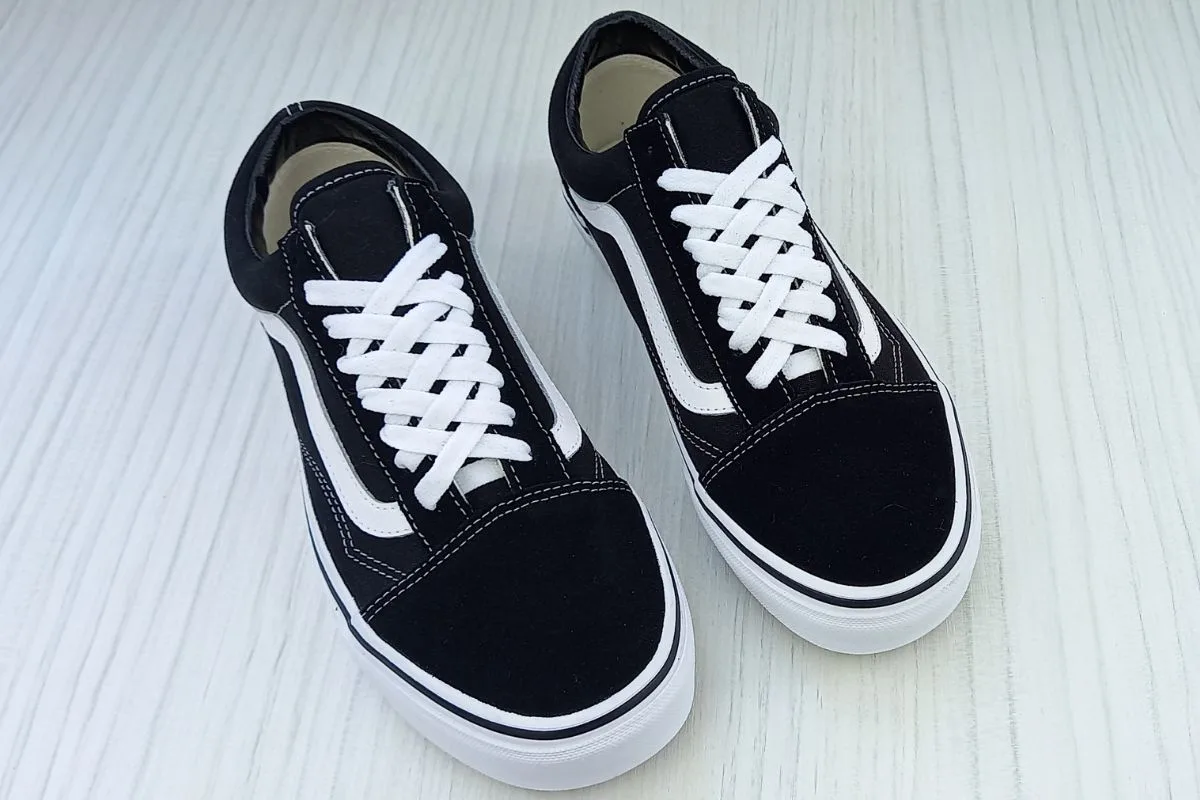
As you can see the Vans sneaker tongue is smaller so the pattern is tighter. Keep this in mind if your shoe has a smaller tongue.
In this tutorial I’ll be covering how to diamond lace your shoes in simple steps with photo and video instructions, to make this as helpful as possible for you.


How To Diamond Lace Shoes
Diamond lacing looks difficult, but it’s actually quite easy once you get started. Take your time with the steps and don’t be afraid to double check as you go, against my images.
Here is a video of me showing how to diamond lace shoes, if you would prefer to watch the steps:
It works best with flat shoelaces, so avoid using round for optimal results. This pattern works best on shoes that have more than five pairs of eyelets. My Converse have seven pairs and it looks awesome on them.
Make sure your eyelets are fairly wide too, as often a lace will be passing through them twice in order to achieve this pattern.
Let’s get started…
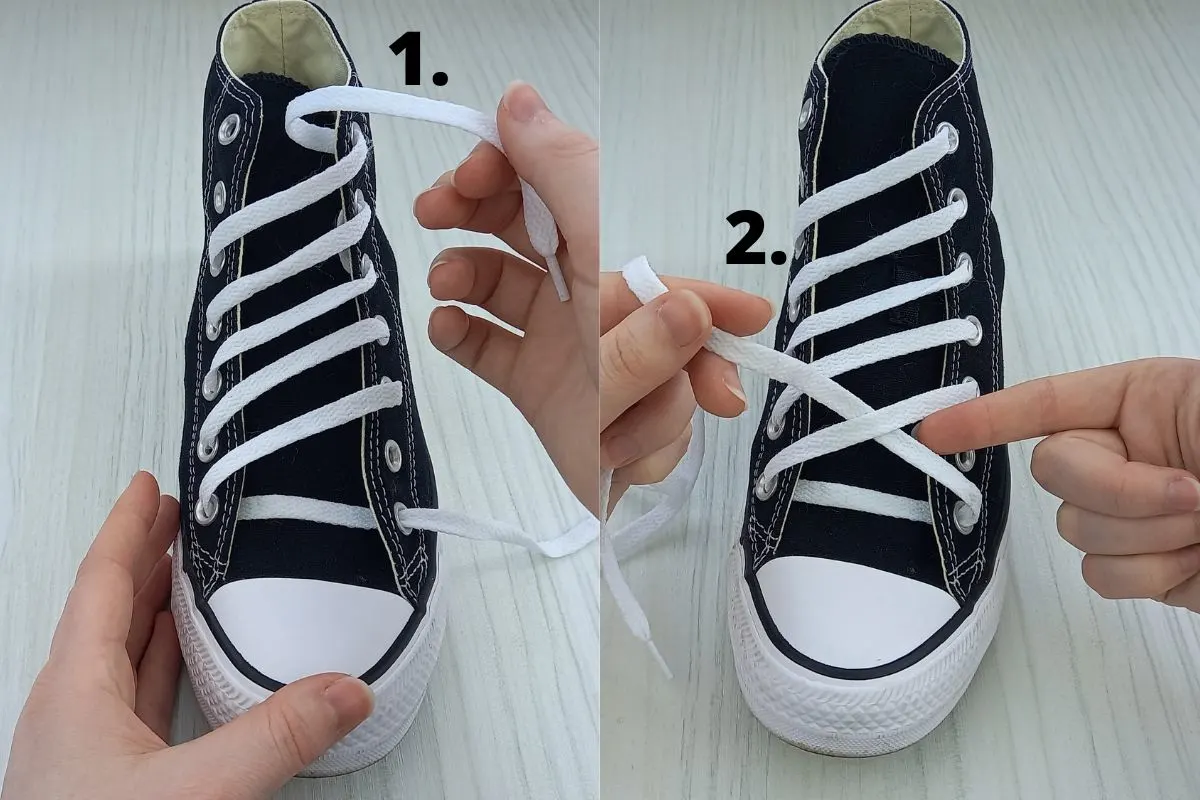
Step 1.

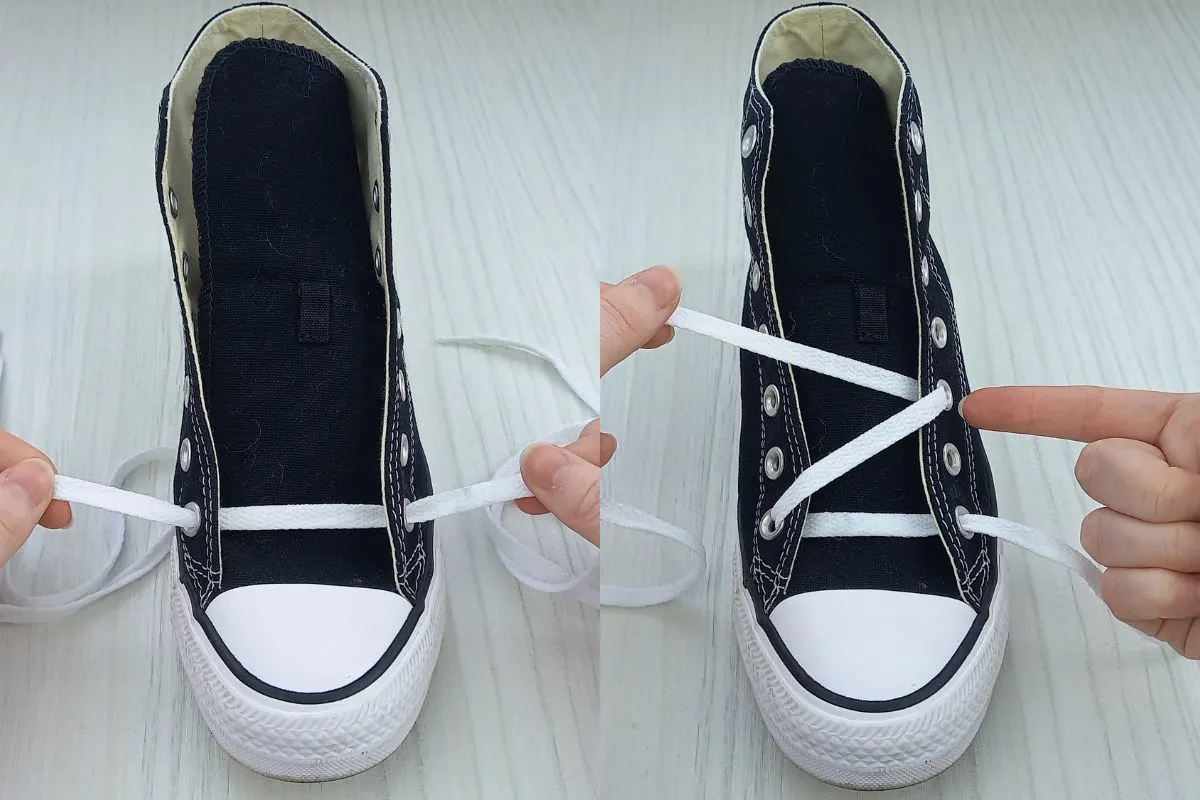
- Begin by threading your lace through the two bottom eyelets of your shoes, as I have done in the image above. Make sure the lace ends are coming up through the eyelets from underneath, not going down into them from above.
- Then take the lace on the left hand side (with the shoe toe facing you) and bring it across to the right hand side. Carefully thread it down into the third eyelet from the bottom on the right hand side, as pictured above. Make sure this time the lace is feeding into the eyelet from above.
Step 2.
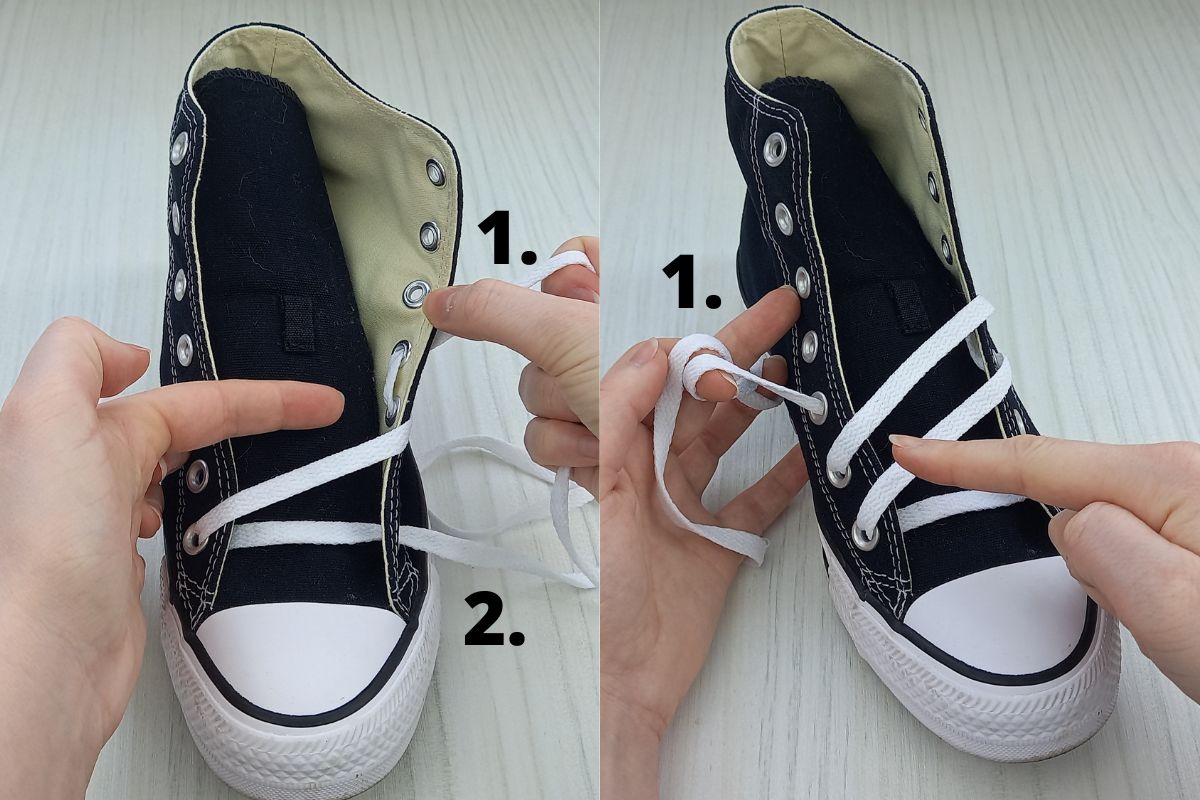

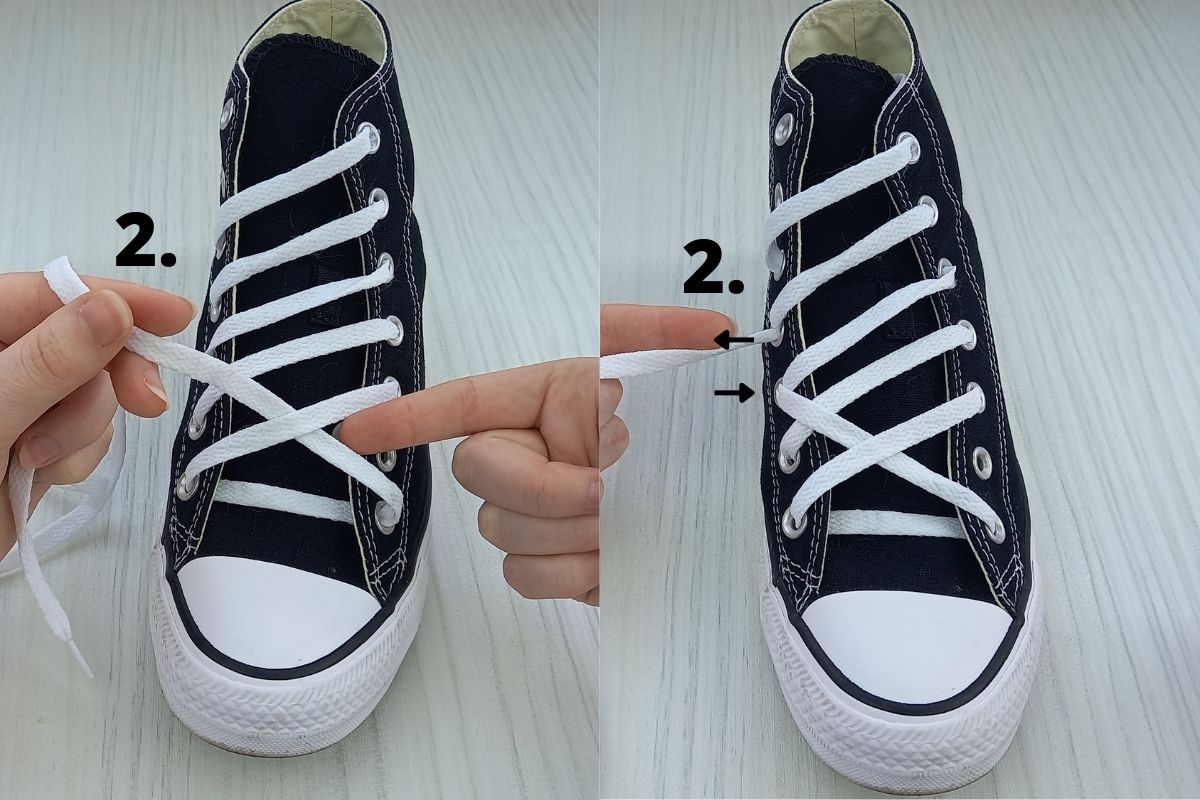
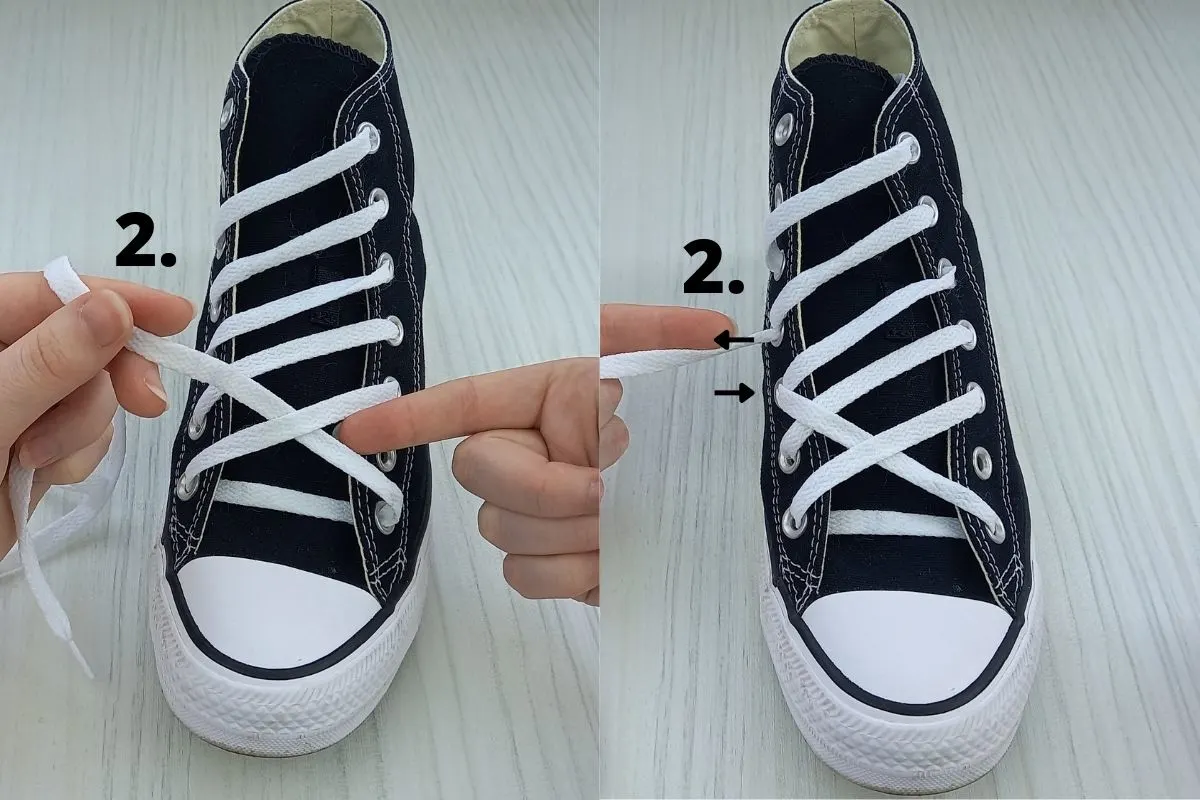
- Next take the lace and bring it up into the fourth eyelet from the bottom on the right hand side, as I do in the above image. Make sure it’s coming up into the eyelet from underneath.
- Then bring the lace back over to the left hand side and thread it down into the second eyelet from the bottom. Now you should have two diagonal laces, as pictured.
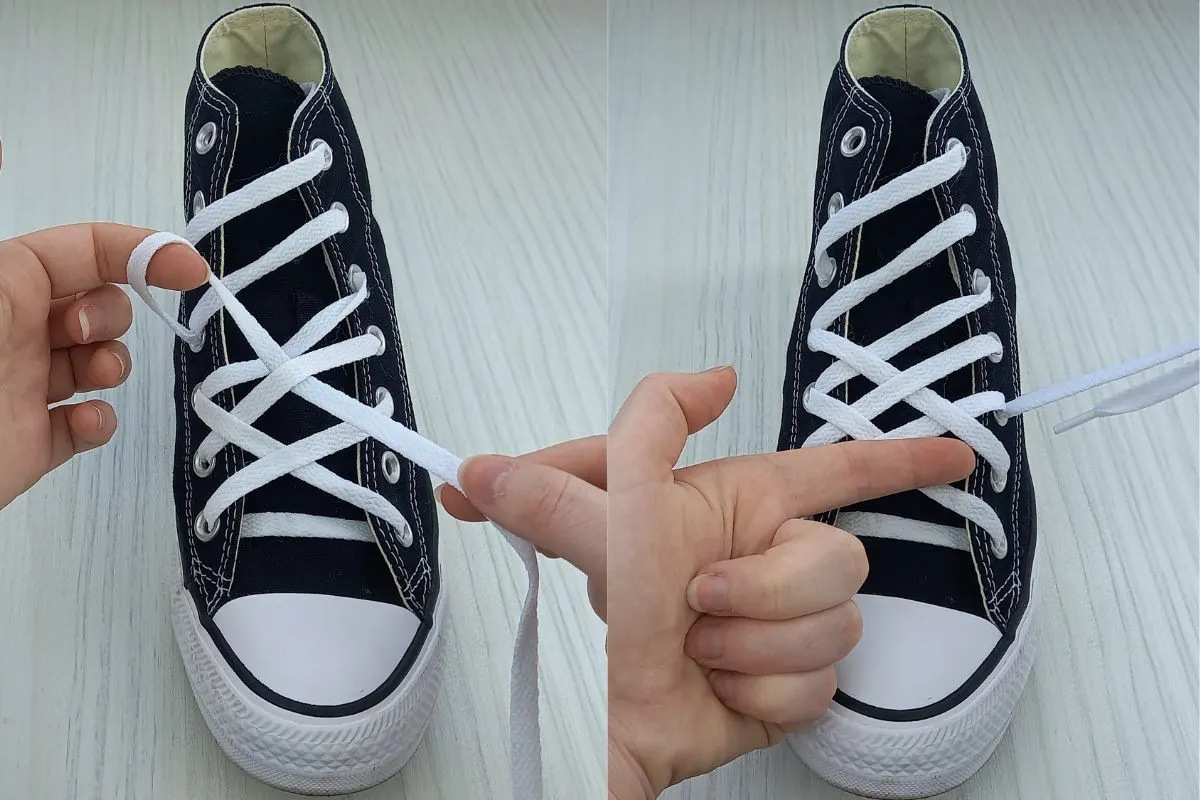
- Take the lace and bring it up into the third eyelet from the bottom on the left hand side, from underneath. Double check the above image to make sure your result looks the same.
Step 3.

- Continue with this pattern until the lace makes it’s way all the way up the shoe tongue, as pictured. Place this lace out of the way, and let’s move on to the other one.
- Take the other lace and bring it underneath the first diagonal line at the bottom, as I have done in the above image. We’re going a start a weaving pattern at this point, and you’ll start to see the diamond effect take shape.
Step 4.
- Now thread this lace down into the third eyelet from the bottom on the left hand side.
- Next feed it up into the fourth eyelet from the bottom on the left hand side, from underneath, as I have done in the above image. If you’re finding the steps a little tricky, refer to the video earlier in the article for extra help!
You may also like: Star Lacing Shoes: EASY Tutorial With Photos
Step 5.

- Bring the lace back over to the right hand side, weaving it underneath the second diagonal line from the bottom. Double check the above photo to make sure you’re following along.
- Now thread the lace down into the second eyelet from the bottom on the right hand side. Bring it up into the third eyelet from the bottom on the right hand side, from underneath this time, as pictured.
Step 6.

- Next take the lace and weave it under the third diagonal line from the bottom and bring it over to the third eyelet from the top on the left hand side. Feed it down into this eyelet.
- Then take the lace up into the second eyelet from the top on the left hand side, from underneath.
- Bring the lace back over to the right hand side, weaving it under the fourth diagonal line. Take it down into the fourth eyelet from the bottom on the right hand side. Then feed it up into the third eyelet from the top on the right hand side, from underneath this time.
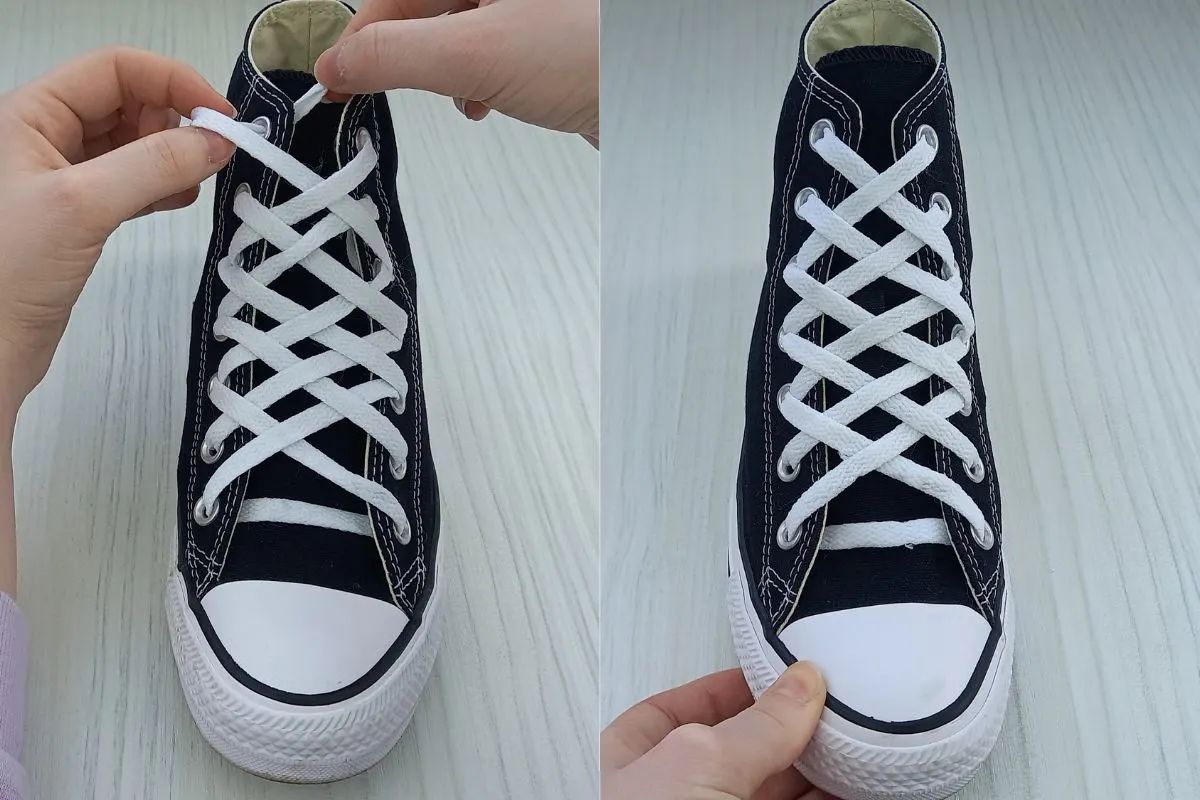
- Now take the lace back over to the left hand side for the last time. Feed it underneath the fifth diagonal line and into the top eyelet on the left hand side, as pictured above.
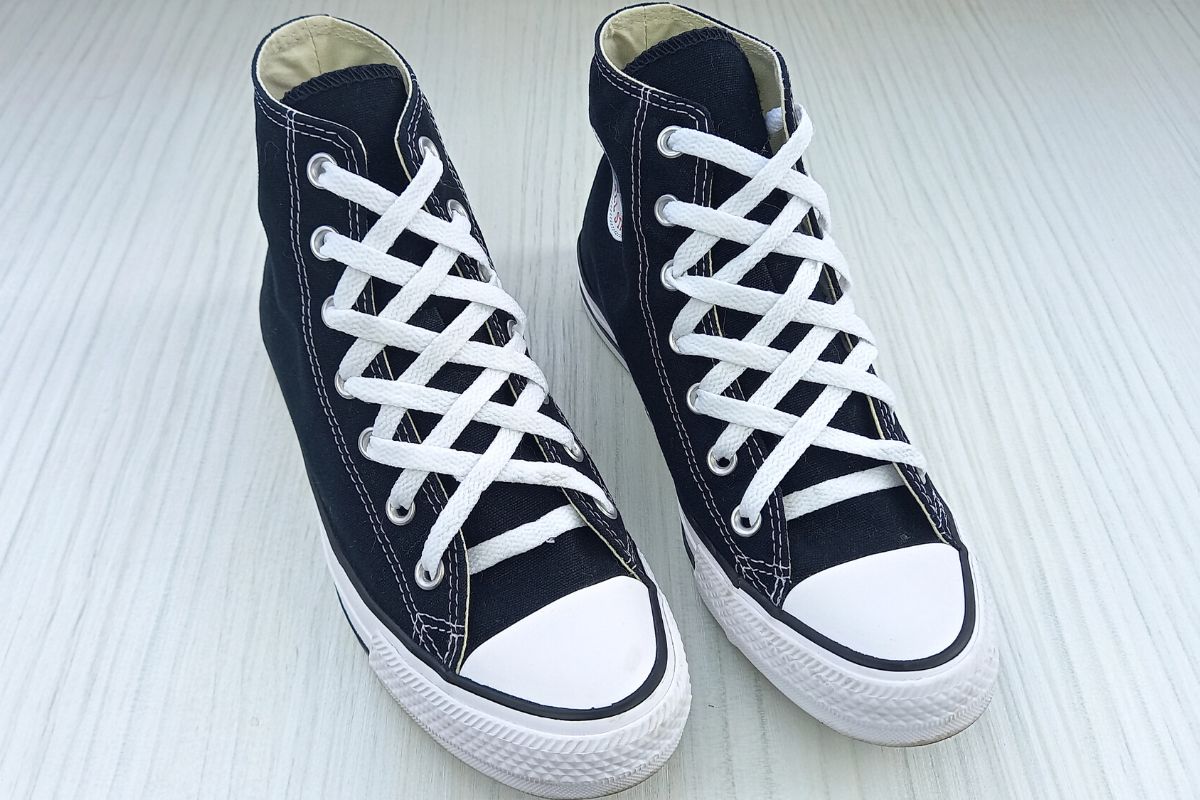
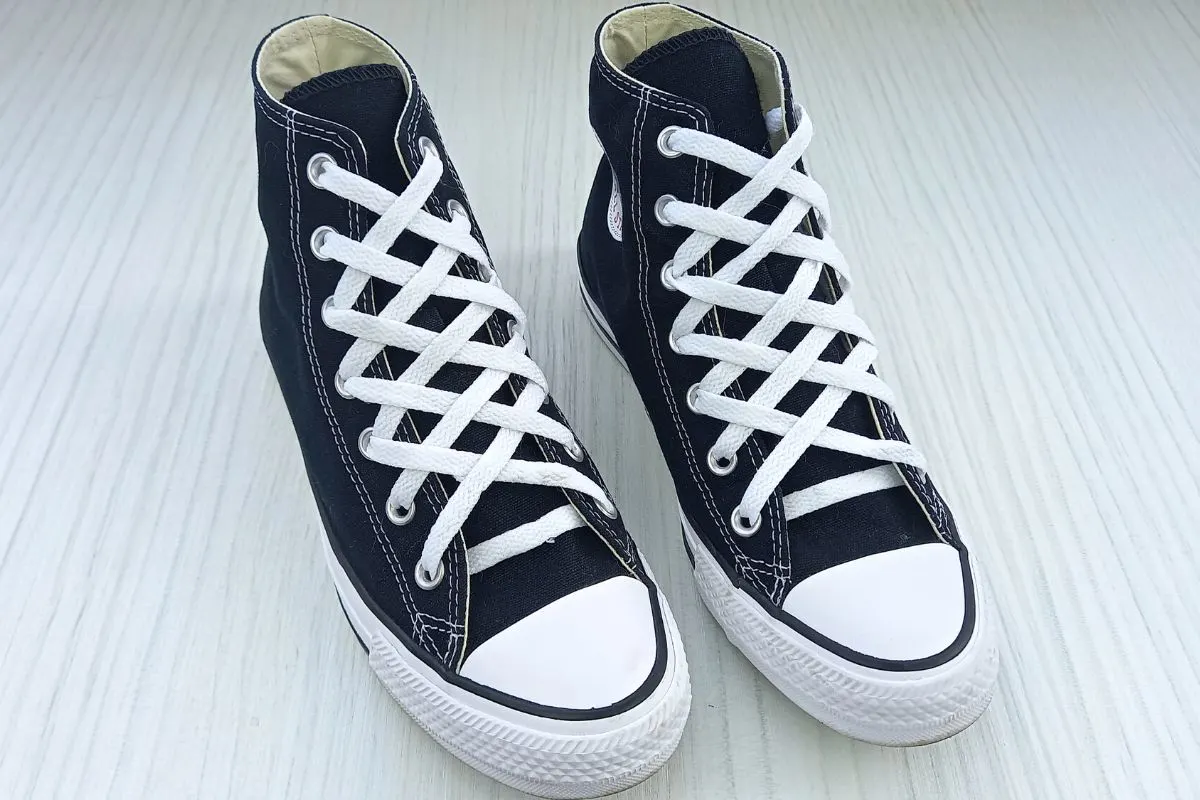
You can opt to bow your laces as usual, or bow them and tuck them underneath the shoe tongue for a crisp look as pictured below:
Best Shoelace Length For Diamond Lacing
Depending on the number of eyelet pairs your shoes have, different shoelace lengths will be required for this technique.
Please note this lacing technique requires five pairs of eyelets and above.
| Number of Eyelets Pairs | Shoelace Length (Inches) |
|---|---|
| 5 | 40 |
| 6 | 45 |
| 7 | 45 |
| 8 | 54 |
Extra Tips for Diamond Lacing
- Try out this diamond pattern with different colored shoelaces for a funky twist!
- Always slip a pair of balled up socks underneath the shoe tongue before you get started on your pattern. This will create some pressure under the shoe tongue to mimic a foot, so the pattern turns out nice and even.
- It’s best to use clean, crisp flat shoelaces with a starchy feel. This will create a neat look.
Related Posts
Thank you for reading this post on diamond lacing shoes! I hope you give this lacing style a try and add new life to your shoes or sneakers.
Once you get started it’s not only fun to do but quite simple too.
For more lacing content, check out:
How To Lace Shoes So They Slip On – 3 EASY Ways
Straight Lacing Tutorial: EASY Guide (With Photos)
How To Lace Vans – 7 Cool Ways (EASY guide)
How To Lace Converse – 9 EASY Ways

Lorna is a footwear geek and the founder of Wearably Weird. She created a YouTube channel in 2021 for fellow footwear fanatics, dedicated to detail-rich footwear reviews and info. She has a fashion media qualification (awarded in 2011).