
When I opened the box of my first ever pair of Vans I was surprised to see they came unlaced, leaving me wondering how to lace Vans. Many people will go for a standard lacing style, but personally I wanted to try something a little different and take my footwear game to the next level.
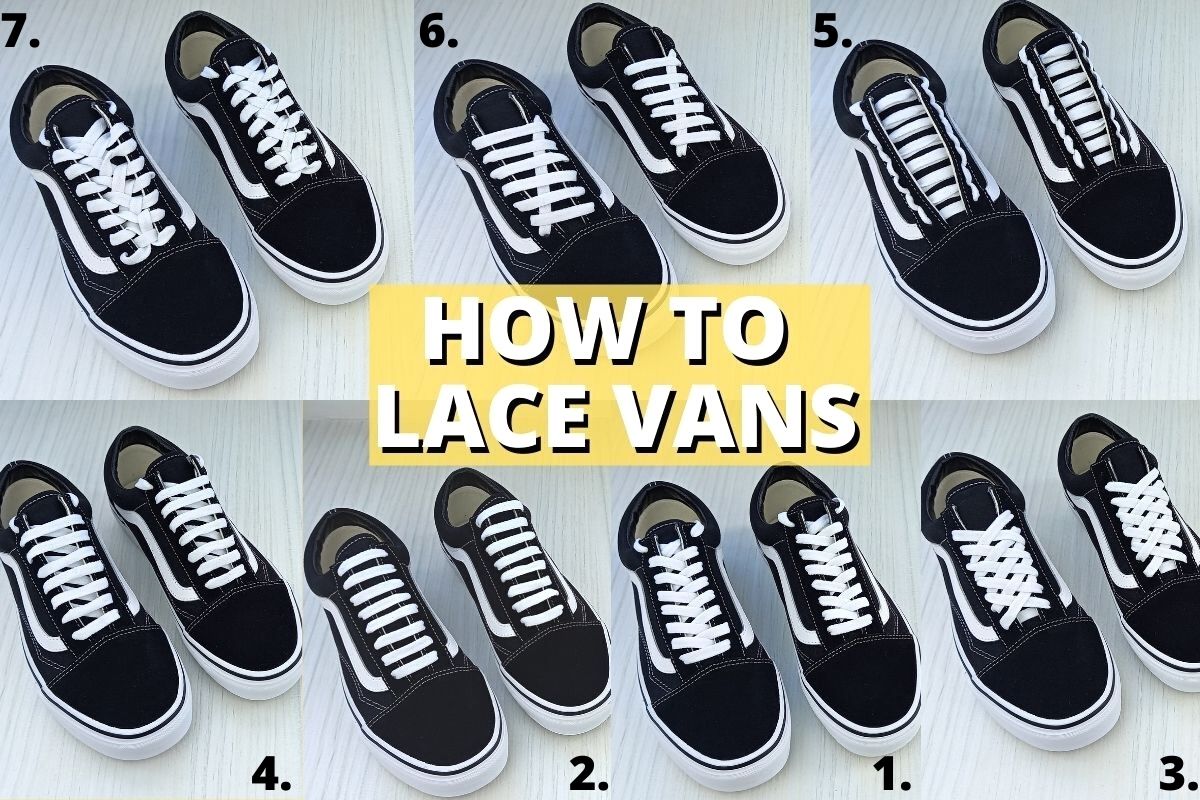
Over 10 years later I’ve owned many pairs of Vans and have tried countless lacing methods. In this post I’ll be sharing my 7 favourite ways to lace vans, with step by step instructions and pictures to be as helpful as possible.
These lacing methods will look great on Old Skool Vans, high top Vans, Sk8-Hi Vans and Vans Era (just adjust them to the number of lace eyelets as needed).
I’ll be demonstrating the lacing patterns on my new pair of Old Skool Vans, so you can see the full effect of the patterns on 7 lace eyelets.
Here is a graphic showing all of the different styles I’ll be covering:

To skip ahead to a lacing style, simply select it’s number from the table of contents below.
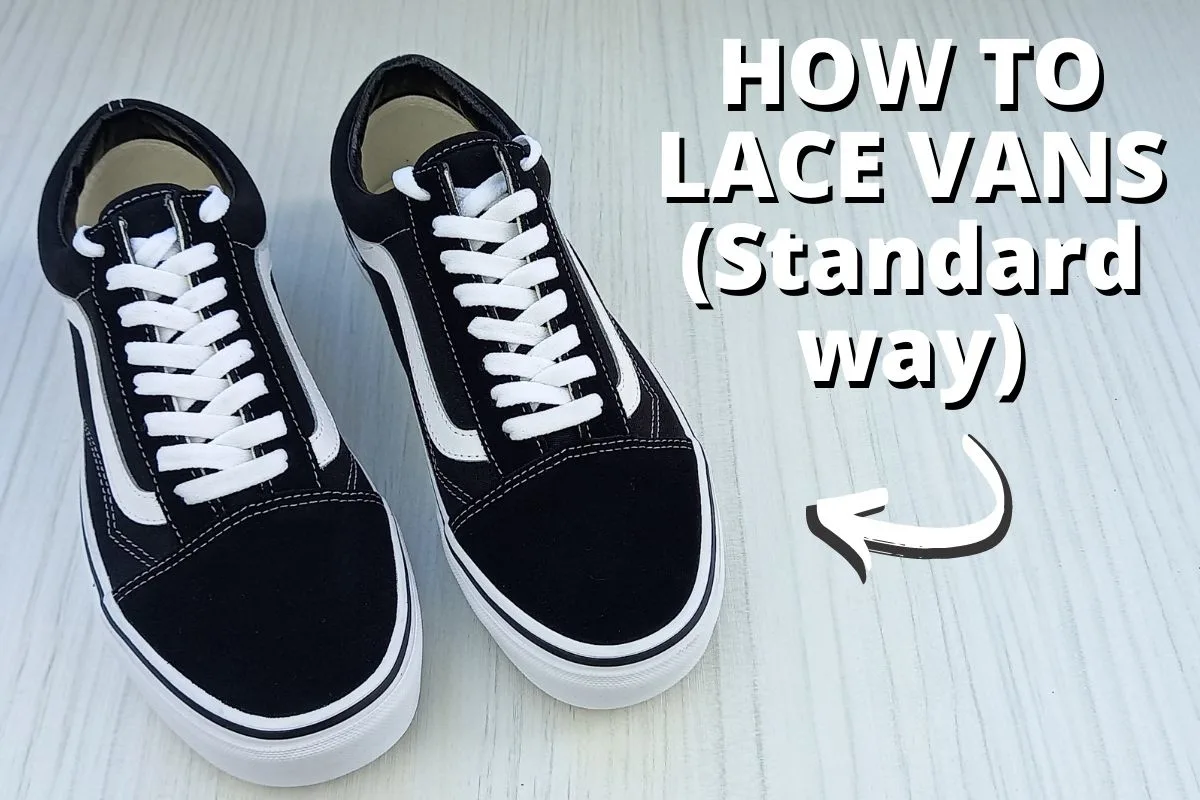
1. How to Lace Vans The Standard Way

Standard lacing your Vans is a great lacing style to come back to if you’ve removed your laces for any reason (cleaning etc) and need a reminder of how to achieve it. It’s a secure design, preventing lace slipping and has a simple, classic look.
I’ve also included a YouTube video of how to lace Vans in the standard way at the end of the written steps.
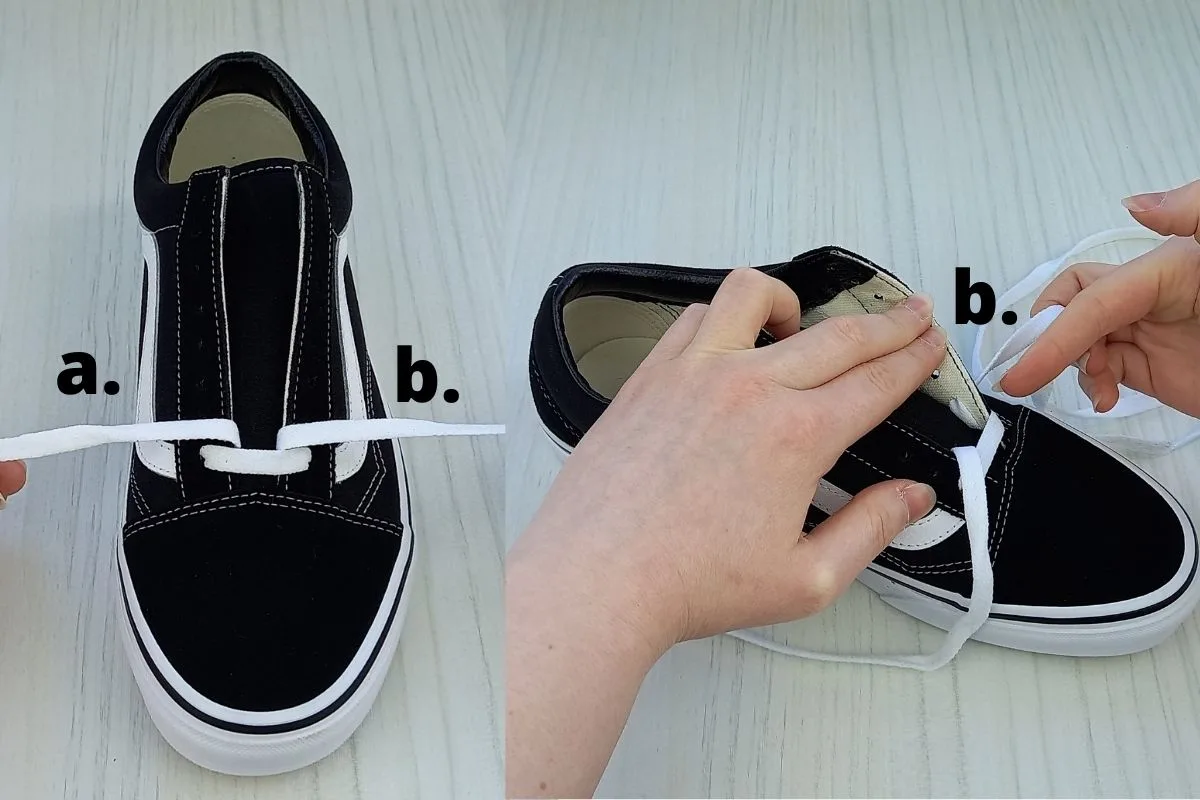
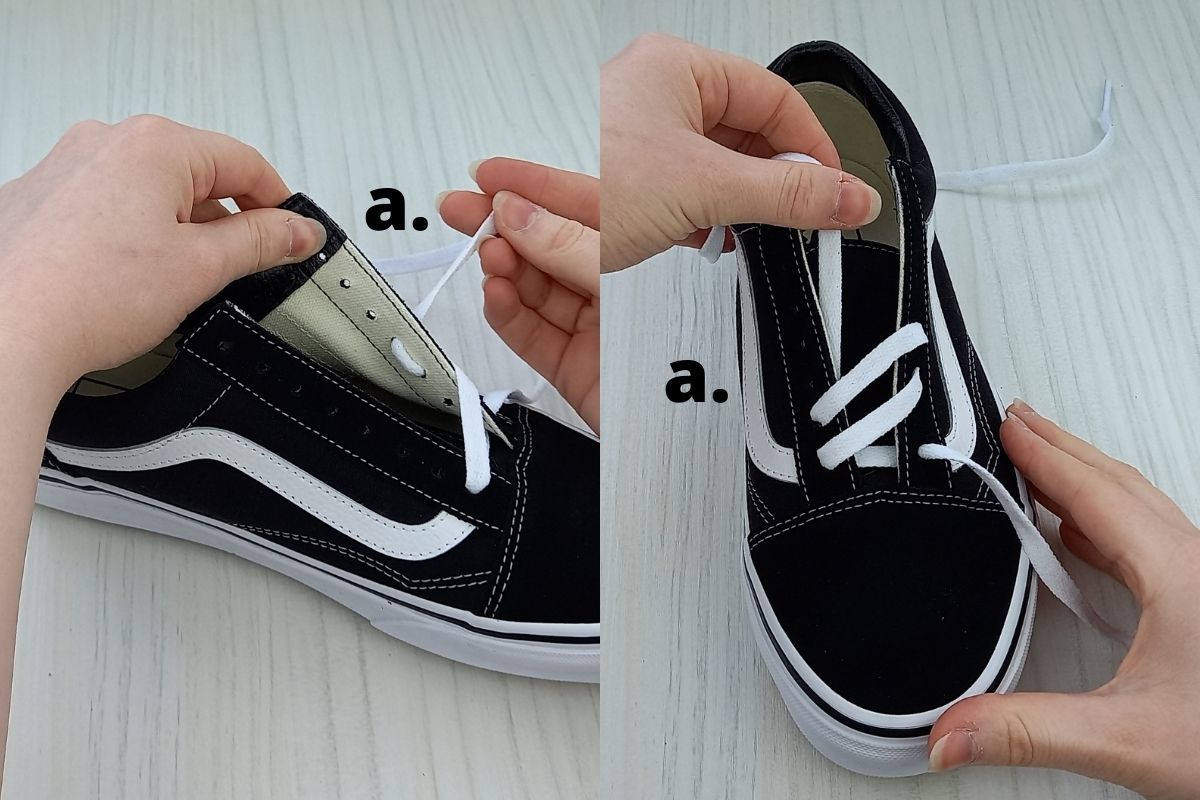
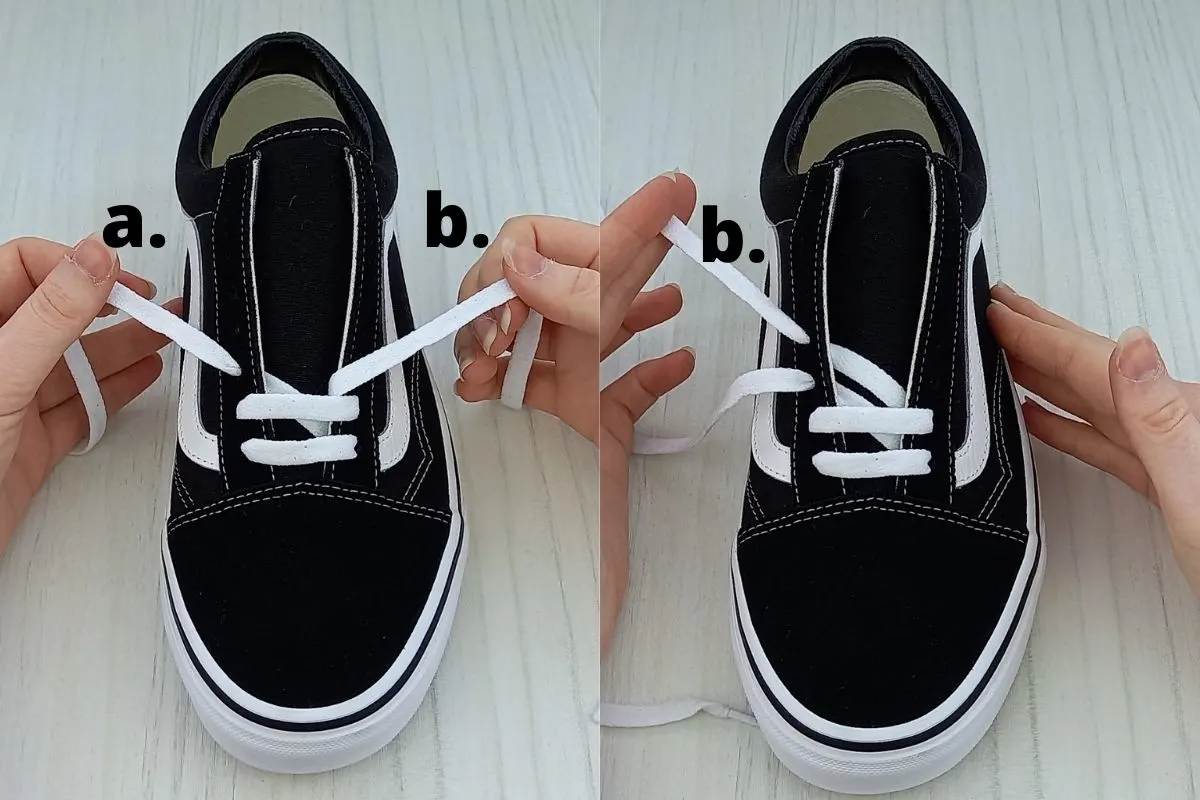
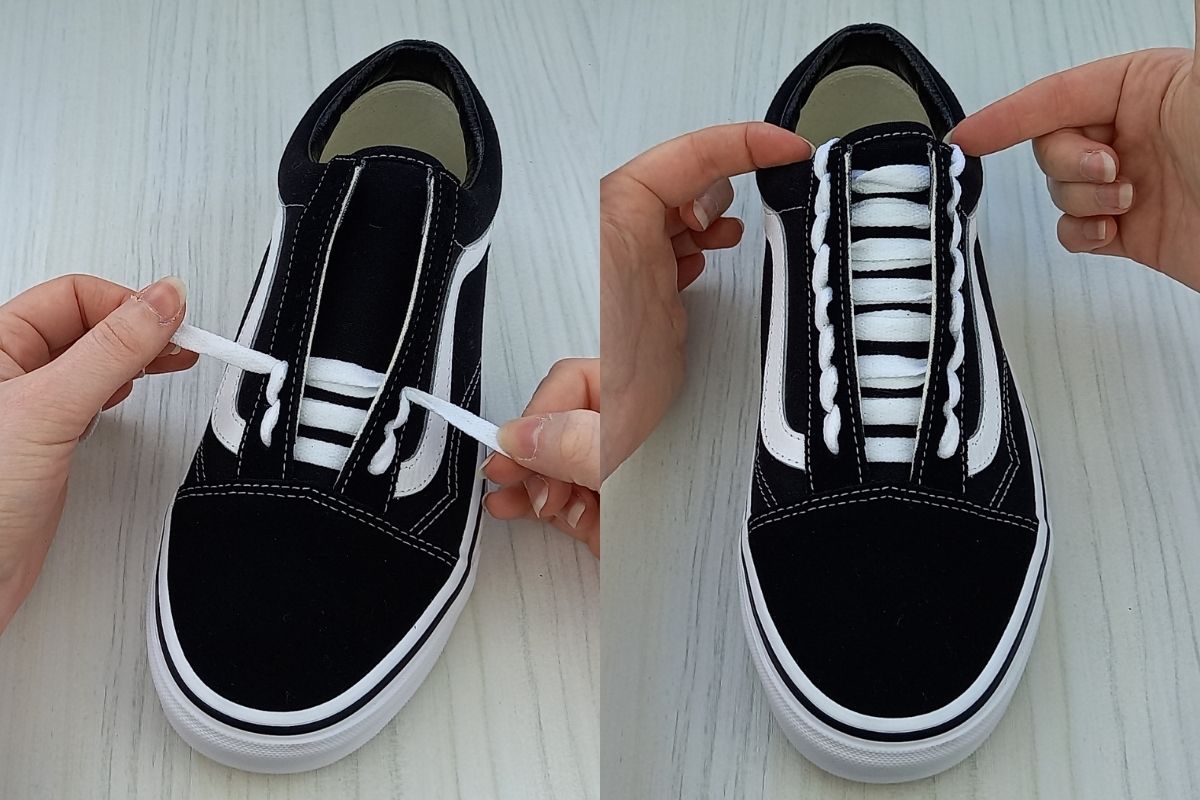
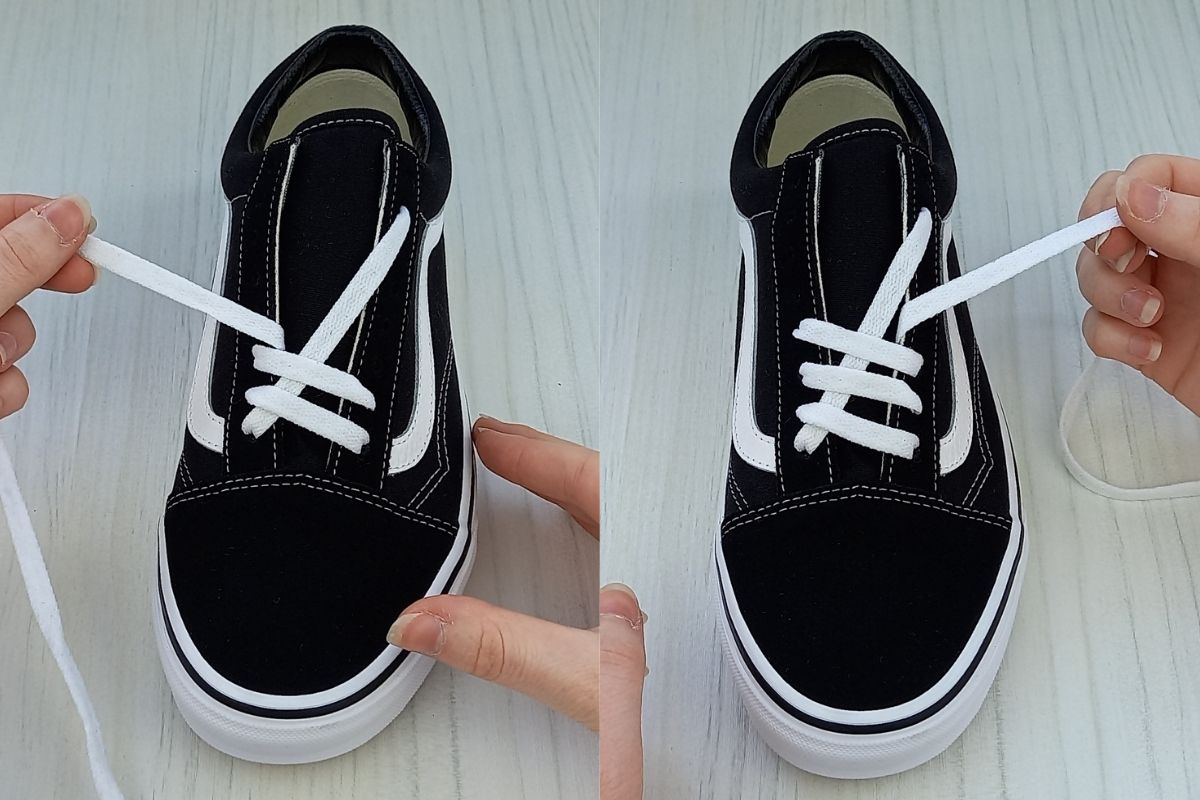
Step 1.

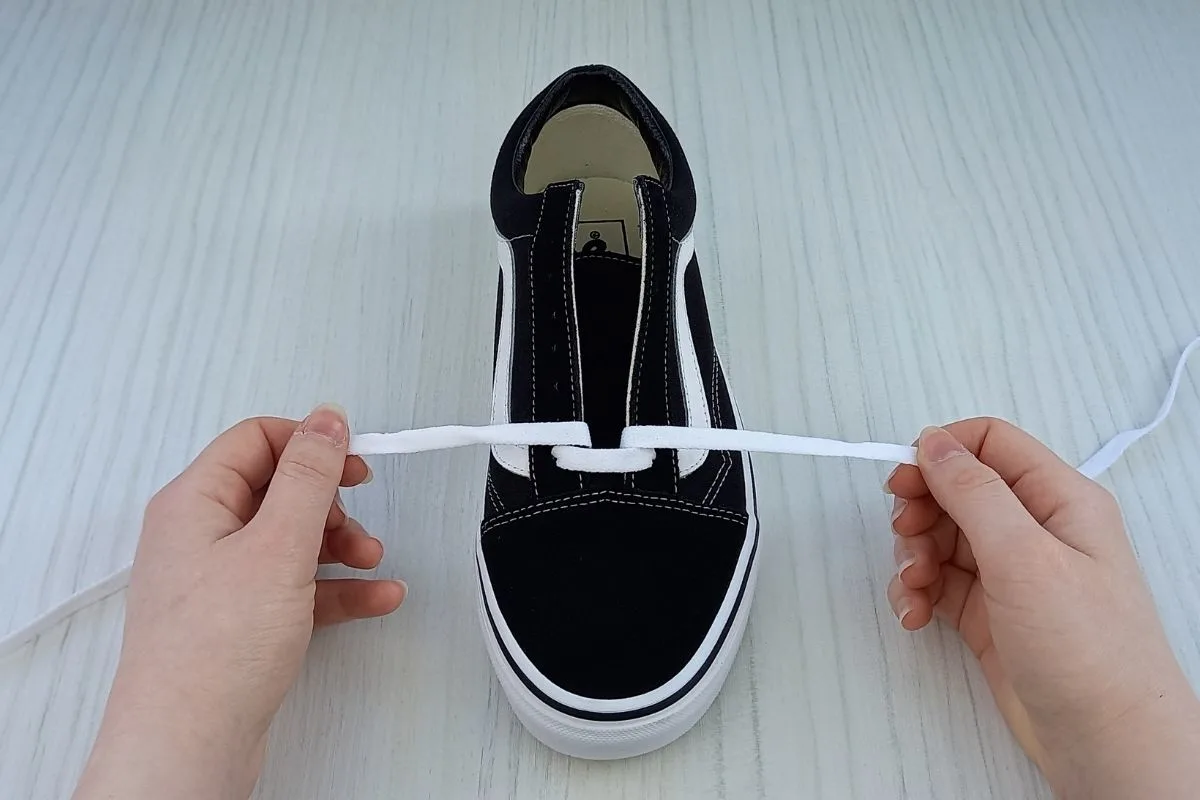
- Thread your lace through the two bottom eyelets of your Vans, as I have done in the above picture.
- Make sure both laces are the same length on either side. Also be sure to thread your laces down into the eyelets, not up from underneath, like in the above image (for a crisp look).
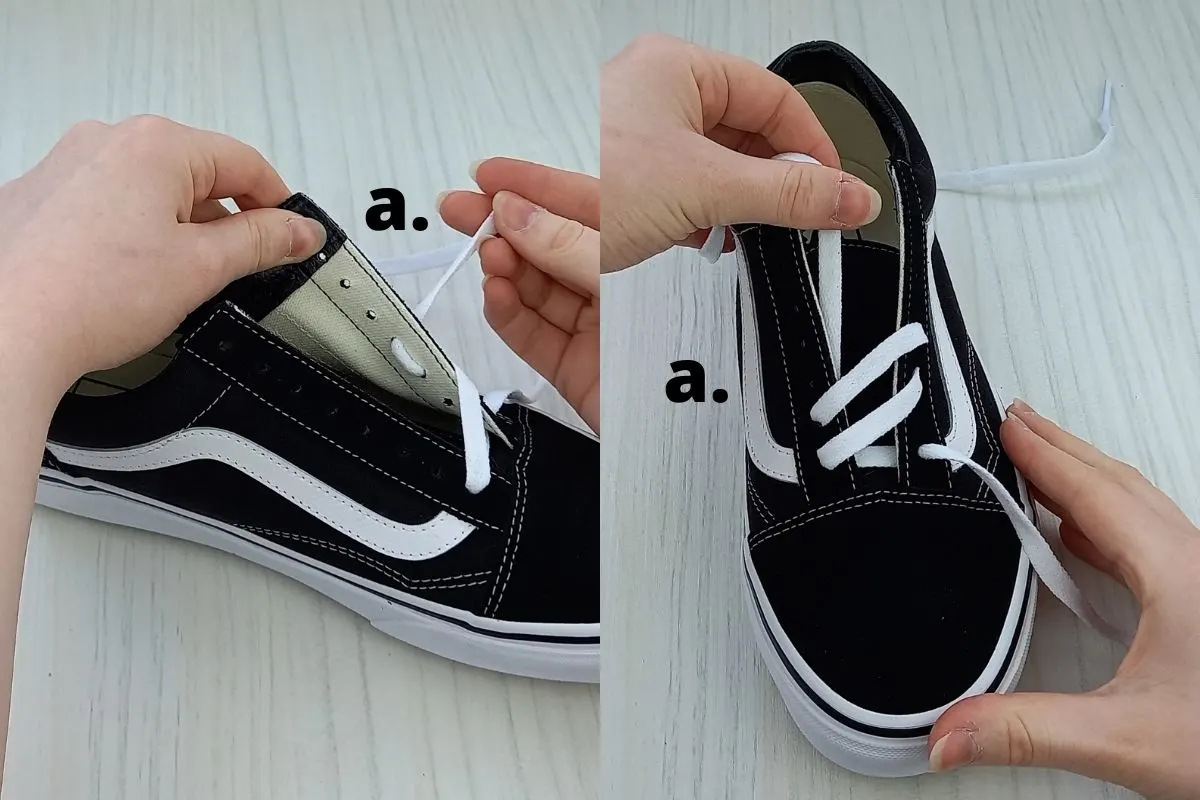
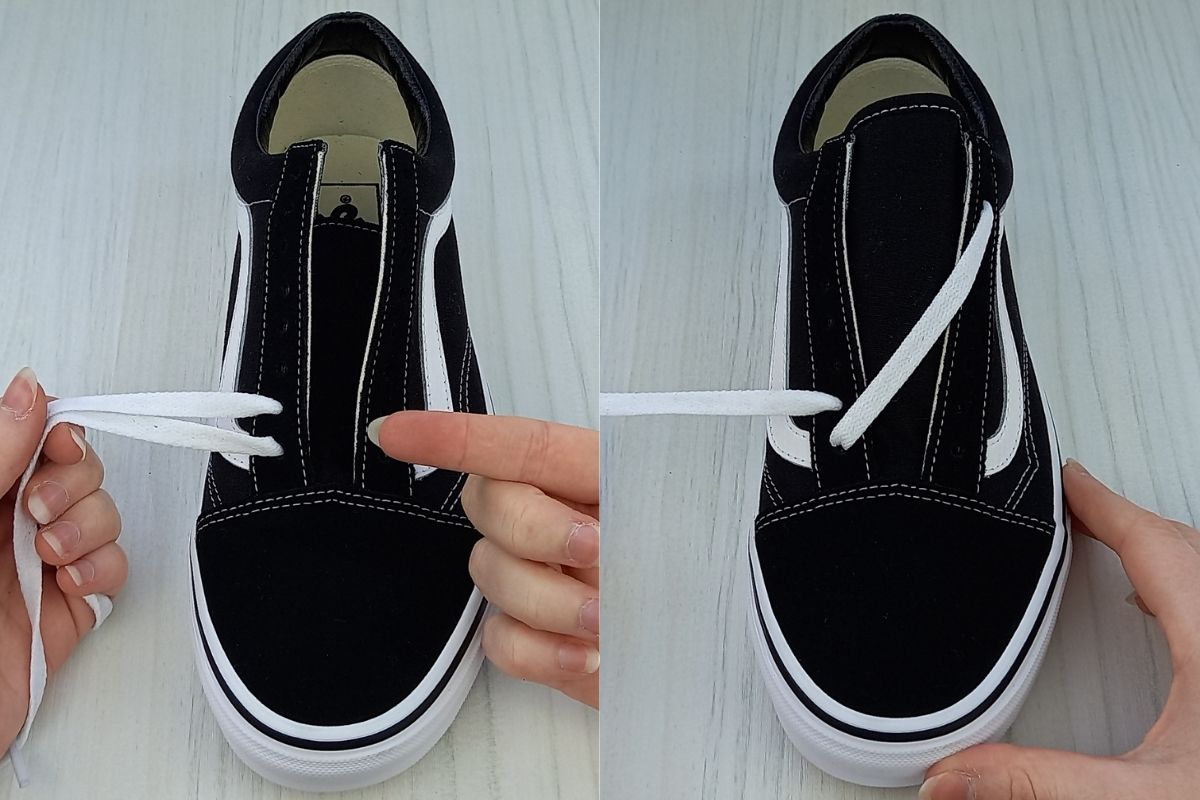
Step 2.
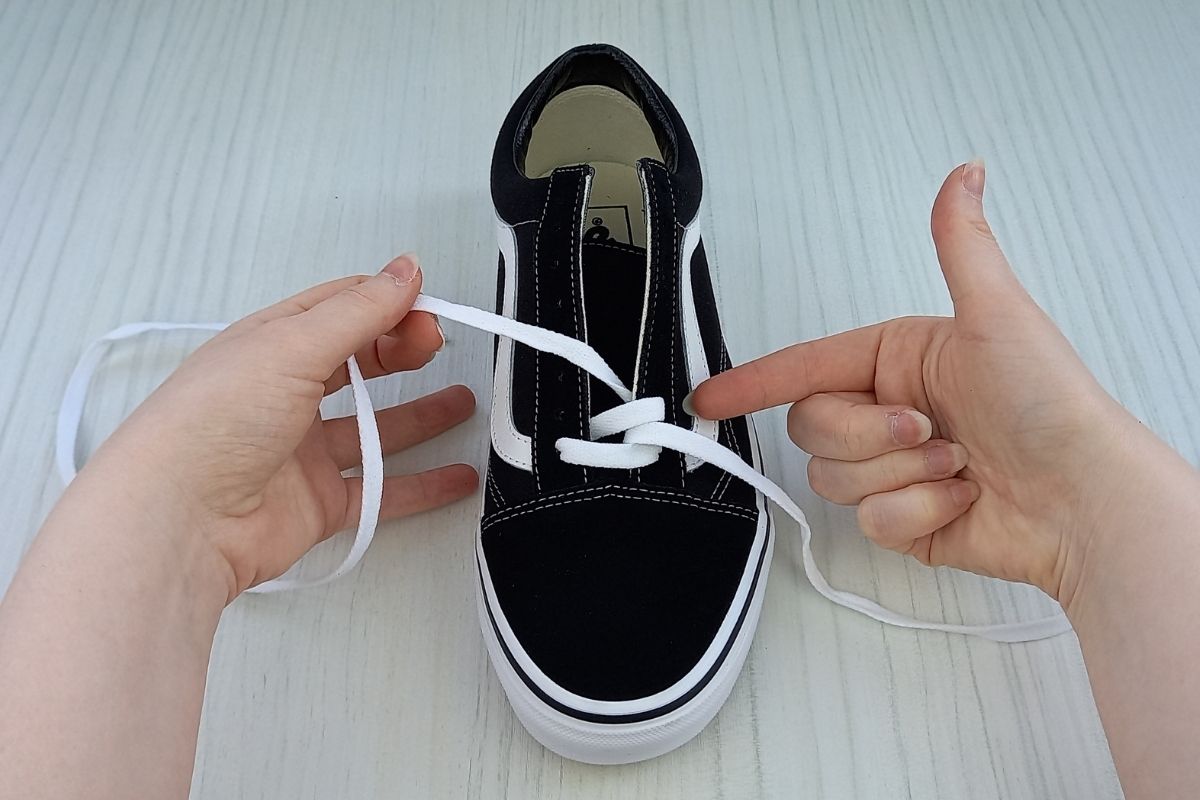
- Next take the lace on the left hand side over to the right hand side and thread it through the second eyelet up, as pictured above. Again make sure you are threading the lace down into the eyelet and not up from underneath.

- Repeat this step with the other lace, as above. You will now see the standard lacing pattern emerge.
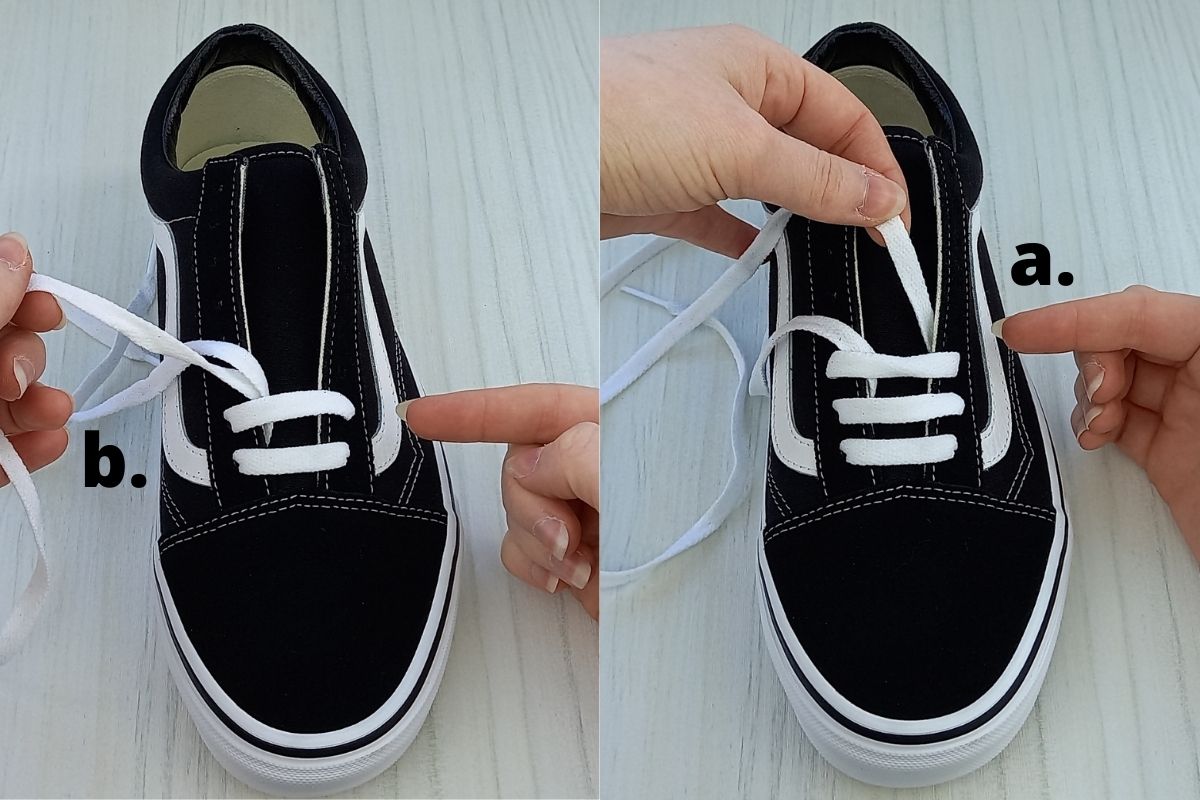
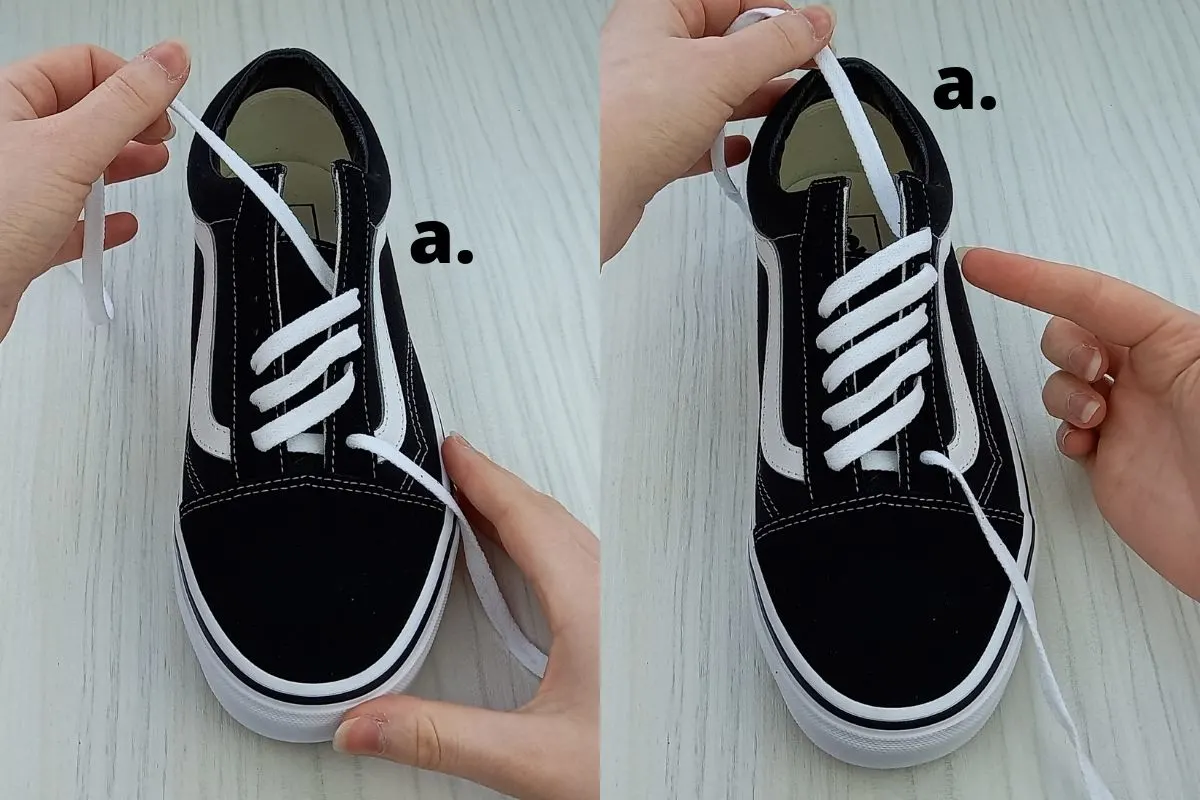
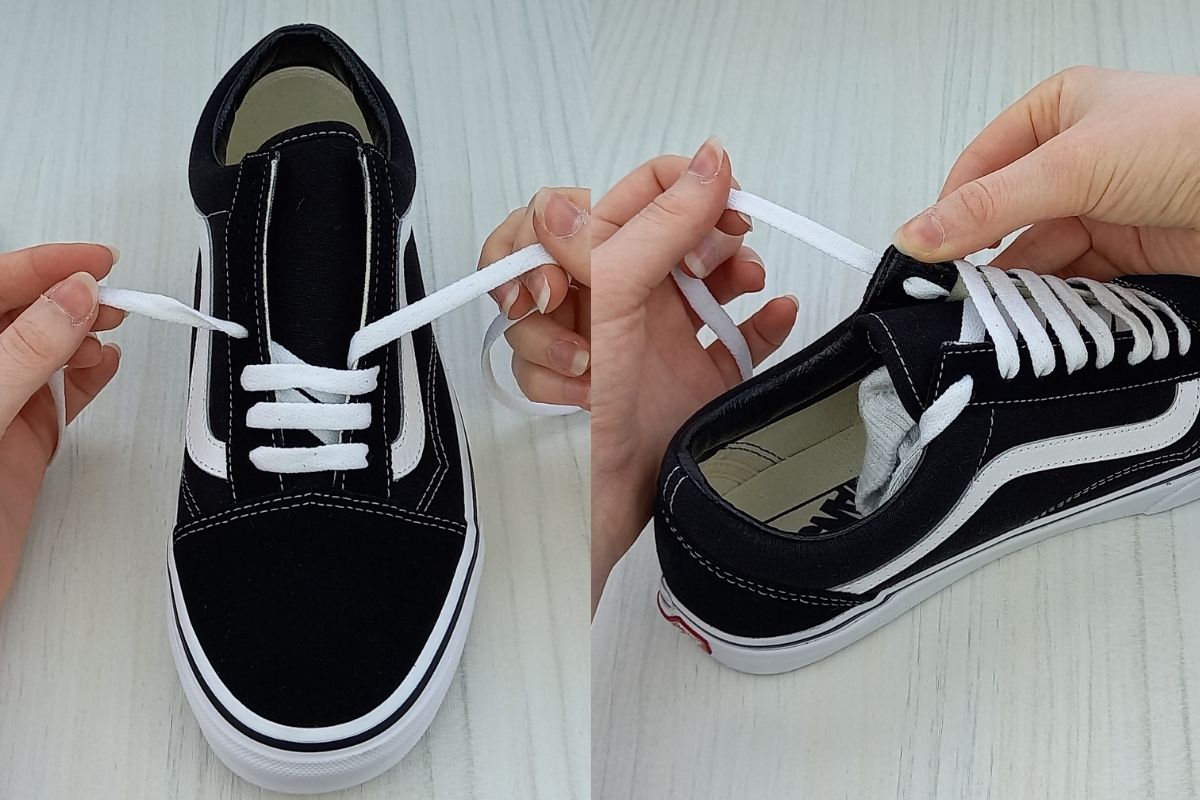
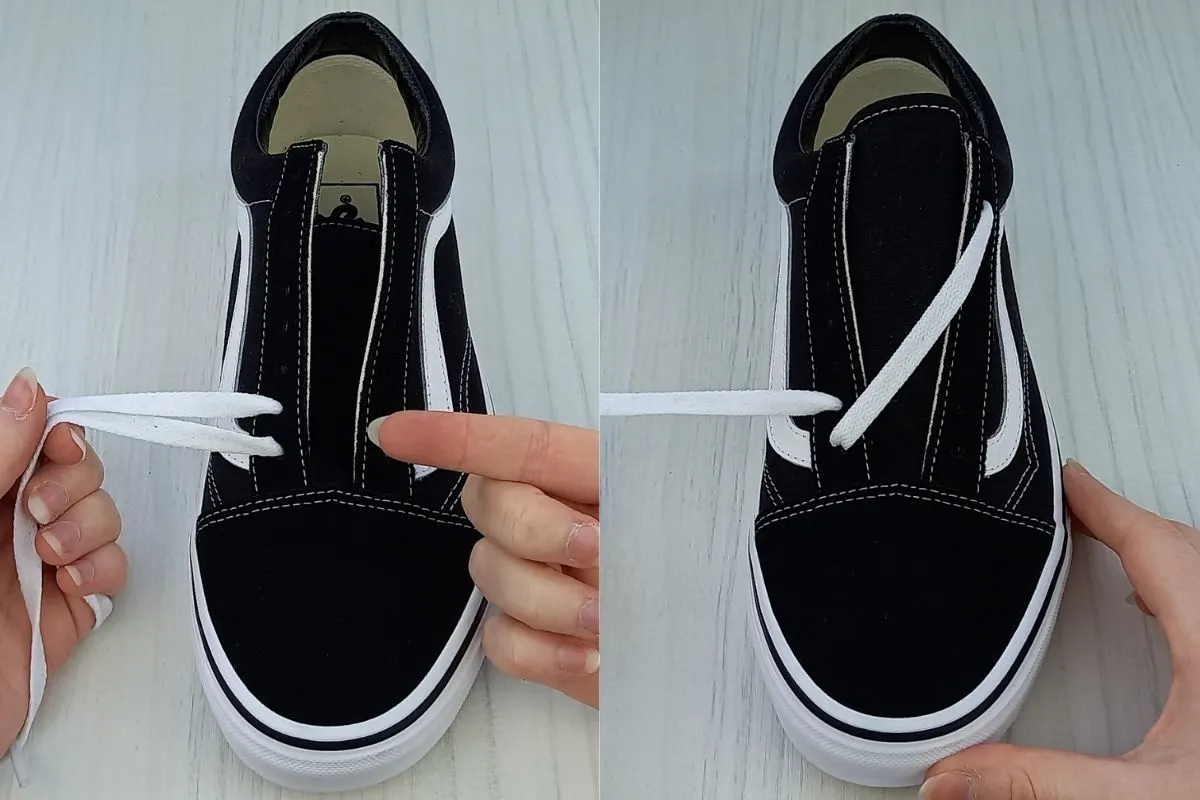
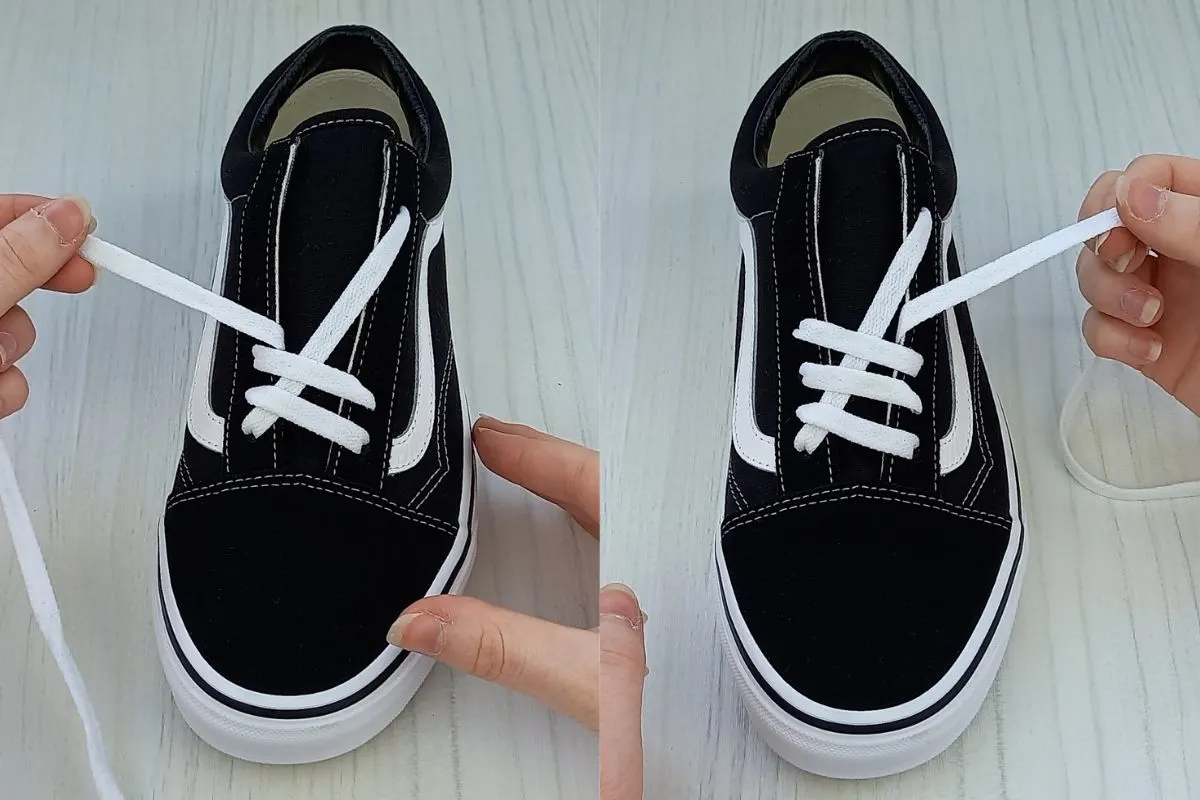
Step 3.

- Keep threading the laces one at a time into each eyelet as instructed. Make sure not to thread one lace all the way to the top and then start on the other one, as the nice lacing pattern won’t happen.
- When done correctly your Vans should look like the below image, with the correct pattern.


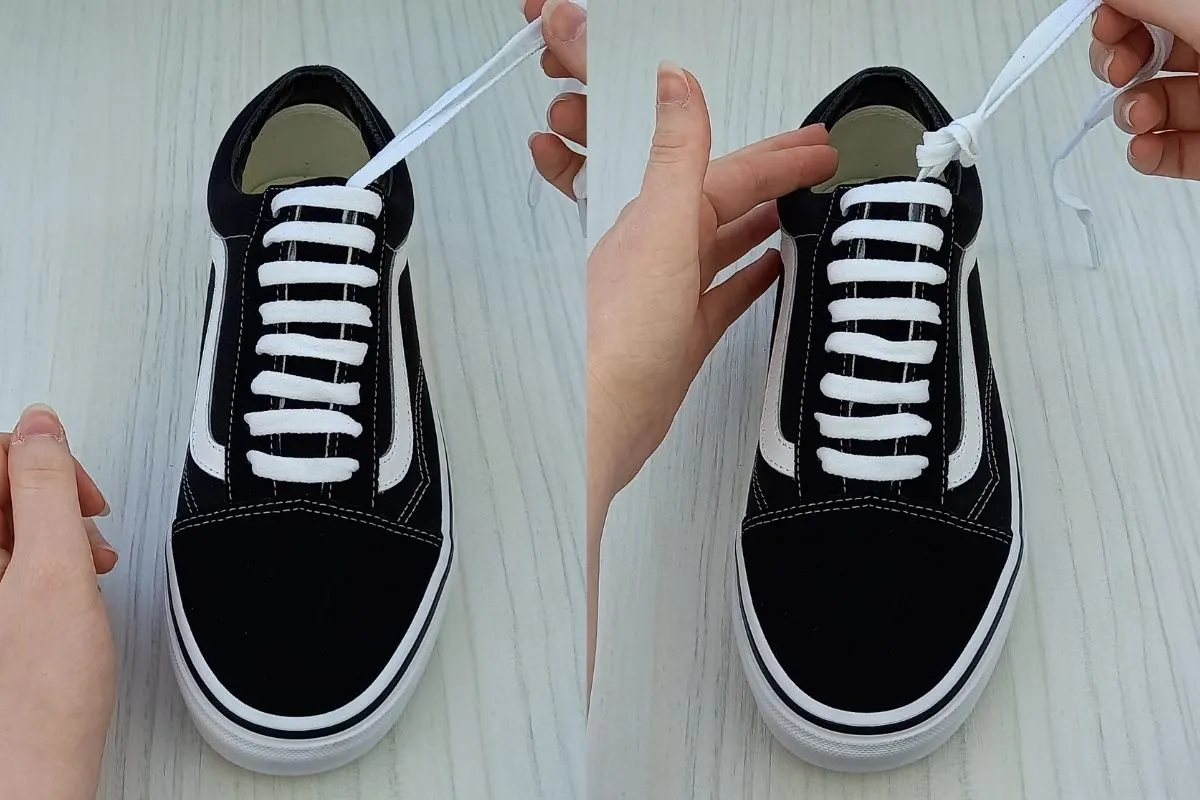
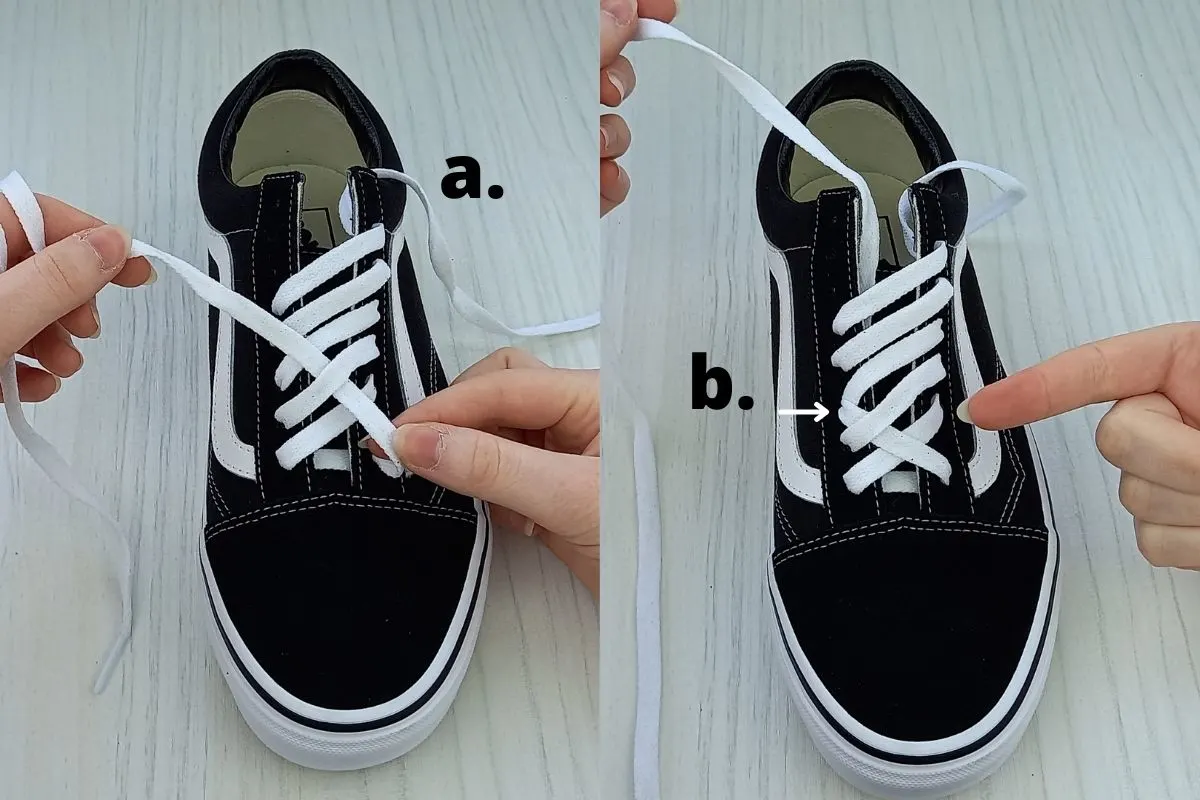
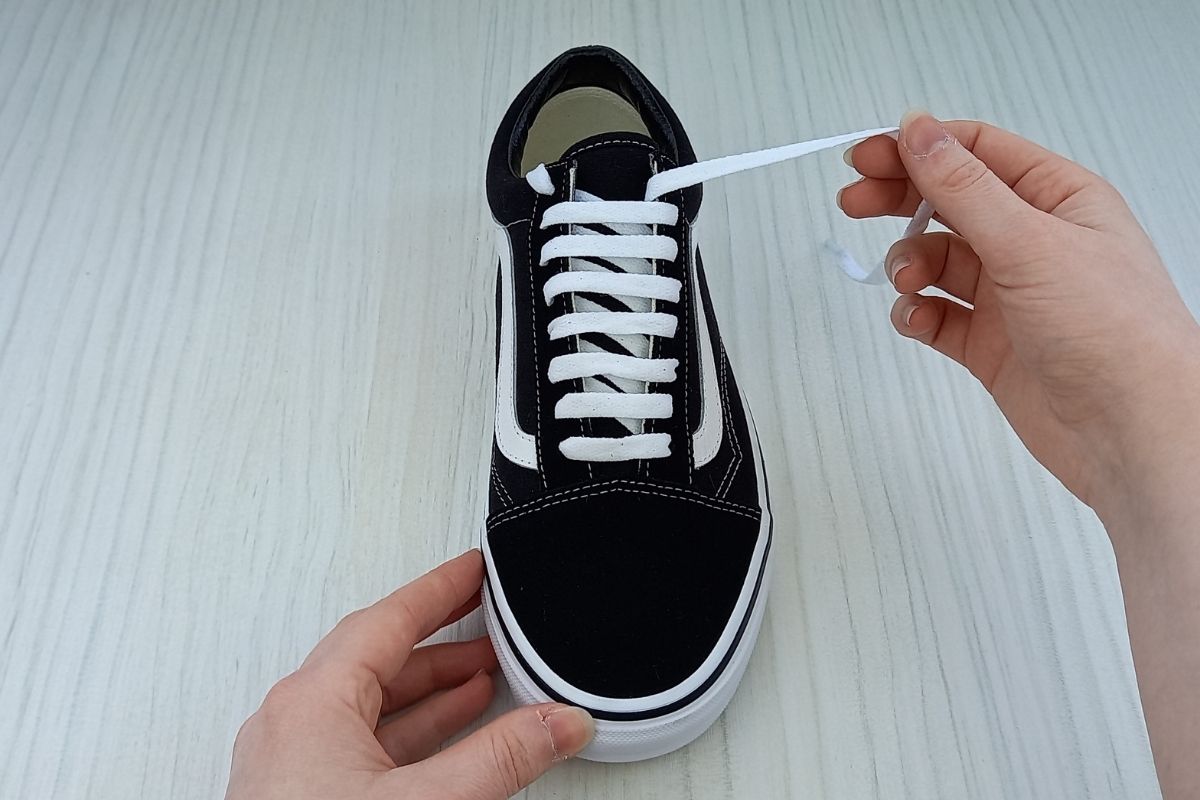
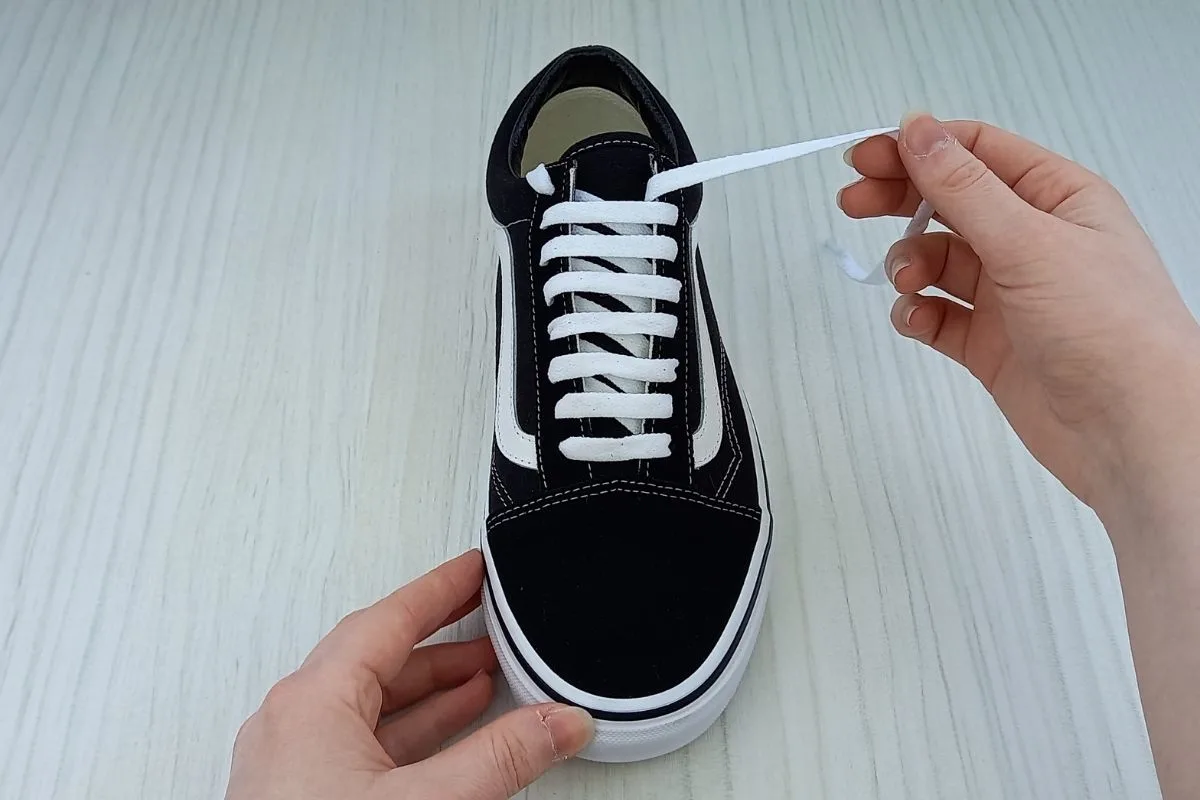
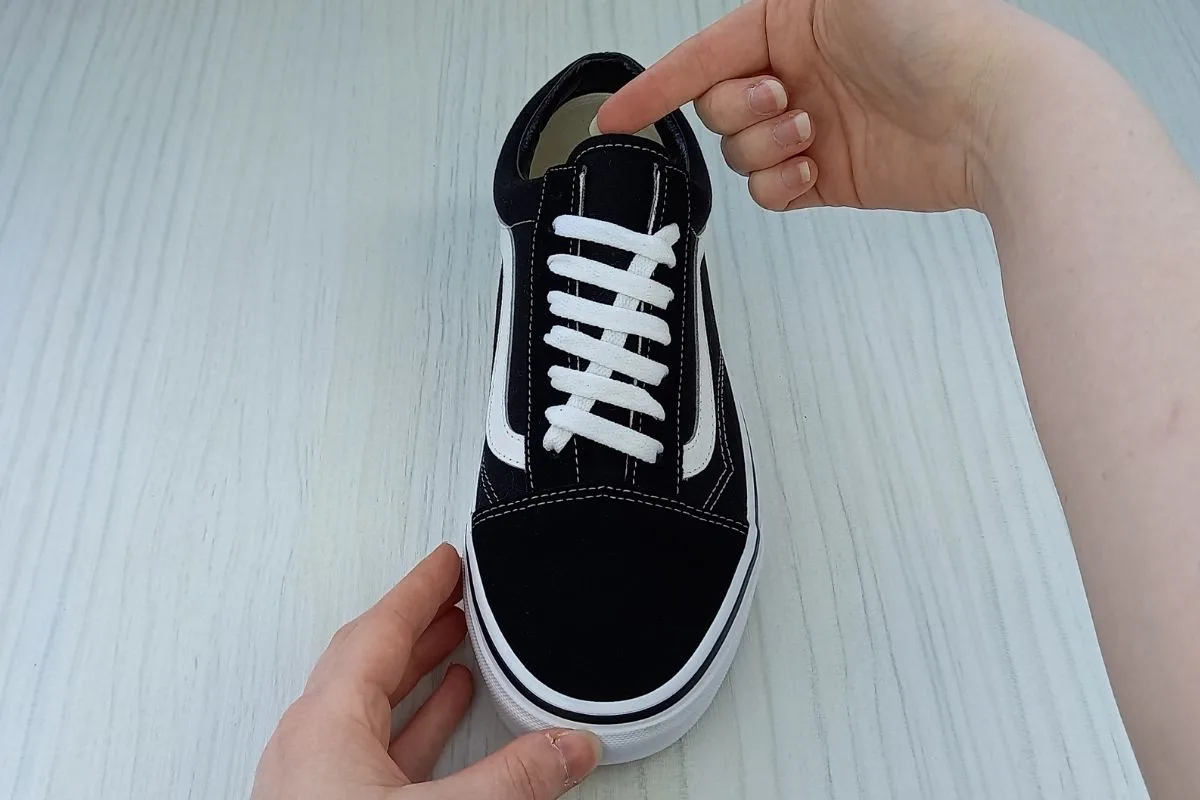
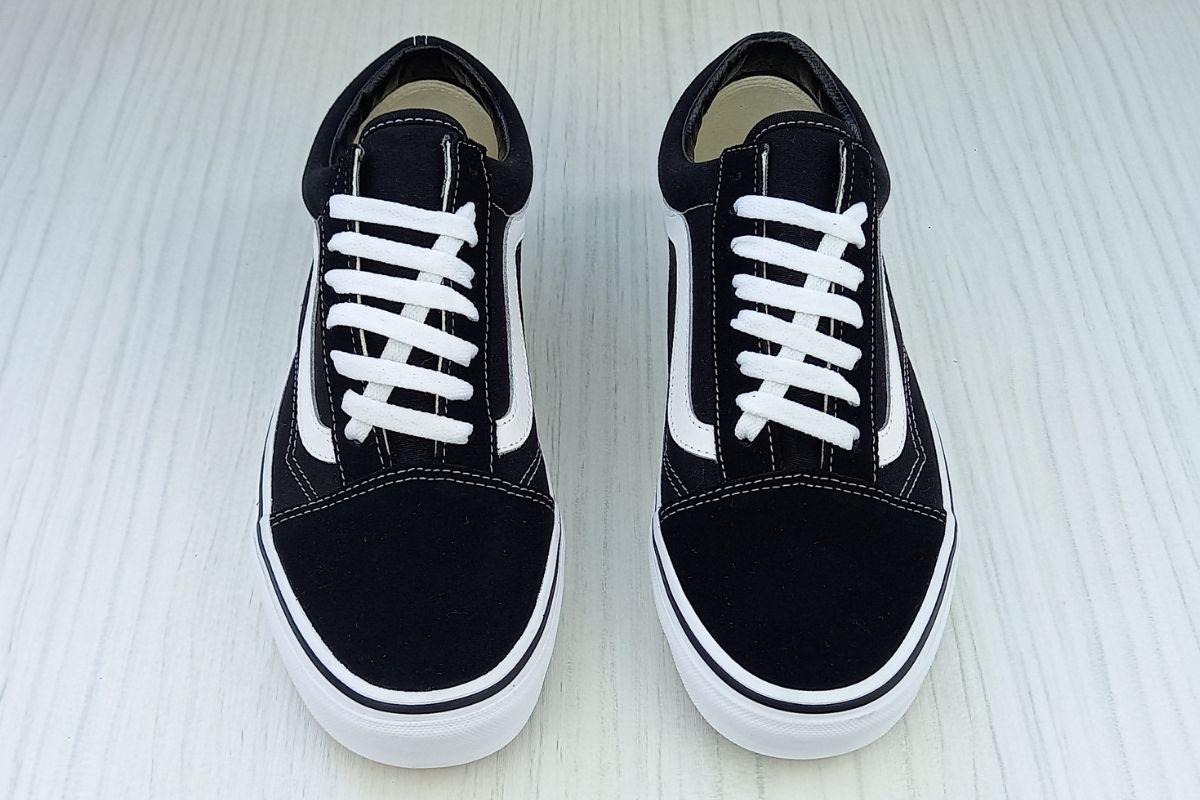
When complete you will have two neat, standard laced Vans, like my pair in the below image.


You can now tie a lace knot in your vans, or tie a simple knot that slips behind the sneaker tongue for a seamless look.
If you learn best by watching videos, here is a YouTube video on how to lace Vans in the standard way from the Wearably Weird channel:
2. How to Bar Lace Vans (Loose Lace)

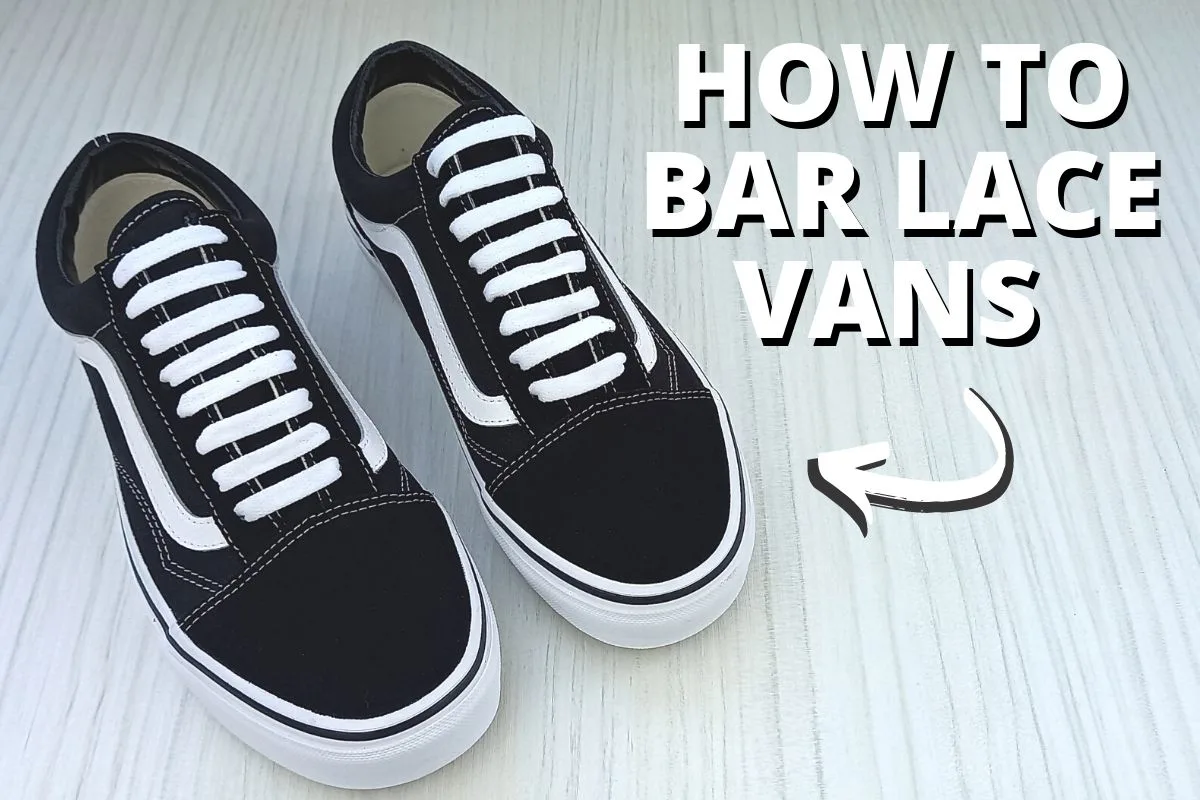
Bar lacing your Vans is an easy way to step you your footwear game. It’s an instantly recognisable lacing style, and always looks fresh and crisp. It’s a great style to try if you want to lace your vans so they slip on.
I’ve also included a YouTube video of how to bar lace Vans at the end of the written steps.
Here’s how to do it:
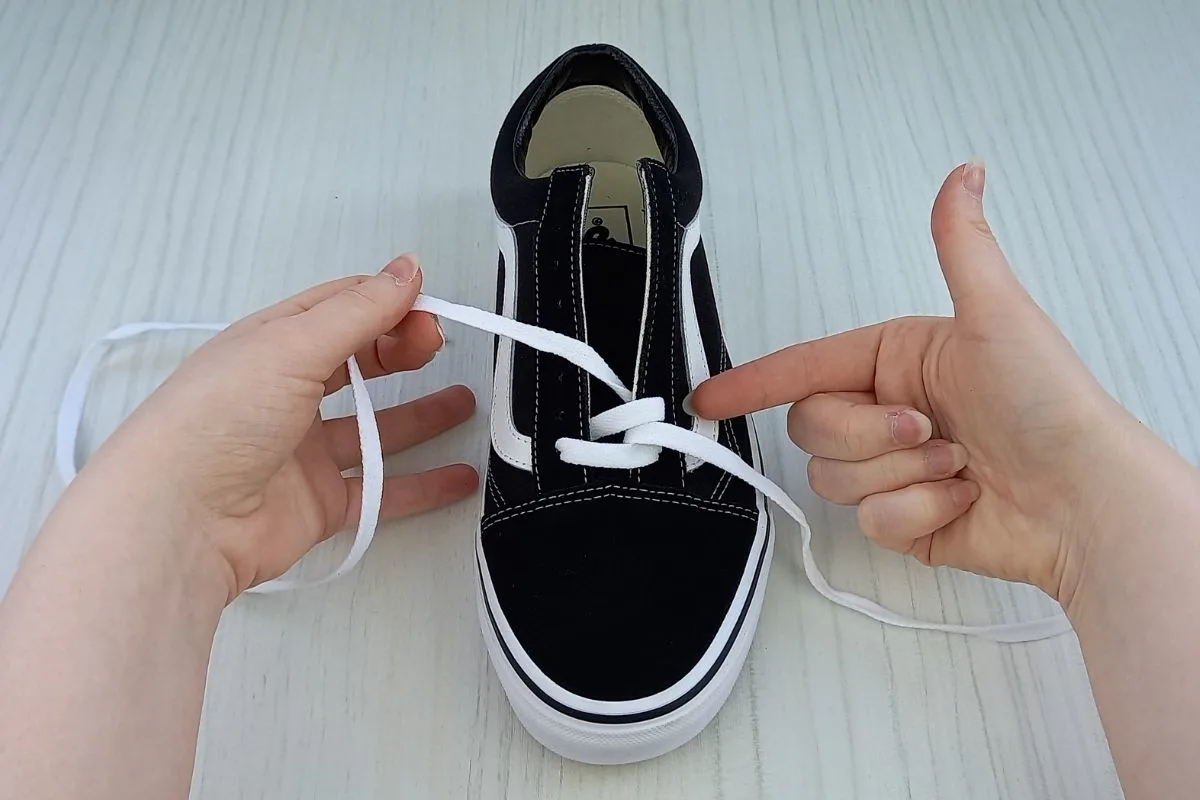
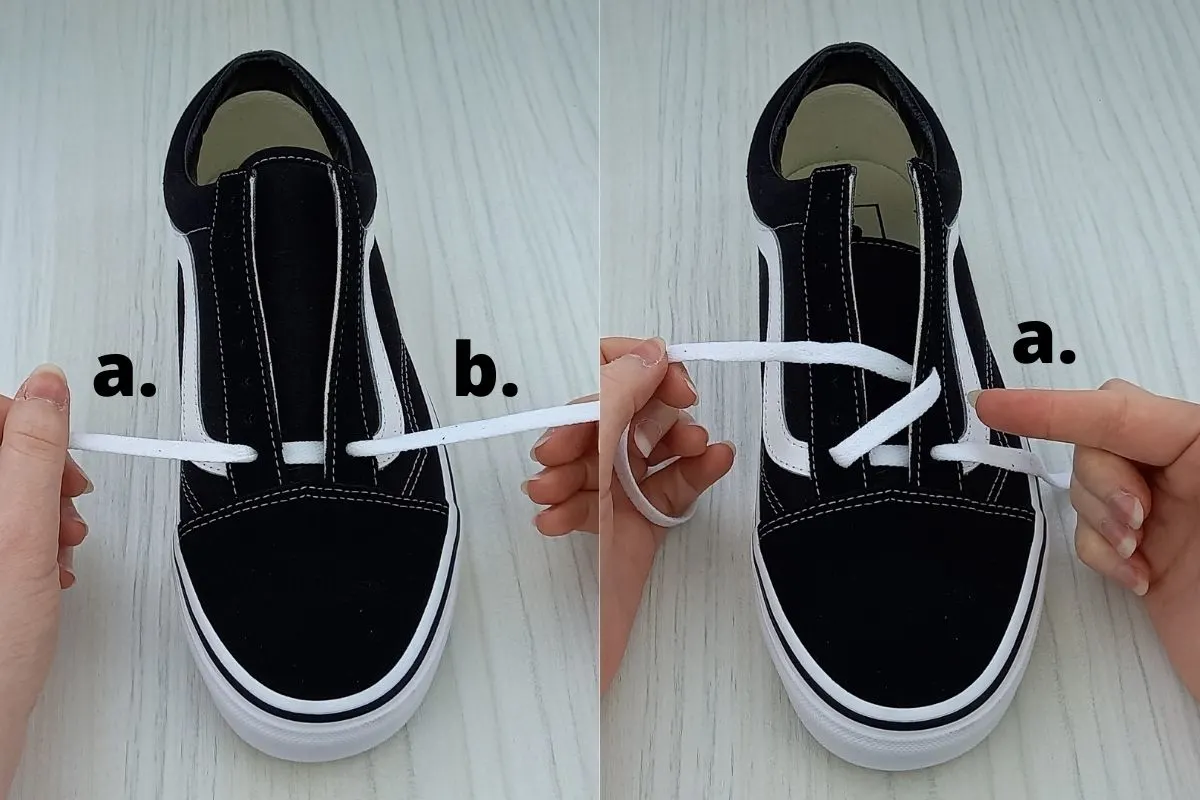
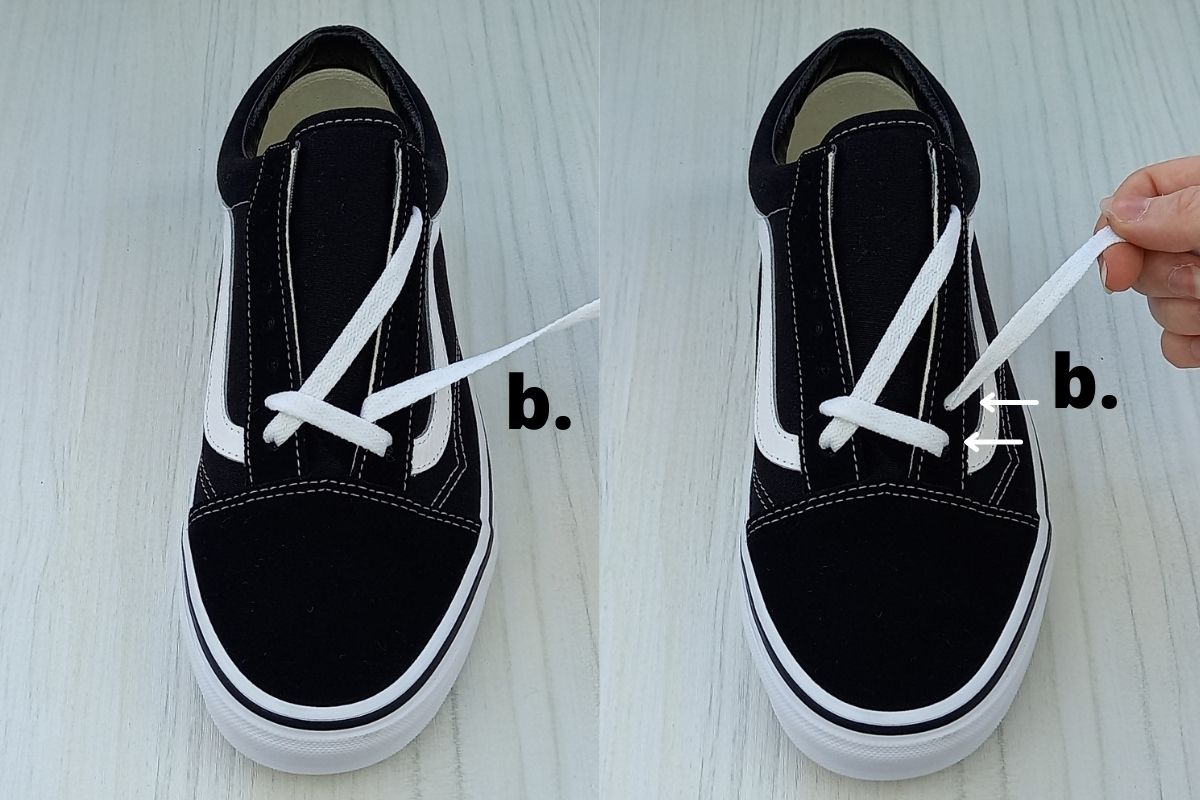
Step 1.

- Take your lace and thread it down into the two bottom eyelets of your Vans, as I have done in the above image. Make sure the laces are the same length on either side.
- Ensure the lace is going down into the eyelets and not up from underneath.
- Next take lace b. and bring it up into the second eyelet on the right hand side, as I have done in the above image.
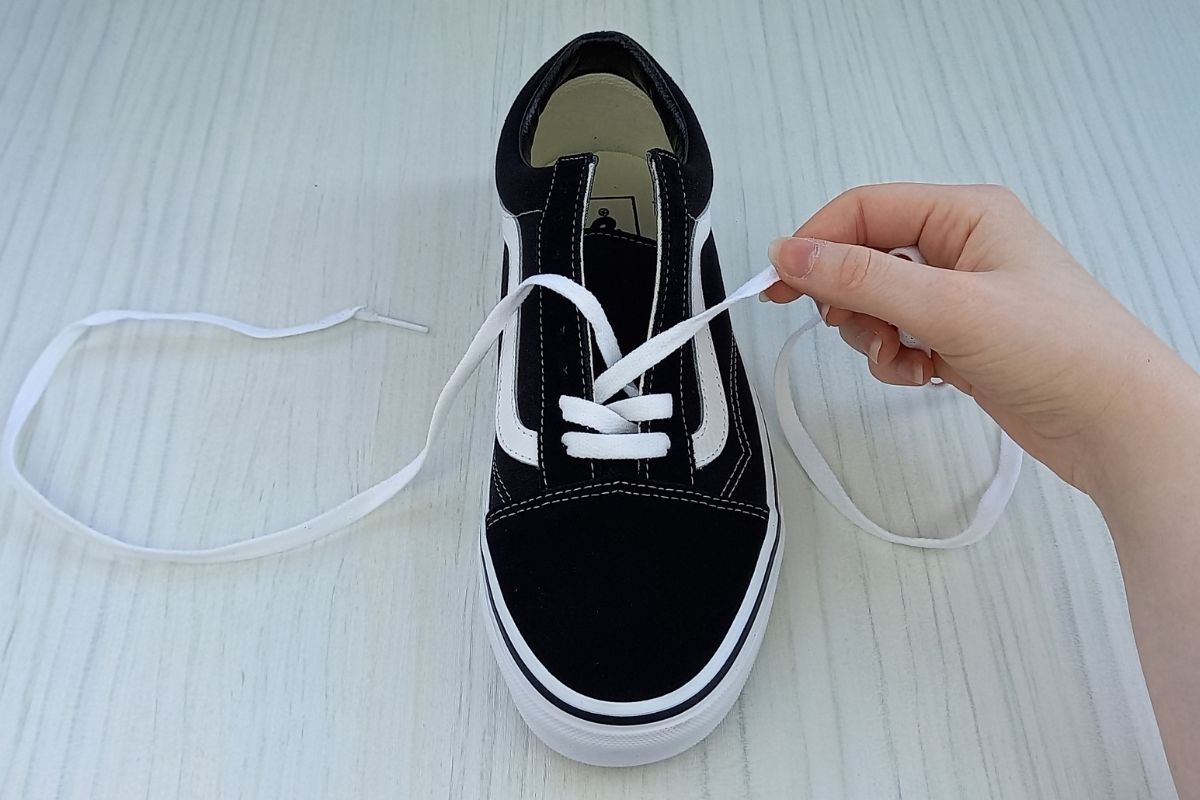
Step 2.

- Bring over lace b. to the left hand side and thread it down into the second eyelet up, as I do in the above image.
- Then take lace a. and thread it up into the third eyelet up on the same side (left hand).
- Next bring lace a. over to the right hand side and thread it down into the third eyelet up. Check the above image to make sure you have the same results.
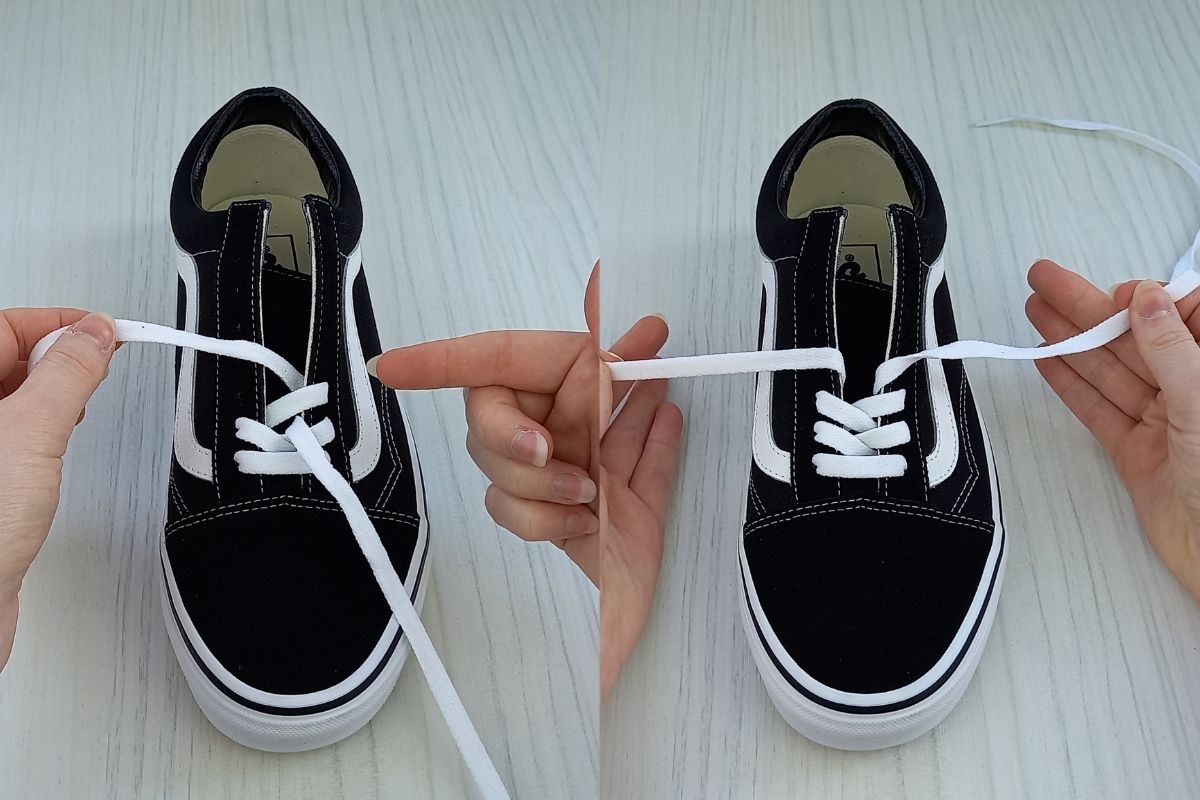
- Continue threading into the next eyelet up on each side, then bring the laces over to carry on the bar pattern.
Step 3.

- Once you have completed the bar pattern all they way up to the top eyelets take the laces and tie them into a simple knot.
- Tuck the knot behind the sneaker tongue.
- When you put on your Vans they should be loose enough to slip on in this style.
Repeat the steps on your other shoe and you should have a pair of Vans that look like mine below.


If you learn best by watching videos, here is a YouTube video on how to bar lace Vans from the Wearably Weird channel:
3. How to Diamond Lace Vans


Diamond lacing your Vans is a super secure lacing technique that not only looks really cool but prevents lace slipping. It’s a lacing style that looks more complicated than it is, so don’t be afraid to give it a go.
Here’s how to diamond lace your vans:
Step 1.

- Take your lace and thread it through the bottom two eyelets of your Vans. Make sure you thread it up from underneath as I have done in the above image. Also be sure to check your lace is the same length on either side after threading.
- Next take lace a. and bring it over to the right hand side. Thread it down into the third eyelet up on the right hand side as pictured.
Step 2.
- Then take lace a. and thread it up into the fourth eyelet on the right hand side, from underneath (as pictured).
- Bring lace a. back over to the left hand side and thread it down into the second eyelet up. Check the above image to ensure you have the same result as me.
Step 3.

- Repeat the lacing pattern until lace a. reaches the second from the top eyelet on the right hand side. Stop here, making sure the top eyelet is left empty. Set lace a. aside for now.
Step 4.

- Now move on to lace b.
- Take lace b. over, then under the laces as pictured above, to create a weaving pattern.
- Thread lace b. down into the third eyelet up on the left hand side.
Step 5.

- Thread lace b. up into the fourth eyelet on the left hand side from underneath, as pictured and highlighted by the arrow.
- Then bring lace b. back over to the right hand side, weaving it over, under then over the laces as pictured.
- Thread lace b. down into the second eyelet on the right hand side. Then bring it up from underneath into the third eyelet on the right hand side as I have done in the above image.
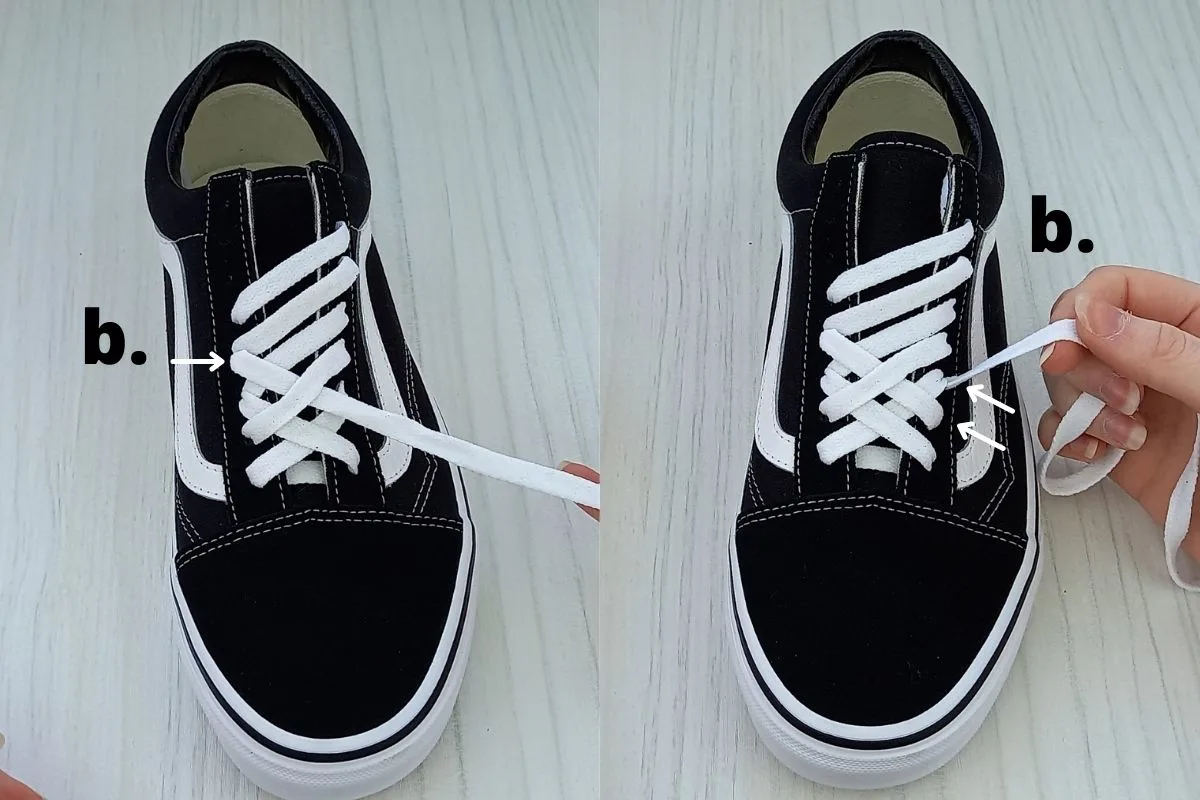
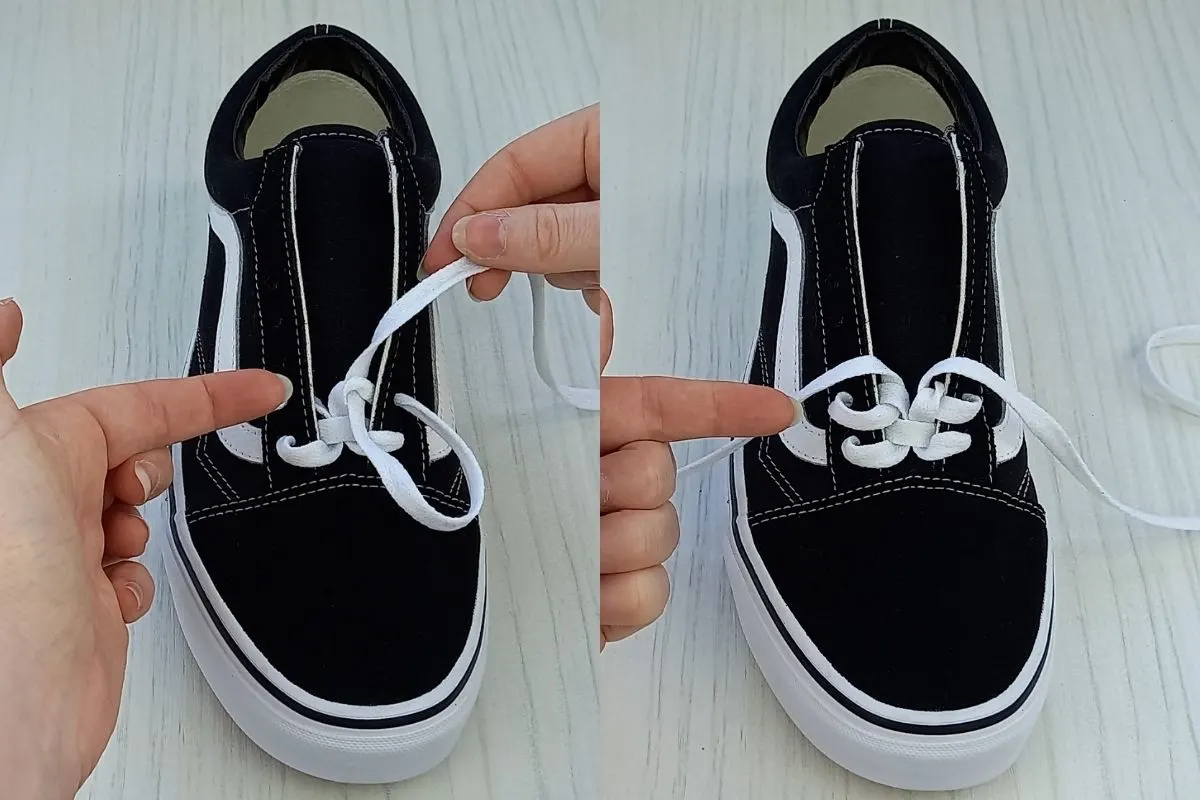
Step 6.

- Bring lace b. back over to the left hand side, making sure to follow the same threading weave pattern. Double check the above image to make sure you get the same result.
- Then take lace b. up and underneath through the next eyelet up, following the same pattern as before. Weave it back over to the right hand side and up again through the next eyelet up. It’s the same pattern as before, so just continue with this.
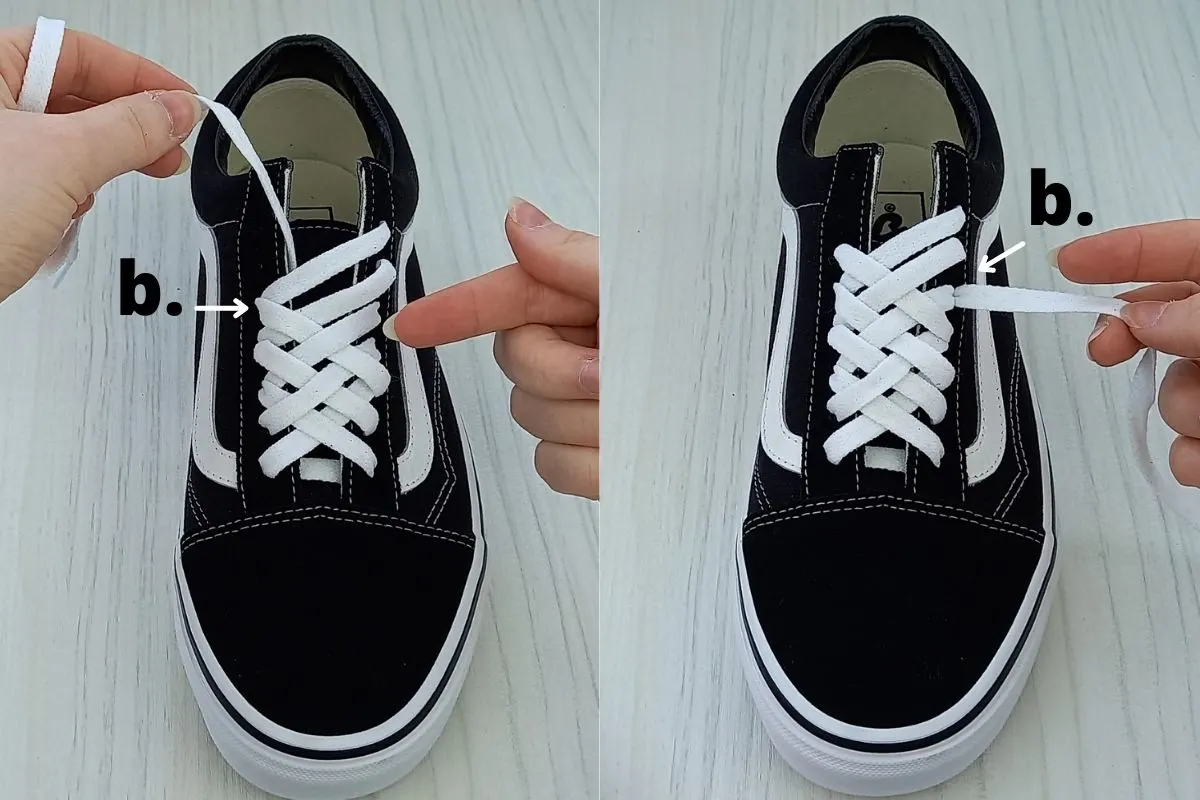
- Take it back over to the left hand side one more time, following the weave and thread it down into the second eyelet from the top.
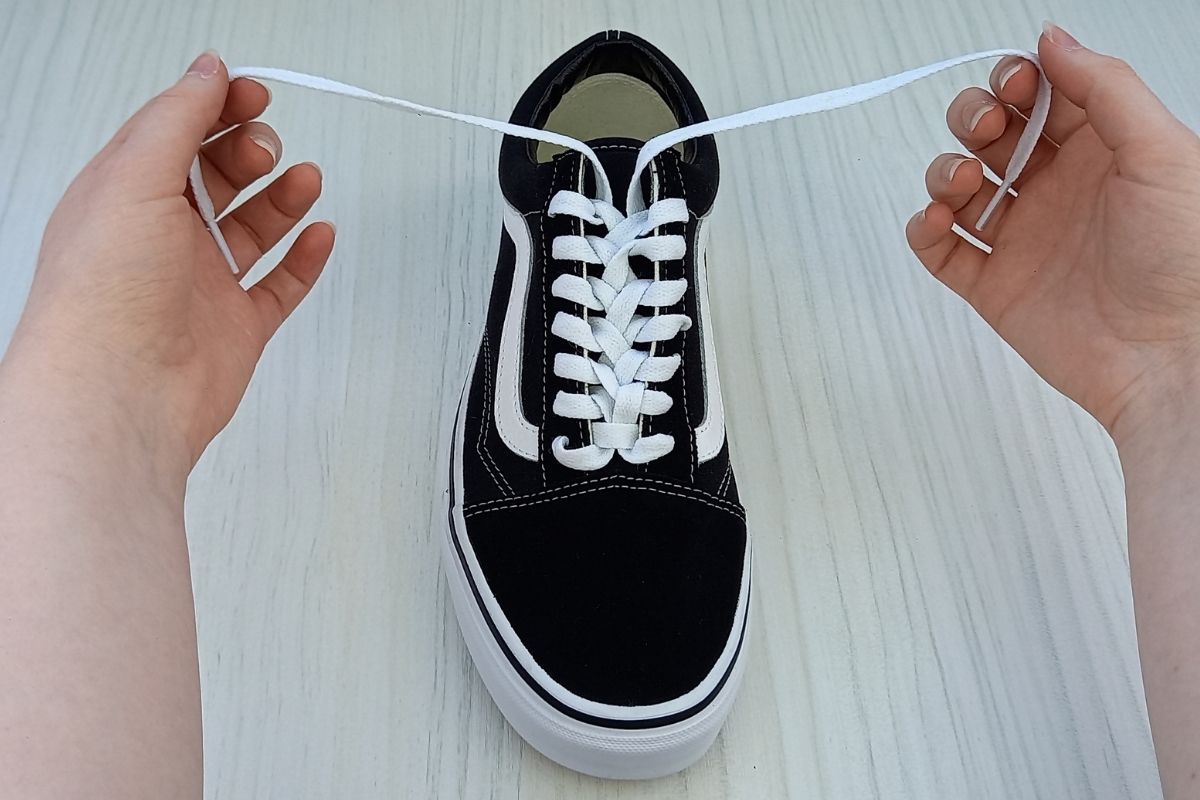
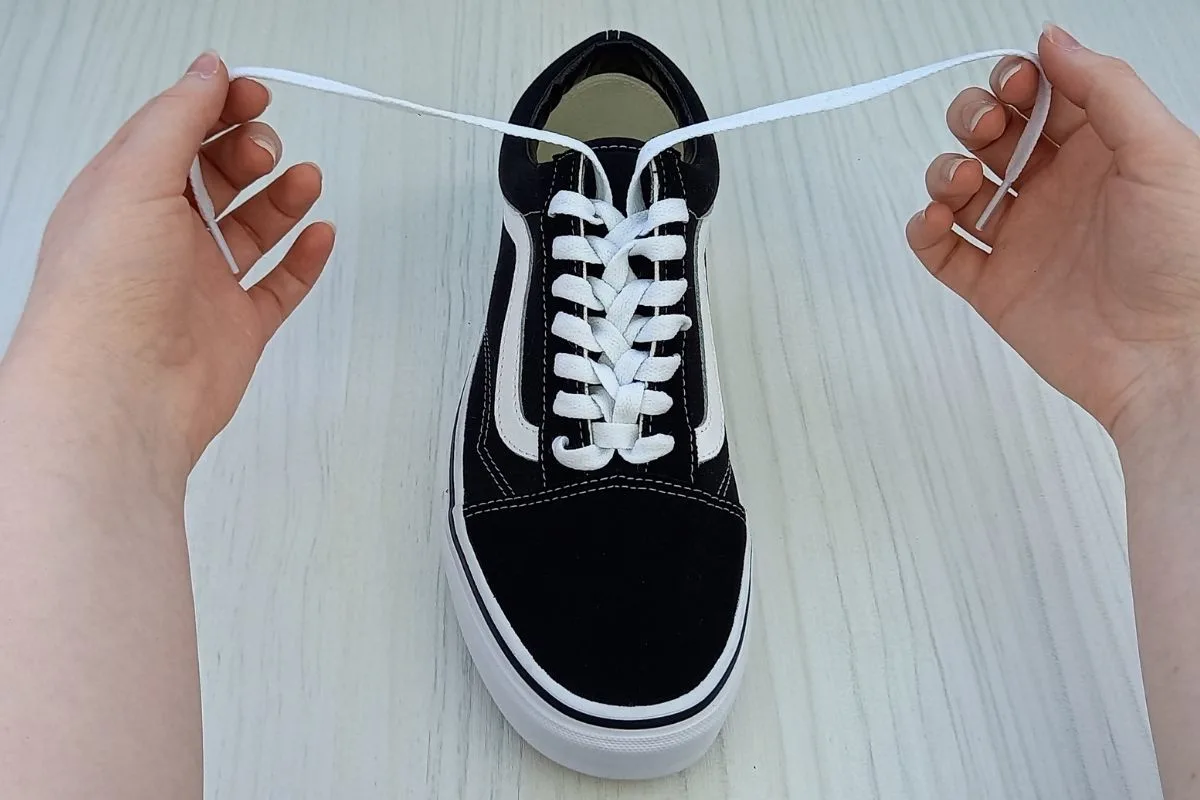
- If followed correctly your lacing pattern should be the same as mine in the below image:
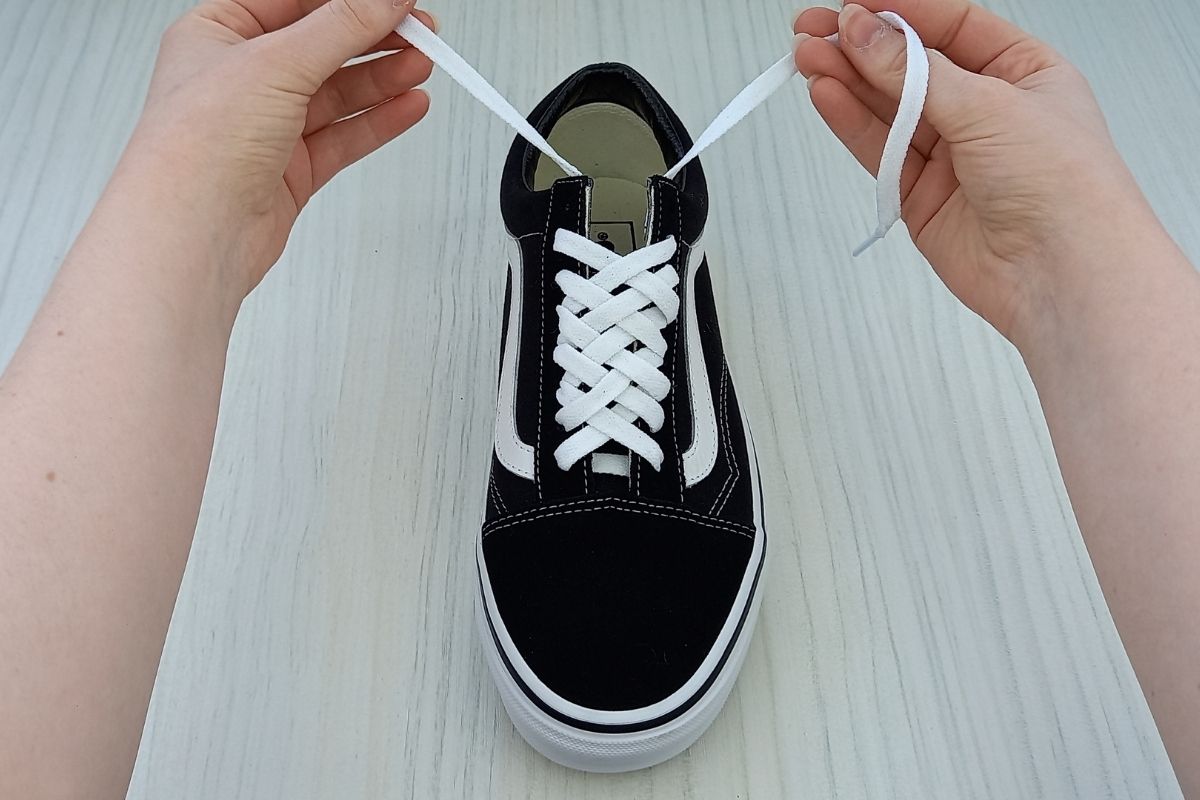
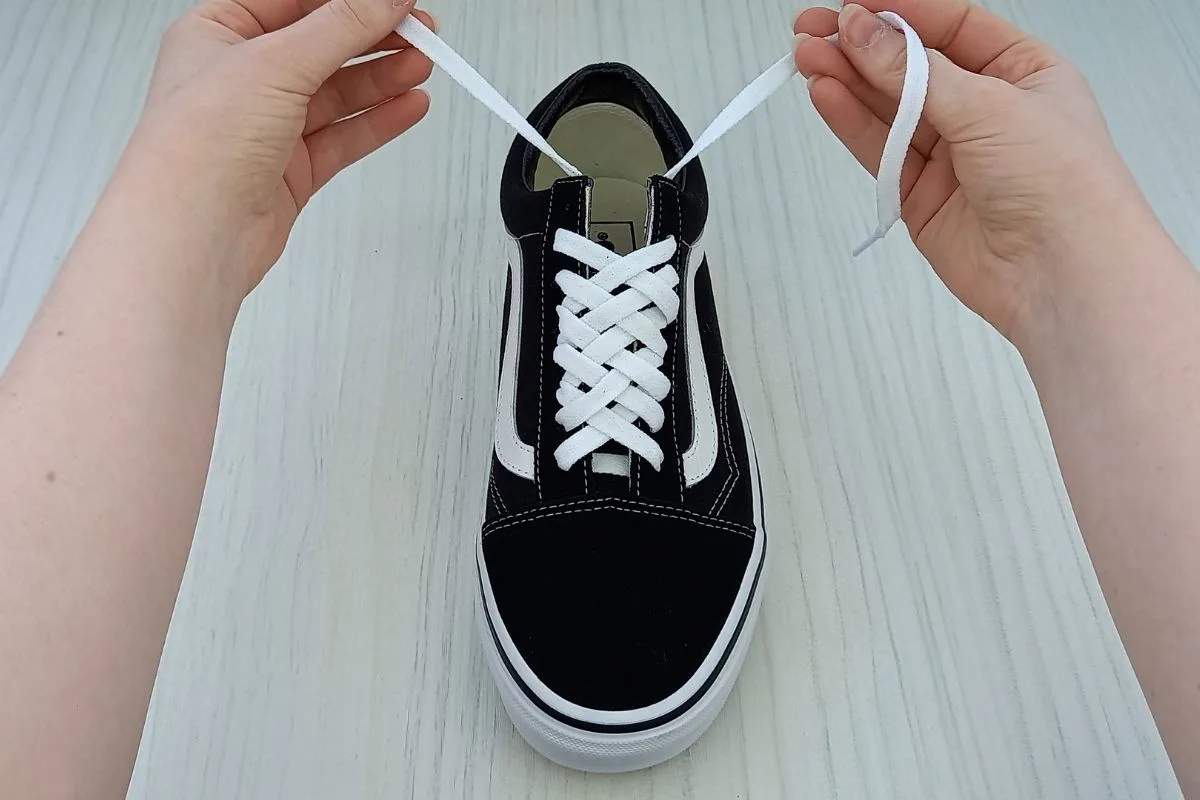
Repeat the steps on your other shoe and you should have a pair of diamond laced Vans that look like mine below.


Diamond lacing is a really eye catching lacing pattern. It does look a lot more complicated than it is, but if you take your time with the steps it’s actually surprisingly simple to do. Give it a go and see how you like it!
You may also like: 15 Cool Ways To Lace Shoes: Shoelace Patterns Tutorial
4. How to Sawtooth Lace Vans
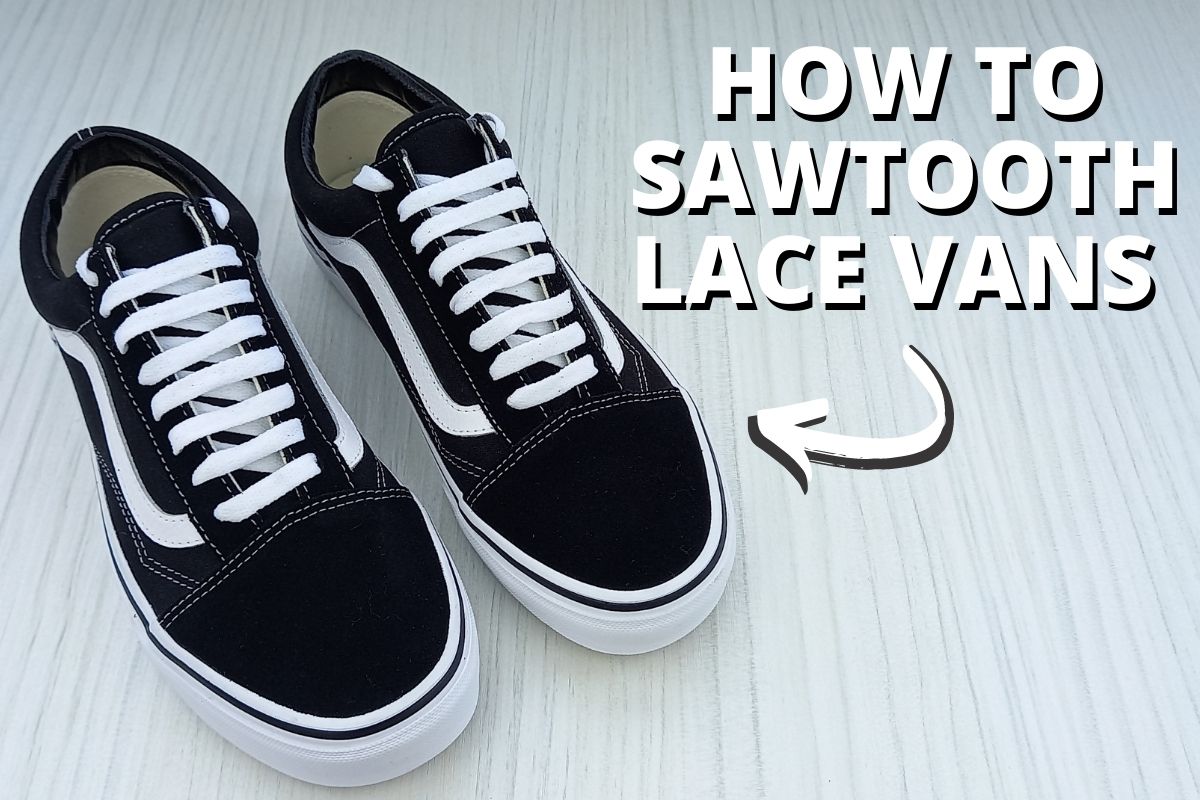
Sawtooth laces have a multi dimensional look making them a fun choice for those who want to elevate their Vans game. The style looks tricky but it’s actually super simple.
Here’s how to sawtooth lace your Vans:
Step 1.
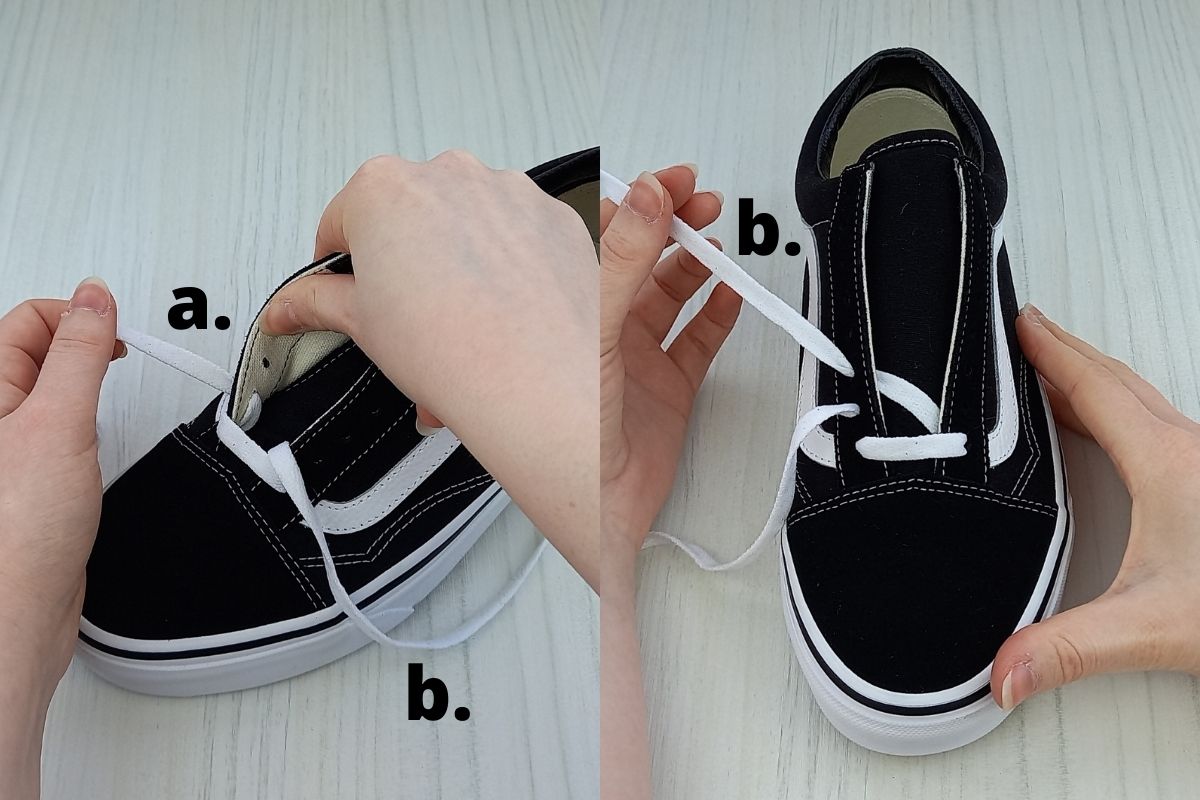

- Thread your lace down into the two bottom eyelets of your vans, making sure it’s the same length on either side.
- Next take lace a. and thread it up into the second eyelet on the left hand side from underneath, as pictured above.
- Then take lace b. and bring it over to the left hand side, threading it up into the third eyelet. Double check the above image to make sure your results look the same.
Step 2.
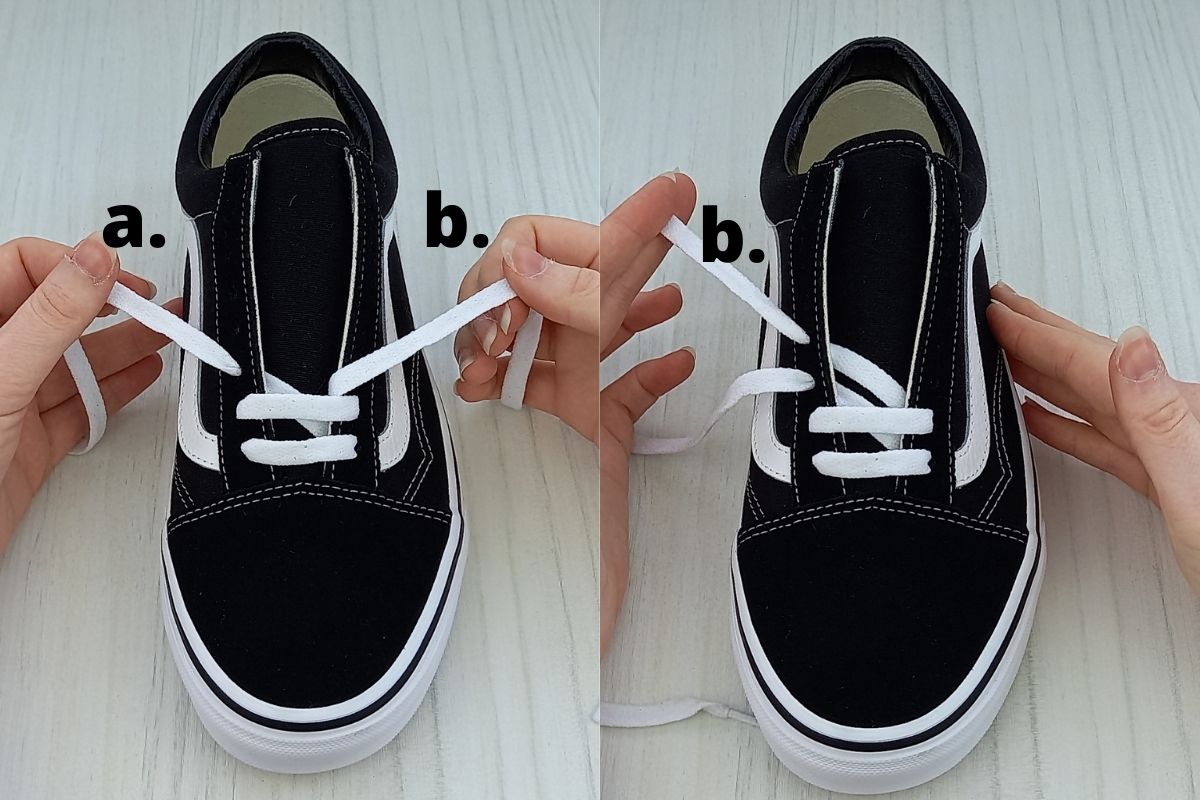
- Bring lace b. over to the right hand side. Thread it down into the second eyelet on the right hand side.
- Then take lace b. back over to the left hand side and up into the fourth eyelet from the bottom as pictured. At this point you will see the sawtooth lacing pattern begin to form.
Step 3.

- Repeat the steps and bring lace a. over to the right hand side, and down into the third eyelet up from the bottom.
- Continue with this pattern until you reach the top eyelets on your Vans.
- Then take the lace on the right hand side and bring it up into the top eyelet from underneath to neatly finish the look, as pictured above.
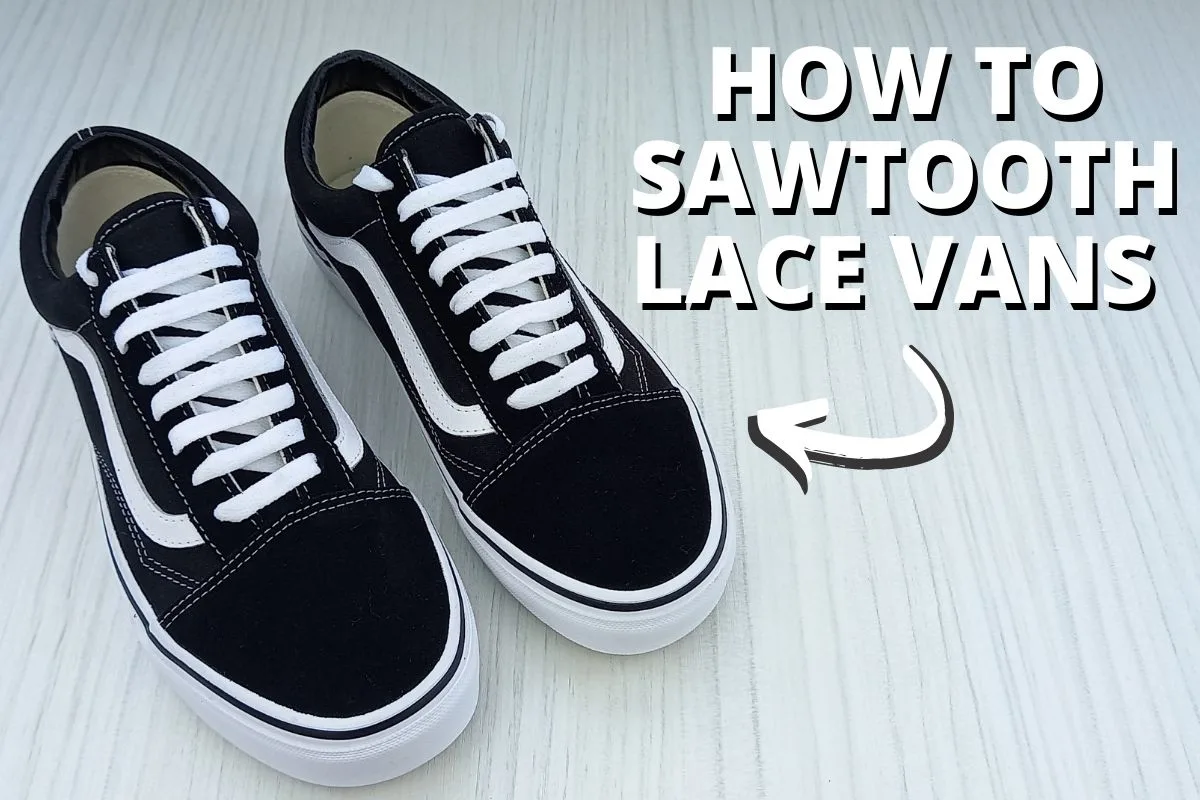
If all of the above steps are followed correctly your shoe should look like mine in the below image:
Repeat the steps on your other shoe and you will have a pair of super cool looking sawtooth laced vans.


Sawtooth lacing is such an interesting style to look at due to the layered lacing pattern. Give it a go and see how you like it!
You may also like: How To Lace Converse – 9 EASY Ways
5. How to Ladder Lace Vans
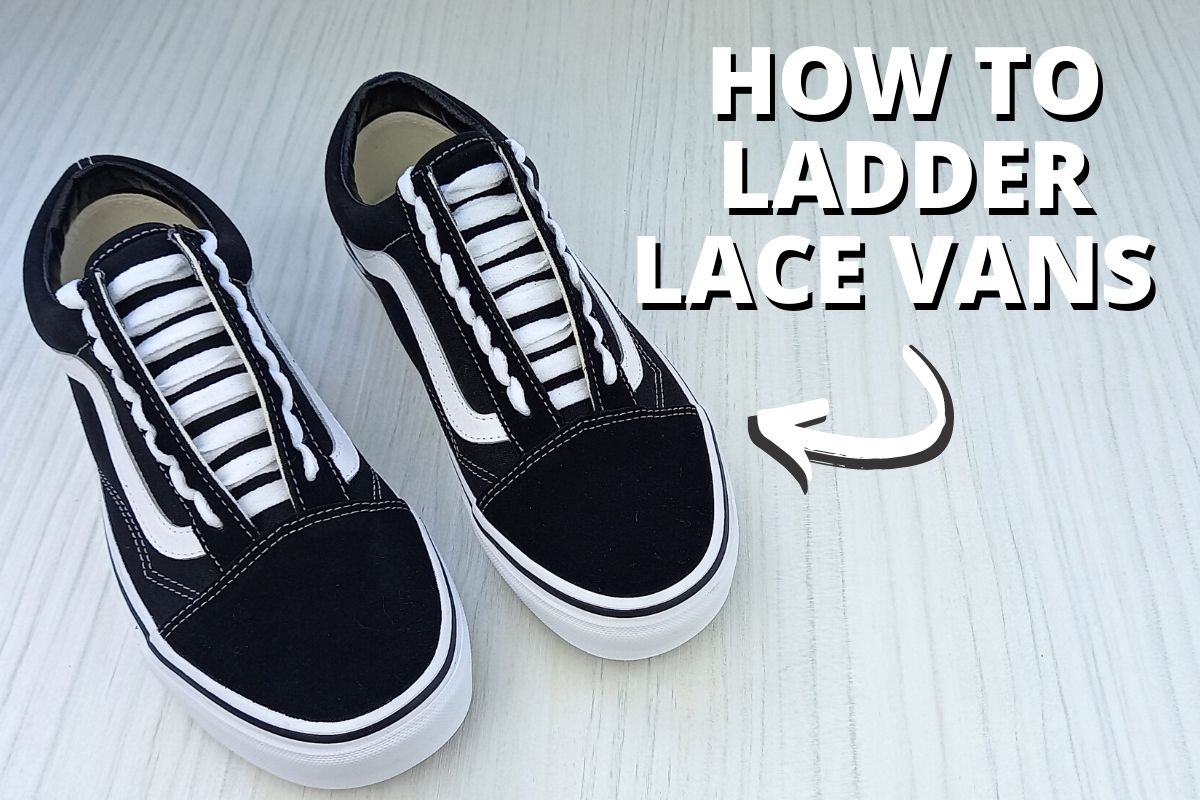

Ladder lacing is a secure lacing technique that is sometimes also referred to as military lacing. This lacing style keeps your laces from slipping for a tight result. It’s ideal for skating or sports.
Here’s how to ladder lace your Vans:
Step 1.

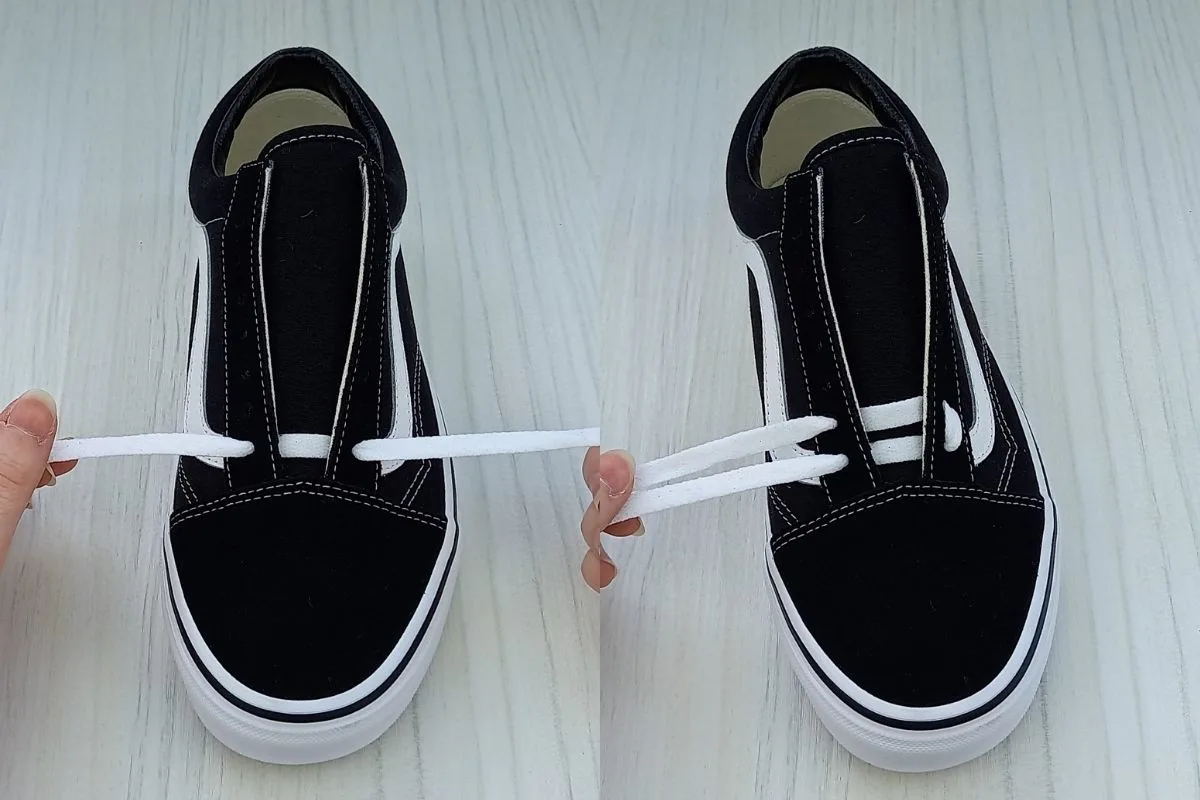
- Thread your lace through the two bottom eyelets of your sneaker. Make sure the lace is coming up through the eyelet from underneath.
- Check your lace is the same length on either side before moving on.
- Next take the lace on the right hand side and take it over to the left. Thread it through the second eyelet on the left hand side from underneath. Double check the above image to ensure you have done the same as me here.
Step 2.
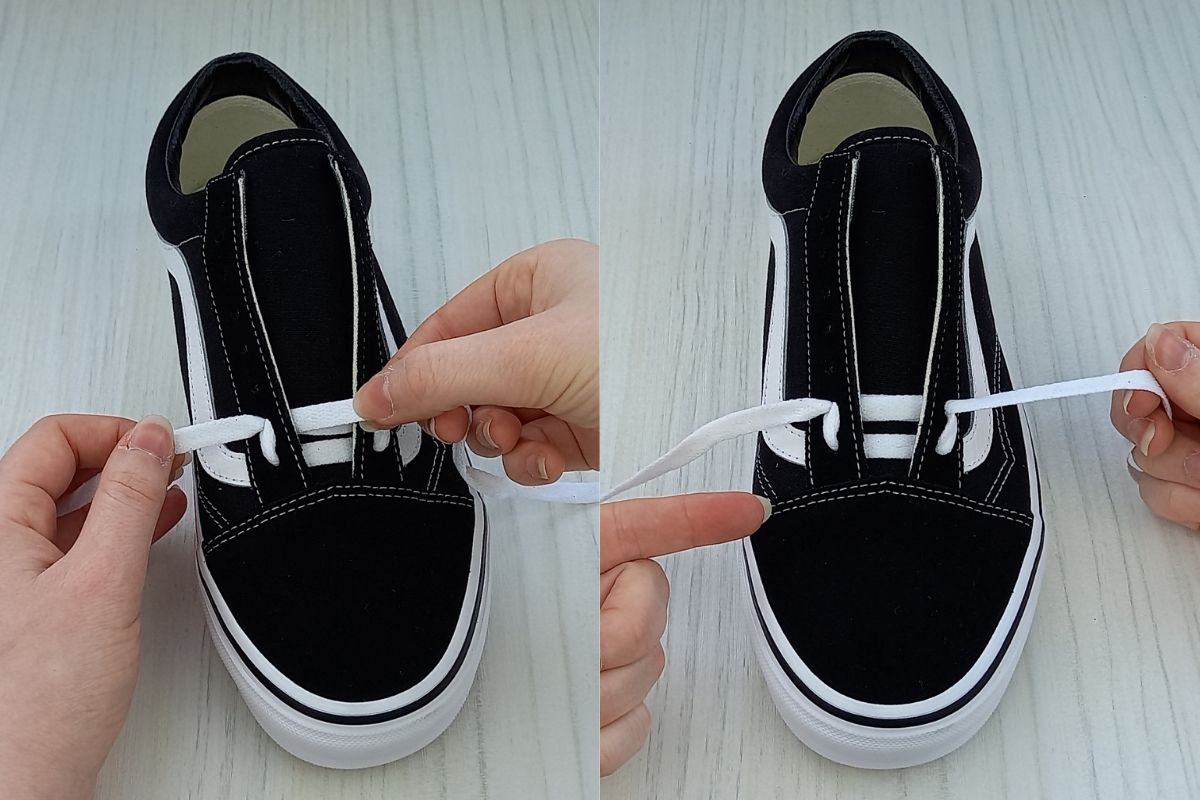
- Take the lace from the left hand side and feed it up and through the second eyelet on the same side.
- Then take it over to the right, and through the second eyelet on that side, as I have done above.
- This will create your first ‘ladder’. Make sure the laces sit nicely on top of one another for a crisp finish.
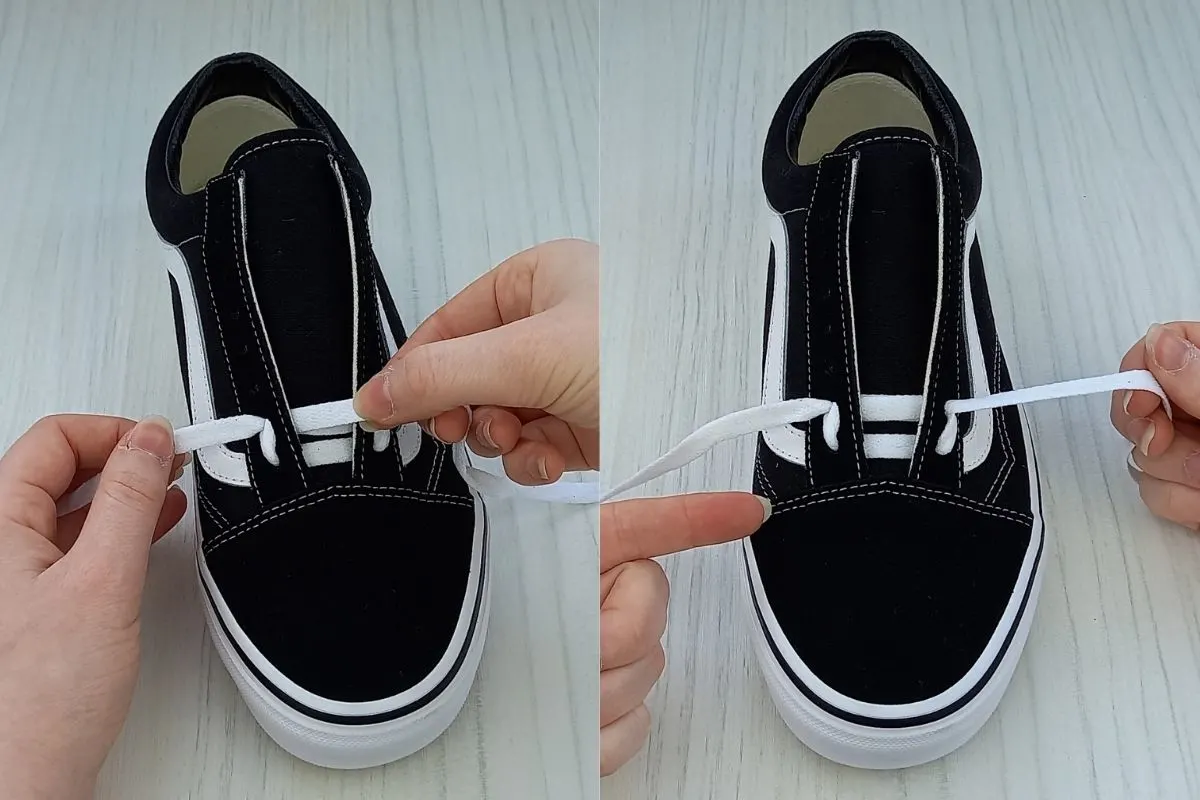
Step 3.

- Repeat the pattern all the way up the sneaker until you reach the top two eyelets.
- At this point you can knot your laces and complete the look.
If the above steps were followed correctly you should have a pair of super crisp and cool looking ladder laced Vans. Here’s what my pair look like both finished:


Ladder lacing may be my favourite style of lacing for Vans, as it’s so cool looking. It’s also practical and reduces lace slip with I love. Give it a try for yourself and see how you like it!
6. Lightning Lace Style


Lighting lacing is a crisp looking lacing design that looks great on Vans. It stands out due to it’s simple but edgy look.
The best news is it’s so quick to do, in only a few simple steps.
Here’s how to lightning lace Vans:
Step 1.
- Take your lace and thread it through the first and second bottom eyelets on the left hand side of your sneaker.
- Make sure the lace is coming through both eyelets from underneath not above.
- Take the lace that is coming through the bottom eyelet and adjust it’s length so it is only one third of the overall lace.
- Then take it over the sneaker tongue and thread it down into the second eyelet from the top on the right hand side.
Step 2.

- Take lace b. (which should be the long lace) and thread it over lace a. and down into the first eyelet from the bottom on the right hand side.
- Feed lace b. up through the second eyelet on the right hand side, as pictured above.
Step 3.
- Take lace b. over lace a. again and feed it down into the third lace hole on the left hand side.
- Take the lace up again underneath and through the fourth eyelet on the left hand side.
- Repeat this pattern by taking it back over lace a. and so on.
- When you reach the top eyelet, the pattern should look like the below image:

Repeat the lacing style on your other sneaker and you should be left with a pair of lightning laced Vans that look like mine below.

Lightning lacing is so quick to do – give it a try and see what you think of the final style. Take your time and make sure to get the first ‘lightning strike’ lace super straight for best results.
7. Zipper Lace Style
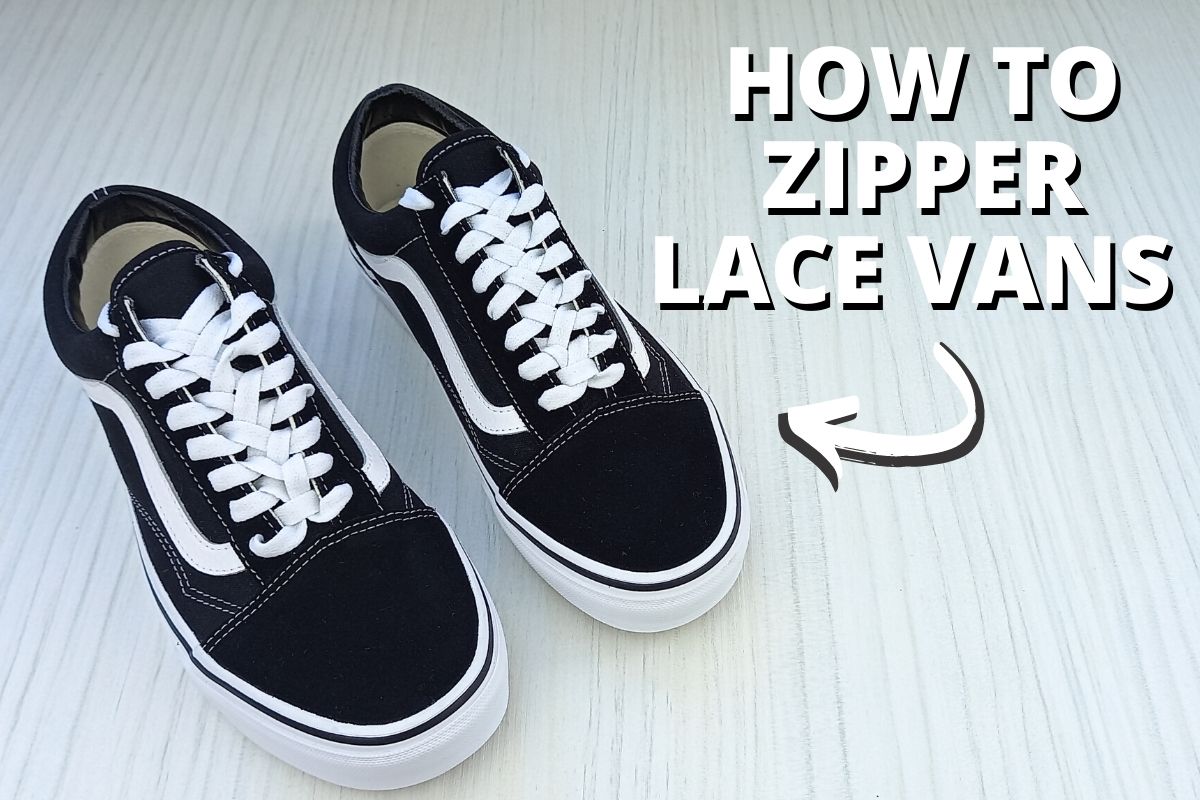
Zipper lacing is a very secure and tight lacing style that leaves no room for lace slipping. When done right it looks great too, as there is a pattern of unusual looking crosses and loops. This lacing style is definitely a conversation starter and looks great at the skate park.
Here’s how to zipper lace your Vans:
Step 1.


- Take your lace through both bottom eyelets of your sneaker. Make sure the lace is coming through the eyelets from underneath, and both ends are of equal length.
- Then take the lace from the right hand side and loop it underneath the lace bar, as I have done in the above image.
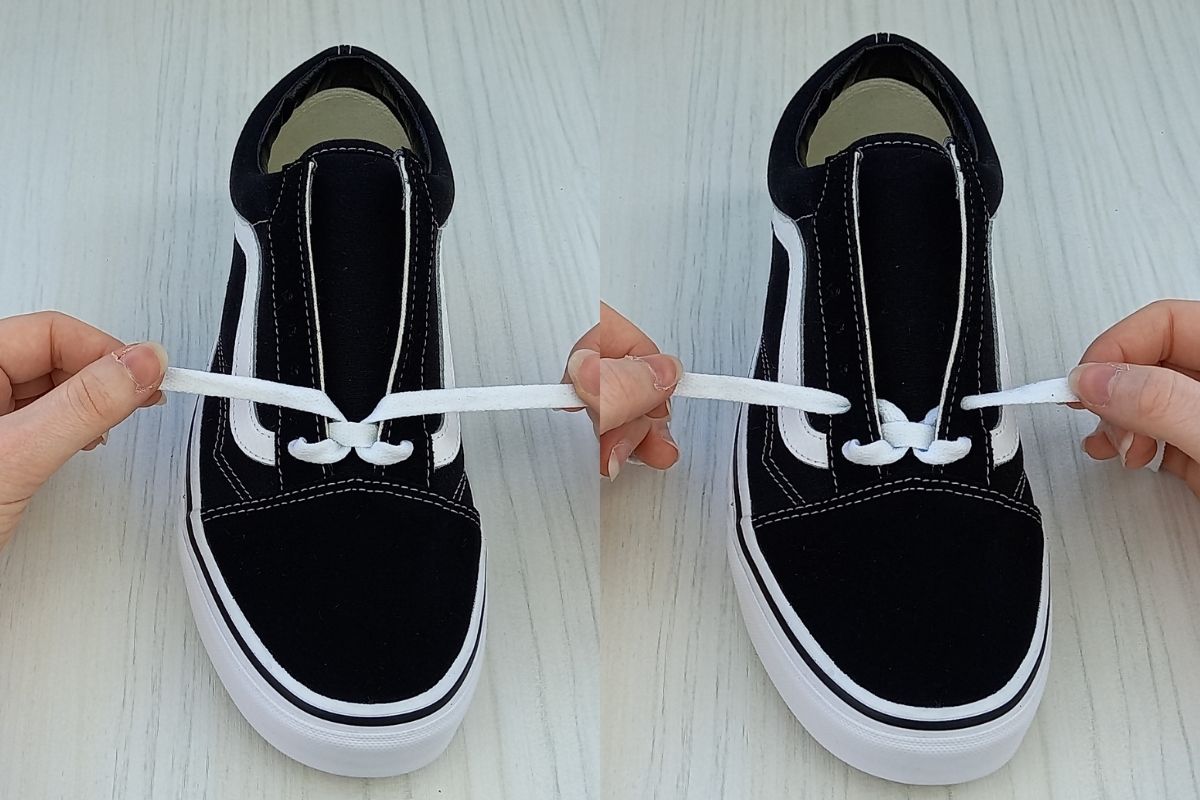
- Repeat this with the lace on the left hand side, as above.
- Then take both laces and feed them into the second eyelets from the bottom on either side, as pictured. You will now have your first zipper lace pattern.
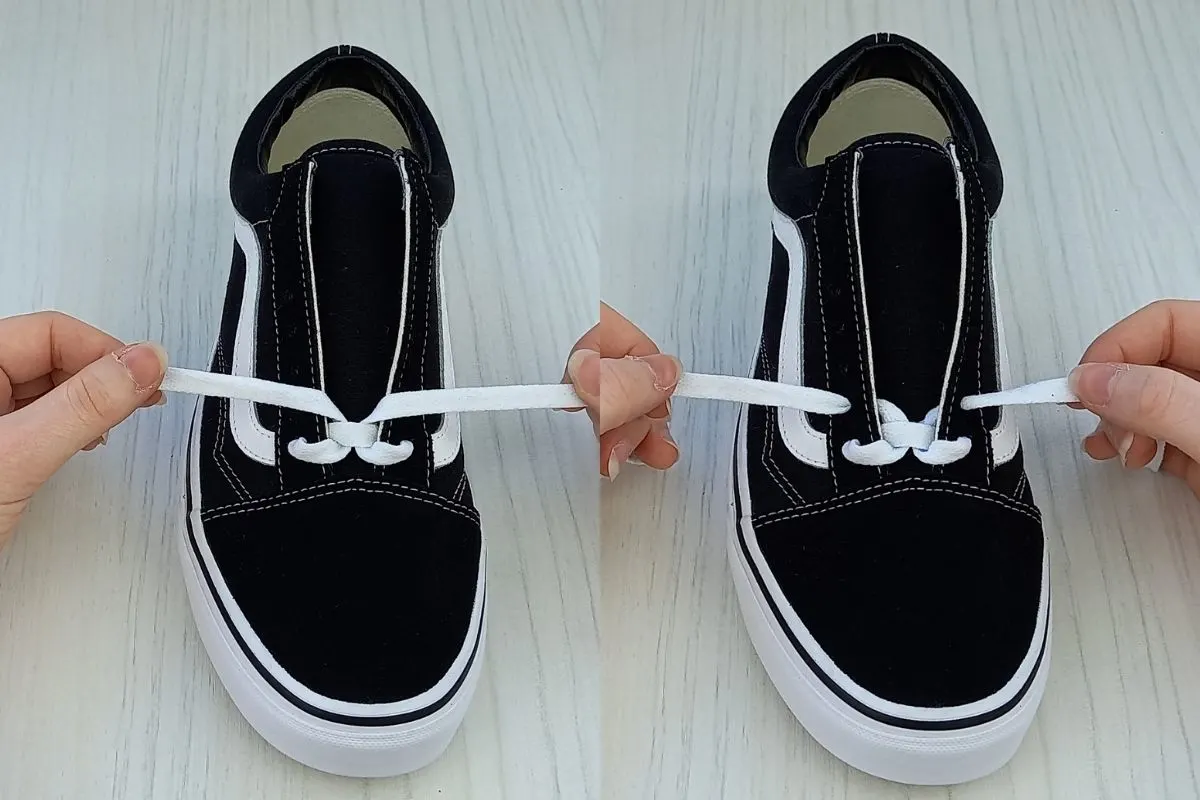
Step 2.

- Repeat the looping step using the new loops created by the previous pattern.
- Do this on both sides as pictured above and bring the laces up into the next eyelets.
- Continue with this step until all of the eyelets are complete. Double check the pattern and make sure your lacing looks like mine in the below image:
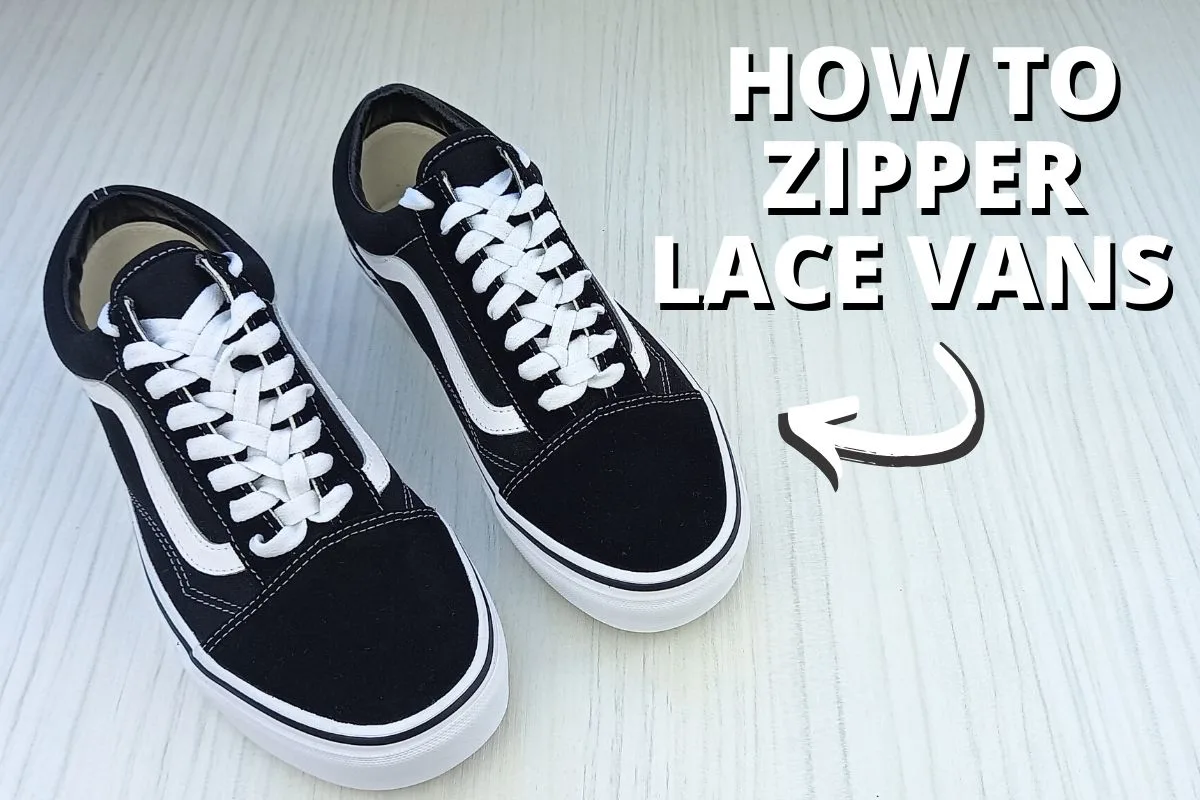
Repeat the lacing pattern on your other sneaker and you should be left with two zipper laced Vans that look like mine below.


Zipper lacing is a sturdy technique and is great for skating and sports as your laces won’t come loose.
Thank you for reading this post on lacing Vans. I hope you feel inspired to give some of the designs a go! Once you get going and follow the steps one by one the patterns are easy and quick to complete.
Elevate your Vans game and start conversations with your new lacing designs.

Lorna is a footwear geek and the founder of Wearably Weird. She created a YouTube channel in 2021 for fellow footwear fanatics, dedicated to detail-rich footwear reviews and info. She has a fashion media qualification (awarded in 2011).