
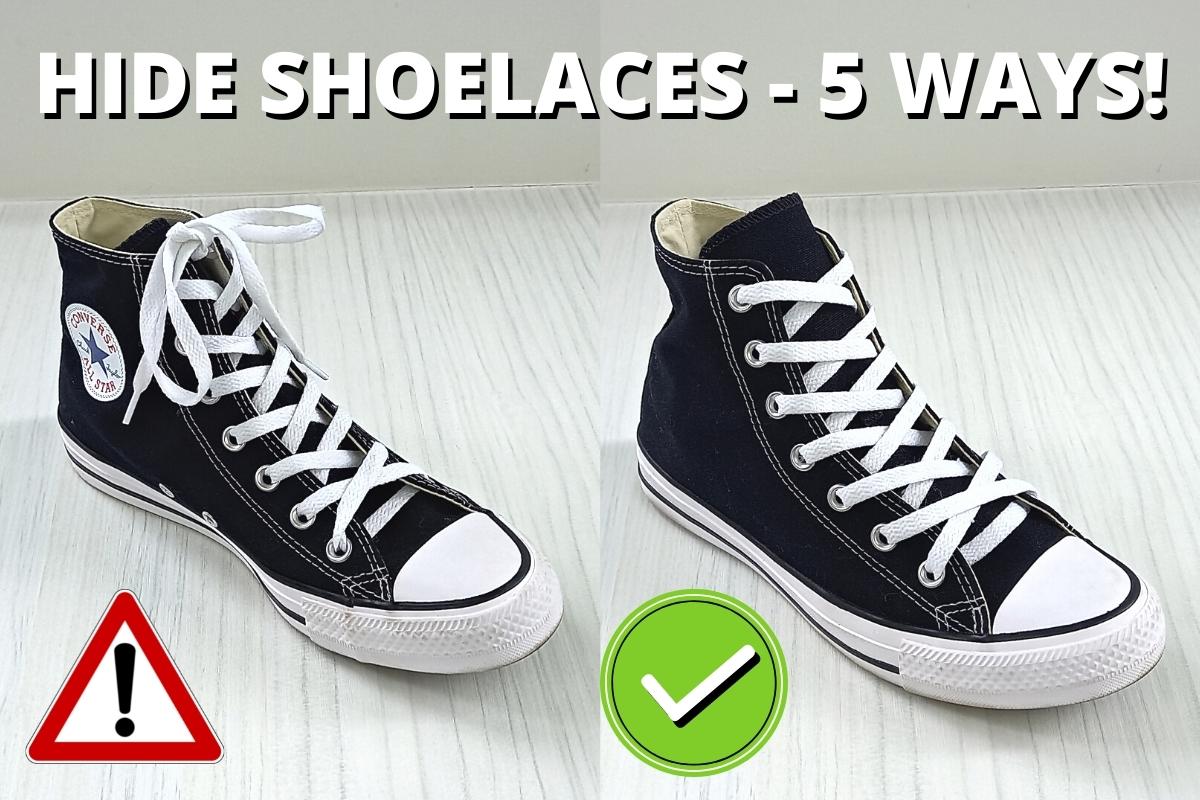
Learning how to hide your shoelaces is a super fast way to take your shoes and sneakers from messy looking to fresh and neat.
Get rid of the untidy lace bow, and say hello to crisp looking footwear. In this post I’ll be sharing 5 easy ways you can hide your shoelaces and hack your footwear game.

*This post may link to online stores. If you click a link and buy something, I may get a commission. Learn more.
How To Hide Shoelaces
I’ll be covering the following five shoelace hiding hacks in this article:
- Lace anchoring your laces (MOST SECURE WAY).
- Using your shoe insole to hide your laces.
- Tucking the lace bow (FASTEST WAY).
- Knotting each lace under the eyelet.
- A hidden bow lacing technique (also known as bar lacing, it looks so cool).
If you would like to watch the first three methods in this tutorial, check out the video I made here:
Method 1. Use Lace Anchors
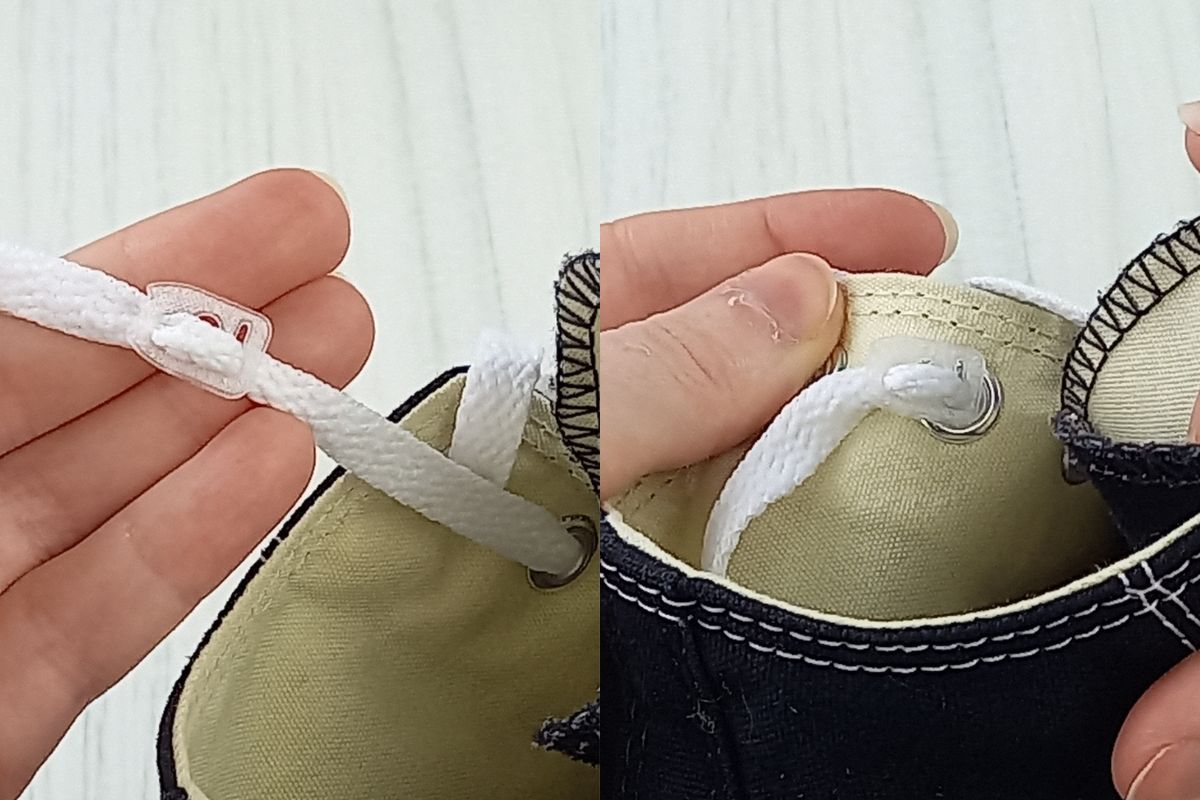

Lace anchors are a handy little tool that keep your laces in place and out of sight. You might be thinking how do they even work?
Lace anchors simply slip down over your lace ends, then can be pulled flush with the lace eyelet, hidden away under the shoe or sneaker side. As you can see in the above image, mine sit nicely out of sight on my Converse and work great.
They will stop the laces coming loose and hide the messy ends eliminating the need for a bow. Plus They make it so you can slip your shoes on and off – I don’t know about you but I love a time saving hack. No more lacing your sneakers each morning, just slip them on and get out the door.
You can grab an inexpensive set of lace anchors here.
Give them a go and see how easy they make getting your shoes on and off (and how crisp your laces look without that bow).
Some people like to trim away the excess lace ends once their lace anchors are in place, but personally I don’t do this for these two reasons:
- First I don’t mind the feel of the excess laces inside the shoe. It just doesn’t bother my feet.
- Second I like to remove my laces for cleaning regularly. Getting a frayed lace end back through the eyelets to re-lace shoes is a pain in my opinion. If you trim your lace ends you’ll likely need to use a new pair of laces each time you want to re-lace your shoes.
Always use fresh laces for best results! Read next: How To Clean Shoelaces – 5 FREE and Easy Ways
Method 2. Tuck The Lace Ends Under The Insole

A quick and easy way to hide your shoelaces is to tuck them underneath the insole inside your shoes. If you insole doesn’t lift up and is really glued in there, I recommend trying out the other steps in this article.
If your insole lifts up – great!
Here’s how to utilise it to hide those messy shoelaces:
- Lace your shoes until the laces come through the top eyelets (from above, so they can be hidden nicely inside the shoe).
- Next, gently lift up your insole, without ripping it out of the shoe.
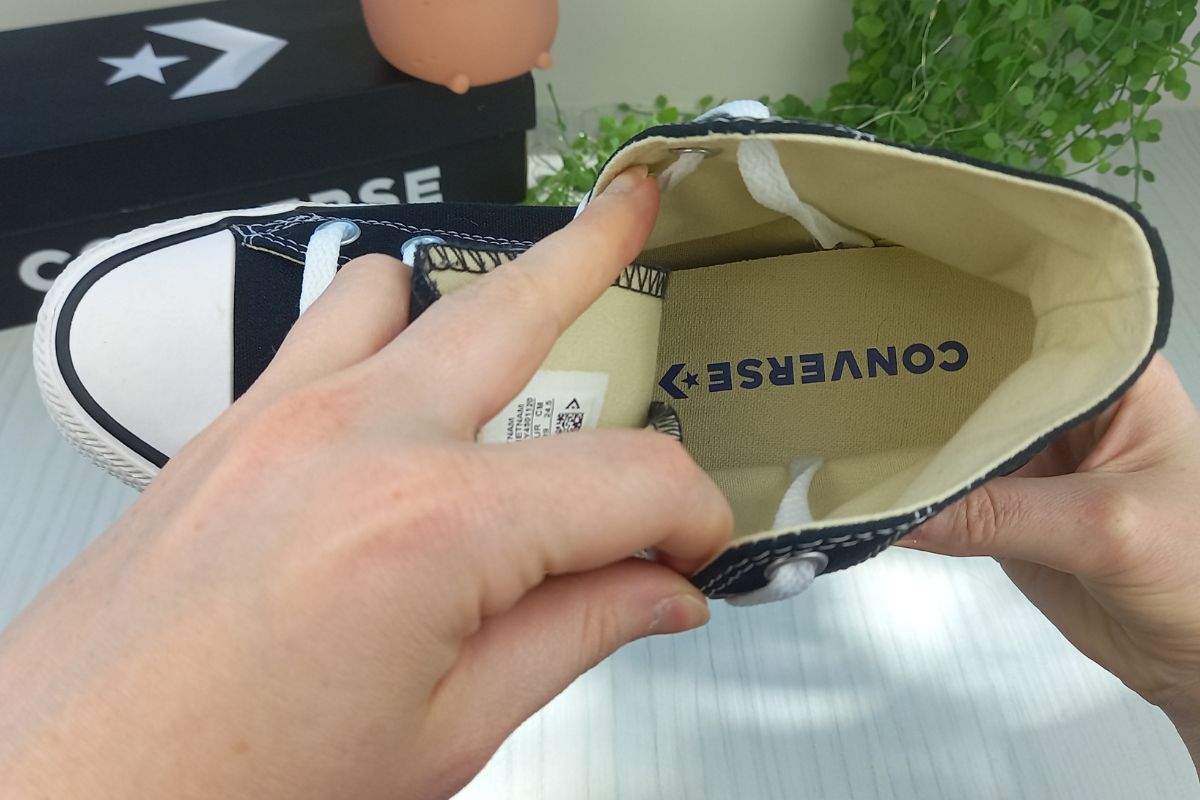
- Work your excess laces and lace ends underneath the insole, until they feel secure.
- Press the insole flat and use it to hold those laces in place, as I have done in the above image.
You may need to try out this technique a couple of times, slipping your shoe on and off to make sure there’s enough slack in the laces, and adjust the insole as needed.
Once perfected this is a great way to get rid of the need for shoelace bows (and slip your shoes on easily each day).
Alternatively you could buy a thin insole to put inside of your shoe, to keep your tucked laces in place. There are ways around it!
Method 3. Hide the Bow Behind The Shoe Tongue

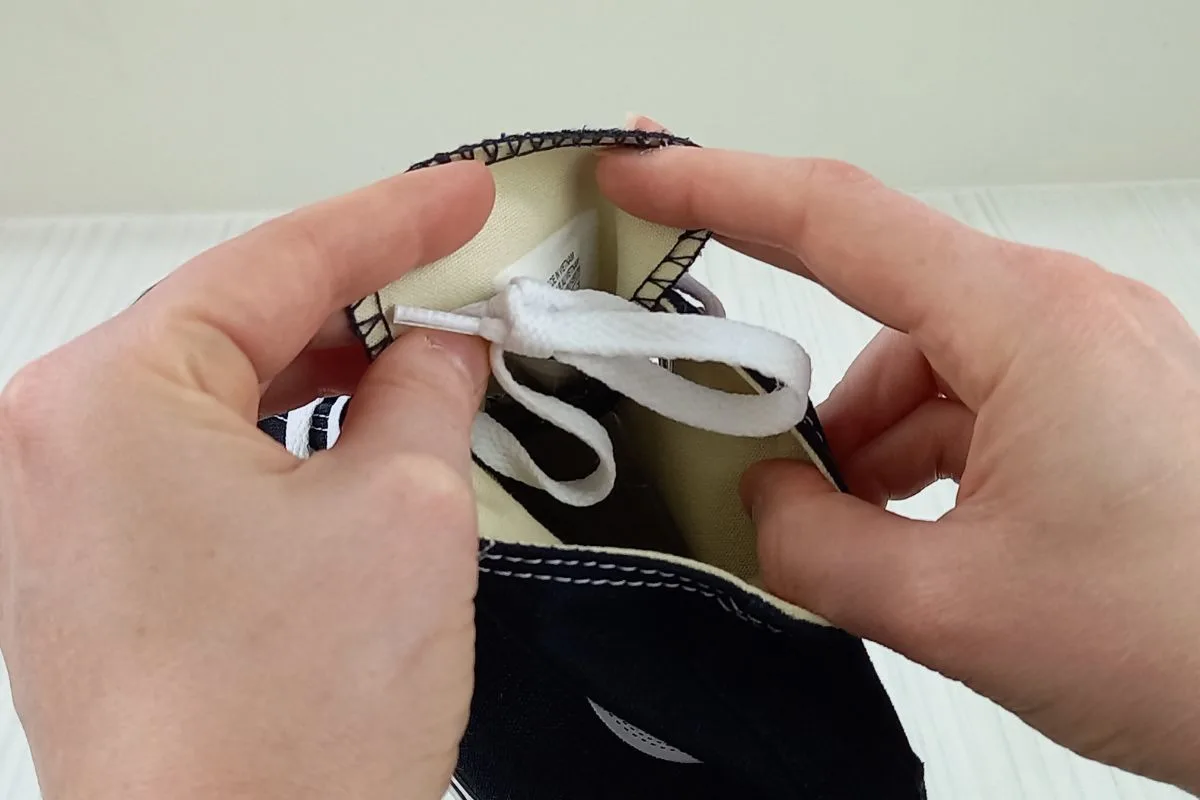
The quickest and most simple way to hide a shoelace bow is to tuck it behind the top of the shoe tongue, as I have done in the above image.
It looks best when your laces are going down into the top eyelets from above, and not coming out of them from underneath.
Wear your shoes as normal and tie your bow a little more loosely then you usually would. Then pull it over the top of the shoe tongue and tuck it out of sight.
Personally the feel of the bow against the top of my foot doesn’t bother me too much, but if you are worried about this feeling uncomfortable, or creating a lump underneath the shoe tongue, then you could try out lace anchors, the tool I covered earlier in this post. It creates the crispest and most seamless result.
Method 4. Knot Each Lace Under The Eyelet.
You could also try simply knotting each lace end underneath each eyelet, hidden out of sight. The two small knots may bother the sides of your feet slightly, but this will eliminate the bunching created by the bow hidden under the tongue. Try out different ways and see which works best for you!
You may also like: Diamond Lacing Shoes: EASY Guide With Photos
Method 5. Hidden Knot Lacing (also known as bar lacing)
If you want a permanent solution to hiding your shoelaces, then try out the ‘hidden knot’ lacing technique. This lacing pattern is designed to keep your lace ends out of sight, without the need for a bow.
It’s a great style to try as a time saving hack too, as you will be able to slip your shoes on and off each time, instead of tying them.
If you would prefer to watch a video of how this method is done, here is my tutorial:
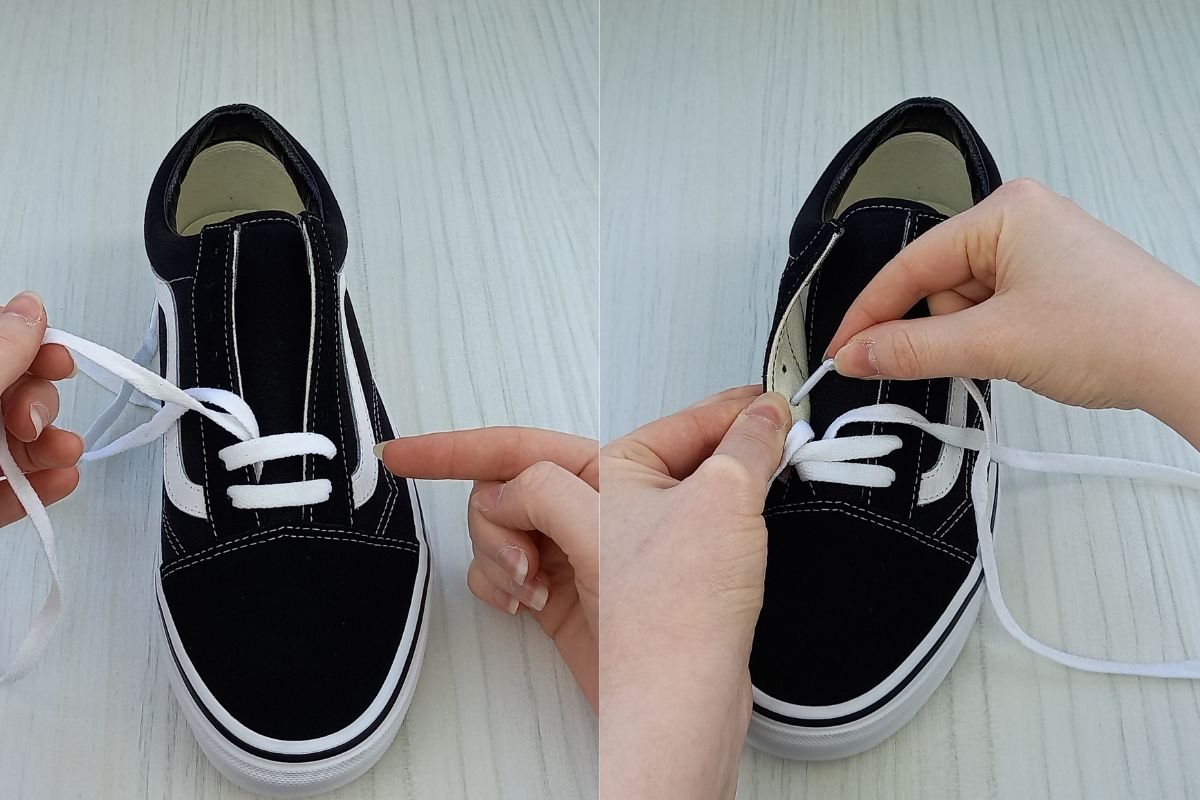
Step 1.


- Begin by placing a pair of balled up socks underneath your shoe, boot, or sneaker tongue. This will create a nice resistance under the tongue that mimics a foot, and will make sure your lace pattern comes out nice and even along the shoe. If you skip this step you run the risk of having small ‘bars’ at the top of the shoe tongue and wide ones at the bottom. It just doesn’t look as good.
- Take a pair of crisp clean laces and thread the lace ends down into the two bottom eyelets on your shoes. Make sure the lace ends go down into the eyelets from above, not coming up into them from underneath, as I have done in the above image.
- Next take the right hand lace end and thread it up into the next eyelet on the right hand side, from underneath. Double check the above image to ensure you have the same result.
Step 2.

- Now bring the lace over to the left hand side and feed it down into the second eyelet from the bottom here.
- As you will see the second ‘bar’ like effect is now formed and the pattern is starting to take shape.
- Next move on to the other lace and bring it up into the third eyelet from the bottom on the left hand side, as I am in the above image.
Step 3.
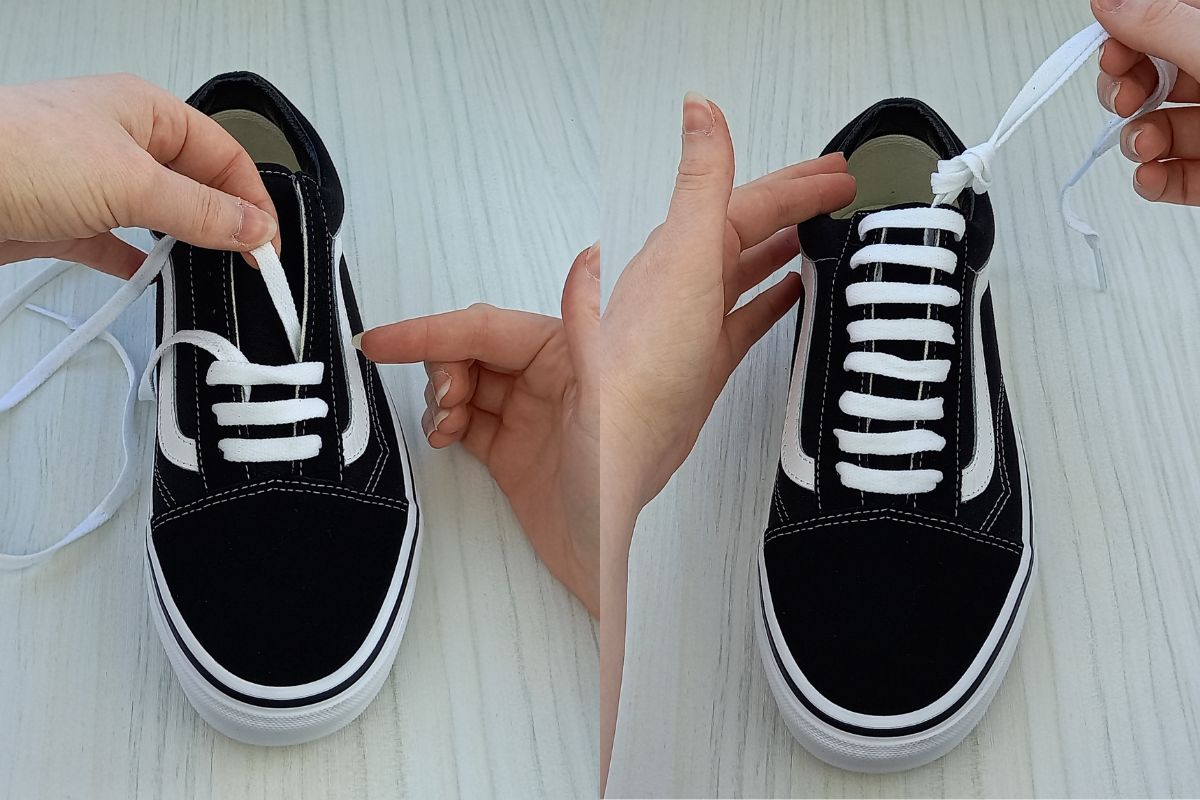

- Pull the lace through the eyelet, then take it across the shoe tongue and down into the third eyelet from the bottom on the right hand side. Now we will have our third ‘bar’.
- Simply repeat this pattern until you make your way up to the top eyelets. If you need extra help, make sure to watch the video I included in the beginning of this section. Follow along with the steps for best results.
- Once your lace ends reach the top of your shoes or sneaker it’s time for the ‘hidden knot’.
- Tie the two lace ends together into a knot and tuck it down into the shoe. This knot will sit inside the shoe, keeping the messy shoelaces hidden. You will be able to slip the shoes on and off without the need for retying. At this stage it’s best to slip the shoes on and adjust the knot as needed, to find your perfect fit.
Enjoy your ‘hidden knot’ laced shoes!
Related Articles
Thank you for reading the tips in this article on how to hide shoelaces. I hope you give them a go and see how quick and easy it is to level up your footwear look.
As a recap, there are five ways to hide your shoelaces:
- Tuck the lace bow behind the shoe tongue.
- Use lace anchors to securely fasten the laces out of sight, without the need for a bow.
- Hide your lace ends underneath your insole.
- Use the ‘hidden knot’ lacing technique.
- Alternatively as a bonus hack simply tie a knot in each lace end, and pull it flush under the eyelet it comes out from.
For more shoelace content, check out:
Ladder Lacing Shoes: EASY Tutorial (Photos)
Straight Lacing Tutorial: EASY Guide (With Photos)
Star Lacing Shoes: EASY Tutorial With Photos
How To Lace Shoes So They Slip On – 3 EASY Ways

Lorna is a footwear geek and the founder of Wearably Weird. She created a YouTube channel in 2021 for fellow footwear fanatics, dedicated to detail-rich footwear reviews and info. She has a fashion media qualification (awarded in 2011).