
Learning how to ladder lace your shoes is an easy way to elevate your footwear style. Here is a step by step guide to ladder lacing, including photos and a video for your convenience.
Known for it’s uses in the military, ladder lacing is a secure lacing style that allows for quick removal (via the cutting of laces on the shoe or boot tongue) in case of an emergency. It’s also a super cool looking style that is popular amongst sneakerheads and skaters.
It’s a great style for those who need a tight lacing method for hiking boots, military boots, roller skates and more.
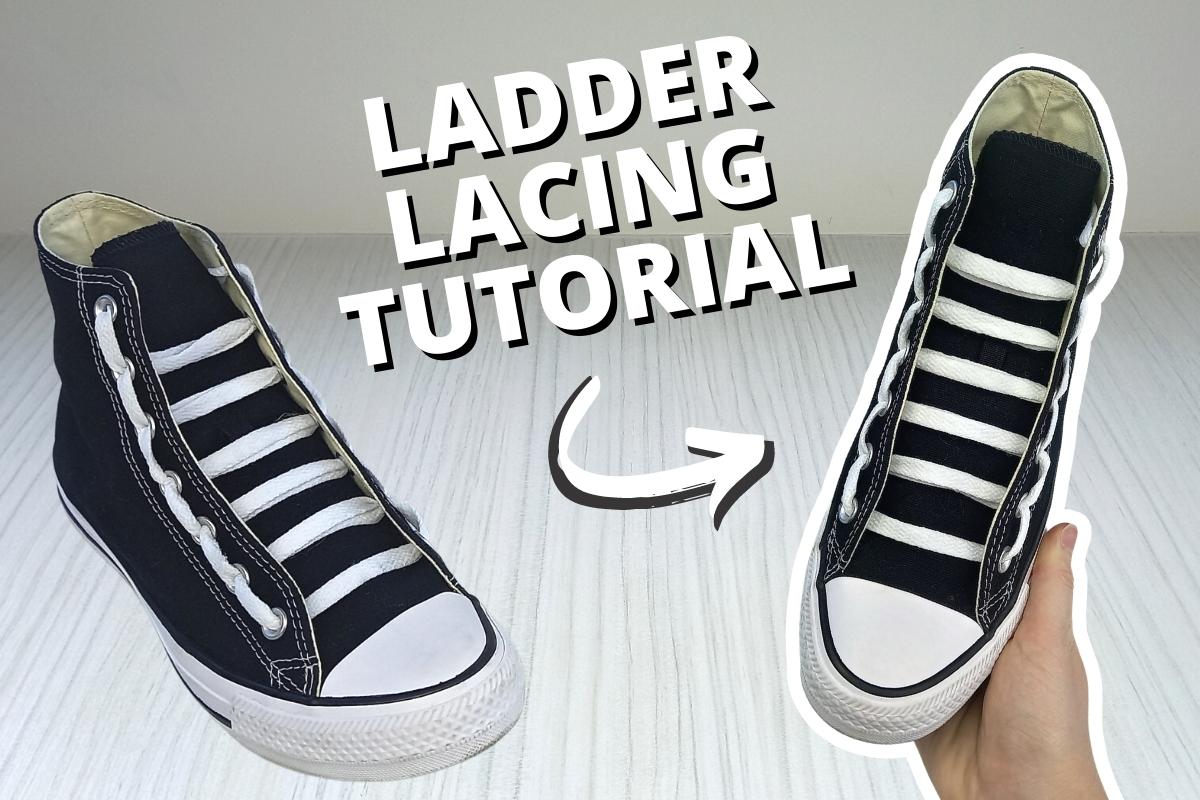

How To Ladder Lace Shoes
Ladder lacing can initially look a little tricky, but it’s actually very simple. Go slowly and double check your results alongside my photo instructions.
Here is a video of me going through the steps, if you would prefer to watch the tutorial:
Step 1.
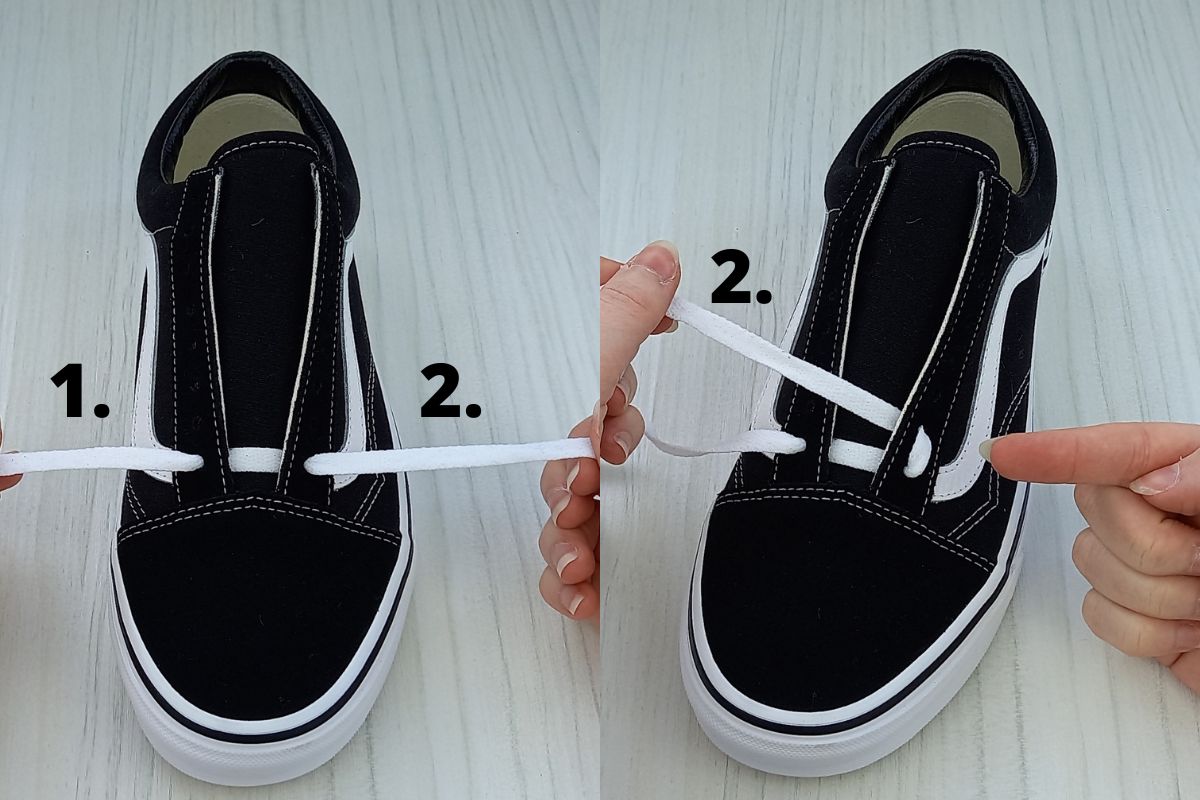
- Begin by feeding your lace through the two bottom eyelets of your shoes. Make sure the laces are coming up from underneath the eyelet, not going down into each eyelet from above.
- Then take lace number 2. (as pictured) and bring it up into the next eyelet on the right hand side. Thread the lace end into the eyelet from above this time, as I have done in the image. Make sure there are no twists in the lace and everything is sitting nice and straight.
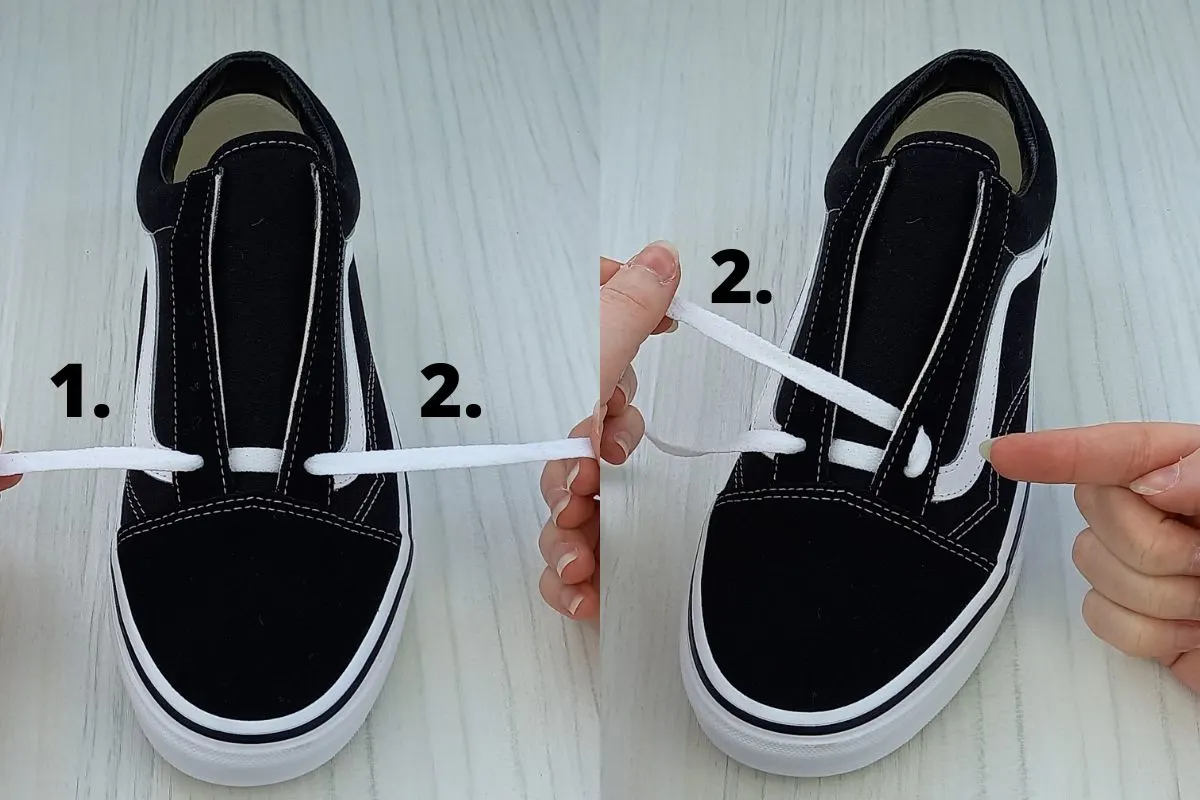
Step 2.

- Now thread lace 2. into the second eyelet on the left hand side, as I have done above.
- Next take lace 1. and bring it up into the second eyelet from the bottom on the left hand side (from above, not from underneath). Take it across the shoe tongue and into the second eyelet from the bottom on the right hand side, just like we did with lace 2.
- At this stage you will have formed the first ‘rung’ on your ladder, and will see the pattern beginning to form. Double check your laces are straight and there are no twists in them. They should sit neatly on top of one another, as pictured above.
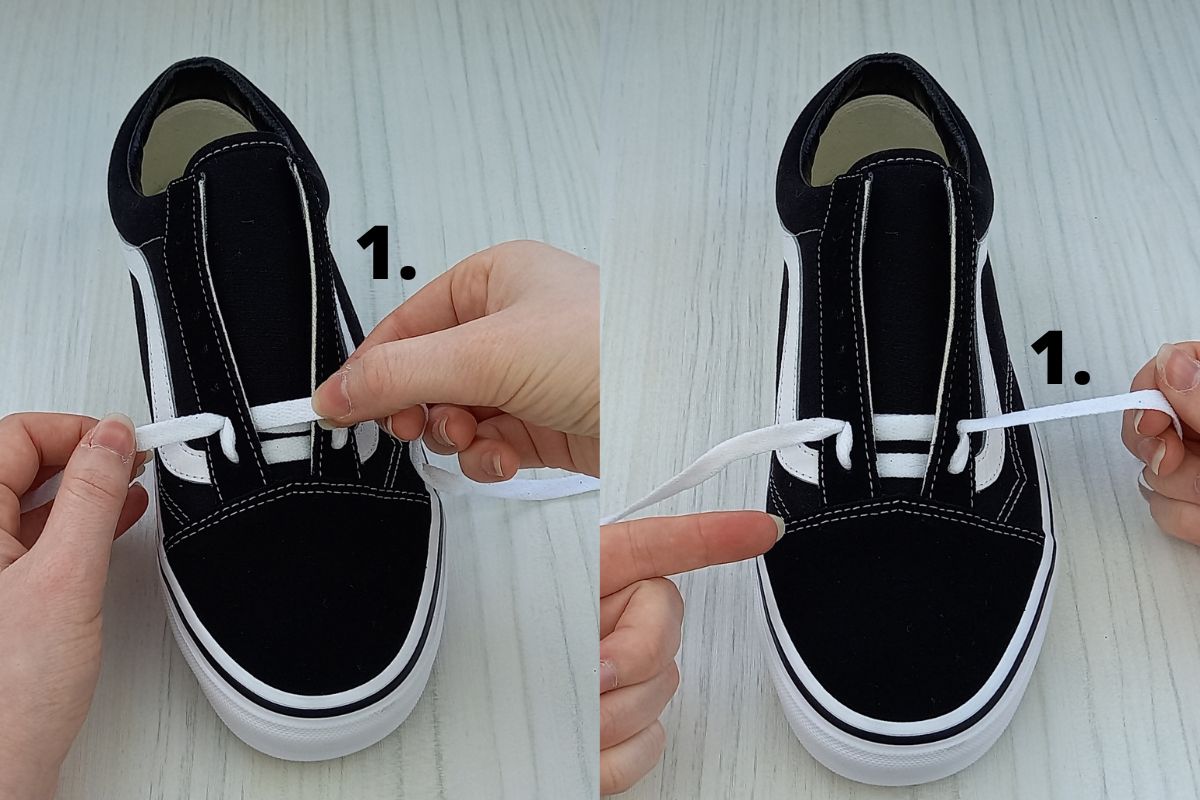
Step 3.

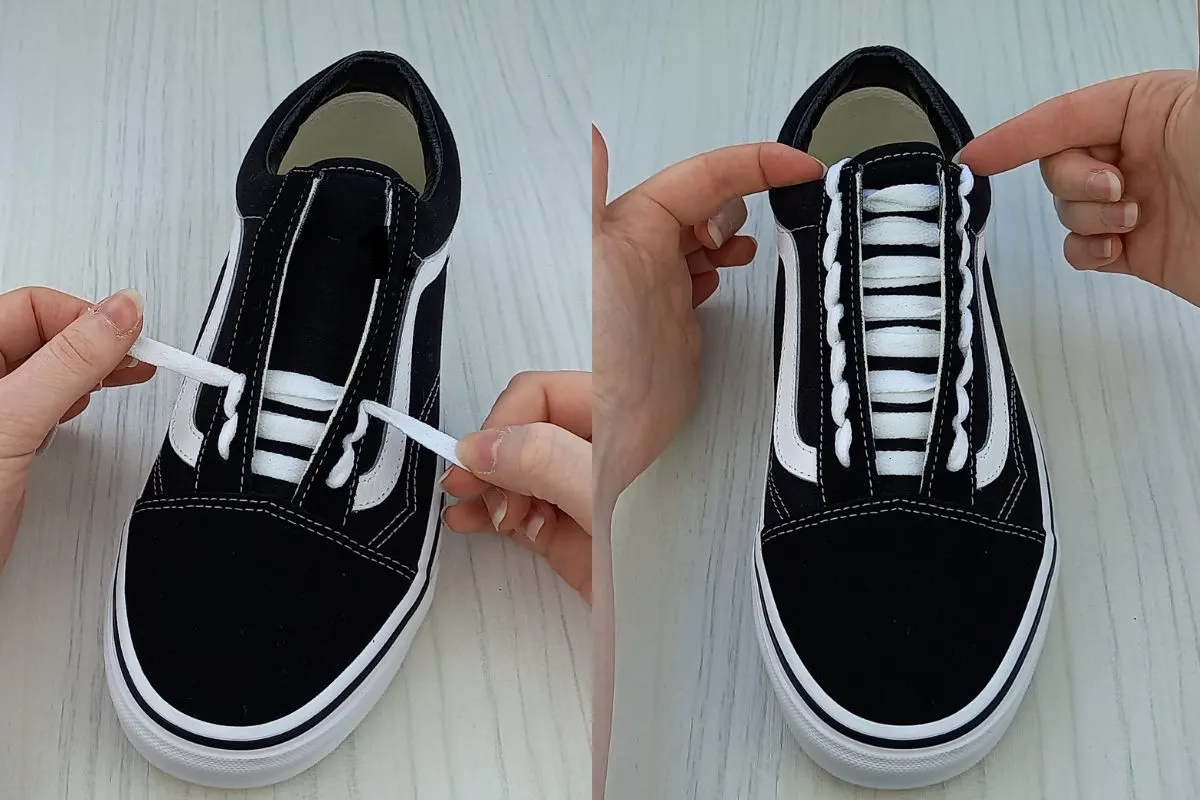
- Begin to repeat the pattern all the way up the eyelets. Remember to feed each lace into the next eyelet up from it on the same side, from above, then bring it across the shoe tongue and into the corresponding eyelet on the other side.
- Repeat this until you reach the top eyelet. Take your time and make sure the laces are straight throughout.
- At the end, neaten up your laces, to ensure they are sat on top of one another, for a crisp look. Then you can simply bow them as usual and tuck the top bow out of sight behind the shoe tongue, if you wish.
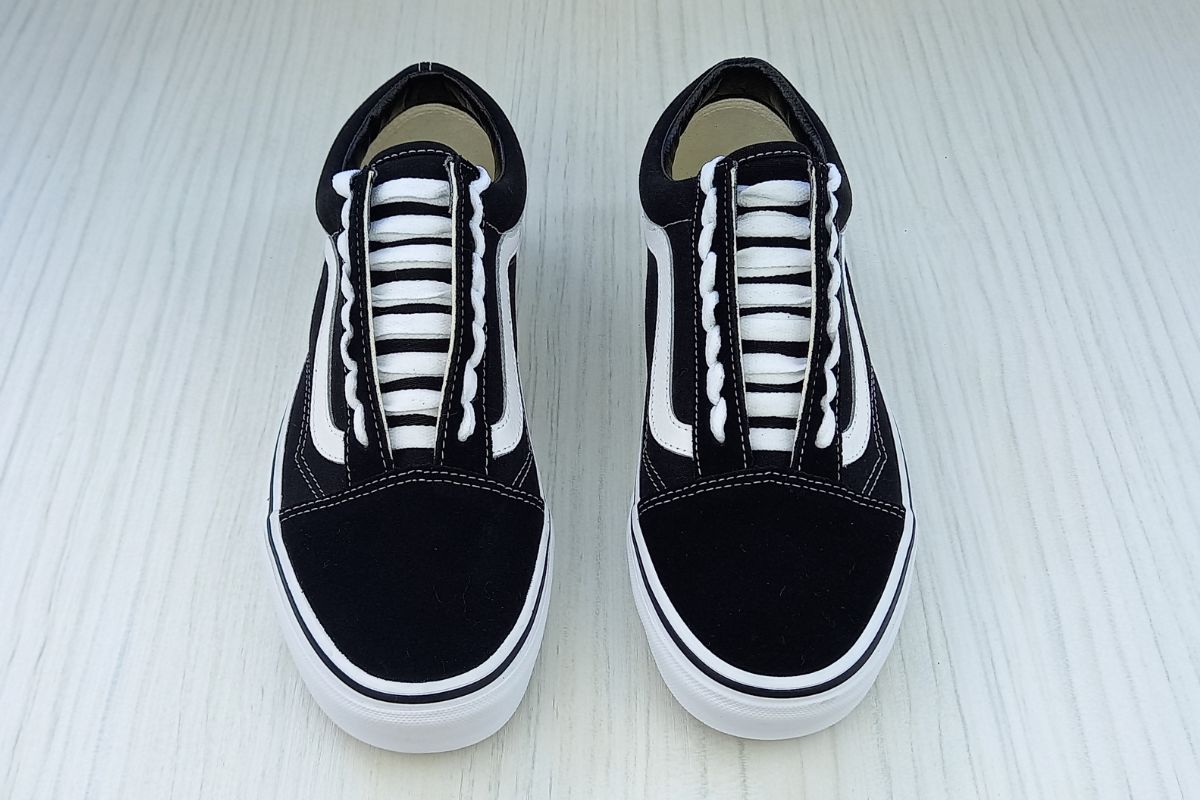
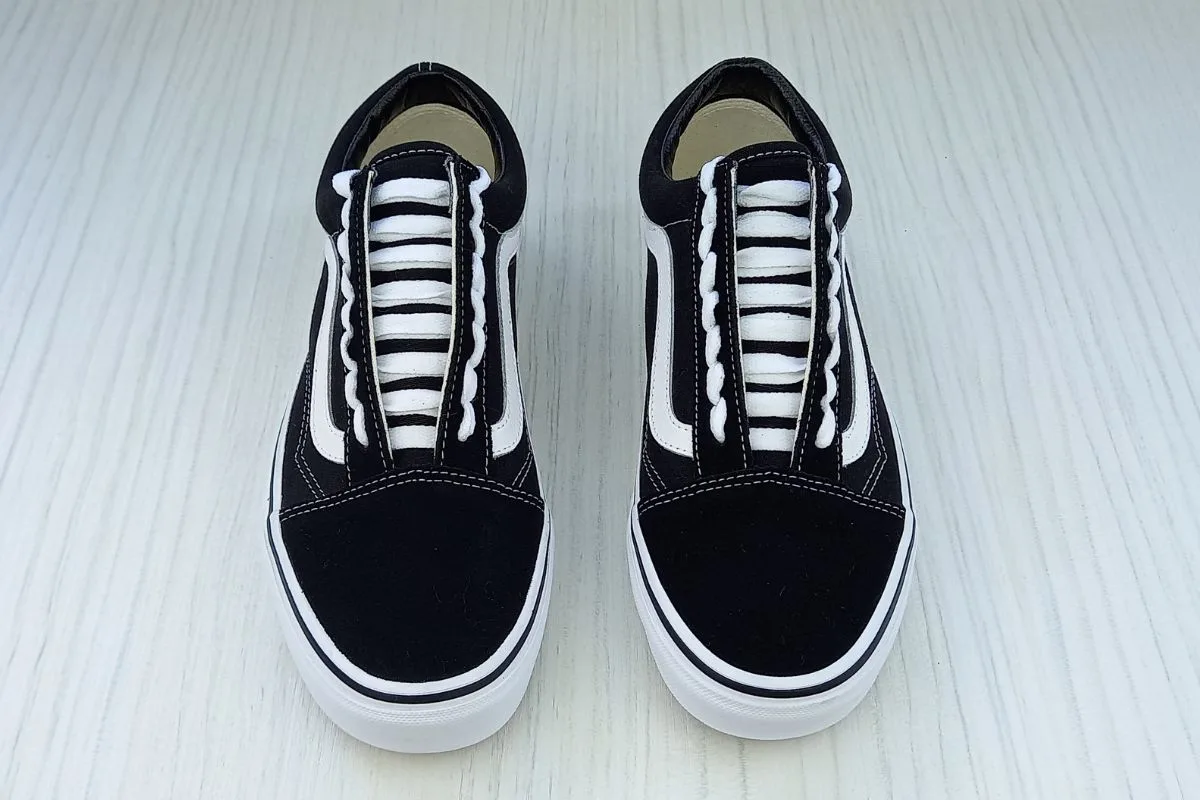
Complete the pattern on your other shoe and you will have an awesome pair of ladder laced shoes!
Here are mine:
You may also like: Diamond Lacing Shoes: EASY Guide With Photos
Best Shoelace Lengths For Ladder Lacing
Depending on the number of eyelets your shoes have, different shoelace lengths will be required. Ladder lacing can be achieved on a minimum of two pairs of eyelets, however it is most commonly seen on shoes and boots with many eyelet pairs.
Here is a table showing the best length of shoelaces, for the corresponding pairs of eyelets:
| Number of Eyelets Pairs | Shoelace Length (Inches) |
|---|---|
| 5 | 40 |
| 6 | 45 |
| 7 | 54 |
| 8 | 54 |
Ladder Lacing FAQs
Here are some frequently asked questions and tips, to help you further.
Ladder Lacing Meaning
Ladder lacing is a lacing style that is designed for use on military boots. The laces lie horizontally on top of each other across the shoe or boot tongue, with a pattern that weaves vertically up the outside of the eyelets. Ladder lacing is a very secure lacing style, allowing for a tight yet comfortable fit.
The laces are easy to cut when laced like this, allowing for quick removal of a boot in an emergency situation. The laces are pulled taught and straight across the shoe or boot tongue, making cutting them easy.
Extra Tips
- I find it easier to get even ladder laces if I wear the shoe as I thread the pattern. Alternatively you can slip a couple of pairs of balled up socks under the shoe tongue. Resistance inside the shoe creates a nice firm shoe tongue, for the pattern to sit on. If you don’t do this, sometimes the ladder ‘rungs’ can come out large at the bottom and small at the top. It doesn’t look as good in my opinion.
- Try out this pattern with different colored laces for a cool twist. I like to use laces that contrast to the color of my shoes or boots, so the pattern really pops.
- Always use brand new, or freshly cleaned laces for best results. If you can get your laces to feel starchy and slightly firm, this is much better than soft worn laces. Washing powder can have this effect. For help cleaning your laces, I have a guide here: How To Clean Shoelaces – 5 FREE and Easy Ways.
- Make sure to refer to the shoelace length table above, to find the ideal length for the number of eyelet pairs your shoes or boots have. Using a lace that is long enough is key when ladder lacing, as the lace will have to pass through the eyelets and across the shoe tongue twice.
Related Articles
Thank you for reading this post on ladder lacing shoes. I hope you are excited to try out the shoe lacing pattern for yourself, and give your shoes or boots a new look.
Remember to take your time with this lacing style. Go slowly and keep checking the laces look straight and crisp, for best results.
For more lacing content, check out:
Straight Lacing Tutorial: EASY Guide (With Photos)
Star Lacing Shoes: EASY Tutorial With Photos
How To Lace Converse – 9 EASY Ways
How To Lace Vans – 7 Cool Ways (EASY guide)

Lorna is a footwear geek and the founder of Wearably Weird. She created a YouTube channel in 2021 for fellow footwear fanatics, dedicated to detail-rich footwear reviews and info. She has a fashion media qualification (awarded in 2011).