
Lattice lacing is a neat and impressive shoelace style, that looks a lot more difficult then it actually is.
The shoelace pattern mimics the lattice technique that is often seen in woodwork and on the tops of pies! The outer laces in this design sit on top of the shoe tongue at a dramatic angle, to mimic the style. Then laces are woven through them to complete the look.
In this tutorial I’ll be walking you through how to lattice lace your shoes, step by step, including photos and a video of me doing the technique to be as helpful as possible for you. I’ll be demonstrating the shoelace pattern on a shoe with seven pairs of eyelets.
How To Lattice Lace Shoes
Here is a video of me showing how to lattice lace shoes, if you would prefer to follow along with the steps:
Let’s get started…
Step 1.


- Begin by threading your lace ends through the two bottom eyelets of your shoes. Make sure they are coming up and out of each eyelet, like my lace ends are in the above image. At this stage you can slip a pair of balled up socks into your shoes to stop the lacing pattern ending up too tight for your foot.
- Then take lace end 1. (as pictured) and bring it across your shoe and down into the fourth eyelet from the bottom on the right. Make sure it’s going down into the eyelet, and not up into it from underneath.
Step 2.
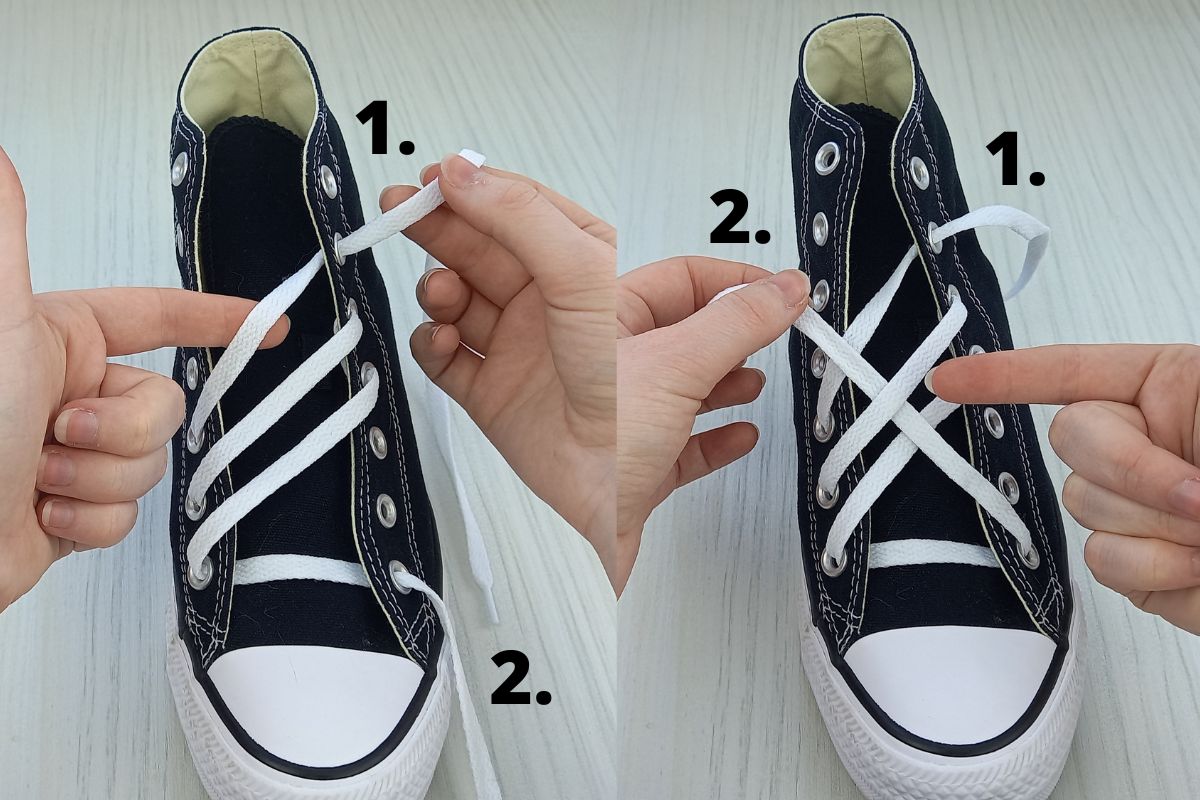

- Next take lace end 1. up into the fifth eyelet from the bottom on the right hand side, from underneath this time. Then bring it back over to the left hand side and down into the second eyelet from the bottom.
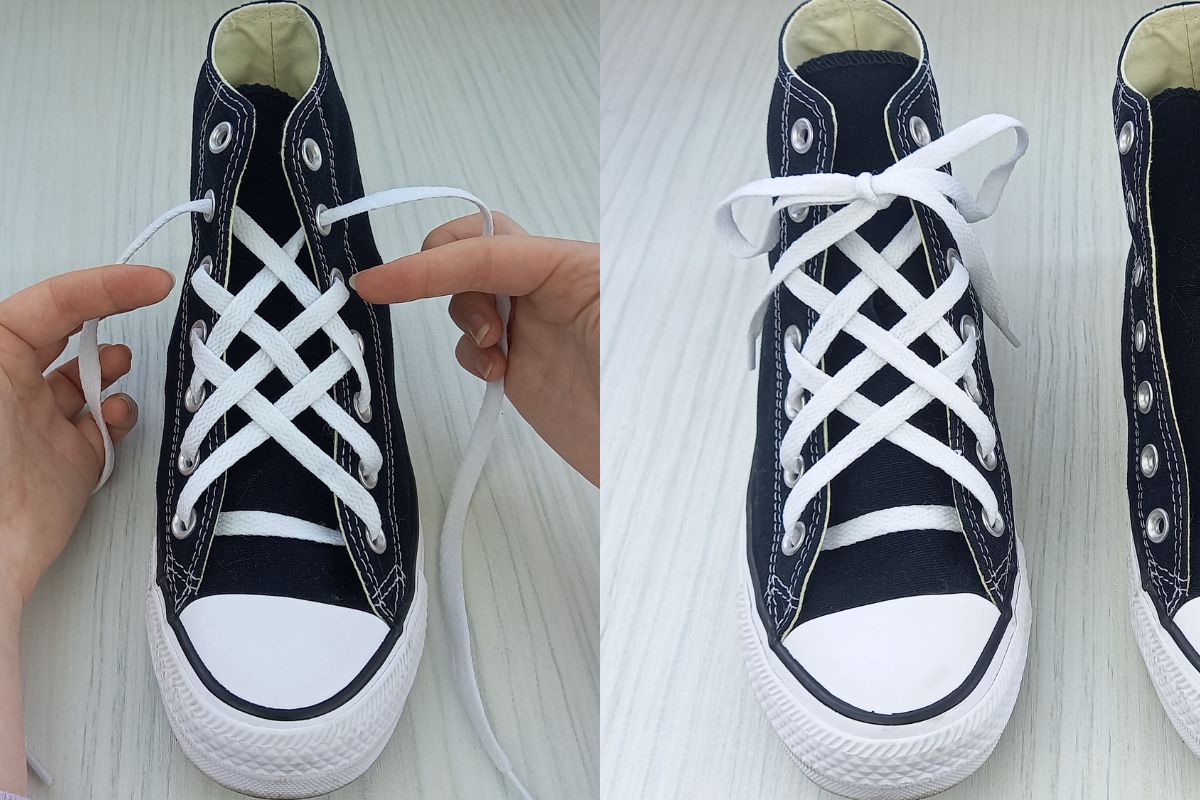
- Now bring lace end 1. up into the third eyelet from the bottom on the right from underneath (as pictured above). Take it over to the right again and down into the second eyelet from the top. At this stage take a minute to double check your pattern against mine. If you are finding it tricky, refer to the video earlier in the post to follow along with the steps with me!
- Next let’s move on to lace end 2. and bring it over, under then over the three diagonal laces, as pictured. It should just feed under the middle one.
Step 3.
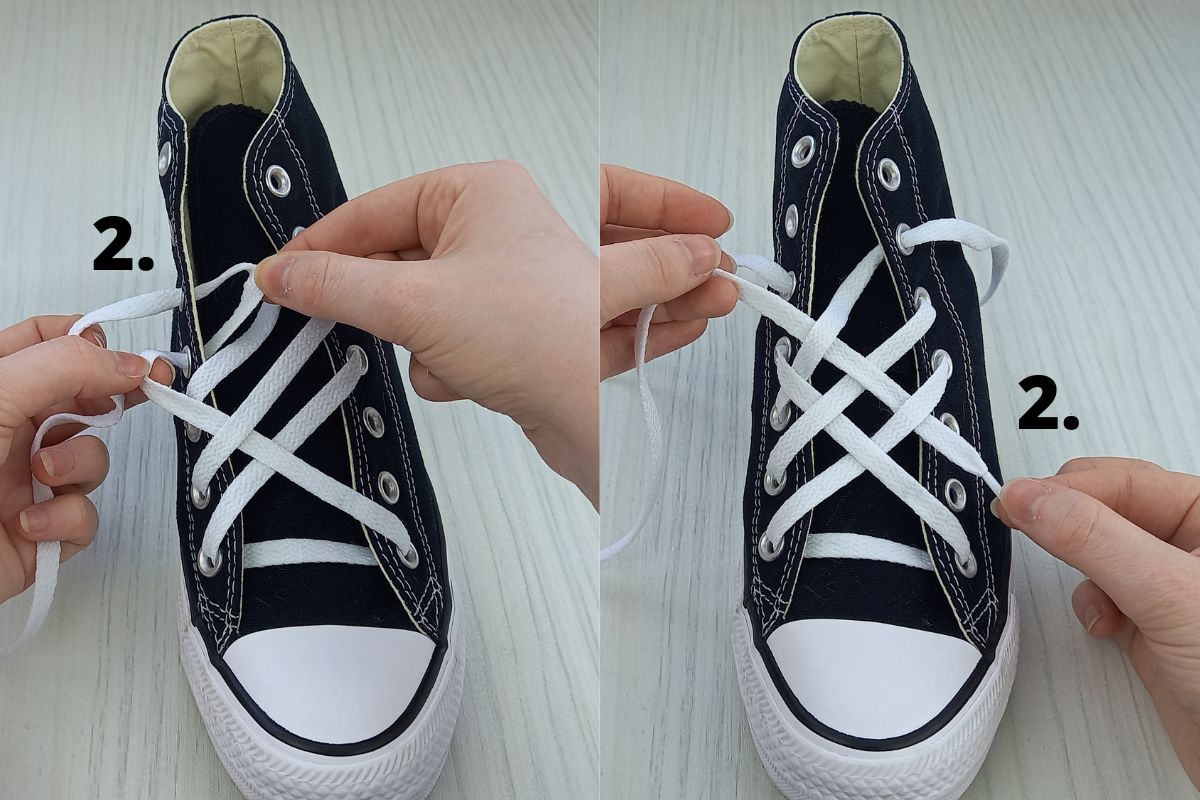

- Now thread lace end 2. into the fourth eyelet from the bottom on the left. After it’s pulled through feed it up into the third eyelet from the top on the left (as pictured in the above image).
- Bring lace end 2. back under, over then under the three diagonal laces this time. As you can see our lattice shoelace pattern is really starting to form!
Step 4.
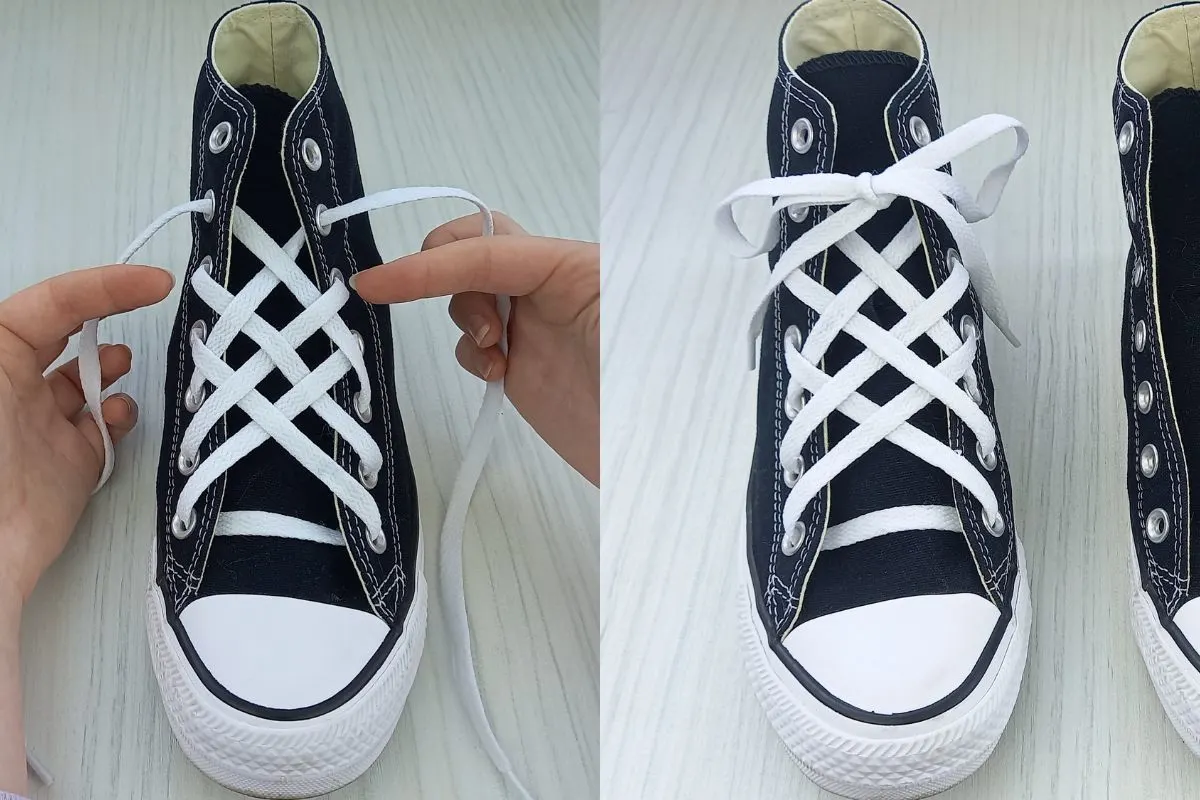
- Feed lace end 2. down into the second eyelet from the bottom on the right. Then bring it up into the third eyelet from the bottom from underneath this time.
- Now we’re ready to complete our last bit of weaving. Feed the lace end over, under then over the laces this time. Bring it into the second eyelet from the top on the left hand side.
- Finish off the look by tying your laces in a nice bow. Alternatively for a cleaner look you can tuck your laces out of sight behind your shoe tongue!
Repeat the steps on your other shoe and you will have a pair of lattice laced shoes. Here’s how mine look:
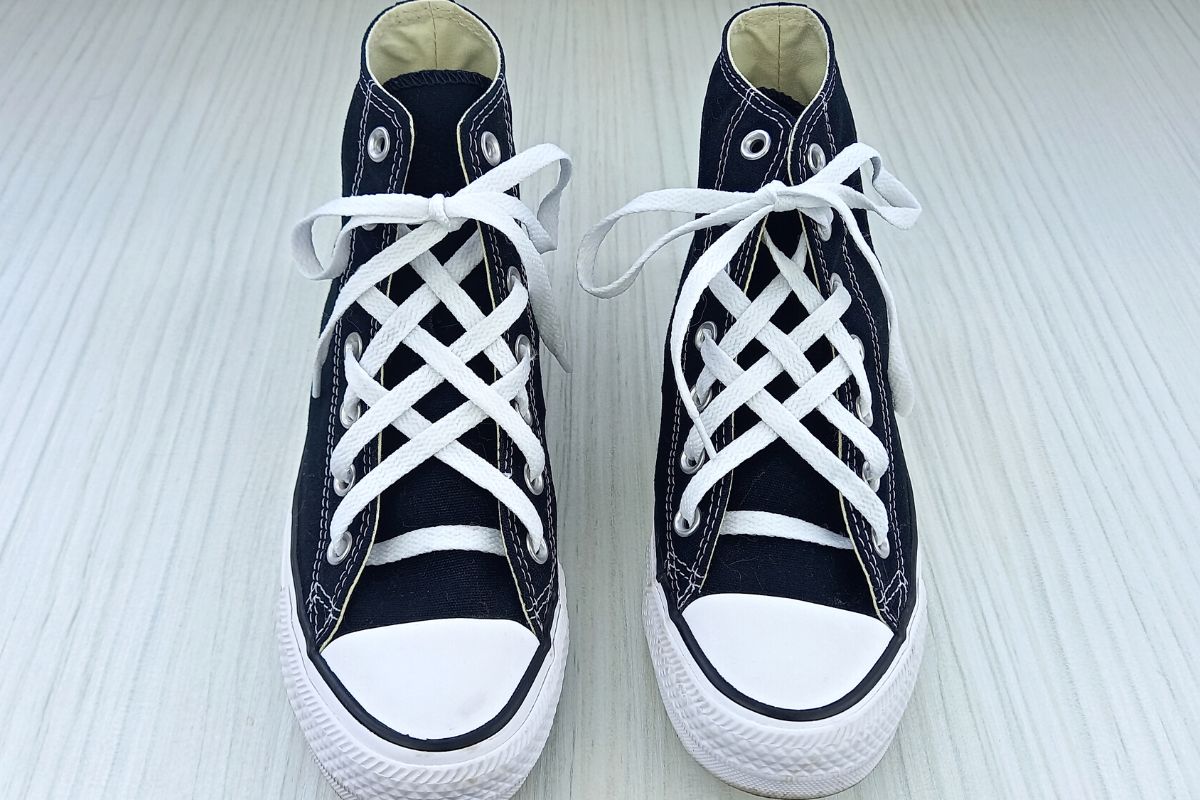

They look really eye catching and give my shoes a twist! Lattice lacing can be a little tricky to tighten up, so spend some time adjusting the pattern whilst your feet are in your shoes, before tying your bow.
READ NEXT: How To Hide Shoelaces: 5 FAST Hacks
Ideal Shoelace Length For Lattice Lacing
Different shoes will require different lace lengths to achieve this pattern, depending on the number of eyelets they have. Here is a table showing the ideal shoelace length, per number of eyelet pairs.
| Number Of Eyelet Pairs | Shoelace Length (Inches) |
|---|---|
| 6 | 45 |
| 7 | 45 |
| 8 | 54 |
Extra Tips/ FAQs
- Try lattice lacing your shoes with differently colored shoelaces for a funky effect!
- Always stuff a pair of socks underneath your shoe tongue to add resistance under the pattern as you lace. This will ensure a more even turn out, and that the laces aren’t too tight when you slip your foot in the shoe afterwards.
- It can be a little hard to adjust the slack and tension of the laces with this lacing pattern, so keep this in mind.
- Clean shoelaces work best for lattice lacing, as the style is so crisp looking. Starchy, brand new laces are best because they snap neatly and aren’t too soft. Soft or dirty laces sag too much and don’t quite have the same effect. If you want to clean your laces and starch them up a bit, try adding a scoop of washing powder to a small bowl of warm water and soak your laces for one hour. Afterwards throw them in the washing machine to remove any extra built up debris. For extra help cleaning your laces (including some easy alternative methods), check out: How To Clean Shoelaces – 5 FREE and Easy Ways.
Related Articles
I hope you found the information in this article helpful and you give lattice lacing a go for yourself! Initially it can seem like an intimidating shoe lace pattern to try, but if you go slowly and take your time understanding each step, you’ll find it’s actually quite simple.
Remember to check out my video tutorial too if you need some extra advice. Thank you very much for reading this post!
If you enjoyed this tutorial on lattice lacing, you may also like:
Diamond Lacing Shoes: EASY Guide With Photos
Straight Lacing Tutorial: EASY Guide (With Photos)
Star Lacing Shoes: EASY Tutorial With Photos
Ladder Lacing Shoes: EASY Tutorial (Photos)

Lorna is a footwear geek and the founder of Wearably Weird. She created a YouTube channel in 2021 for fellow footwear fanatics, dedicated to detail-rich footwear reviews and info. She has a fashion media qualification (awarded in 2011).