
Marbling polymer clay is a simple technique that can really elevate your crafting skills. If you want to create funky designs for jewellery making, home décor or model crafting, learning to make marbled polymer clay will set you in good stead for creating easy, yet impressive looking designs.
Here’s a quick breakdown of the technique…
How to make marbled polymer clay:
- Make a polymer clay bullseye cane using two or more colours
- Slice several pieces from the cane and roll together to form a marbled ball of conditioned clay
- Roll the ball flat using an acrylic rolling pin, to form a slab
- Roll out a couple of strings of your coloured clay and add them to the slab to create a cracked effect
- Roll the slab back into a ball, then roll flat again with the rolling pin to form a slab again
- This final slab should have now have a realistic marbled effect
Now you know the basics, read on for a more in-depth guide, including pictures, tips and tricks to help you make sure you get this technique right…
This post may link to online stores. If you click a link and buy something, I may get a commission. Learn more.
How to Marble Polymer Clay
First you should understand the basic principles of polymer clay slab making, so here is an easy breakdown.
How to make a polymer clay slab:
- Roll out your base colour of clay at about 0.5cm thick for earring cutting
- Add details to the base layer with the other coloured clay you have available
- Use glue or a rolling pin, if the detail is intended to lie flat, to secure the clay details to the base of your slab
- Use clay cutters or a cutting tool to cut out your earring designs and bake according to the clay packet instructions
What is marbling clay?
Marbling clay is blending two or more colours of clay together, to form a marbled effect, similar to that naturally occurring in rock.
The best clay to use when marbling is FIMO – my favourite brand, as it’s well priced, not too hard and not too soft – perfect for beginners!
Now you have some basic info on marbling, let’s get into the slab tutorial.
What you will need:
- Two colours of your clay brand of choice
- A clay blade
- An acrylic rolling pin or pasta machine
- A silicone clay mat or ceramic tile
- Your oven, with a baking paper lined tray
- A well lit, clean and organised working space
Method:
Start by making a Bullseye Polymer Clay Cane

What you will need:
- Two colours of your clay brand of choice
- A clay blade
- An acrylic rolling pin or pasta machine
Method:
- Take the clay you would like to use for the external colour of the bullseye cane and roll it into a sheet, about 0.5 cm thick. Trim off the edges so it looks like a rectangle with clean lines.
- Roll a cylindrical stick of your second colour. Place this at the end of your sheet, vertical to the shortest side of the rectangle and trim the sheet to the correct length of the cylinder.
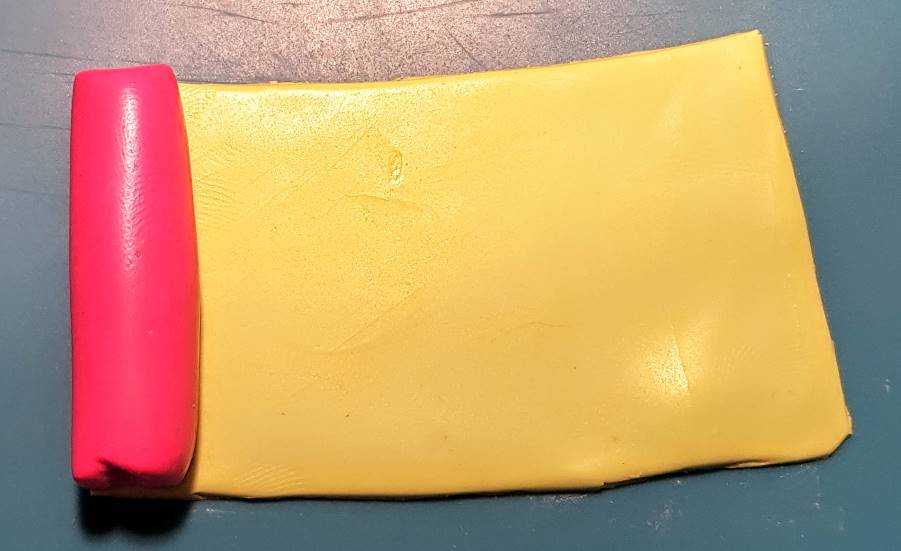
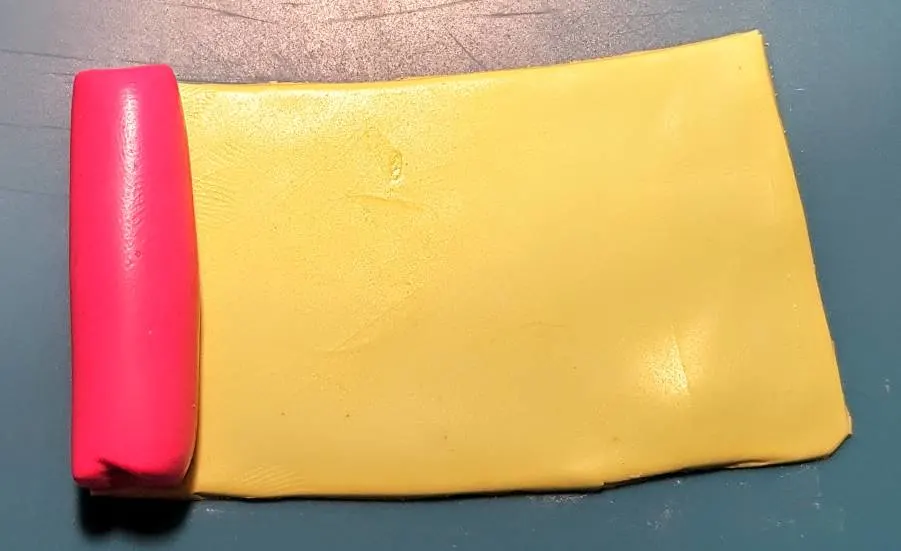
- Begin to roll the sheet of external clay around it, a bit like making a sushi roll, where the internal colour is the rice and the external is the seaweed sheet.
- Roll until the cylinder is covered, and then trim off the excess of the external sheet.


- Roll the seam against your working mat to seal the cane.

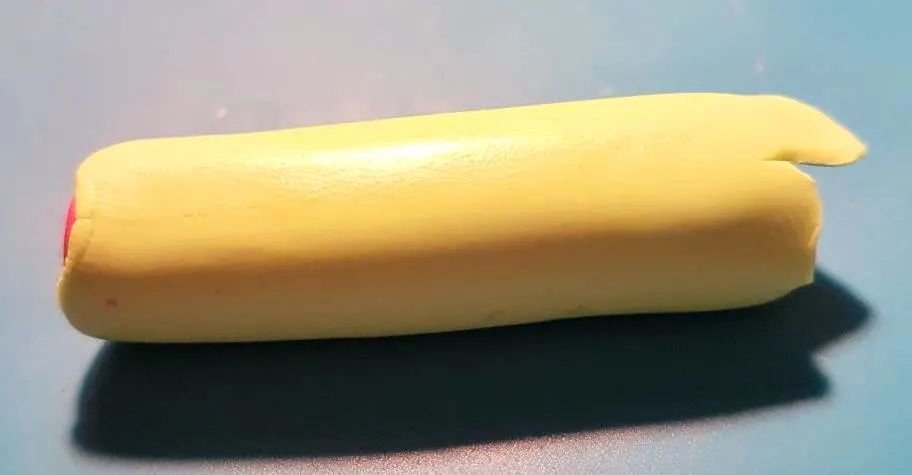
- Then start to squish/reduce the cane by stretching it out to make it longer. Take your time with this until the cane looks even.
- Then roll the cane with your hands over the mat to even it out.
- Then cut your cane into even slices, and there you have your designs!
For more on polymer clay canes, check out:
Using your cane to create a marbled slab
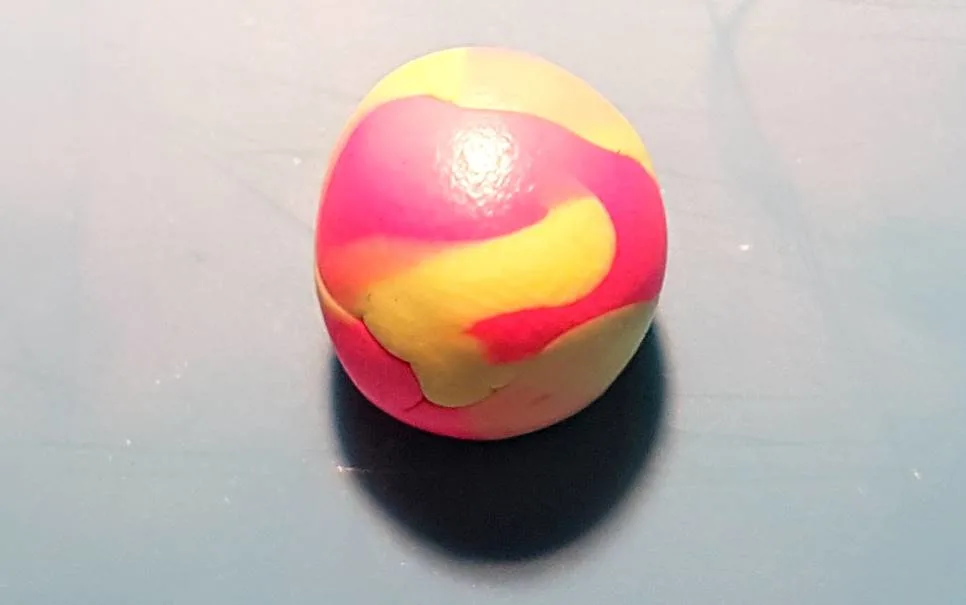
Now your cane is ready, cut several even slices from it and roll them together in your hands to form a ball. Depending on how large you want your slab to be, decide on a number of slices to cut from your cane.
Your marbled ball should look something like this, and should be warmed up enough to have properly conditioned the clay:

Next take an acrylic rolling pin (not wood as wooden rolling pins leave grain imprints in your clay and they are hard to work with), and roll out your marbled ball to form the base of the slab.
This is what you should have:

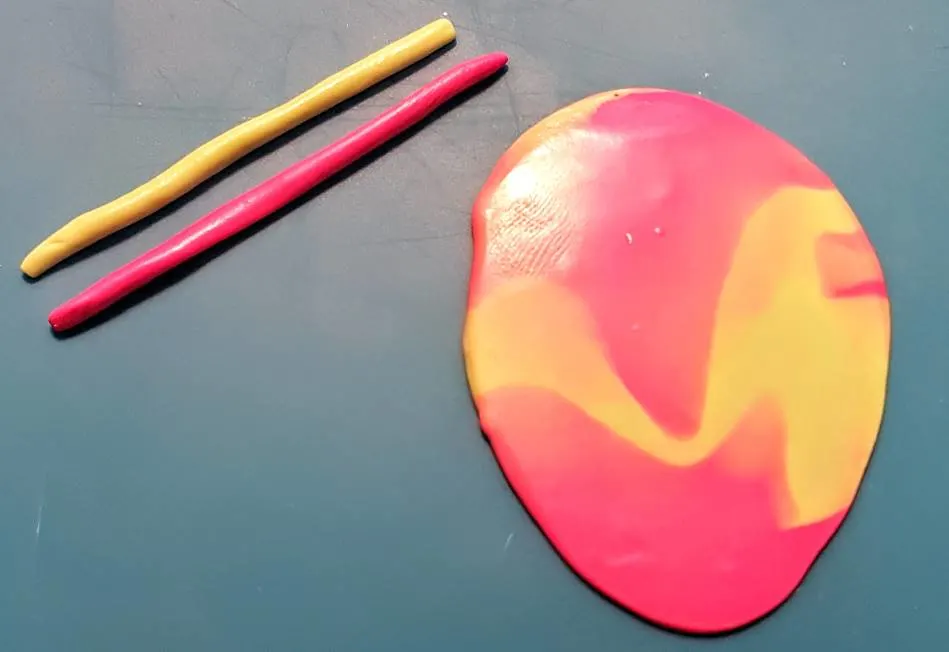
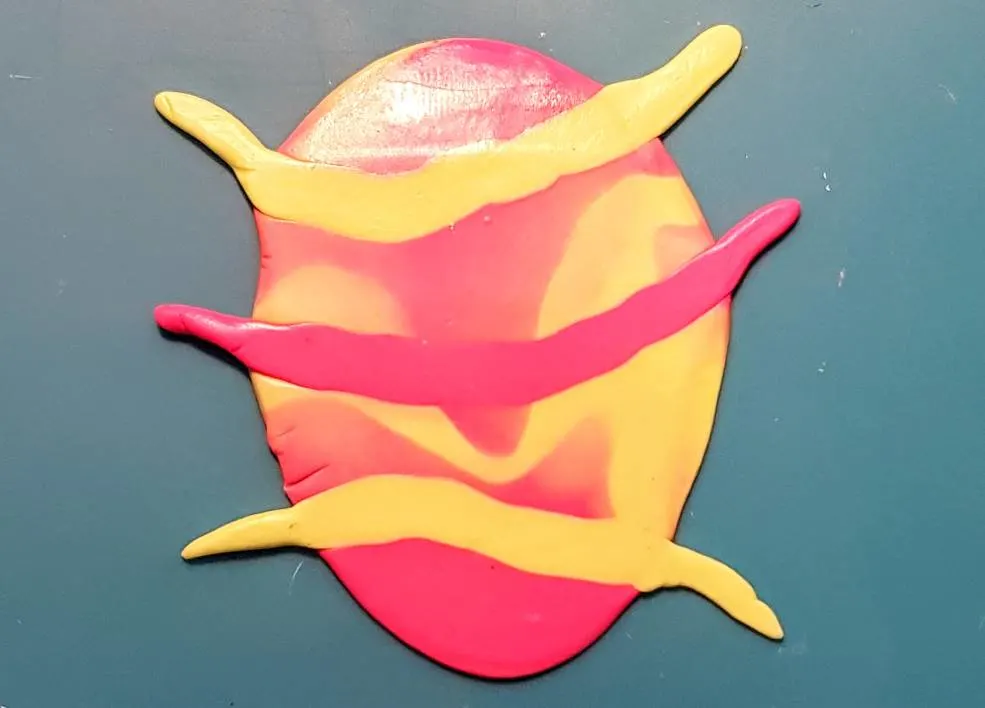
Now you will need to cut some additional clay from your blocks to roll into little strings, as above. Either use the same colours as the base of your marbled polymer clay slab, as I have done, or spice up your marbling by using a third colour.
Place the strings across the slab, by twisting them first, and laying them out evenly. This will help create a lined effect throughout your slab, helping it mimic the cracked formation of real marble – cool right?
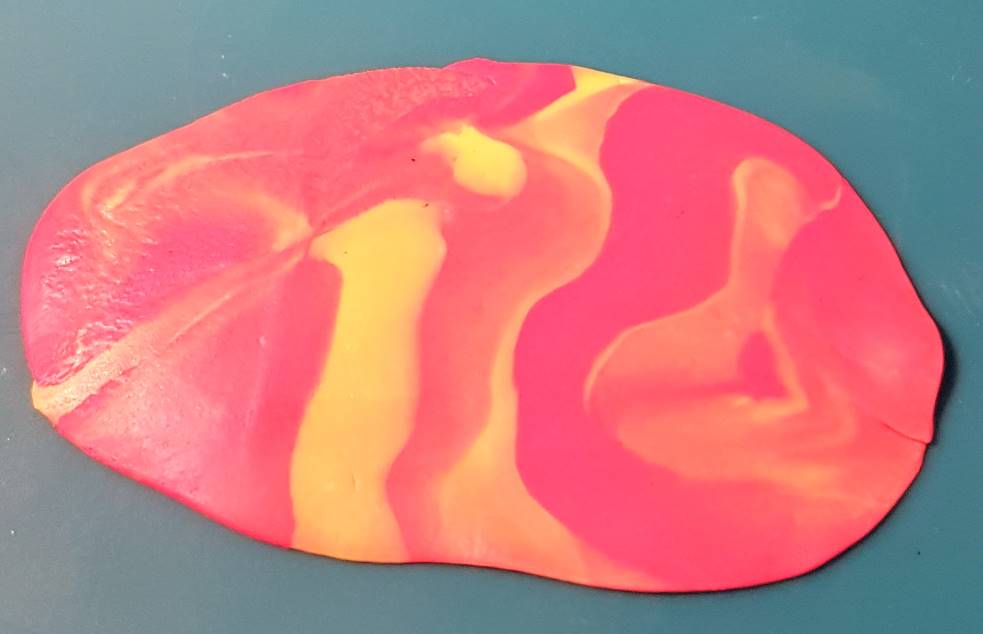
Then use your rolling pin to flatten the strings against your slab, and roll the whole slab up again to form another ball. Once it’s all squished together roll out your slab one final time and you should have something that looks like this:

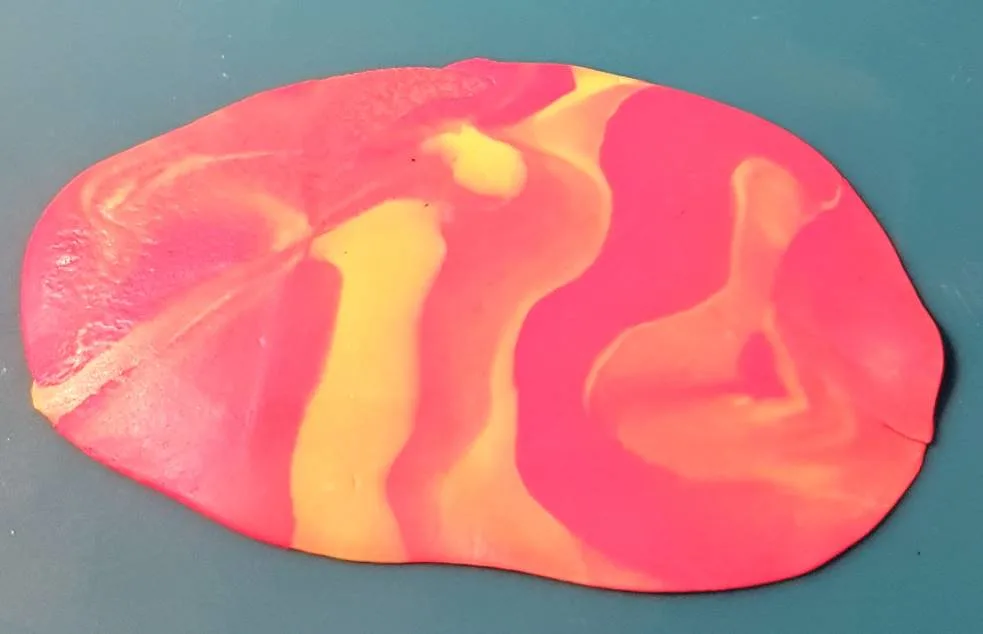
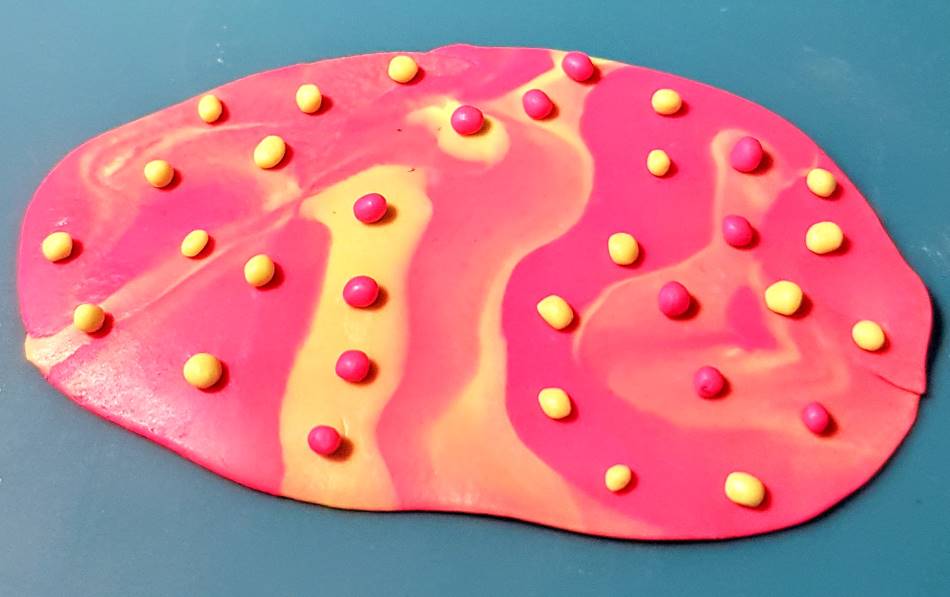
You can stop here if you like, but I enjoy adding further details to my marbled slabs, such as little balls or flowers, as below:

Your slab is done – great! Now it’s time to take cuttings from it for your creations.
If you are making polymer clay jewellery from your slab, as I do with mine, then read on for some advice for using/buying cutters, baking and FAQs to help you out…
Cutters
If you are looking to make polymer clay jewellery from your marbled slabs, there are loads of great cutters out there that are sized ideally for earrings and necklaces.
Top tip: fondant and cookie cutters are perfect for polymer clay earrings, as you can often find varied styles in small sizes!
I love clay cutters so much I’ve actually written a full guide to them, which can be read here:
But here’s a quick summary for you, including some product recommendations if you’re stumped for shopping ideas.
When you’re first starting out in the world of polymer clay adding accessories to your kit can be quite daunting. Whether you’re looking to create wearably weird jewellery like I do with cutters, or you’re creating Christmas decorations, models or home décor from your marbled polymer clay slab, a good set of cutters will help you get started creating.
You can buy cutters in craft stores, baking departments and find them easily online. I’ve included my favourite cutters below for you to browse and add to your collection if you prefer online shopping like me, keeping quality, price and style in mind when selecting these styles…
The Basics:
This is an amazing kit, that’s really well priced for metal cutters! The cutter styles come in a range of sizes which I really like to see for versatility, plus the range of styles is quite broad for such a well-priced kit; circles, hearts, flowers, tear drops, stars, rectangles, triangles and hexagons.

- Made from stainless steel
- FDA approved for American and European health standards
- 100% lifetime guarantee on these items.
The reviews are fantastic too, making this cutter set a perfect all-rounder for beginners in my opinion. Buy here:
Adventurous Cutters:
Here is a huge bumper kit of 30 cutters, for an unbelievable price, for those who are looking to get adventurous and have a range on hand, in addition to their basics. They include some Christmas and Easter shapes, so it’s a good seasonal choice too, if you’re looking to buy a broad set.

- 30 piece set, including festive options, Easter shapes, animals and plants – the little mushroom is adorable!
- Stainless steel
- Great value for money
- Shapes ranging from 4cm to 9cm – ideal for jewellery making
A perfect choice for those looking to purchase a broad set of cutters that covers a lot of bases (I would still recommend purchasing a basic set too, to ensure those essentials are covered). Buy here:
Top tip: cover your slab of clay in a layer of cling film before pressing your cutter into it, for a smoother cut and no need for sanding after baking!
Baking
Now you’ve made your marbled slab, and cut some designs from it using clay cutters, it’s time to bake your creations and see how they turn out.
Before baking your masterpieces, start with a couple of experimental pieces from your slab to test bake in the oven. Each brand of clay will have slightly different baking requirements, so check the packet of yours and make sure you get it right.
Carry your designs to the oven on a plate lined with baking paper instead of with your hands, otherwise you may run the risk of leaving unwanted last-minute fingerprints on your designs – not good!
If your designs are still bendy when they come out of the oven this is normal, depending on thickness and brand, but many beginner crafters take this as a sign the clay is not done.
For more info on baking polymer clay check out:
Related Questions
What is a Polymer Clay Slab?
A polymer clay slab is a rolled out slab of clay, that is often decorated with other coloured clay to create unique patterns for cutting; similar to how a roll of fabric is cut in textile-based crafts.
Polymer clay slabs are great for jewellery making, as it makes pattern making simpler with one large piece of clay, as opposed to cutting your clay jewellery first and then adding patterns onto the pieces. Slabs are a beautiful way to get creative with polymer clay, as the results can be stunning!
There are some basic slab designs I would suggest you master if you are a beginner to the polymer clay craft, such as simple prints like cow print, leopard, and easy patterns like multicoloured grids. But really slabs are only limited to your creativity, and many talented polymer clay crafters have produced some gorgeous designs on Instagram and Pinterest for you to browse for inspiration.
Here’s a great example from my friend Cat and Clay who creates truly stand-out polymer clay earrings from the advanced kind of slabs I’m talking about:

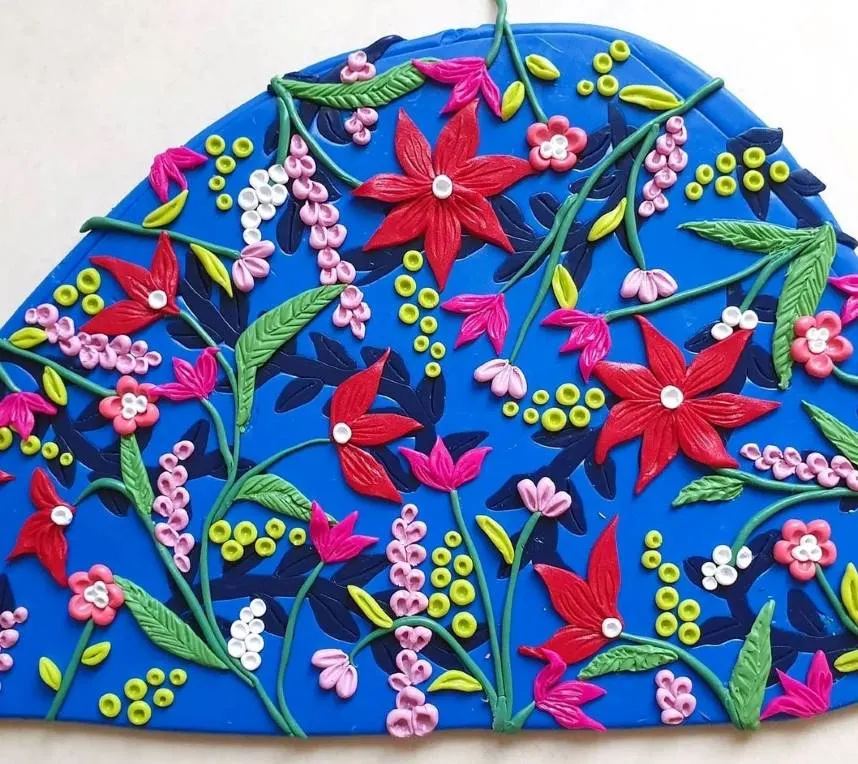
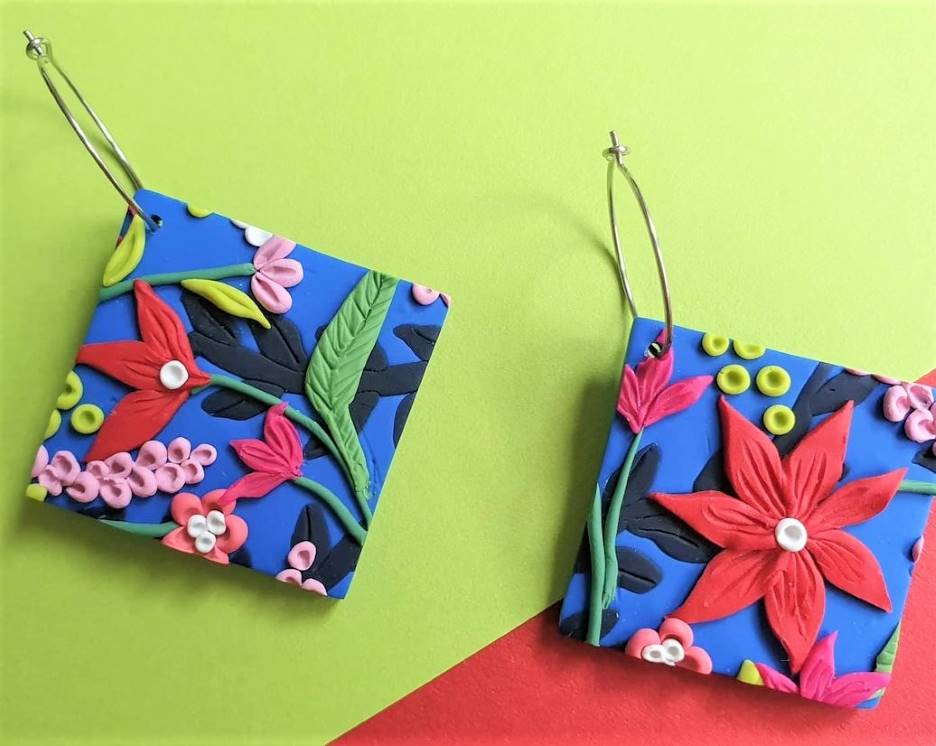

Beautiful right?
What other polymer clay techniques are there?
Caning is a popular polymer clay technique that involves creating a cane of clay similar to a candy cane, or canes of glass used in traditional glass working. The cane of clay features a central design, that runs throughout the entire stick, that when cut into pieces will feature an identical pattern. Canes are particularly useful for polymer clay jewellery making, as they make uniformed designs easier to achieve.
Slicing designs from a cane of clay is a quick way of mass producing earring designs, such as studs, as one long stick has a high yield. The concept of caning is used in many other crafts, such as glasswork or candy making, as a beautiful way of creating mass uniformed designs.
There are countless designs of polymer clay canes that can be bought or made at home; the caning technique will really elevate your polymer clay jewellery game, and is also useful for model making and other polymer clay crafts. Some of the most beautiful polymer clay earrings I’ve come across have been made using the caning technique, and some of the designs are simply breath-taking – there are a lot of talented people out there!
Read on for my guide to polymer clay canes, including some design ideas and tips to help you get going if you want to make your own, or recommendations if you would like to buy ready-made canes online…
Conclusion
Thanks for reading my guide to creating a marbled polymer clay slab! I hope you feel confident to go and give this awesome technique a go for yourself, using your favourite colours. I’ve seen some really beautiful marbled polymer clay slabs on Instagram and Pinterest – the possibilities and inspiration is endless!
My goal is to make the world of polymer clay earring making super easy to get into, with tips, tricks and tutorials on how to get started.
I also provide articles on: a How-to Guide for beginners, a Sales Guide for selling polymer clay earrings on Etsy, a comprehensive Cost Guide, and a bumper list of earring Design Ideas, so you’re never stumped by clay-makers block!
For more information on getting started with polymer clay earrings, check out:
How Much does it Cost to Make Polymer Clay Earrings?
Can You Paint Polymer Clay Earrings? A How-to Guide
How Long to Bake Polymer Clay Earrings – Quick Guide
How to Sell Polymer Clay Earrings on Etsy
How to Make Polymer Clay Earrings: the Basics
Design Ideas for Polymer Clay Earrings
Top Tips for Making Polymer Clay Earrings
Why Polymer Clay Breaks and How to Fix it
The Best Polymer Clay for Earrings and Other Jewellery

Lorna is a footwear geek and the founder of Wearably Weird. She created a YouTube channel in 2021 for fellow footwear fanatics, dedicated to detail-rich footwear reviews and info. She has a fashion media qualification (awarded in 2011).