Polymer Clay Earrings are the hottest trend in the homemade and small business world right now. Why not join in and give it a go for yourself, with my quick guide on how to sell polymer clay earrings on Etsy!
Here are the basic principles-
How to sell polymer clay earrings:
⦁ Make the earrings
⦁ Store and log your stock properly
⦁ Decide on a brand name and identity
⦁ Set up a logo and banner for your Etsy shop
⦁ Learn to market via social media
⦁ Take appropriate photos for Etsy
⦁ Add your listings
⦁ Open your shop!
Ever since the Covid lockdown people have had the time to hone their crafting skills, and many are turning their hobbies into business ventures with the above method.
Read on to learn how to get started with your own, just like I did, step by step…
This post may link to online stores. If you click a link and buy something, I may get a commission. Learn more.
Making the earrings
1. Start with the basics
Get your supplies, your workspace and your packaging process ready. My best advice would be to refer to my article on the basics of getting started actually making the pieces –
How to Make Polymer Clay Earrings: the Basics
But here are the basic principles:
⦁ Get your clay and tools supplies ready
⦁ Get your earring supplies ready
For help choosing your gear, browse my recommended polymer clay products, if you need a shopping list:
A starter kit is also a great option if you want to get some tools, clay and accessories in one place – I would suggest buying some earring hooks separately in 925 silver (for no more than a few pounds or dollars – these are pretty cheap), if you plan on selling your creations, as the earring hooks provided in starter kits aren’t usually 925 silver.
The below starter kit is my current top pick from amazon– it has amazing value for money for the price, and it’s one that I’ve owned previously:

⦁ Create a clean and organised work space
Make sure your creative space is spotless, so no tiny fibres or dust particles floating on the air and table will stick to your clay – this is of paramount importance! If possible create yourself a permanent workstation in a room away from pets – (fur is the worst) and dust gatherings items – non-carpeted rooms are best, but not essential.
Organise your space with storage boxes or drawers, so there are places for your clay creations to live – baked and unbaked.
Avoid storing your clay in wooden or metal boxes, as the wooden boxes can dry out the clay’s oil residue, which is essential for keeping the clay pliable. The wood is more porous than the clay, so it will draw moisture into it, ruining the box and your block of clay. Metal boxes can be an issue in warm rooms, as they are a heat conductor and will melt your clay.
Plastic or glass is best in this case! Also, the containers don’t need to be completely air tight, as clay won’t air dry or dry out, which is one of the reasons it’s so easy to keep and use.
Top tip: to tell if something is the correct plastic, flip it over and look for the markings on the bottom. There should be the number five in a triangle on the underside.
Here is a great storage set from Amazon made of the right kind of plastic:

⦁ Experimental test piece
Before creating your masterpieces, start with a couple of experimental pieces to test bake in the oven. Each brand of clay will have slightly different baking requirements, so check the packet and make sure you get it right.
An experimental piece has many benefits:
⦁ You’ll learn how long it takes for the brand of glue you’re using to set in the oven and the time it takes to sufficiently bake the clay
⦁ How long it takes for your to warm up your clay between your hands (or cool down in the fridge if too squishy) when you start moulding
⦁ How thick to make your designs
⦁ And an idea of the precise amounts of clay needed for each earring, for easier batch-making
⦁ Making the earrings
Now your kit is ready, read on for the next step in actually getting started making the earrings – woohoo!
2. Get your ideas ready
Have a plan for your stock; will you sell a range of cute girly earrings, or is your style more quirky and silly? Once you have your ideas sorted for your designs you can start to refine what your brand is all about.
For help with initial ideas for your designs, read: Design Ideas for Polymer Clay Earrings
Once you’ve decided on the style of stock you would like to make, this is the part of the process where you start asking yourself these kinds of questions:
- Will I hand mould my designs, or will I use clay cutters to get precise and even pairs of earrings?
- What colours of clay do I need to buy?
- How much is all of this going to cost in materials, and how much will I charge for my creations?
Let me break it down for you (oh how I wish I had of had someone to do this for me!)…
Moulding or cutting? I would recommend making ‘slabs’ of your clay designs, and then using cutters to cut out as many pairs of earrings as possible for your clay. Here is a picture of some cow printed jumper earrings I made, with the slab included as an example for you:
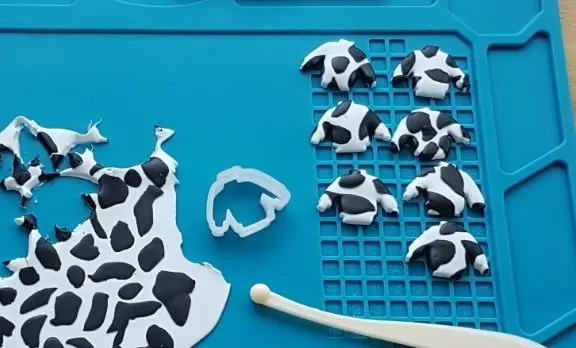
To make a slab roll out a layer of your base clay colour, and then add little designs to it. Once your slab is ready, figure out how many cuttings you will be able to make from it using your cutter shapes of choice, and plan accordingly so you can use as much of the clay up as possible. If there are scraps left over, take smaller cuttings from it for you use in other earring projects.
Here’s how I created a cow print slab:
- First I rolled out an even slab of white at around 0.5cm thick – make sure you really take your time to get the base even, as uneven clay will bake at different times, and isn’t ideal for a batch that you want to be uniform.
- Then I rolled out a much thinner slab of black clay, at about 0.2cm thick, and hand cut little cow print patterns from it with my clay tool (pictured)
- Once I was happy with my cow prints I positioned them over the white clay, and lightly pressed my rolling pin over them to seal the clay together. You could use glue here if you wanted to, but I find a bit of pressure from the rolling pin does the trick.
- Then I prepared my little jumper cutter, by making sure it was clean.
Cool right? And how cute is the jumper clay cutter? – Actually it’s a fondant cutter used for baking, but let me get into that next…
Fondant cutters
Cutters make everything easier, and come in a whole range of cute designs – from seasonal items, to food designs to your standard basics. I have an entire beginners guide to cutters here, which is a handy read if you’re not familiar with them (plus info on where to buy cute cutters!).
When I started making polymer clay earrings I was surprised that it was a little tough to find teeny tiny earring-sized clay cutters out there on the web.
When I discovered the massive range of fondant cake cutters I was overjoyed! So many cute styles to choose from, and all the perfect size for dangly earrings.
Next I’ll answer ‘what colours of clay do I need to buy?’
So this all depends on your project, but as I mentioned before in the article I highly recommend getting a starter kit at first, so you can learn to work with clay and still make a decent enough few batches to start selling.
I would also add that you buy a block of white clay, because it’s a staple piece that everyone seems to run out of – you’ll see what I mean once you get going.
Browse my recommended clay blocks: Best Polymer Clay for Earrings Buyers Guide
Now let’s move onto price…
How much is all of this going to cost in materials, and how much will I charge for my creations?
I have created a full cost guide to starting with polymer clay, if you would like to have a proper read, but I’ll also include a quick cost breakdown for you:
TOTAL, BASIC OPTIONS (not including clay and if selling): approx £55.00, $74.00
TOTAL, PRO OPTIONS (not including clay and if selling): approx £364, $484
OR
STARTER KITS: anywhere from £10.00 – £30.00, $13.00 – $40.00
So there’s a range of prices there, for you to decide on what fits you best!
3. Start creating
Now everything is bought, prepped and planed, time for the fun part…
Start to mould and bake your prototypes, to get an understanding of working with clay. Do your research on common mistakes and tips to help make the process smoother and practice with trial and error first!
I’ve complied a list of top tips here: Top Tips for Making Polymer Clay Earrings
Selling on Etsy
1. Inventory/organisation
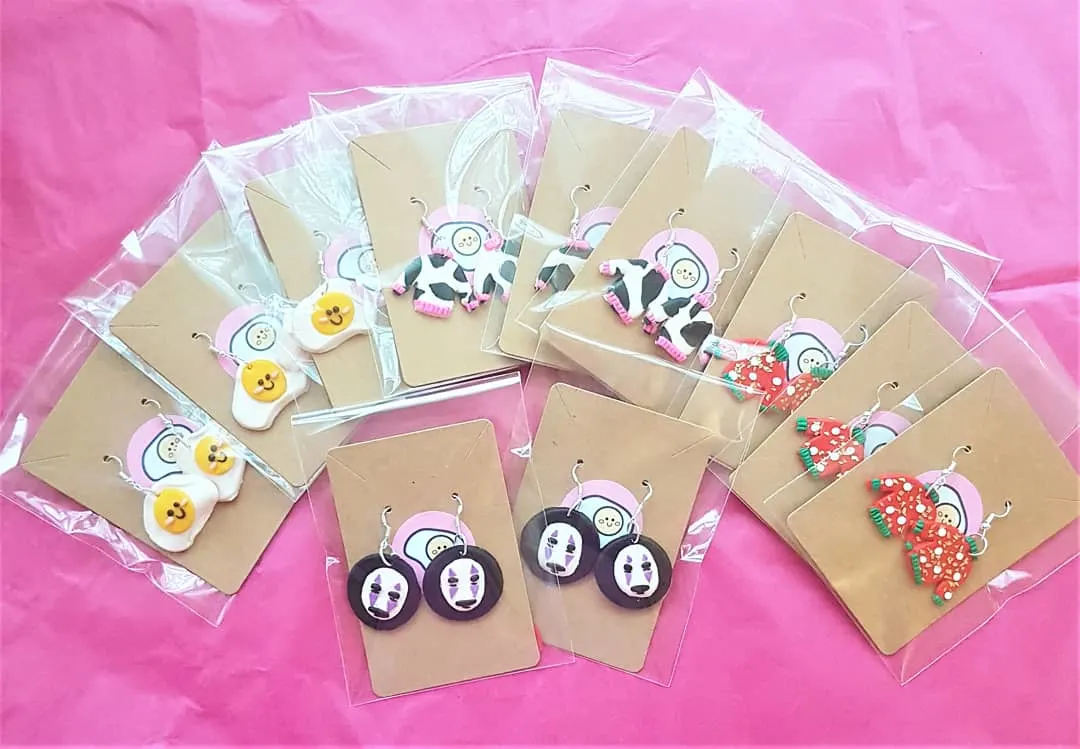
Now your earrings are made and you have a host of lovely stock ready to go, you want to make sure all of your inventory is logged and accounted for.
There are two principles for this that I stick by:
1st Stock Keeping
You can use a spreadsheet or a written diary for this, but it’s important you keep track of your numbers from the get-go. No matter how small your first batch is, these are good habits to start cultivating now.
Top tip: If you’re using a spreadsheet, try and get this on both your PC and mobile phone, so you have it to hand to update easily, wherever you are!
2nd Appropriate Storage
Make sure you have a suitable storage space for your designs – the dining room table or a shelf in your bedroom won’t cut it, as they’ll quickly gather dust and are at risk of being damaged.
It’s best to store your clay away from sunlight, in packaging so the earrings are kept pristine for sale, as pictured above. A great way of achieving this is with storage drawers – you can pick these up all over the place or online.
Dedicate a little nook in your home, or perhaps a corner of an office space for your stock storage. If you’re using a written tally, keep a clipboard with your stock sheet on it with your stock.
It’s not advised that you store baked and unbaked clay together, as the uncured components of the unbaked clay may actually weaken the baked clay over time, through exposure to it’s oily residue.
This is due to what the clay is made of and how it responds to baking; the clay is made up of plastics, stabilizers, fibres and colouring components, that can be quite greasy before baking. Once exposed to the proper temperature for the allotted time, the clay hardens up and the oily residue solidifies. If you then place that hardened clay next to unbaked clay, the residue in the unbaked clay can draw back into the porous baked clay and start to make it brittle.
** Sidenote – avoid storing your unbaked clay in wooden or metal boxes, as the wooden boxes can dry out the clay’s oil residue, which is essential for keeping the clay pliable. The wood is more porous than the clay, so it will draw moisture into it, ruining the box and your block of clay. Metal boxes can be an issue in warm rooms, as they are a heat conductor and will melt your clay.
Plastic or glass is best in this case! Also, the containers don’t need to be completely air tight, as clay won’t air dry or dry out, which is one of the reasons it’s so easy to keep and use.
Top tip: to tell if something is the correct plastic, flip it over and look for the markings on the bottom. There should be the number five in a triangle on the underside.
This storage set from Amazon is a good size and is made from the right kind of plastic:

2. Plan a marketing strategy
The next thing you want to do is get your products under the noses (or in front of the eyes) of customers. That’s where a marketing strategy comes in!
Are you going to use social media?
Here’s an example of my Instagram feed:
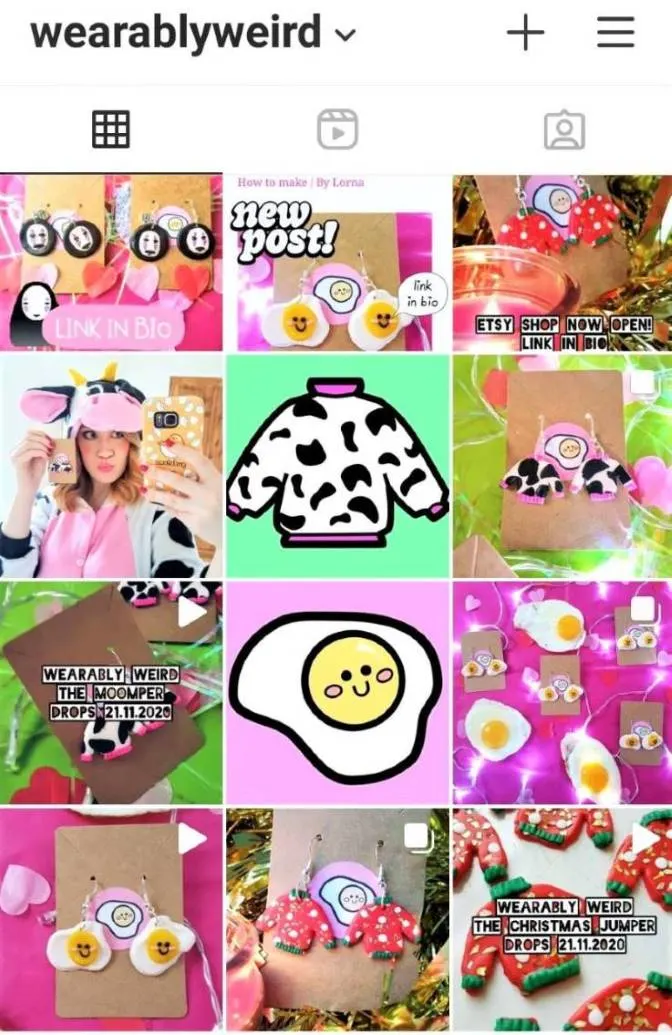
Instagram is a fantastic and simple first step to cultivating a brand identity. There are thousands of small business Etsy-sellers out there willing to bolster each other through sharing posts, joining chats and giving plenty of advice on their stories and reels, from actual time loops of making designs to business advice.
There’s a whole wealth of information available to you from the polymer clay earring Instagram community; you just need to tap into it and get following!
Will you create adverts – reels, stories, feed posts? Promoted posts?
Here’s an example of my Instagram Reels feed:
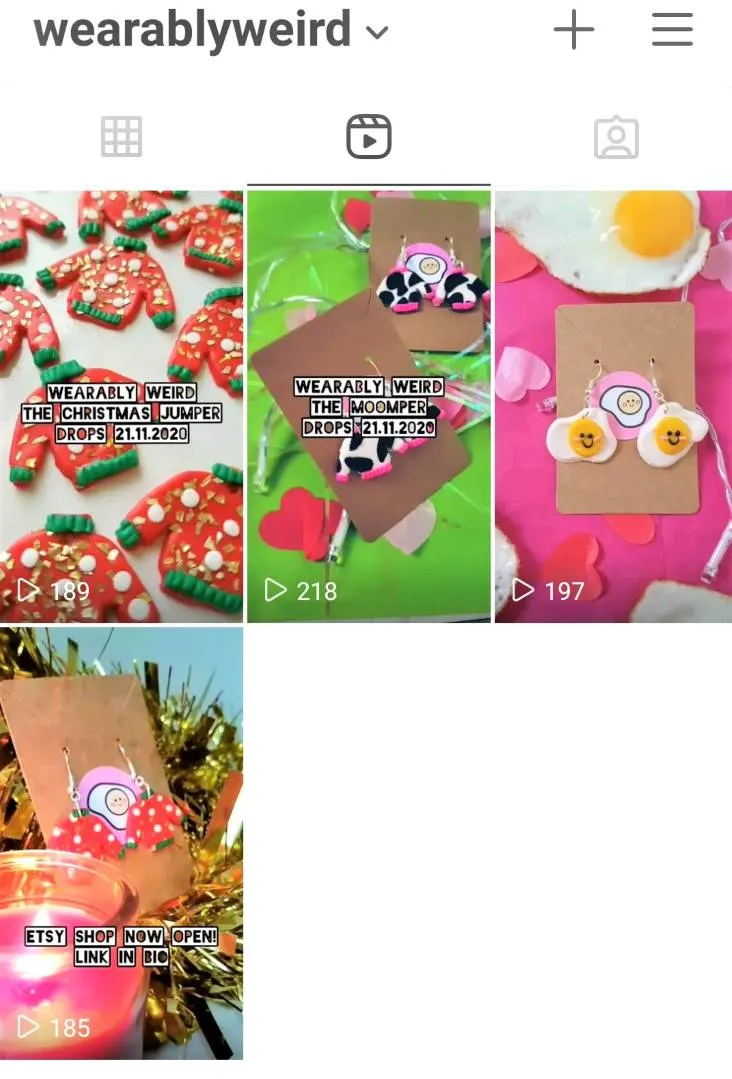
What would you like your Instagram feed to look like?
Get creative and start writing your ideas down, do mind mapping and keep a sketchbook/notebook of all of your thoughts to refer to and add to as you go.
You can decide on a colour scheme for your brand, a name, even a logo quicker than you think when you just start sketching!
Once you’ve planned a few posts for your feed, get taking the photos and posting.
Top tip: Add hashtags, and research what’s popular in your community; why not check out a post of a brand you like in the polymer clay earring community and see what hashtags they’re using/how they’re engaging their followers.
Some useful hashtags I like to use to access the polymer clay community are: #polymerclayearrings, #polymerclayuk, #polymerclayjewellery, #polymerclaycreations
How will you take your photos/videos for Instagram and Etsy?
Luckily you don’t need a lot of equipment to achieve good quality photos.
The pictures can be taken on your phone; most models have macro options in the phone camera settings for super focused close-ups of your products.
Have a play around with your phone camera’s settings and see how good you can make things look!
3. Branding
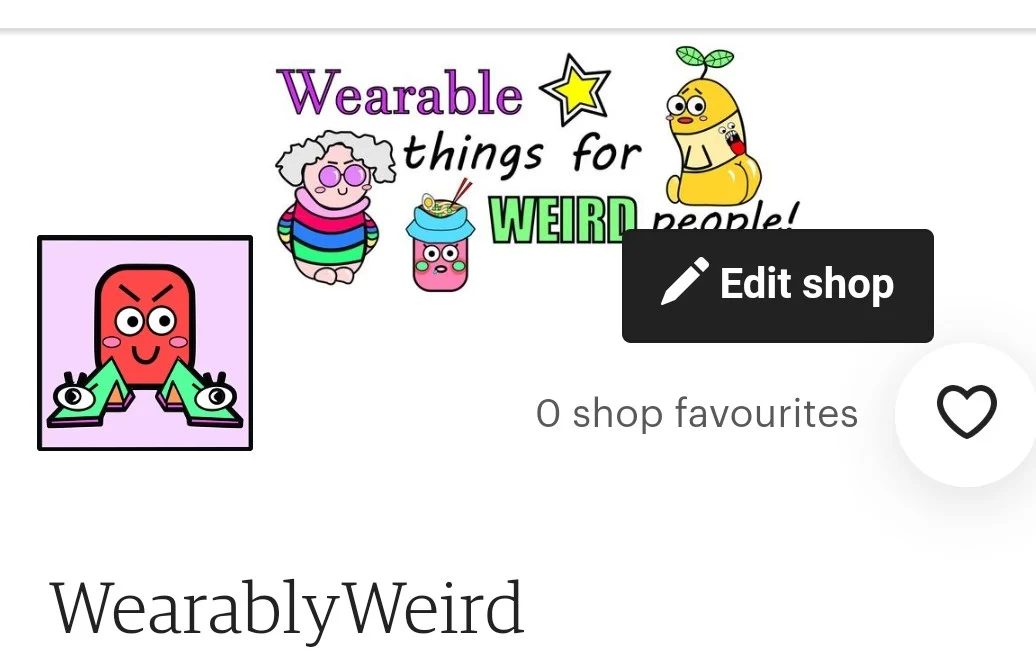
1st on the agenda is to pick a creative name, create a profile picture for Etsy and a banner for Etsy.
Grab a notebook and start mind mapping what you want your brand to be about; think about keywords that you like, keep writing them down and before you know it you’ll have come up with a brand name! This is one of the most exciting parts about setting up a shop, and it can make for a really fun and rewarding activity.
When I was trying to decide on a brand name I knew I wanted the word ‘weird’ in there, because I wanted to write about/make unusual fashion pieces.
I came up with ‘wearably’ because I found it more interesting than ‘wearable’ and it’s a made-up word, which feels fun and unique to me, and together ‘wearably weird’ tells the reader or customer that I’m talking about/making fashion.
So grab that notebook and start thinking!
The same principle goes for designing your logo, once you have your brand name.
Do you want your name to be reflected in the imagery of the logo, for example ‘Lion Designs’ to have a lion’s head as the feature piece? Do you want a super cool negative space logo, or a kitsch/cute design with pops of colour? What suits your brand best?
Once you’ve addressed these questions and sketched out your logo a great tip would be to use Inkscape, a free graphic designing program, to design your own (like mine pictured above), or a choose a great photograph of your stock. Then the same goes for your banner.
An Etsy banner should be eye-catching, and it should tell the customer immediately what your brand is about.
You can have a scrolling banner that showcases multiple items your stock, or a static image – have fun deciding what’s best for your shop!
Top tip: Etsy banner sizes should be 3360 x 840 pixels for optimal performance, and a minimum of 1200 x 300 pixels.
Etsy also has a great handbook with loads of advice for setting up your shop: read here
Another way to take your branding to the next level is to glow-up your packaging.
There are loads of ways to do this, but the quick and easy way to get started featuring your brand image on your packaging is to get stickers and earring cards printed with your logo on them for a relatively cheap price; there are plenty of small businesses on Etsy that offer this service: here
Another piece of advice I would offer is to look at brands that you love and analyse their packaging.
What do they do that stands out to you? Do they have funky business cards in their packaging? A personalised note to their customer? A freebie, like a sticker pack or a lollipop?
Once you’ve figured this out and noted down some ideas, start researching how to do this for yourself.
4. The photos
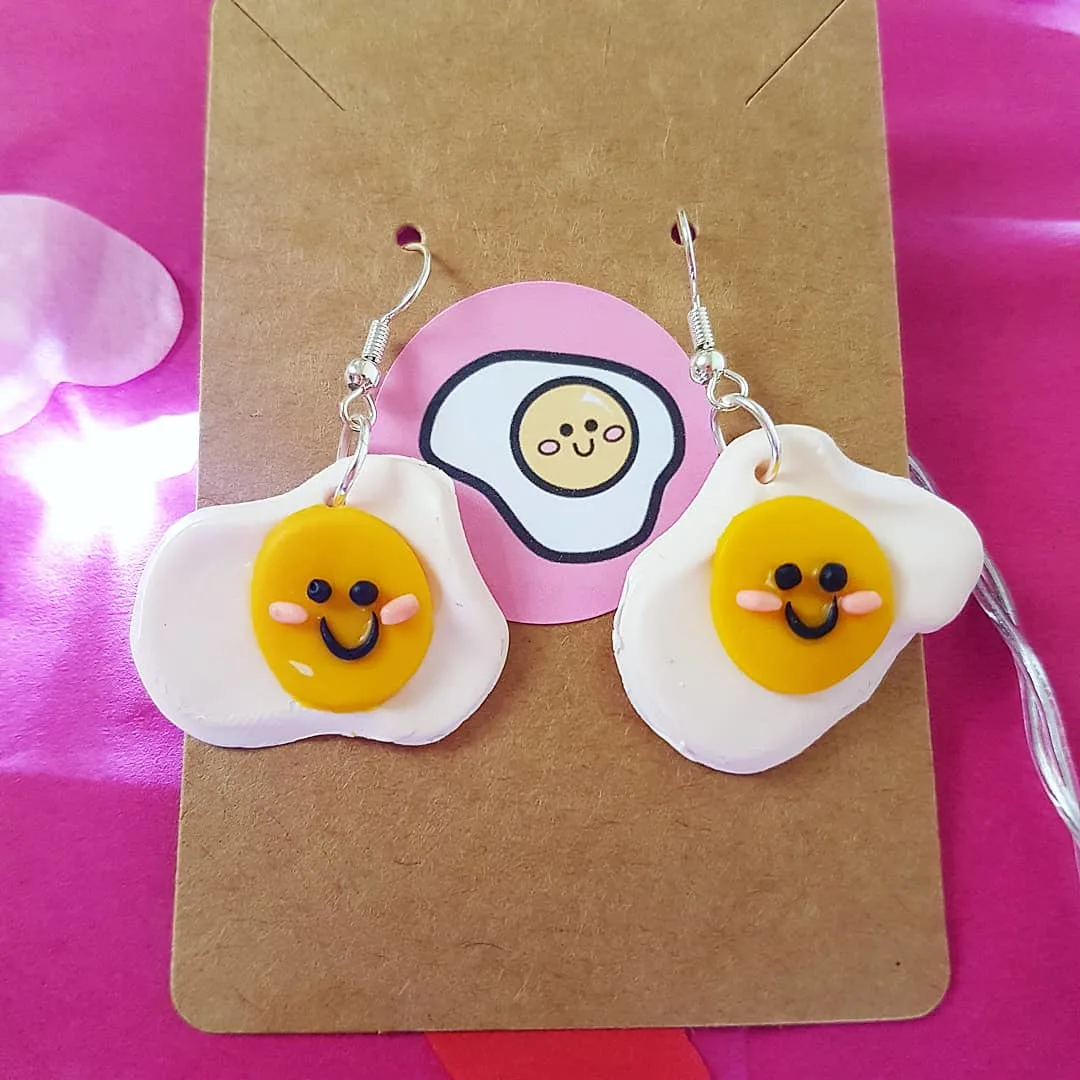
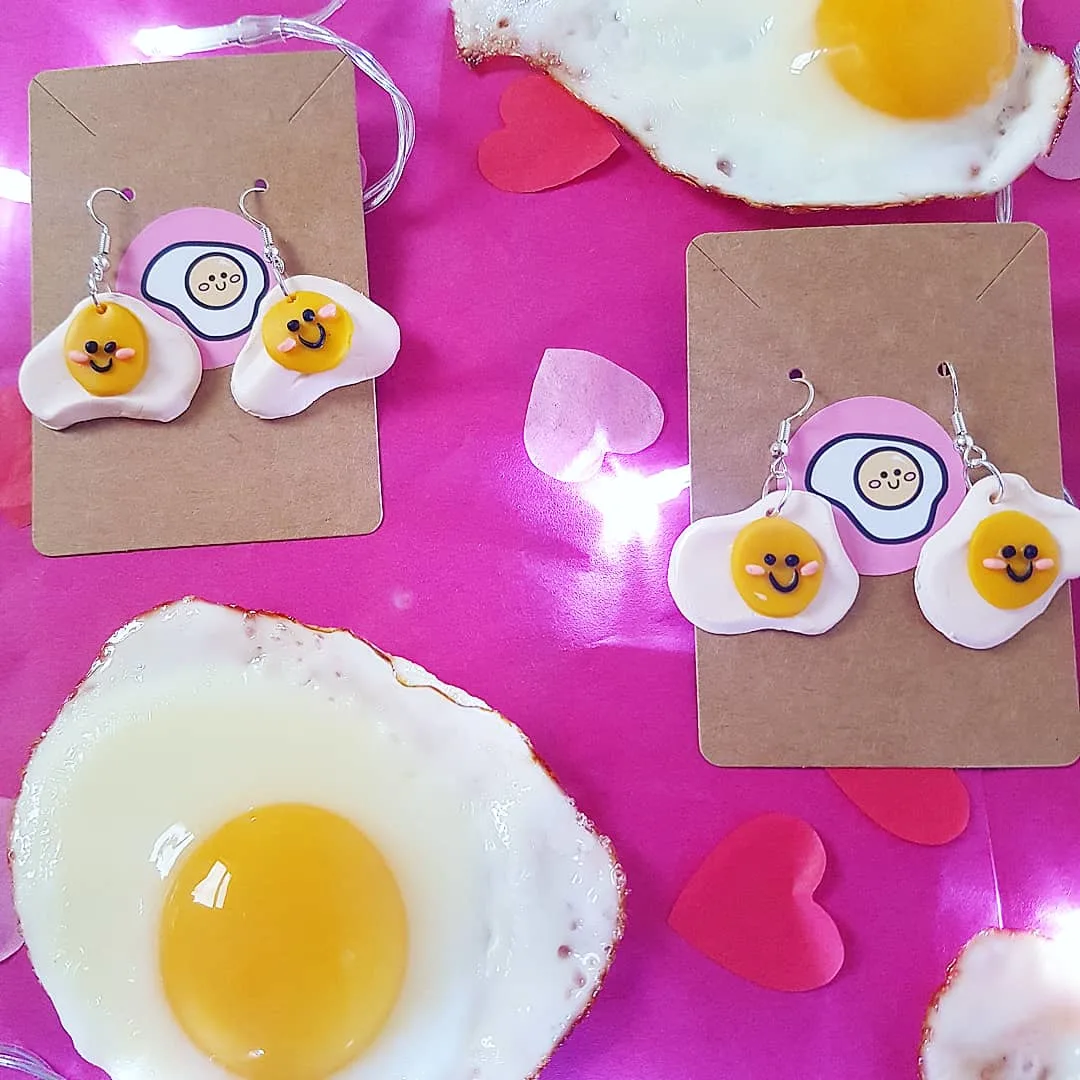
Make sure the photos of your stock are as HD as possible, taken in natural light and don’t over edit, you want the image and colours to be as true to real life as possible so the buyer has a good idea of what they are purchasing; this is rule no.1 of how to sell polymer clay earrings on Etsy.
Take several, from all angles and for best results put a small object (like a coin or ruler) in for scale.
Get creative and make your photos stand out to buyers.
If there is a way you can hook their attention and get them to click on your listing, you’re one step closer to making a sale.
Pictured above is how I decided to market my EGGY earrings – with real fried eggs! The image proved really popular on Instagram too.
This worked so well because it’s weird, eye-catching and on-brand for me.
Keep that in mind for your own brand; if your brand is magical, add glitter and props. If your brand is nature-focussed, use flowers or foliage in your pictures – hang your earrings on a bouquet of lavender, etc.
Top tip: in the words of Dr. Seuss, ‘You have to be odd to be number 1.’
Keep pushing yourself to be creative – do something different, do more, do you!
Stay ahead of the competition by learning to think outside of the box and keep asking yourself the question, how can I make this better?
5. Stock and launch your shop!
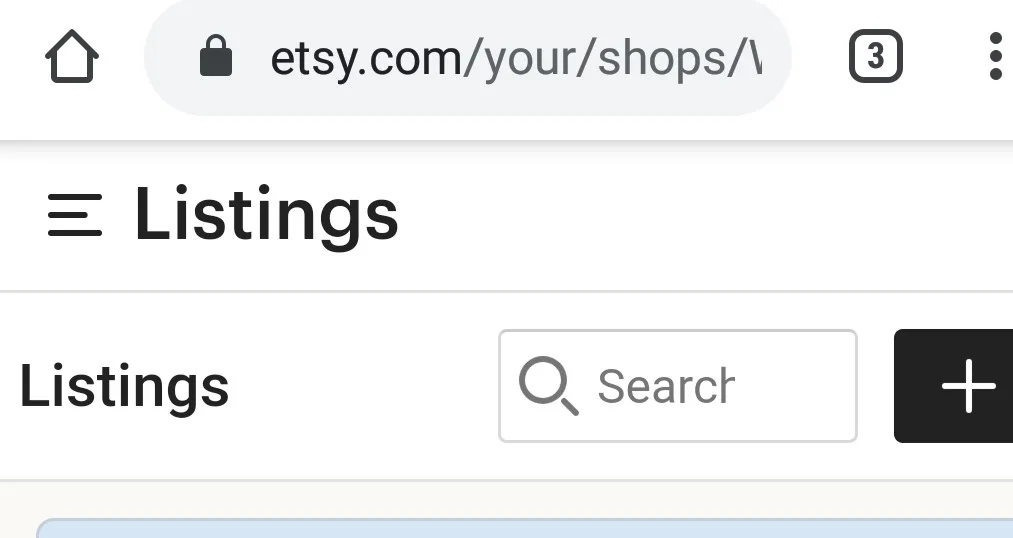
It’s super easy to stock your Etsy shop via the shop manager page. Click the plus button to add listings and follow the steps as you go- easy as 1, 2, 3!
When all of your products are listed tell your friends, family and followers on social media – don’t be shy! Post to your Instagram feed and story, you can even promote your posts for extra visibility if you set your account to a business account.
Thanks for reading my quick guide on how to sell polymer clay earrings on Etsy! You should now be equipped with some fun ideas and concrete first steps to opening your own Etsy shop.
Good luck!
Related questions
Is polymer clay safe?
Polymer clay is non-toxic, making it safe to use around children and pets, as it has been tested and certified. Polymer Clay only becomes toxic when baked at extremely high temperatures, for prolonged periods of time. If baked according to the packaging instructions, it’s perfectly safe.
Can Polymer Clay Air Dry?
Polymer Clay cannot air dry, it needs to be oven baked at the correct temperature for the brand you are using; instructions are found on the packaging of each clay block. Oven baking allows the clay to sufficiently cure (harden) which cannot be achieved at room temperature with air drying.
Can Polymer Clay Dry Out?
Polymer will not dry out at room temperature. Polymer clay requires oven baking in order to properly dry and harden, at the temperature suggested on the packaging of each individual brand, and so will not dry out in a normal room, in normal conditions.
Can Polymer Clay get wet?
Both baked and unbaked polymer clay is waterproof as the material is oil based (made with plastics), so it cannot get wet.
Conclusion
I hope you found this guide to ‘sell polymer clay earrings on Etsy‘ useful, and you now feel confident to proceed on the next step of your small business journey, no matter what stage you are already at. Starting a small business is a rewarding and exciting thing to do, and there’s no time like the present. Polymer clay is so easy to use, and extends as far as your imagination does – what’s holding you back? Dive in and make some income on Etsy – sell polymer clay earrings on Esty!
It’s my goal to make the world of polymer clay earrings as easy and accessible as possible for everyone who wants to get started in this fun and versatile craft. Thanks for sticking around and happy crafting!
More from Wearably Weird:
For more information on getting started with polymer clay earrings, check out:
How Much does it Cost to Make Polymer Clay Earrings?
Can You Paint Polymer Clay Earrings? A How-to Guide
How Long to Bake Polymer Clay Earrings – Quick Guide
How to Sell Polymer Clay Earrings on Etsy
How to Make Polymer Clay Earrings: the Basics
Design Ideas for Polymer Clay Earrings
Top Tips for Making Polymer Clay Earrings
Why Polymer Clay Breaks and How to Fix it
The Best Polymer Clay for Earrings and Other Jewellery

Lorna is a footwear geek and the founder of Wearably Weird. She created a YouTube channel in 2021 for fellow footwear fanatics, dedicated to detail-rich footwear reviews and info. She has a fashion media qualification (awarded in 2011).
