
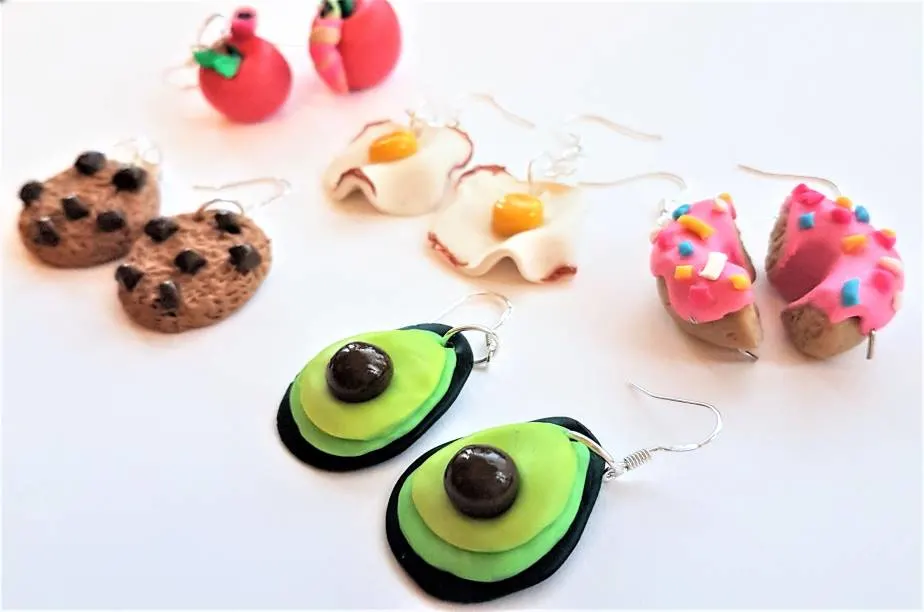
Polymer clay earrings are fun, easy to make and most importantly wearably weird! It seems like everyone is talking about them on social media, with many beginner crafters wanting to give making them a go for themselves. Whether you’re interested in starting a small Etsy shop selling polymer clay earrings, or you simply want to make some cute ones for yourself, here are five step-by-step food inspired polymer clay earring designs to get your creative juices flowing…
Join me in crafting these adorable and eye catching pieces!

This post may link to online stores. If you click a link and buy something, I may get a commission. Learn more.
What you will need
Before we start crafting let’s make sure we have all of our tools and supplies ready for the polymer clay earring designs. I’m going to do a breakdown of everything I use in the following tutorials, so you have a clear list to refer to when making your own.
Here’s what I used:
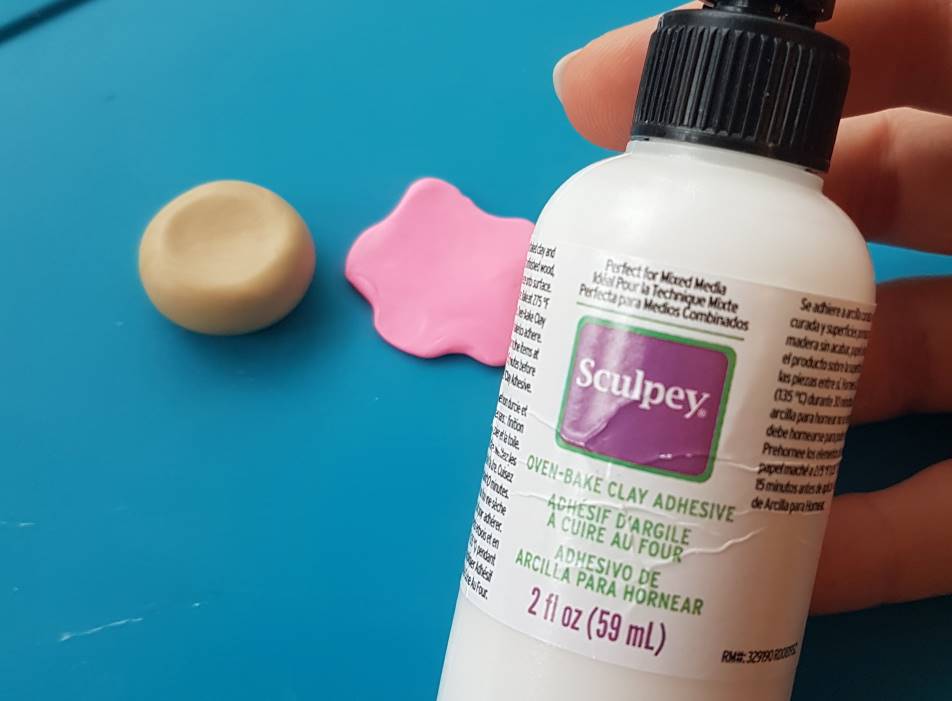
- Clay
- Clay glue
- Tweezers or jewellery pliers
- Clay cutting tool
- A needle
- Silicone board
- Rolling pin – avoid wood because of the grain
- Baking paper
- Optional – rubbing alcohol (to remove fingerprints from clay)
- Earring hoops
- Jump hoops
Browse my recommended polymer clay products, if you need help with your shopping:
Make sure your creative space is spotless, so no tiny fibres or dust particles floating on the air and table will stick to your clay – this is of paramount importance! If possible create yourself a permanent workstation in a room away from pets – (fur is the worst) and dust gatherings items – non-carpeted rooms are best, but not essential.
Now you know what you will need, let’s move on to the designs…
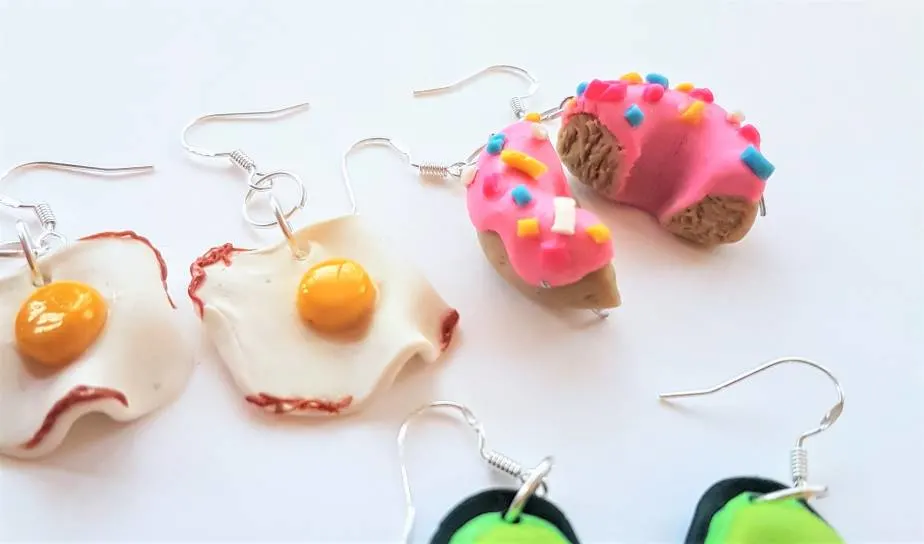
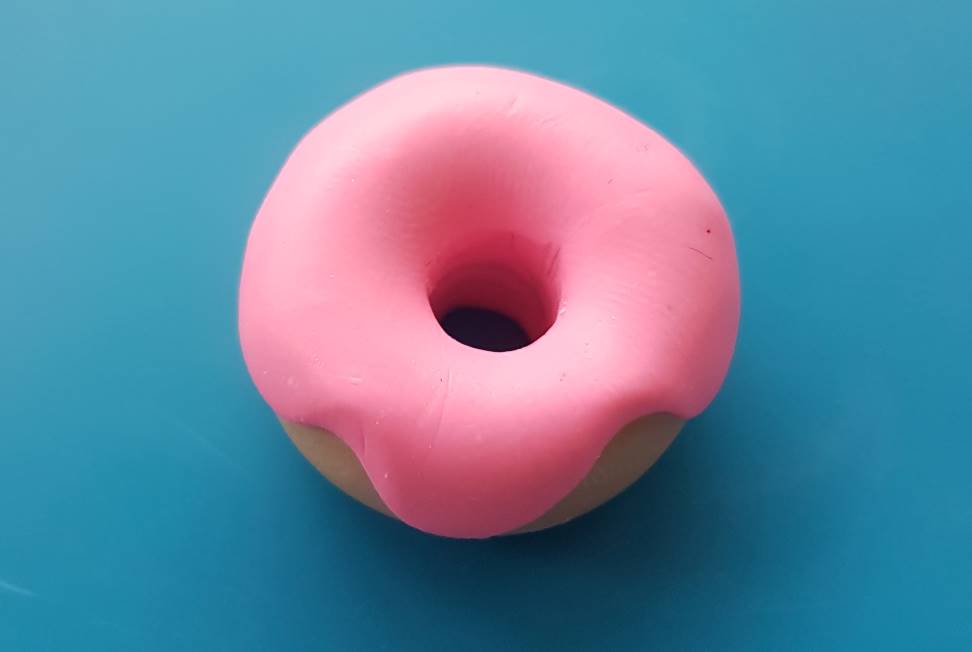
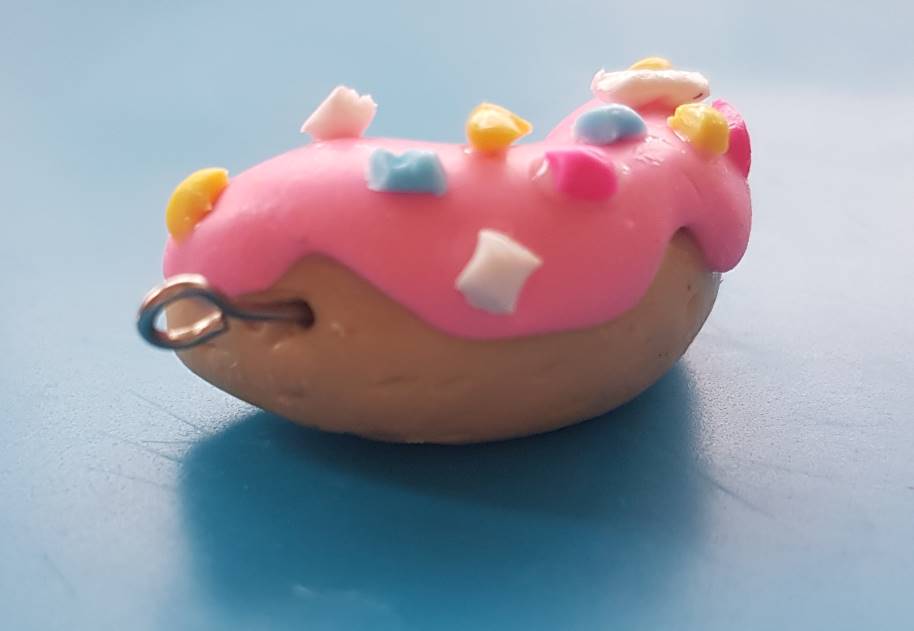
1. Donut polymer clay earring designs

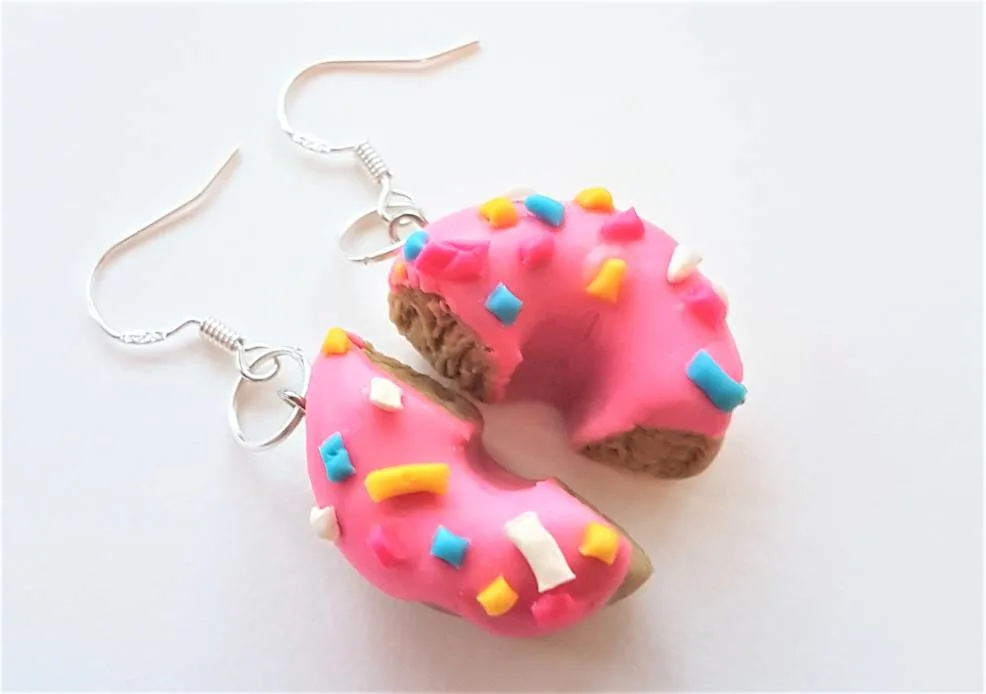
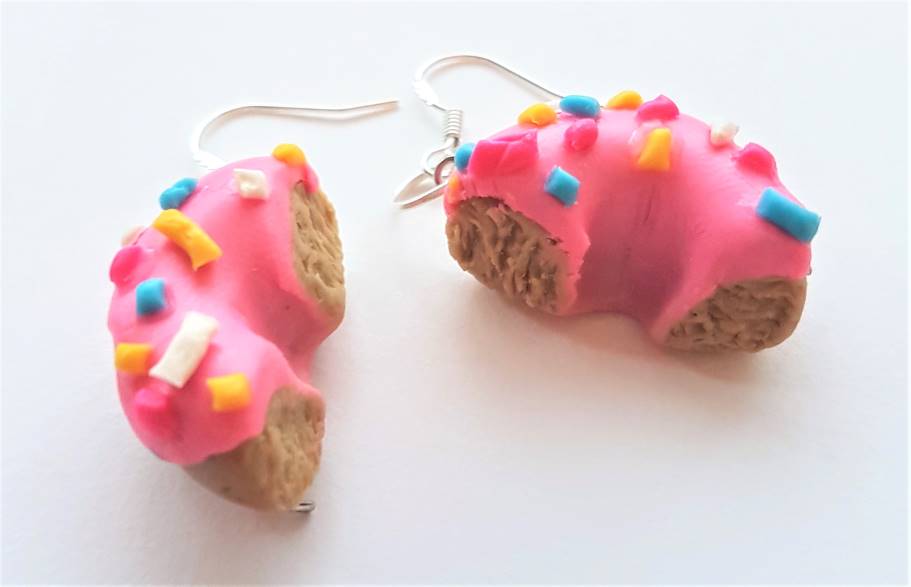
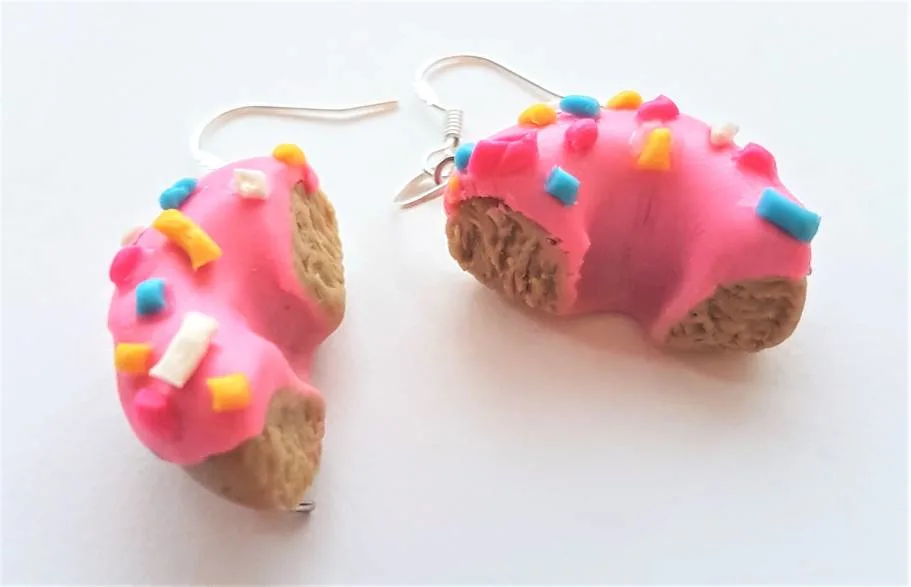
How cute to these little donuts look? Like something straight out of the Simpsons, these pink iced donuts with multicoloured sprinkles are a sure conversation starter, and they’re SUPER EASY to make.
Step 1.
Use a dough coloured clay to form a nicely conditioned ball (you can make this as large or small as you like, depending on how big you want your earrings to be).
To properly condition your clay, roll it between your hands for a couple of minutes to warm it up, so it’s nice and smooth with no cracks or flaky parts. A well conditioned ball should look smooth and slightly soft.
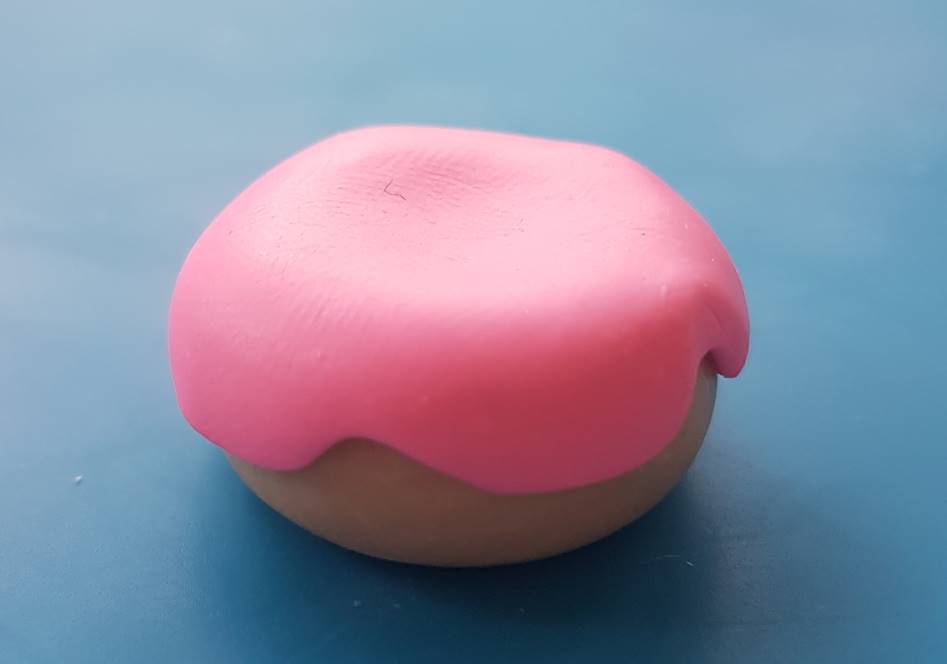
- Once your ball is ready, squish it slightly between your fingers to form a donut shape (as pictured below).
- Once your donut base is ready, condition a ball of pink clay, or any colour you would like for your icing, and roll it out with a rolling pin into a small circle, to cover the top half of the donut.
- Then pinch and push the edges of the circle to form a wiggly icing edge effect, as pictured below.
- Pop the icing on top of your donut, securing it with polymer clay glue.


Step 2.
Once your icing is secured to to the donut base with glue, take a tool that has a ball-end and press the ball through the centre of the donut, to form the hole. Look for something that is sized relatively to your donut, that will create a perfect hole shape.
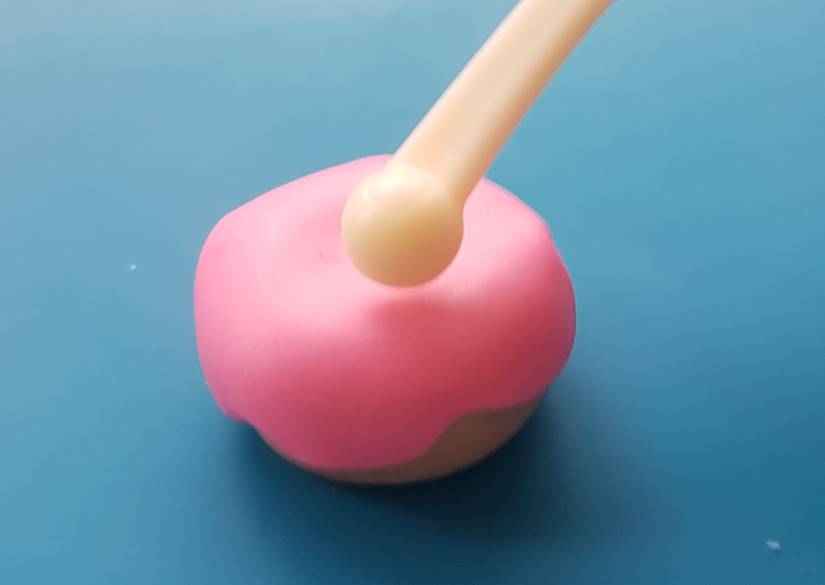

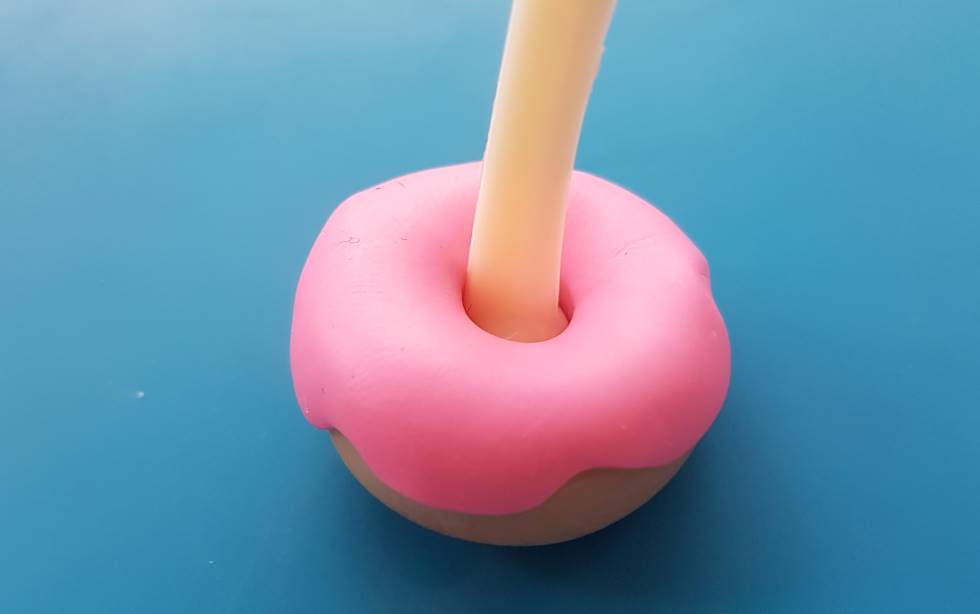


Once you have created your hole in the donut, carefully wiggle out the tool, so you don’t pull off the layer of icing. I find it best to gently twist the tool as I’m extracting it from the clay, so it comes out slowly and smoothly.
Step 3.
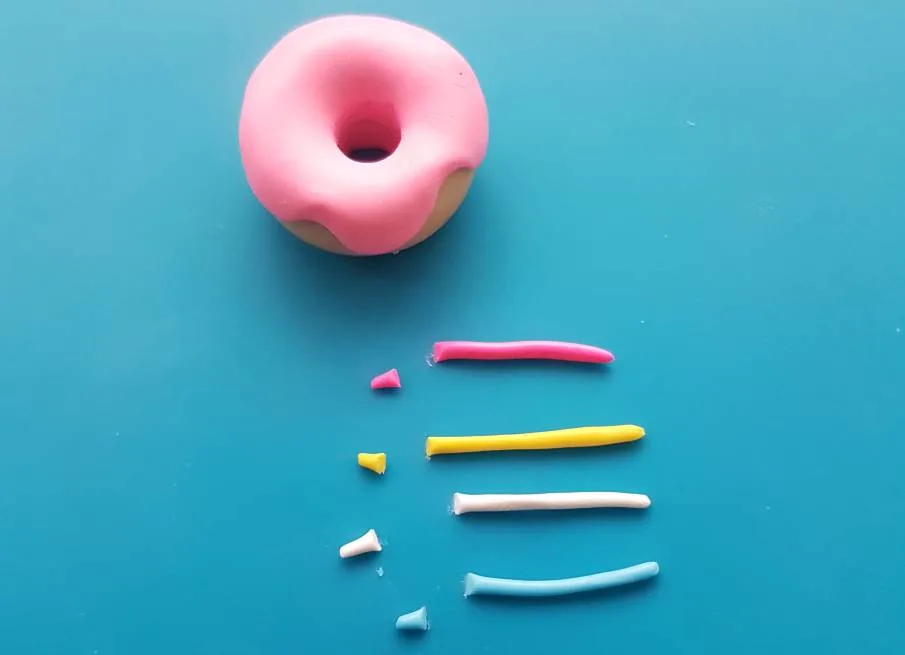
Now it’s time for a really fun part – making your sprinkles!
- Roll out strings of clay from the colour blocks you would like to use for your sprinkles (I used white, yellow, pink and blue).
- Cut the sprinkles so they are of varying lengths, just like real sprinkles used for baking.
- Use tweezers or your fingers to dip the sprinkles in polymer clay glue and place them on top of the pink icing

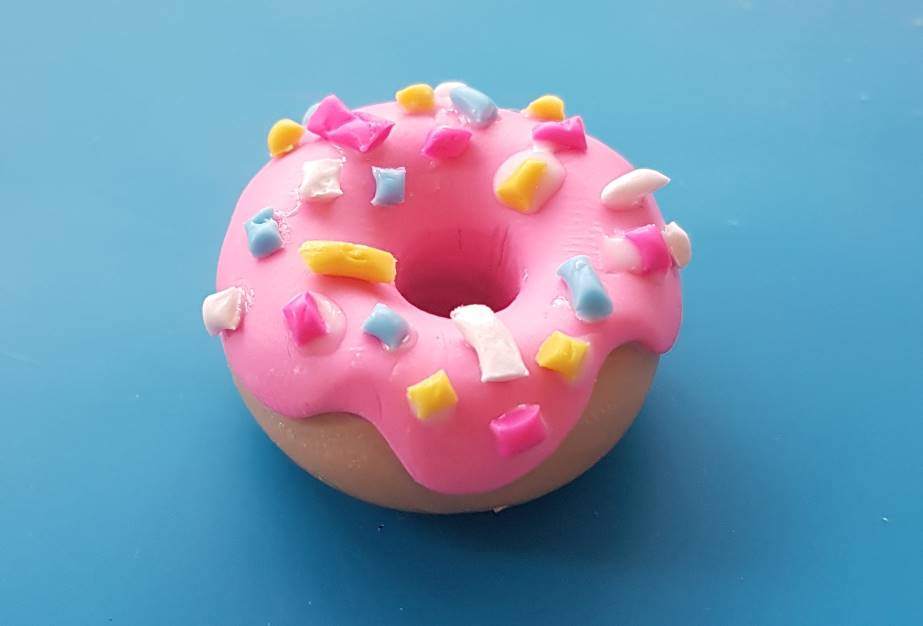

It looks great so far.
You can either stop here and make a second donut if you want two fully formed donut earrings, but I prefer the halved donut effect, which I will continue with now.
Step 4.
- Slice your donut in half with a clay cutting tool
- Use a needle or a pointed tool to pull at the inside on the donut to create a textured effect

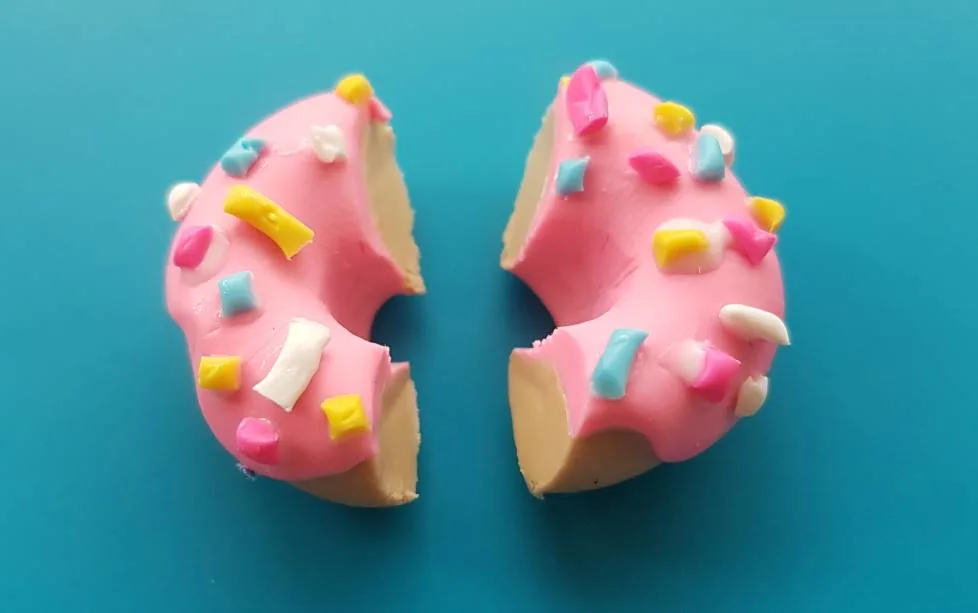
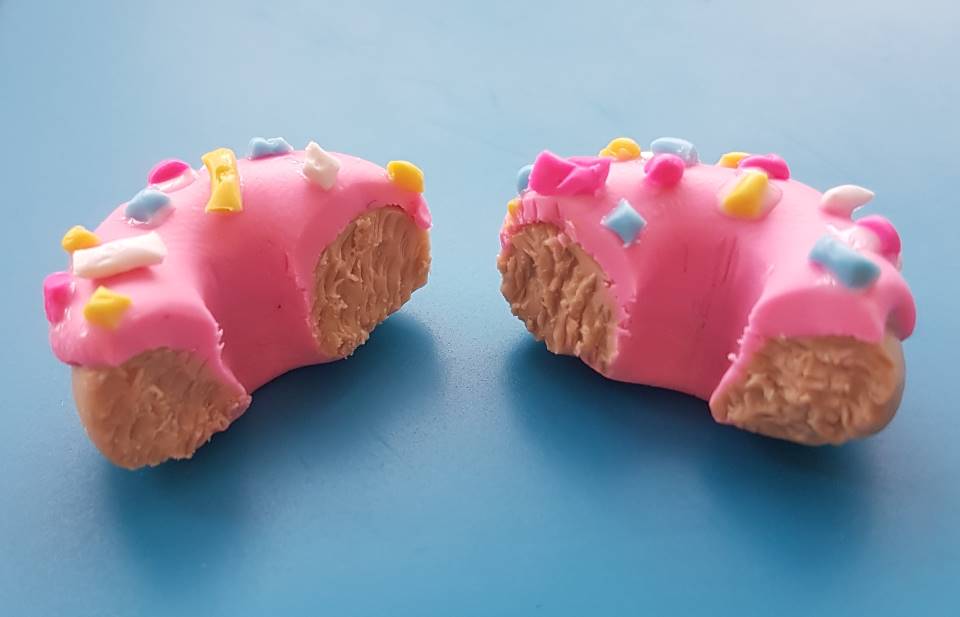
When creating the above textured effect I find it best to create rows of little lines in the clay, and then to go back over them in the opposite direction with the pointed tool or needle.
Step 5.
Now your earrings are ready for their anchoring hooks to be added. Slowly press these through the clay, and if they are too long simply snip off the protruding ends with jewellery wire cutters – most jewellery pliers with have a sharp edge for cutting wires.
Now put your little designs in the oven and bake according to your brand of clay’s packaging instructions. For help with baking skip to the end of the article for some top tips.
Once your earrings are out of the oven and sufficiently cooled, you can add your jewellery jump rings and hooks and your earrings are done!
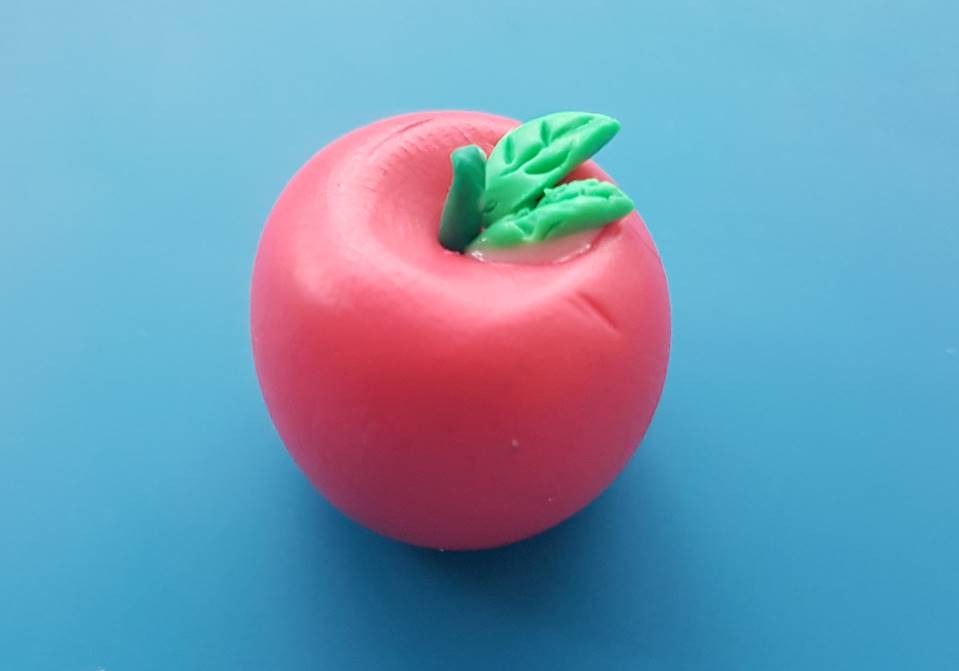
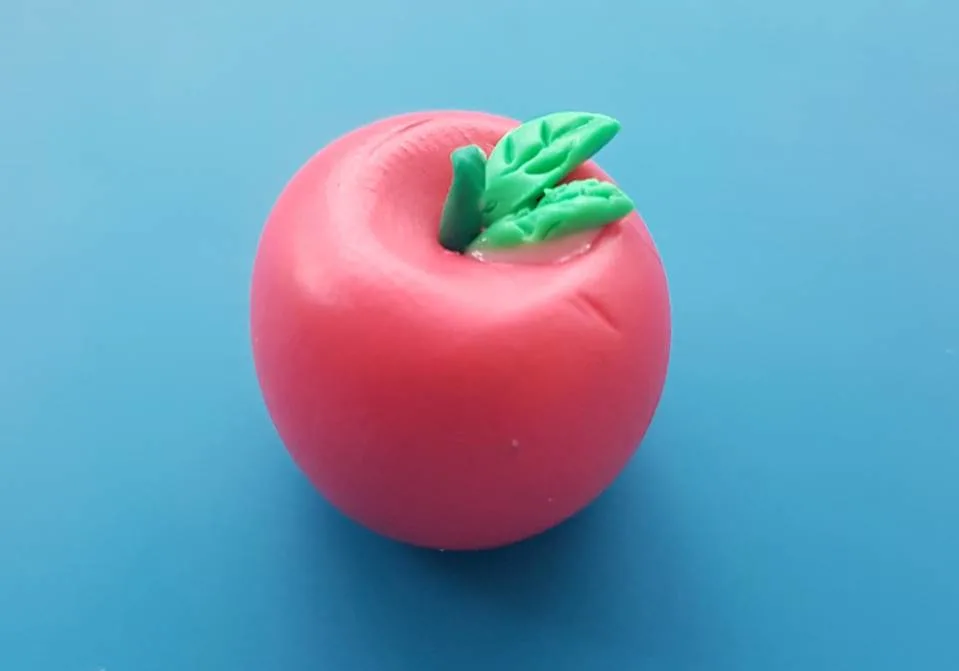
2. Apple with Caterpillar polymer clay earrings
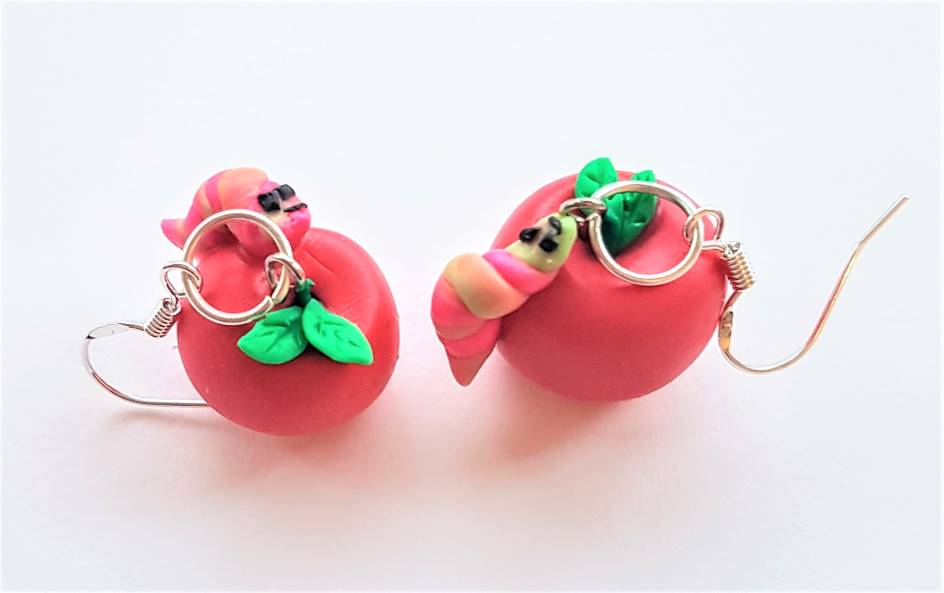

These lovely little apple earrings are complete with a squishy caterpillar friend to add a touch of quirkiness to an already quirky design. Make your friends giggle, or customers swoon with these funny drop earrings.
Here’s how to make them:
Step 1.
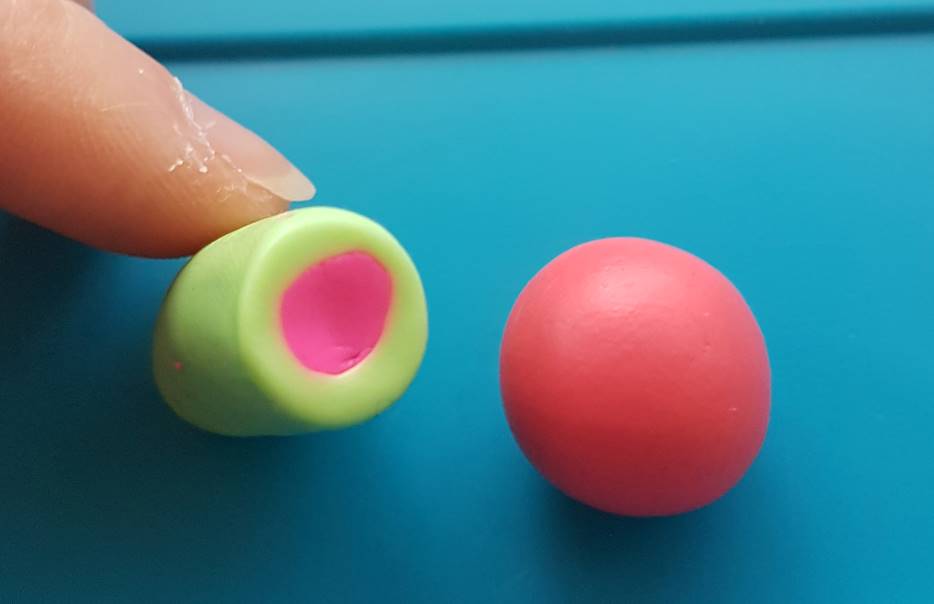
Prepare a red (or green if you want a green apple) ball of clay by conditioning it between your palms, until sufficiently soft and smooth.
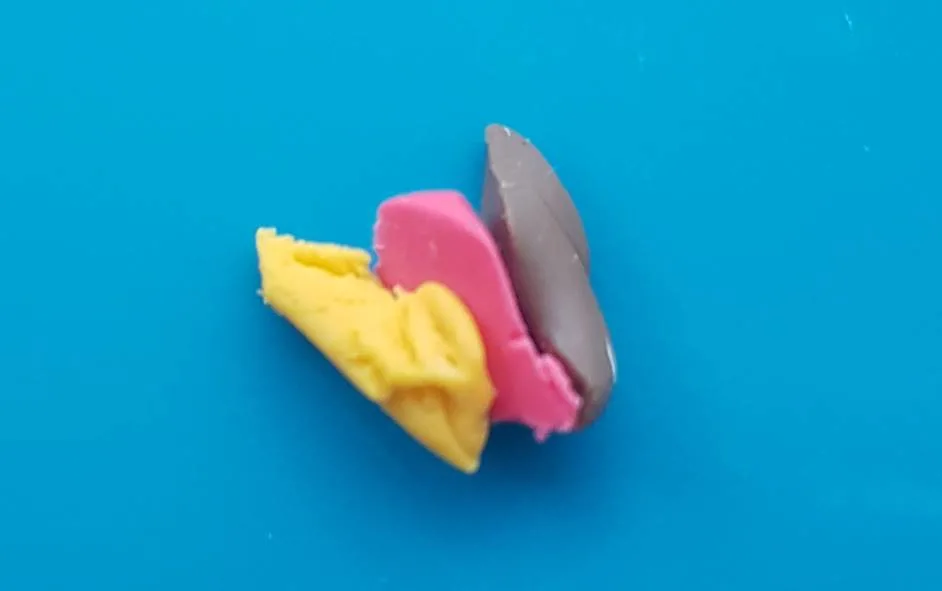
Then prepare a ‘bullseye’ polymer clay cane, to make your little caterpillar – if you want it to be two toned like mine. You can use one colour for your caterpillar if you like, without the need to make a cane.

For a quick cane tutorial, check out this post (the tutorial is midway through):
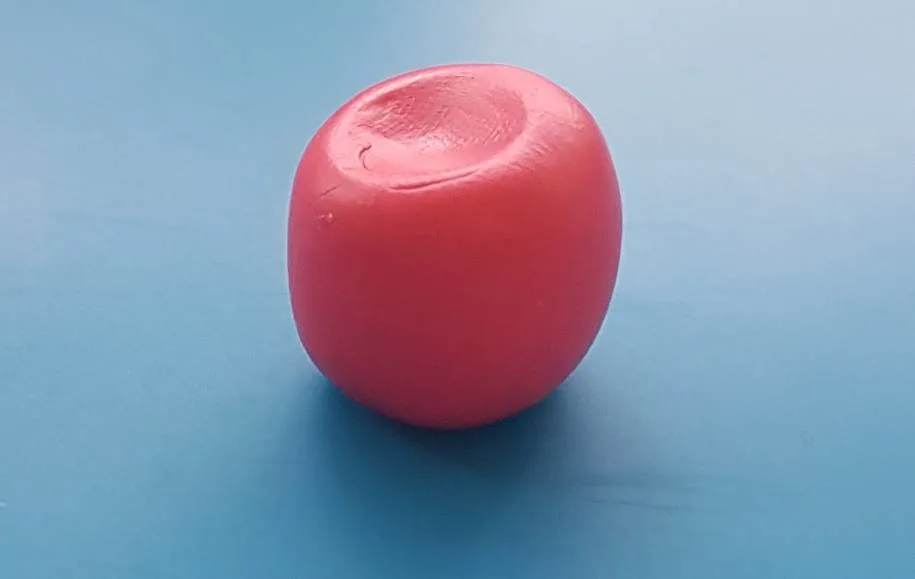
Once you have your cane and your conditioned ball of red clay, mould the ball between your fingers until it resembles an apple shape, as below:

Step 2.
Next you should prepare some little clay stems and leaves for your apples. I used a dark green for the stems and a lighter green for the leaves.
For the stem:
- Simply roll out a string of green clay and trim off the stem length you would like
- Use a tool, needle or piece of dried spaghetti to poke a hole in top of the apple
- Add some polymer clay glue to the stem and poke it into the hole
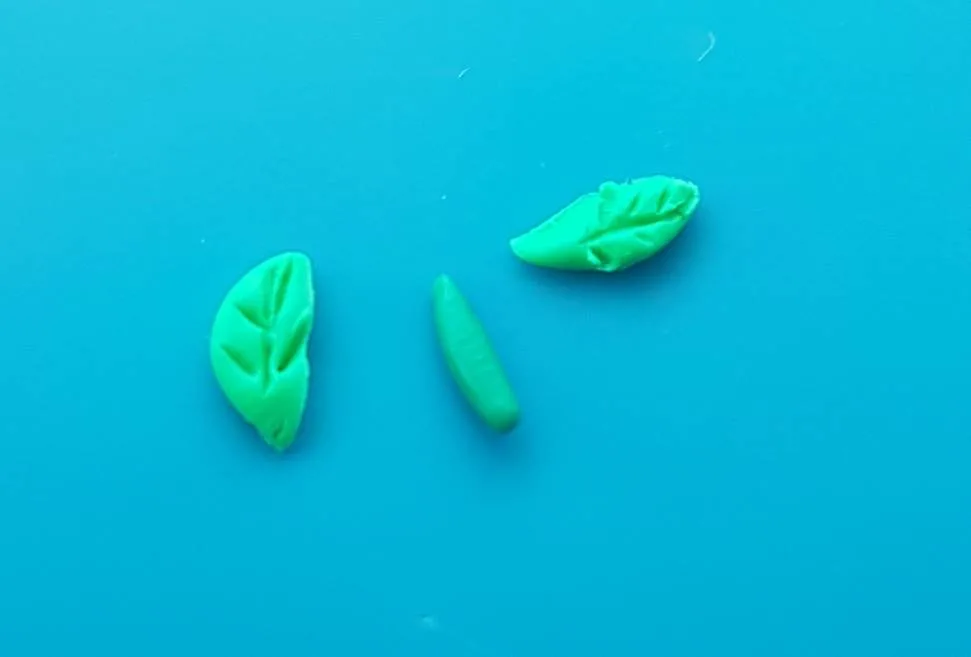
For the leaves:
- Take a small amount of light green clay and roll it into a small ball
- Roll the ball flat with an acrylic rolling pin until you form a circle
- Cut the circle in half to create two leaves, and use a needle or pointed tool to press leaf designs into the clay
- Then add a little polymer clay glue to the underside of the leaves and place it next to the stem on the apple base

Step 3.
Now your apple is complete, we’ll move on to making the caterpillar. Slice a circle from your polymer clay cane, as pictured below and roll it flat with an acrylic rolling pin.
Once you have a flat disk of clay take it between your fingers and begin to twist it, until you form a caterpillar-like effect, as pictured below.


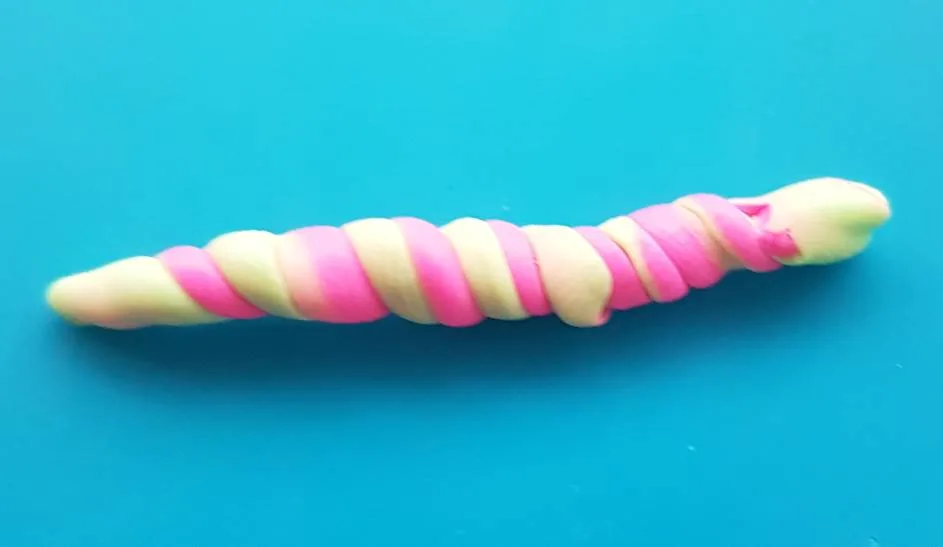
Take your little caterpillar and cut it in half (ouch!), to form one for each earring. Then bend the clay until it resembles a crawling caterpillar, as below.
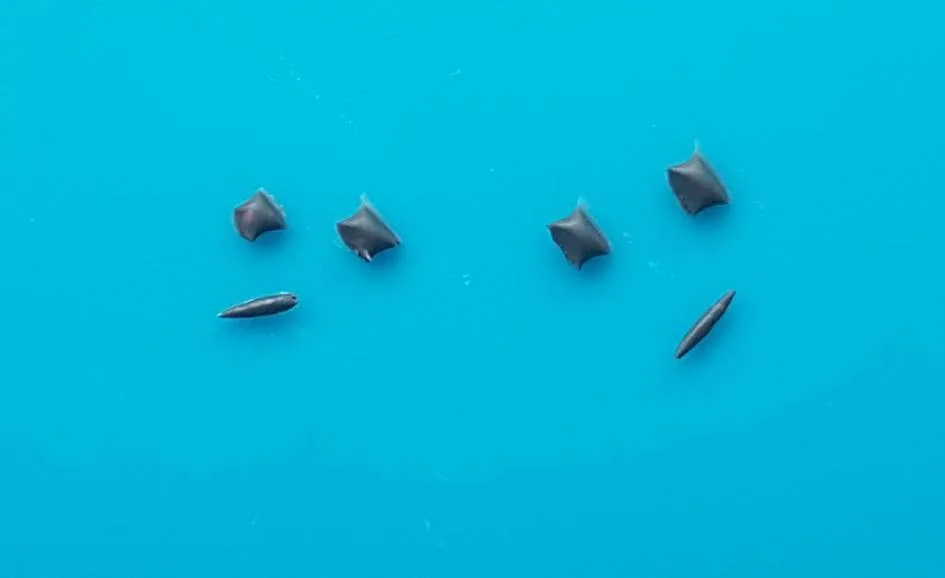
Cut some little eyes and mouths from a thin string of black clay, and glue them to the caterpillar to form it’s little face.
Once you have your formed caterpillar glue it to the side of your apple.

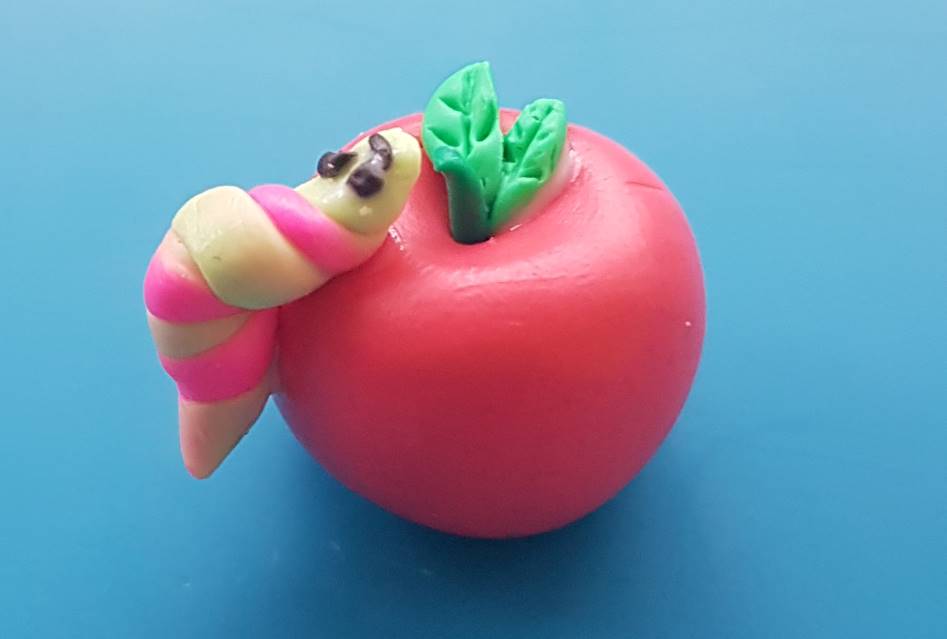
How great does he look chomping on that apple?
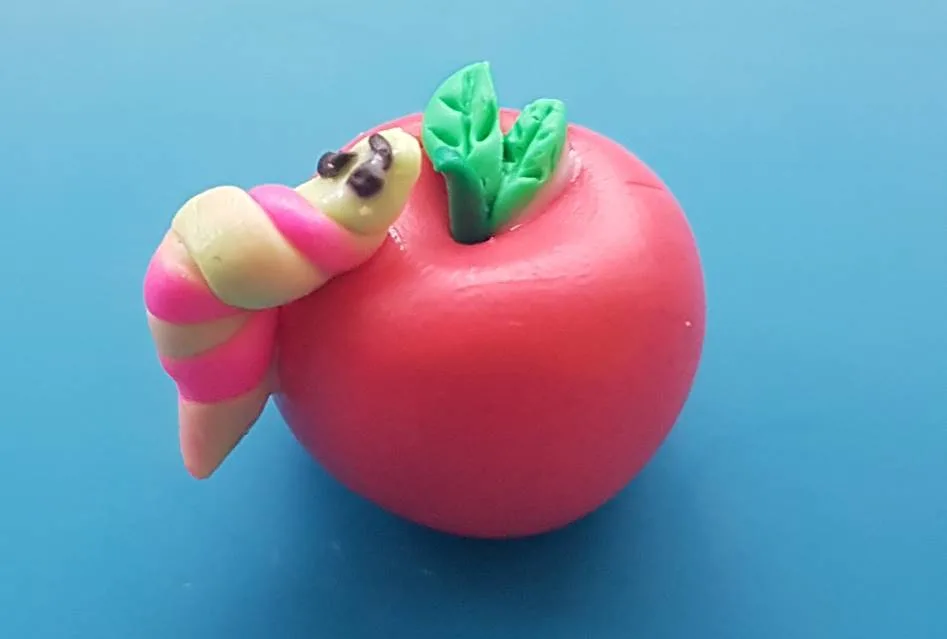
Now your design is ready for an earring anchor hook to be inserted into it, and popped into the oven for baking.
Top tip: For rounded designs, add a little mound of cornflour to your baking tray and pop the design into it, to prevent it becoming flattened on one side whilst baking.
And… you’re done!
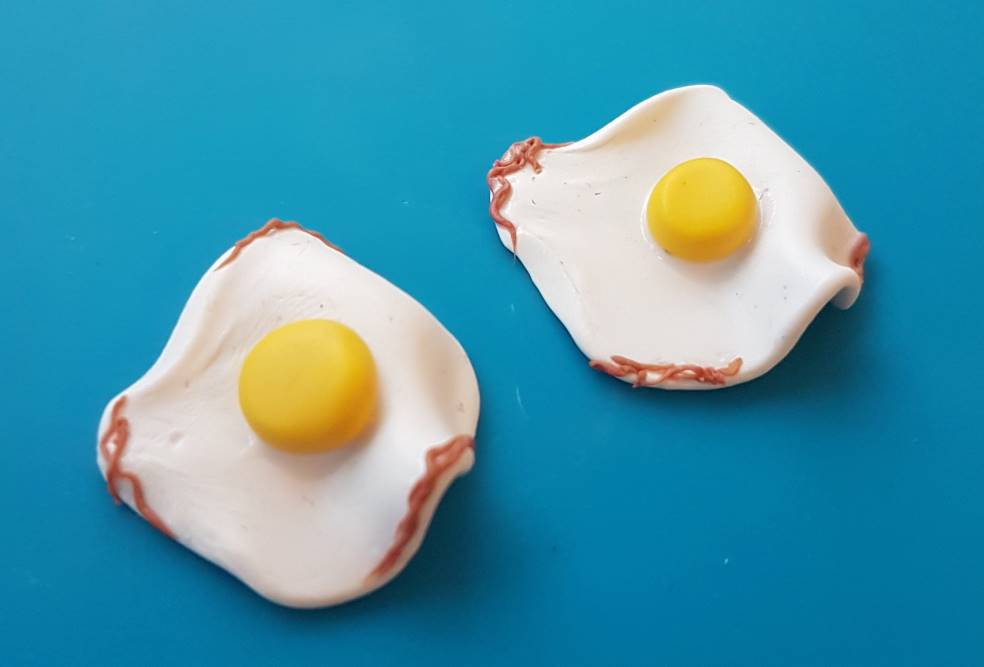
3. Fried egg polymer clay earring designs
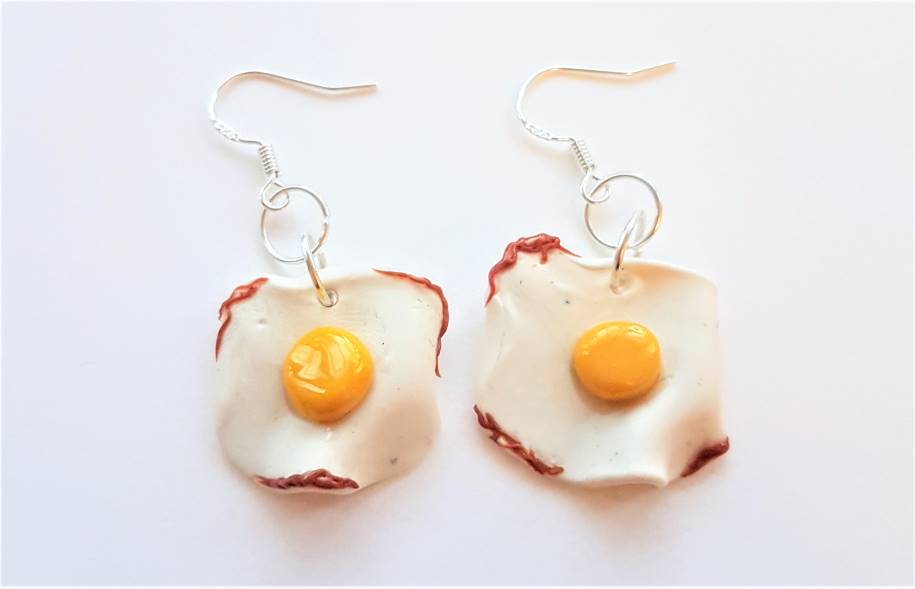
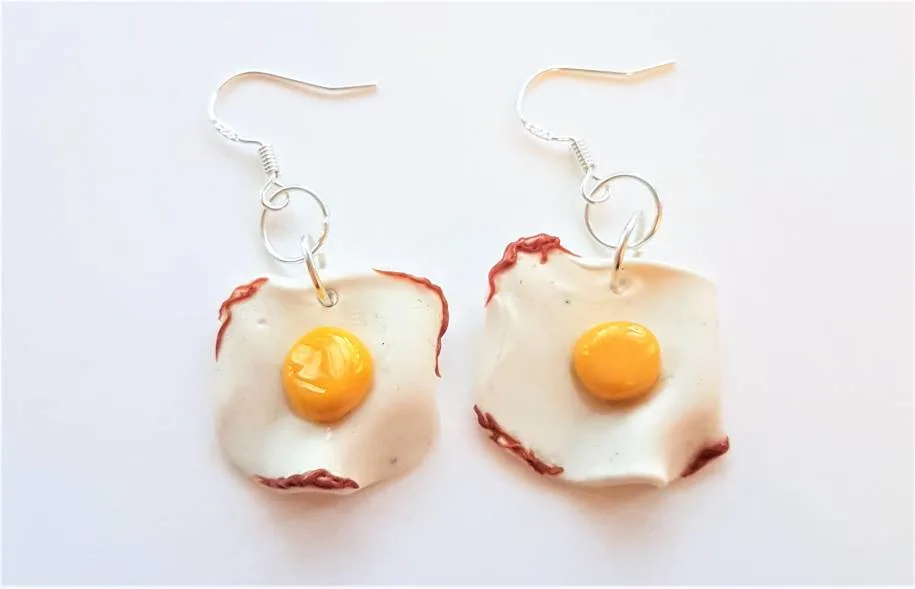
I love how realistic these fried egg earrings turned out, so I wanted to share how to create them. These are the easiest earrings to make out of the bunch, and they look great.
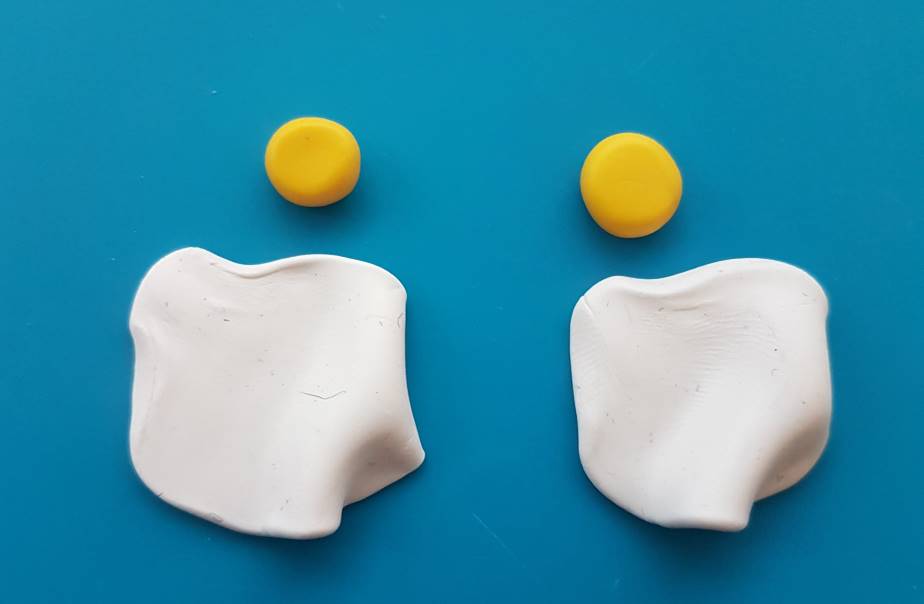
Step 1.
Prepare two balls of conditioned white clay for the egg whites and two smaller balls of yellow conditioned clay for the yolks.
Flatten the whites with an acrylic rolling pin, and pinch the edges to form a waves effect, as below.

Step 2.
Place the little yolks onto the main base of the egg, and secure them with some polymer clay glue.
Now your designs are starting to look like real fried eggs, it’s time to add the details. If you look at the fried eggs on your English breakfast you’ll notice they often have little crispy bits along the edges of the white, that have cooked a little faster than the base of the egg in the frying pan.
- To make these I mixed together three colours of clay, to achieve that perfect ‘crispy bit’ colour.
- Then I rolled out the mix into a very fine string to take my cuttings from

- Press your stringy, crispy details against the edges of your fried eggs, by first applying the glue directly to the egg edges
- Layer several string cuttings until the achieved effect looks kind of realistic, and then you are done
- Add tiny little holes into the tops of your eggs for the earring jump rings after they are done baking

Time to pop your creations in the oven!
Step 3.
Once they are properly baked and cooled, get your polymer clay glaze and add some shine to your egg yolks. I feel this step makes all the difference and really makes the earrings pop with a realistic glossy yolk.
I also added some glaze to the crispy bits, to give them that frying pan, oily shine.

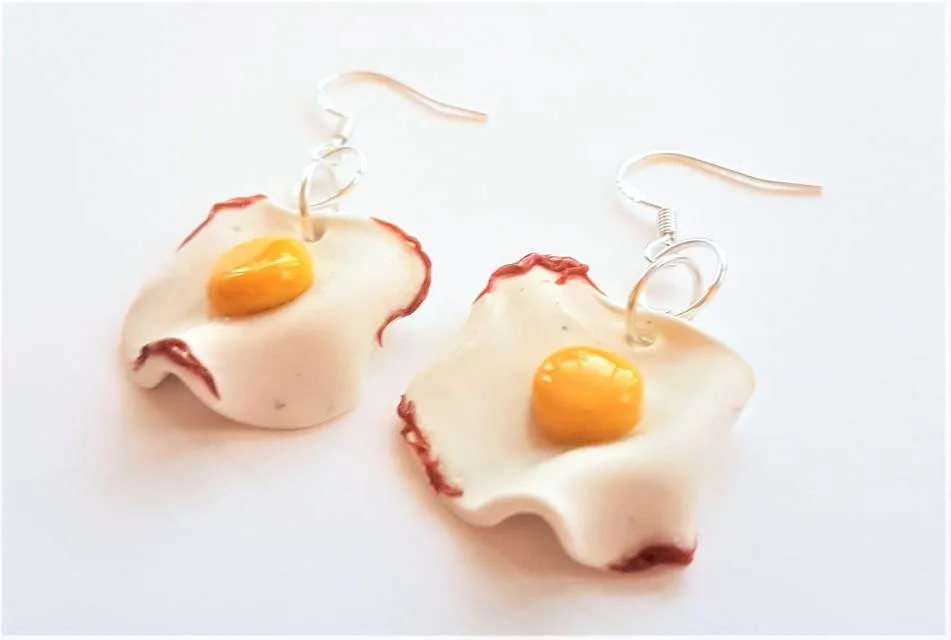
For help with glazing, I have a guide to making polymer clay shiny with glazing:
4. Cookie polymer clay earrings
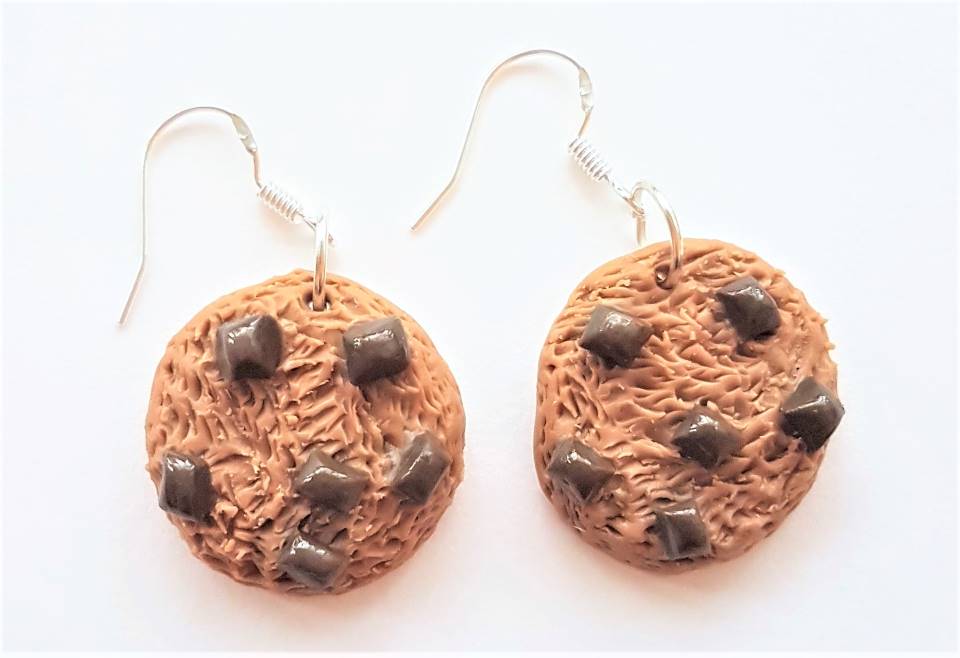

These cookie earrings look so realistic, be careful not to eat them! But seriously, keep small parts away from children as they may pose a choking hazard – but you already know that.
Making these earrings is very simple and only takes a few steps. Let’s get into it…
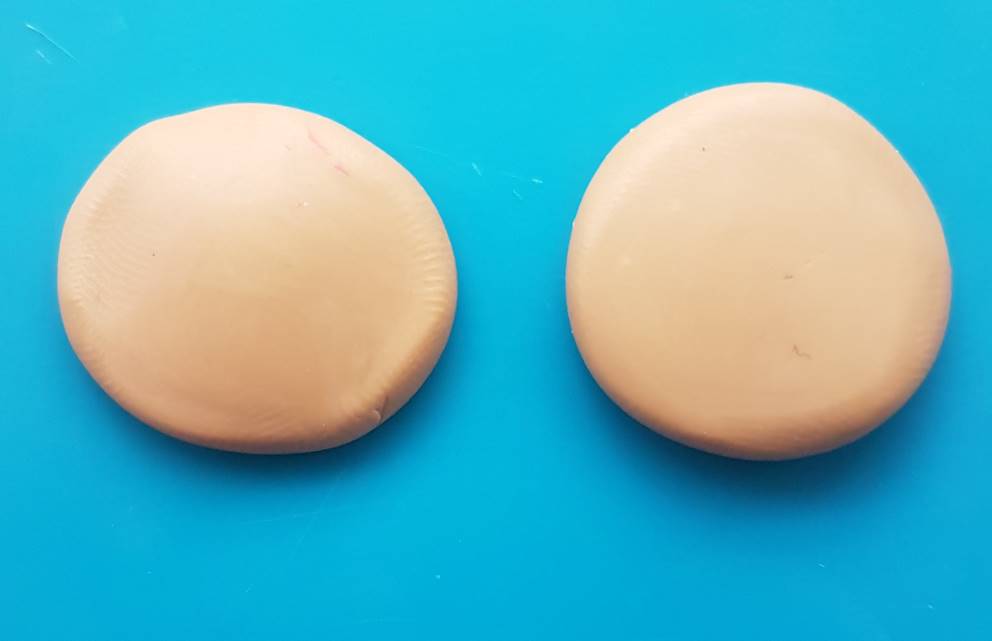
Step 1.
Condition a ball of cookie dough coloured clay. I had to mix several colours together to get the colour of baked biscuit just right – I used a peachy tone, a mid-brown, a small bit of red and a small bit of yellow, to create the perfect cookie colour.
Once you’ve got your dough-coloured balls ready, press them with an acrylic rolling pin to flatten them slightly into cookie shapes – but don’t over press them.
Top tip: Use an acrylic rolling pin as opposed to a wooden one, as wooden rolling pins leave grain imprints in your clay.

Perfect, they look great.
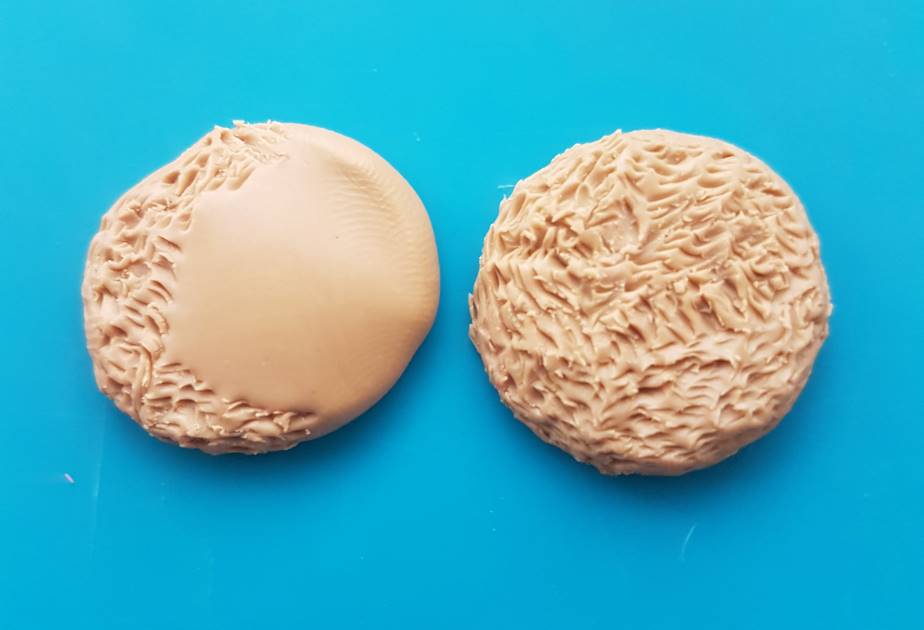
Step 2.
Take a needle or a pointed tool and add texture to the surface of your cookies, in the same way you texturized the inside of the donut earrings.
Draw little lines into the clay with your tool, and once you have rows that cover the surface of the clay go back over them in the opposite direction. Keep trying until you get the effect you like.

Step 3.
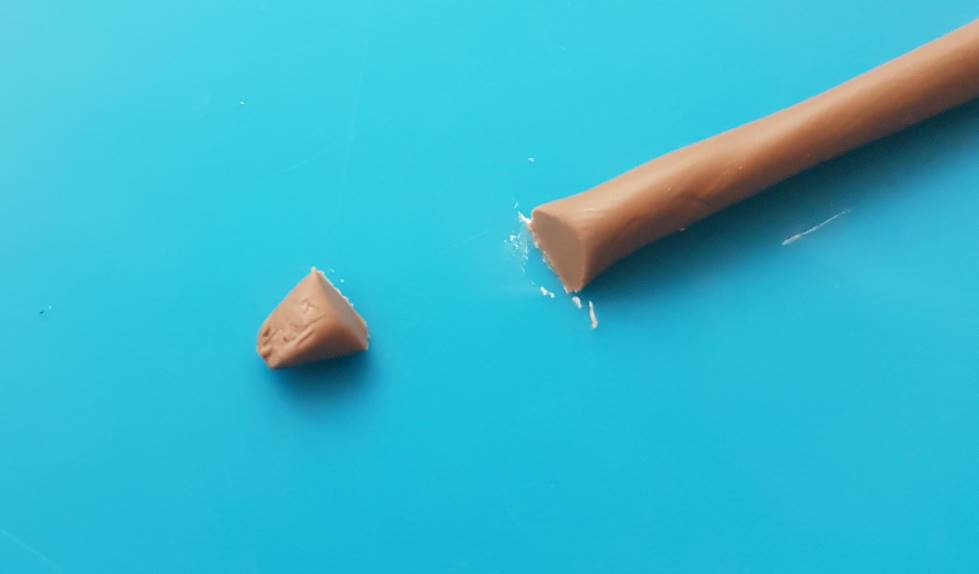
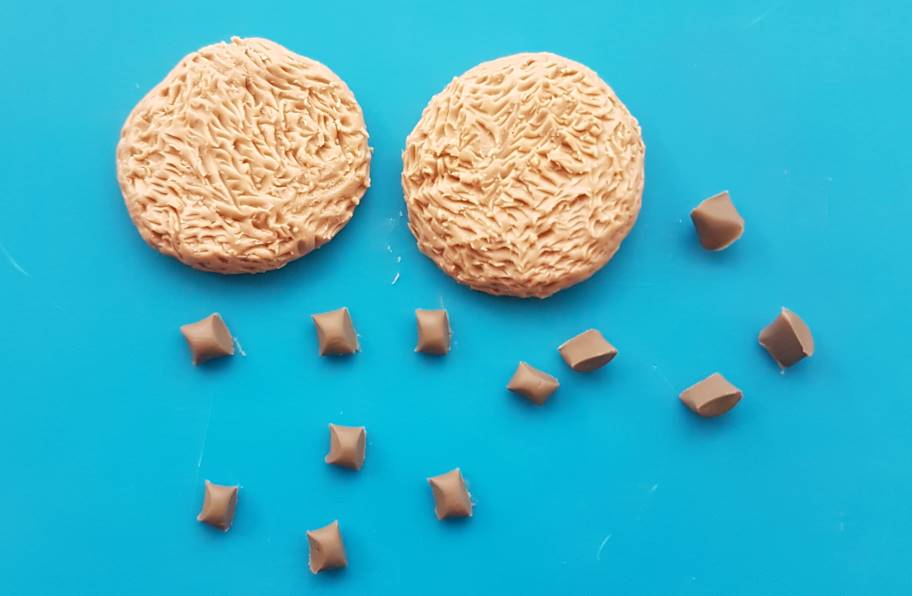
The next step is to add chocolate chips to your cookies. This is really simple and quick to do.
Condition a ball of chocolate coloured clay in your warm palms and then roll it out on your mat into a string. Use a clay cutting tool to chop little chips from it, discarding the first end piece, so each piece has an even blunt cut side on each end, just like real chocolate chunks for baking.
Here’s how they should look:

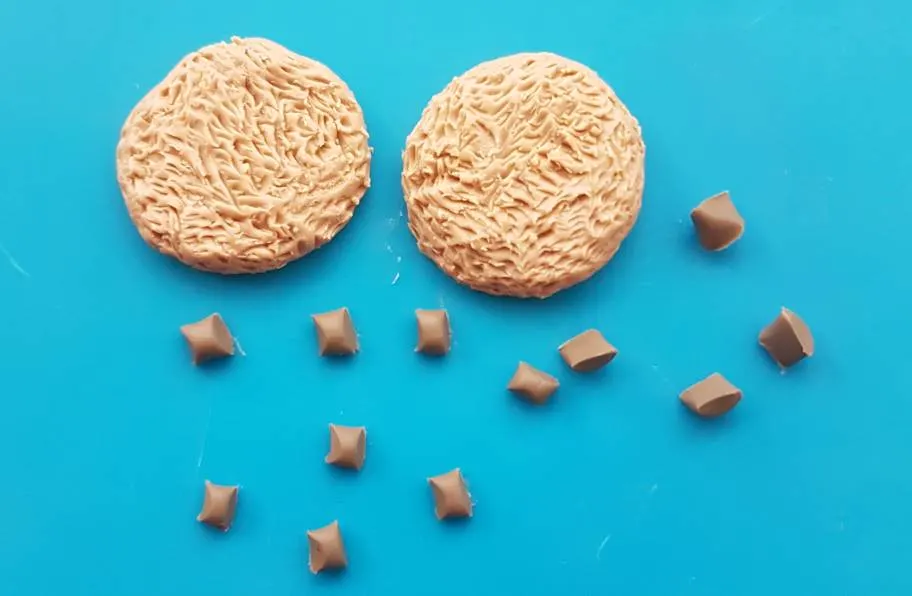
They’re looking great.
Time for the next step.
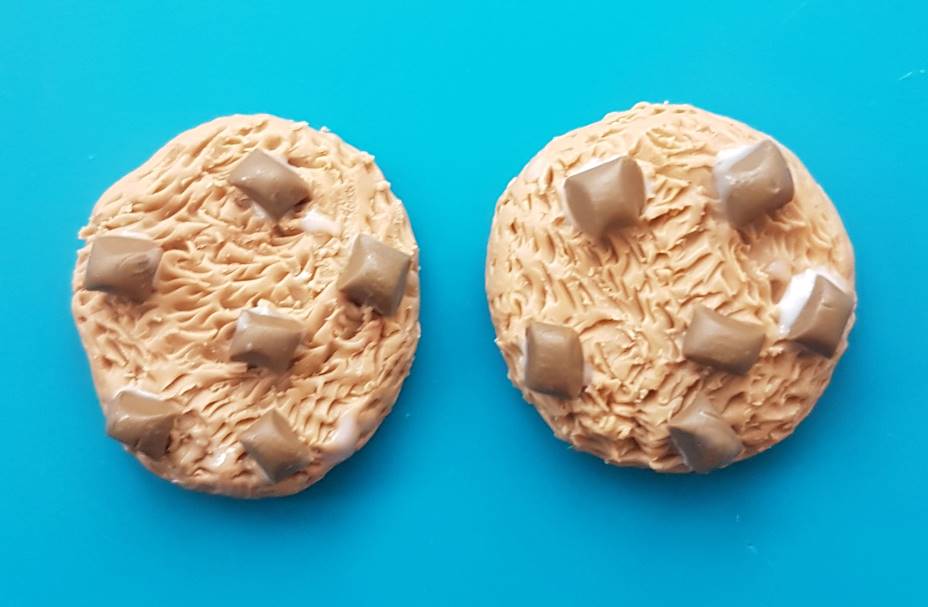
Step 4.
Now you can add your chocolate chips to your cookies by pressing them into some polymer clay glue and then popping them on the surface of the biscuits.
Add some earring jump ring holes into your cookies and bake them in the oven. (I’ll include some baking tips at the end of the article).

Step 5.
Once your cookie earrings are out of the oven allow them to properly cool before varnishing the chocolate chips.
Top tip: use a good quality brush when varnishing to avoid bristle shedding and rough strokes from cheap brushes.
This final step really elevates the cookie design, adding a realistic shine to the chocolate coloured clay. Good enough to wear!
They should turn out like this, see the difference between the glazed and unglazed chips?
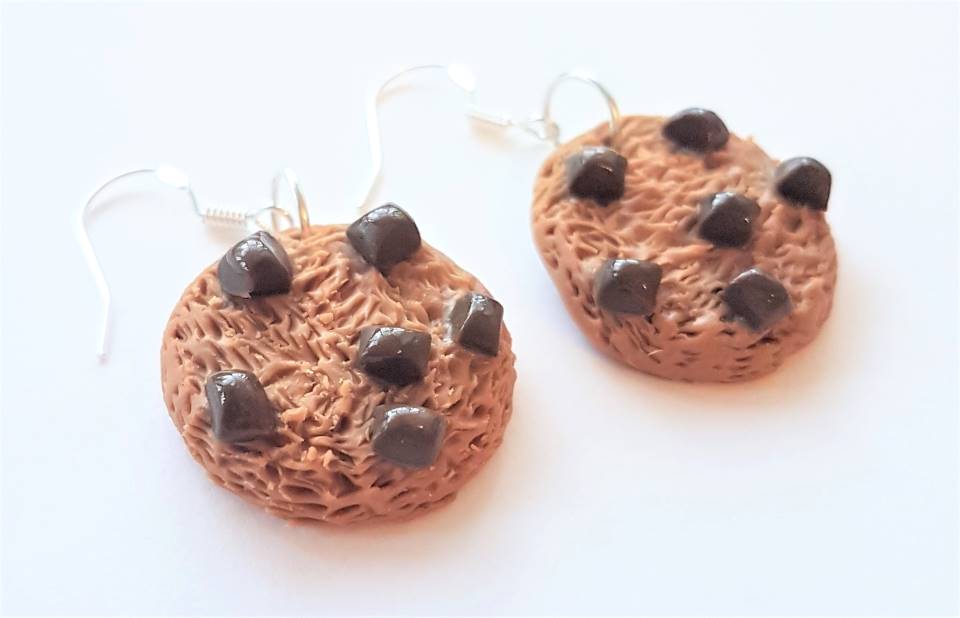

Now your cookie earrings are done! Enjoy.
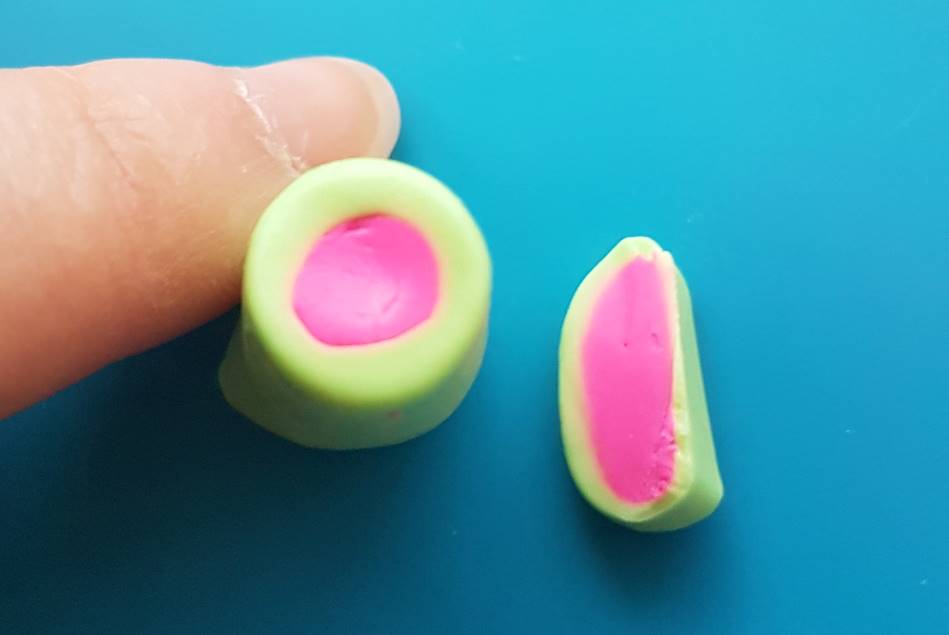
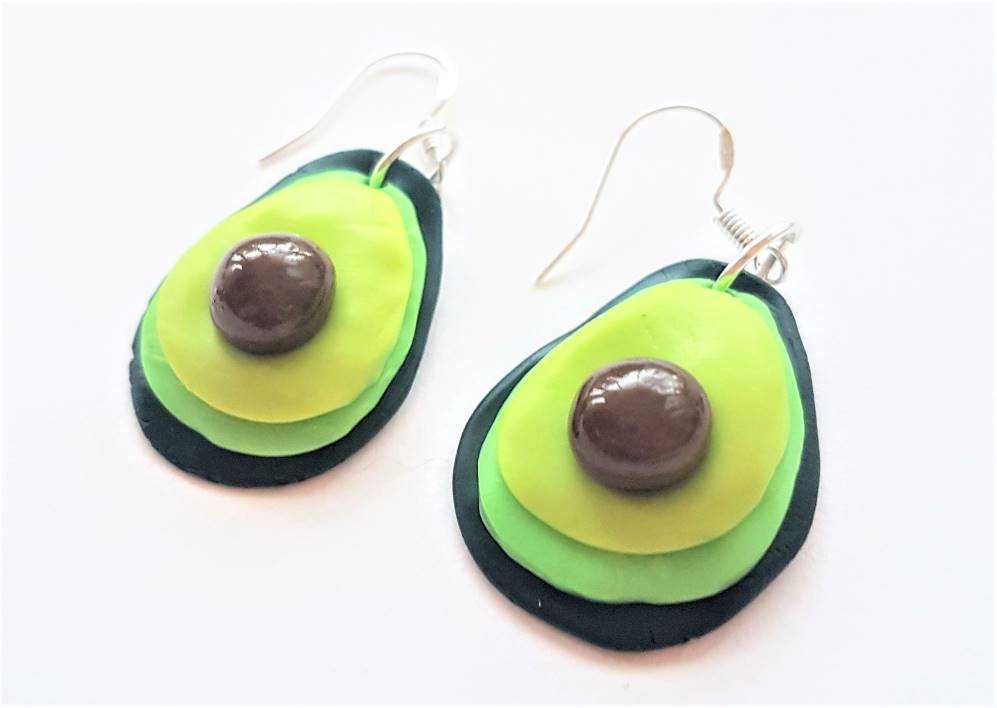
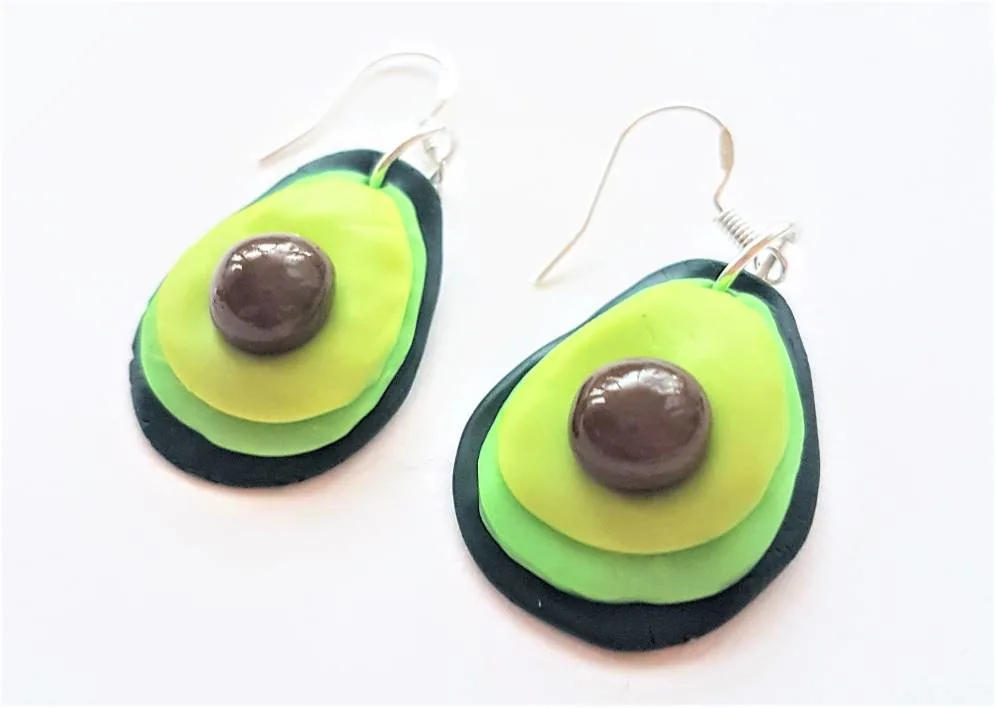
5. Avocado polymer clay earring designs
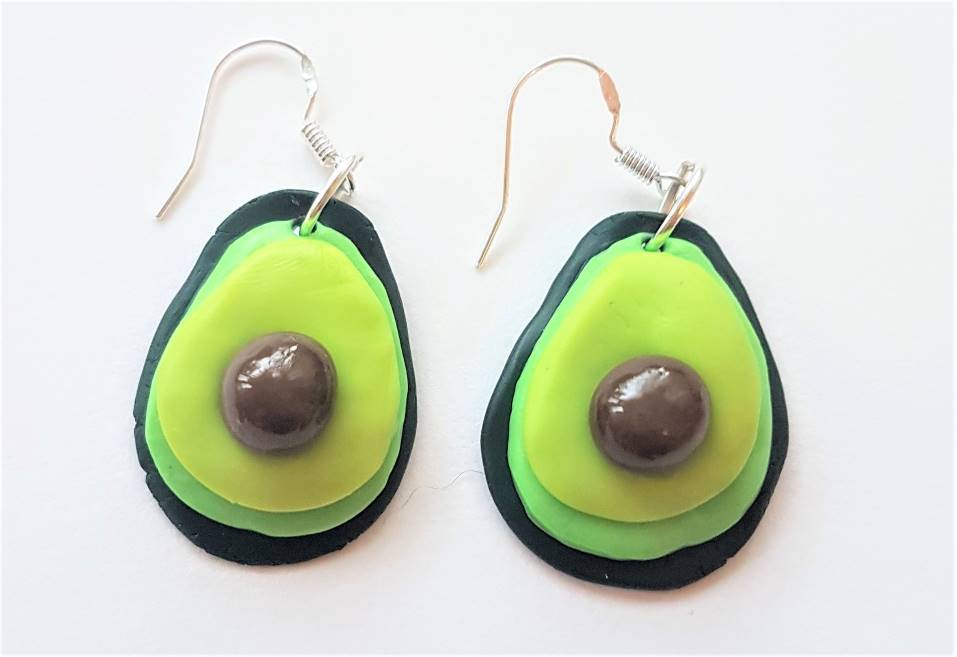
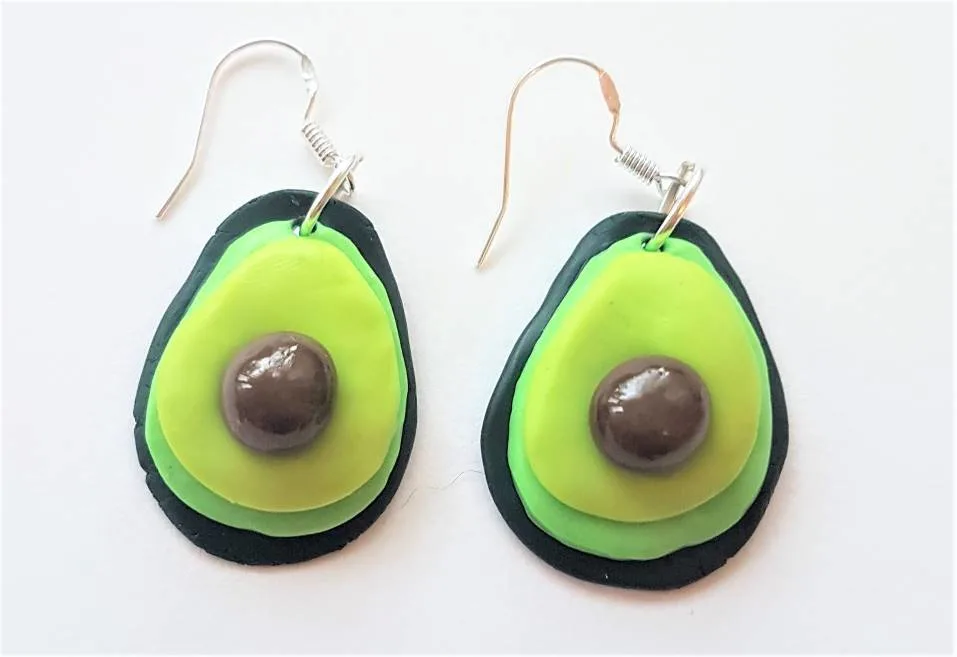
These avocado earrings are so sweet and eye-catching, plus they’re quick to make.
Let’s get into it!
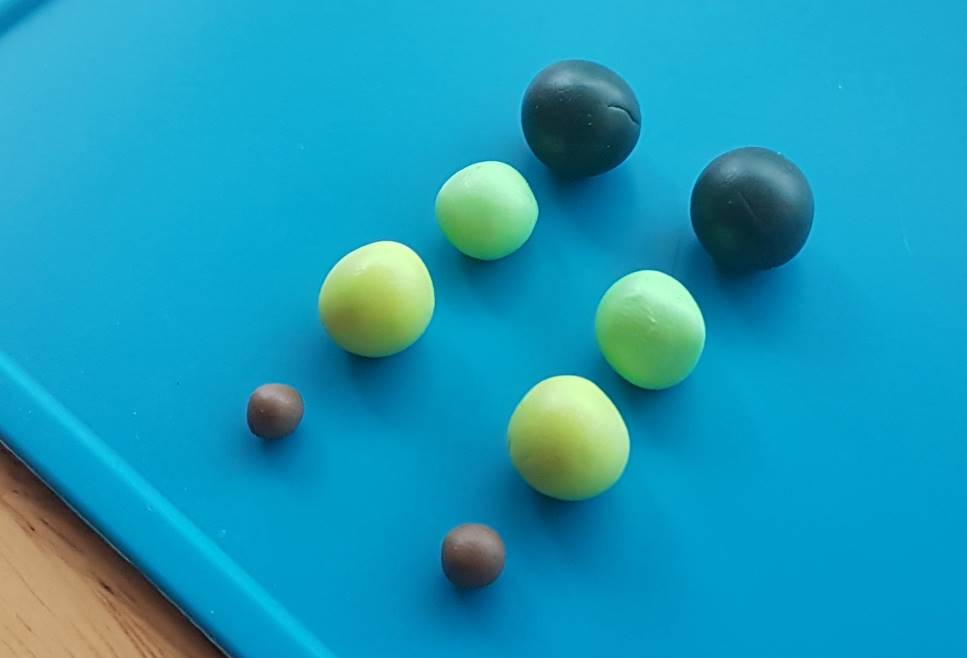
Step 1.
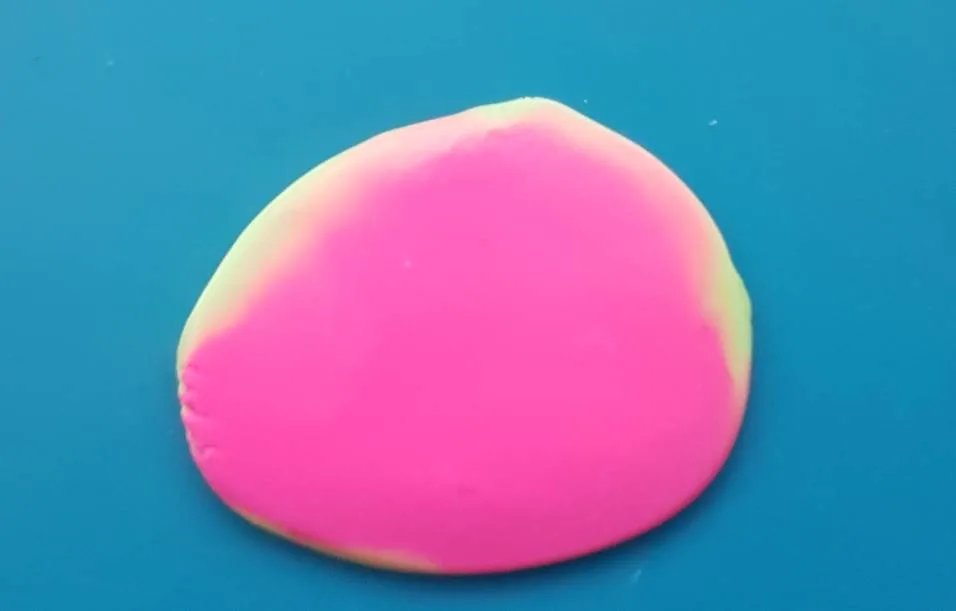
Condition two balls of clay in each of these colours: very dark green for the avocado skin, a light green for the avocado flesh, a yellowy green for the central avocado flesh and then two small brown balls for the seeds.
Here’s what the balls should look like, for size reference:

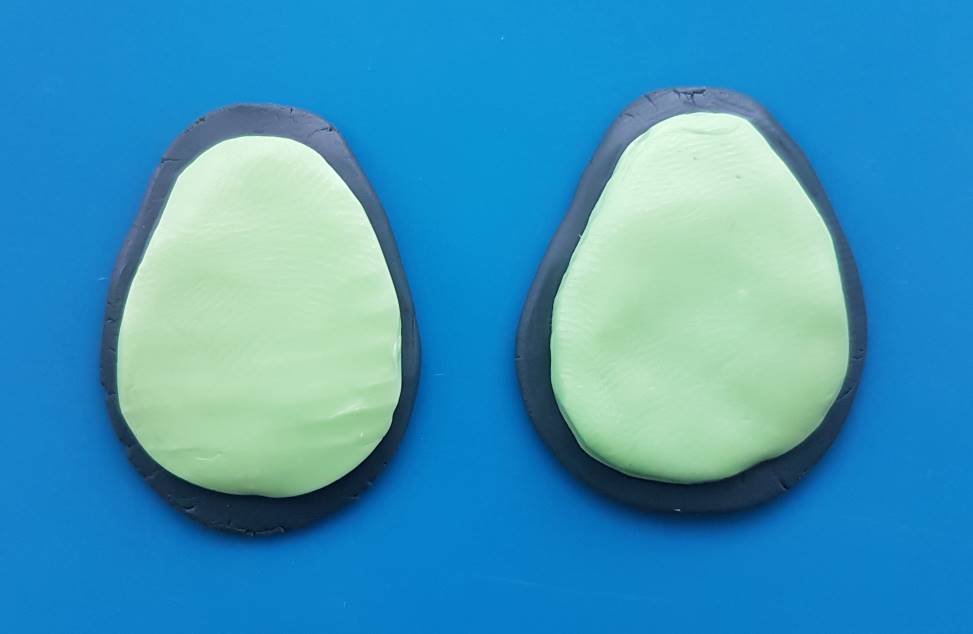
Step 2.
- Roll out the very dark green balls to form the base of your avocado earrings.
- Flatten them with an acrylic rolling pin and pinch the top halves to form an avocado shape, as picture below.
- Do the same with the other balls of clay, except the brown balls which we’re keeping for the seeds.
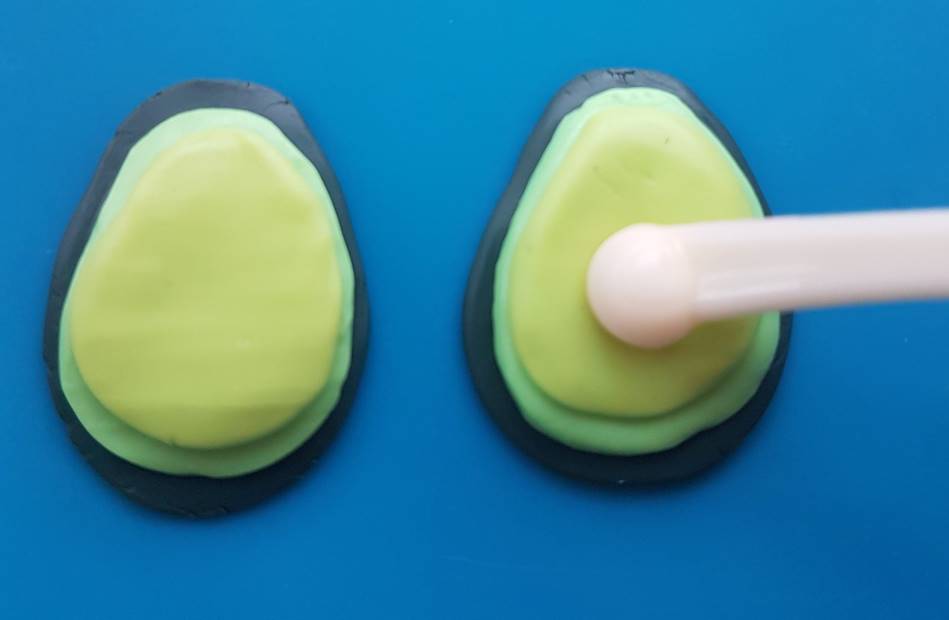
- Stack the avocado layers on top of each other, with the yellowy green sitting on top. When you stack the greens on top of each other it should look something like the below pictures.
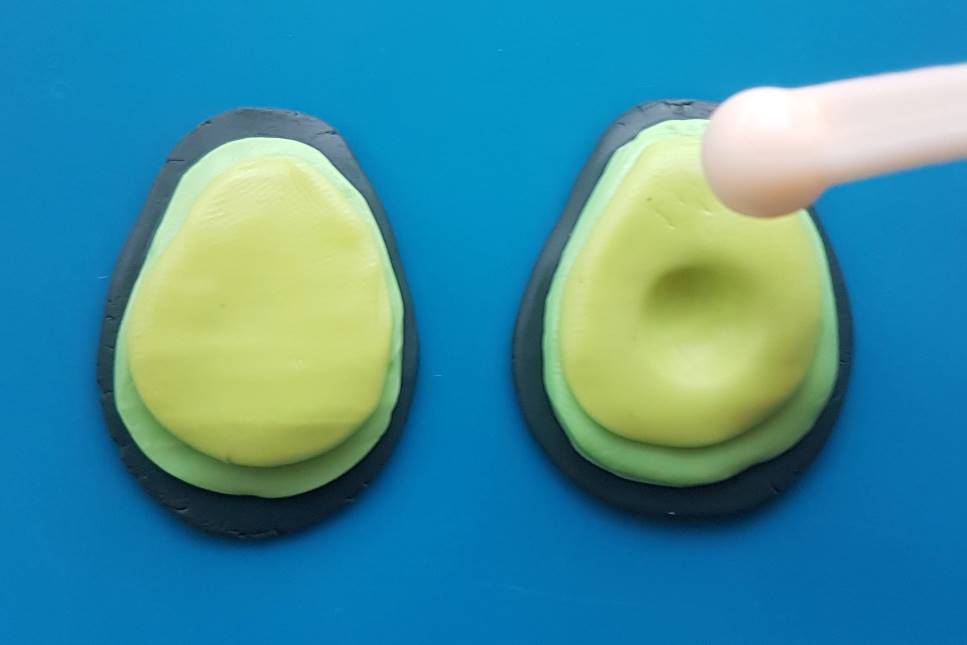
- Once they’re stacked, take a tool with a ball-end and press into the avocado to form a little indent for the seed to sit in.


Step 3.
Add a little polymer clay glue to the indent for the seed to sit in and roll the seed into it. Press down lightly to make sure it’s firmly secured, but don’t flatten the seed. We want it to be nice and round for the next step.

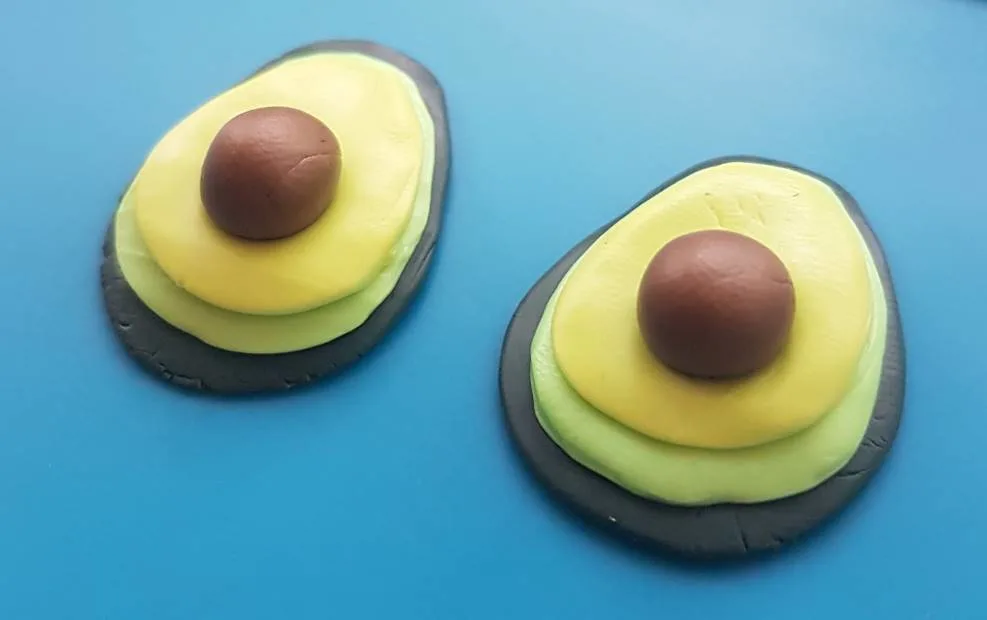
Pop your creations into the oven and bake according to your clay brand’s packaging instructions.
Step 4.
Once your earrings are baked, allow them to cool and then add come varnish to the avocado seeds for a glossy shine.
Like with the fried egg earrings, the shine really adds a realistic detail that makes the earrings pop. See the difference below?
Top tip: Varnishing (or glazing) is really easy – start with a thin layer of varnish, and build up to 2-3 layers. Don’t do too much as your polymer clay may go from looking shiny to looking a little opaque.
That’s it, the avocado earrings are done!
As promised throughout the article, here are some baking and varnishing tips for beginners, to help make the earring making process smoother…
Baking
Here are my top baking tips to help you on your polymer clay venture…
- Make an experimental test piece to try out baking
An experimental piece has many benefits:
⦁ You’ll learn how long it takes for the brand of glue you’re using to set in the oven and the time it takes to sufficiently bake the clay
⦁ How long it takes for your to warm up your clay between your hands (or cool down in the fridge if too squishy) when you start moulding
⦁ How thick to make your designs
⦁ And an idea of the precise amounts of clay needed for each earring, for easier batch-making
- If your designs are still bendy when they come out of the oven this is normal, depending on thickness and brand, but many beginner crafters take this as a sign the clay is not done.
- After your new gorgeous designs are properly baked (bendy but not snapping), the next step to properly complete the baking process is allowing the clay to cool.
If you start to drill, or paint your clay before it’s sufficiently cooled, things can go wrong. It’s best to store your designs somewhere safe and wait a couple of hours, or even a full day, before you take on the next step. Cooling allows the clay to properly harden after the heat of the oven, making the structure of the piece stronger and less susceptible to damage or brittleness.
This is an added time requirement onto baking that isn’t often talked about.
For more info check out my guide to baking polymer clay:
Varnishing
Here are my top varnishing/glazing tips…
- Polymer clay is made shiny through the process of glazing, using a water based polyurethane glaze.
- Sand and buff your clay before glazing – for a super smooth and shiny finish
- The glaze (or varnish) is super easy to use: simply wait for your paint to dry and then seal your design with a thin layer, and leave to dry – acrylic sealer and varnish can take between 4-12 hours to dry, so be patient and avoid touching your designs.
- Varnishing (or acrylic sealing) will make your design stronger and less susceptible to brittleness from moisture absorption over time – widely available in craft stores, DIY stores, online, you should have no trouble getting your hands on some.
Glazing technique:
- Glaze the clay two or three times with thin layers, to avoid overdoing it and making the glaze look opaque
- Add your first layer carefully and wait a few minutes, to create a barrier for the following coats – especially if you have painted your designs, as this will help prevent unwanted smudging
- Allow to dry fully before touching
- Allow the glaze to dry by hanging the clay creation from a hook
- It’s best to use a polymer clay varnish or glaze that has been specifically designed for use with the material, as this will adhere the best and will not have any adverse side effects on your clay.
Here’s my full guide to glazing:
Conclusion
I hope you enjoyed this ‘5 food polymer clay earring designs‘ tutorial and you’re feeling inspired to try out some of the designs yourself, or come up with your own food design ideas.

Polymer clay is such a fun crafting material, and it’s great for beginners. Many crafters go on to open small businesses through Etsy and other online sales platforms, because polymer clay earrings are a highly sought after fashion trend at the moment.
It’s my goal to make polymer clay earring making as easy as possible for beginners, as it’s such a rewarding hobby! Polymer clay is fairly inexpensive, comes in just about every colour you can think of and is non-toxic – perfect.
I’ve written a number of guides on polymer clay earrings if you would like to learn more…
I also provide articles on: a How-to Guide for beginners, a Sales Guide for selling polymer clay earrings on Etsy, a comprehensive Cost Guide, and a bumper list of earring Design Ideas, so you’re never stumped by clay-makers block!
For more information on getting started with polymer clay earrings, check out:
How Much does it Cost to Make Polymer Clay Earrings?
Can You Paint Polymer Clay Earrings? A How-to Guide
How Long to Bake Polymer Clay Earrings – Quick Guide
How to Sell Polymer Clay Earrings on Etsy
How to Make Polymer Clay Earrings: the Basics
Design Ideas for Polymer Clay Earrings
Top Tips for Making Polymer Clay Earrings
Why Polymer Clay Breaks and How to Fix it
The Best Polymer Clay for Earrings and Other Jewellery

Lorna is a footwear geek and the founder of Wearably Weird. She created a YouTube channel in 2021 for fellow footwear fanatics, dedicated to detail-rich footwear reviews and info. She has a fashion media qualification (awarded in 2011).