
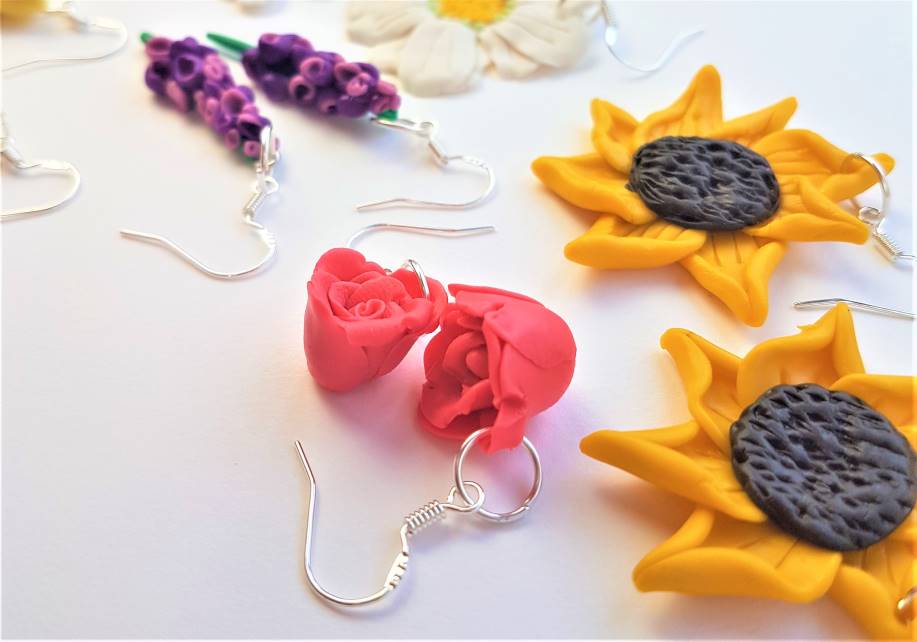
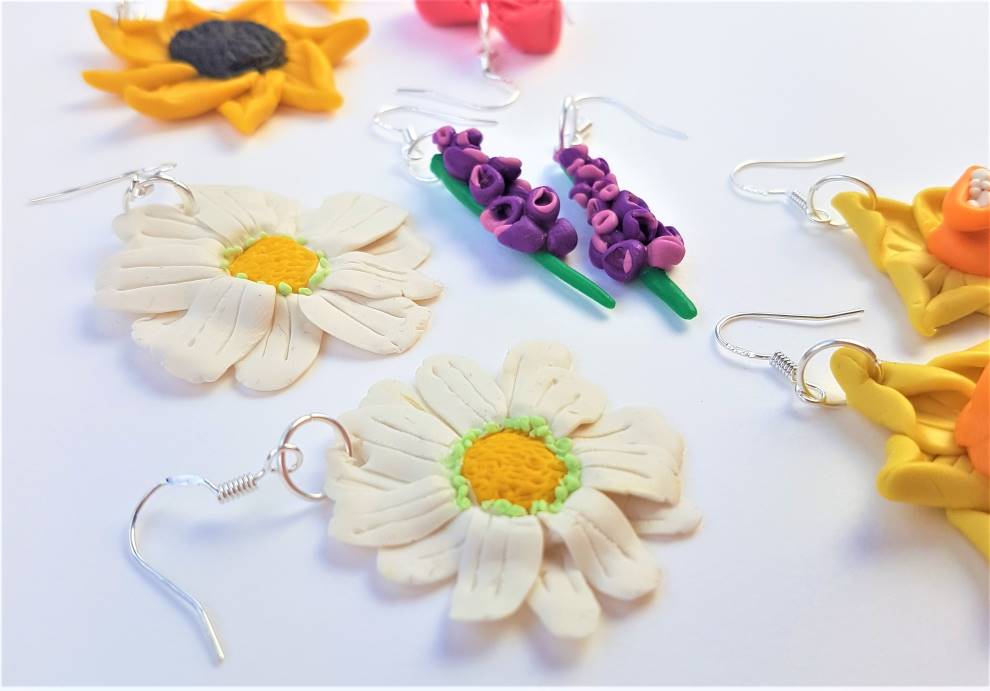
Polymer clay earrings are a hot fashion trend right now, and everyone either wants to wear them, design them or make them! Join in on the fun and get inspired with my tutorial guide on how to make 5 flower polymer clay earrings designs.
I’m going to be covering:
- Polymer Clay Rose Earrings
- Polymer Clay Daisy Earrings
- Polymer Clay Hyacinth Earrings
- Polymer Clay Sunflower Earrings
- Polymer Clay Daffodil Earrings
I have simplified a supplies list and five step-by-step guides for beginners, including my top tips for working with polymer clay.
Let’s get into it…

What you will need
Before we start crafting let’s make sure we have all of our tools and supplies ready. I’m going to do a breakdown of everything I use in the following tutorials, so you have a clear list to refer to when making your own.
Here’s what I used:
- Clay
- Clay glue
- Tweezers or jewellery pliers
- Clay cutting tool
- A pointed tool
- Silicone board
- Rolling pin – avoid wood because of the grain
- Baking paper and an oven tray for baking the earrings on
- An oven
- Optional – rubbing alcohol (to remove fingerprints from clay)
- Earring hoops
- Jump hoops
Make sure your creative space is spotless, so no tiny fibres or dust particles floating on the air and table will stick to your clay – this is of paramount importance! If possible create yourself a permanent workstation in a room away from pets – (fur is the worst) and dust gatherings items – non-carpeted rooms are best, but not essential.
Now you know what you will need, let’s move on to the designs…
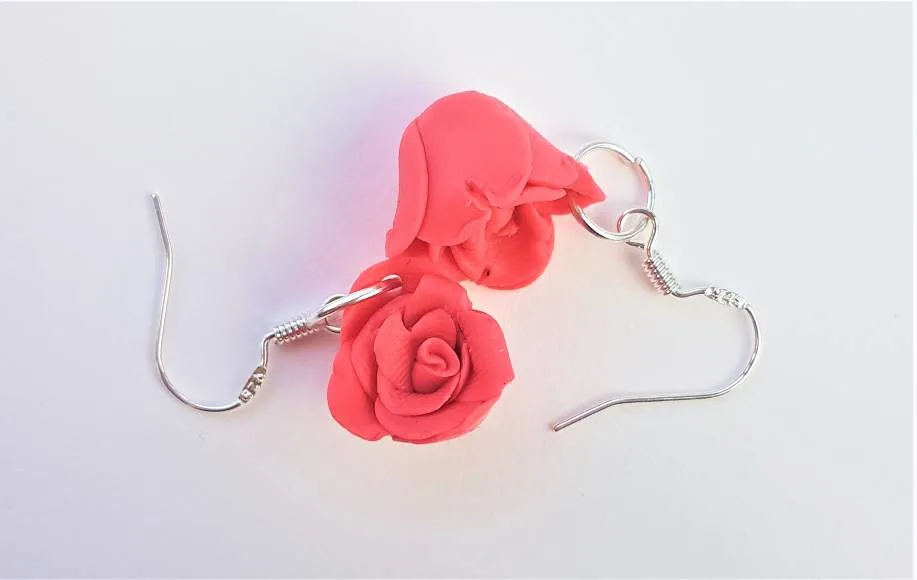
1. How to Make Polymer Clay Rose Earrings
Roses are a favourite flower for many that make for lovely gifts, and polymer clay roses are no exception.
Turn one of the most loved flowers into earrings as a product to sell in your Etsy shop, a gift for a friend or a lovely treat for yourself. I’m going to breakdown how to create these simple, yet impressive looking, polymer clay flower earrings designs into a few easy steps for you to follow.
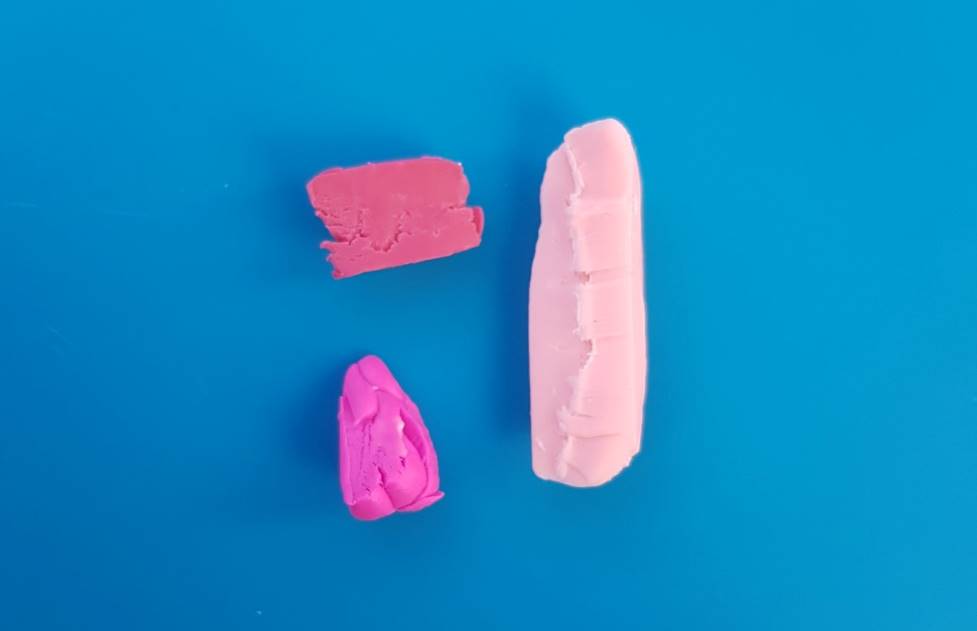
Make sure you have all of your supplies ready and you’ve picked out a colour for your rose petals to be; I went with a cerise pink that I created by blending together several colours of clay, until I was satisfied with the shade.
You can make these roses in whatever colour you like, just google roses for some inspiration (and check out rainbow roses while you’re at it if you’ve never seen those before – wow!)
Here are the most well known rose colours and their meanings:
Red: love, respect and passion
White: purity, innocence, heavenly, silence and secrecy
Dark pink: appreciation and gratitude
Light pink: admiration, sympathy, grace, joy and sweetness
Yellow: joy, delight, friendship, new beginnings
Orange: fascination, enthusiasm
Peach: appreciation, sincerity, getting together, closing a deal
Which will you pick for your earrings?
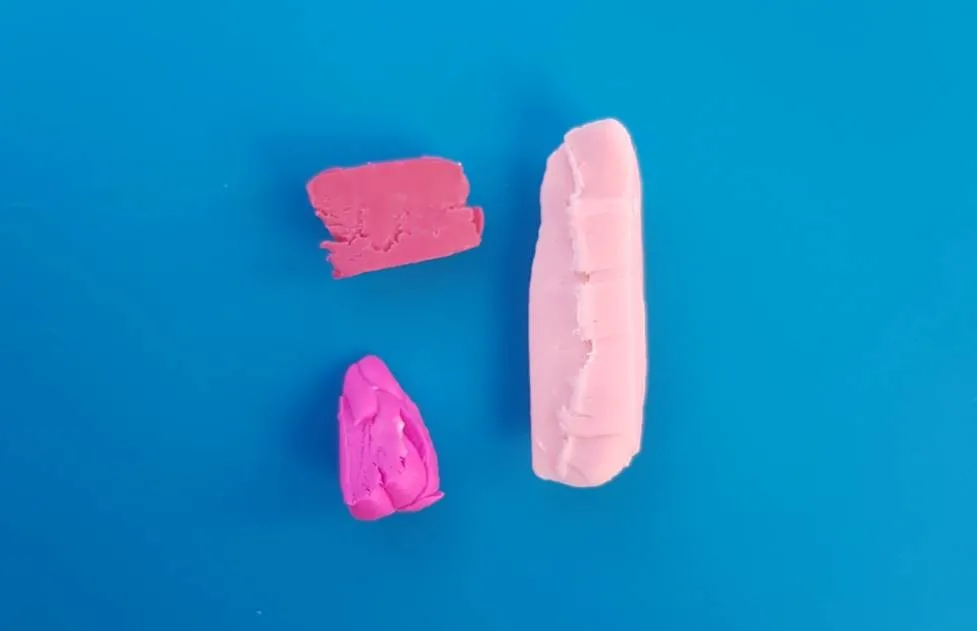
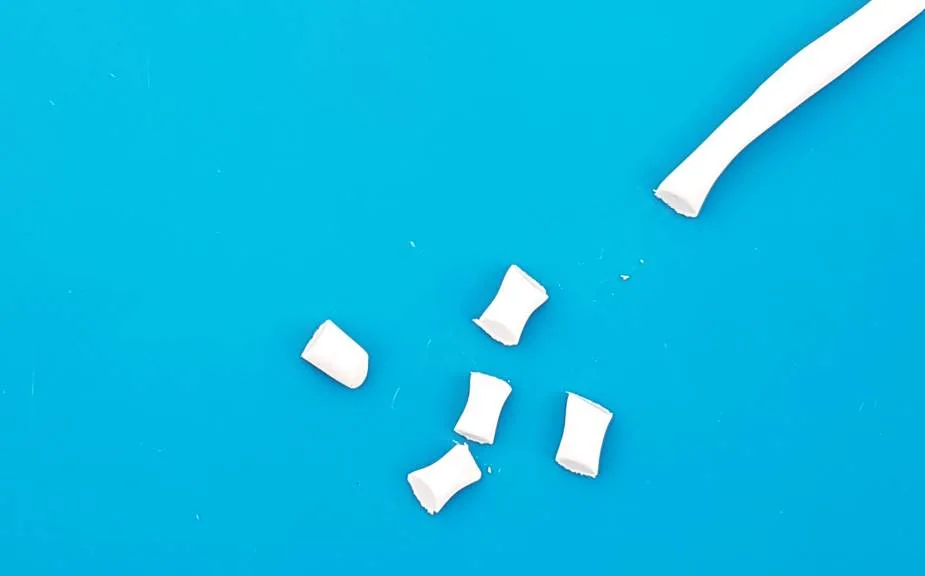
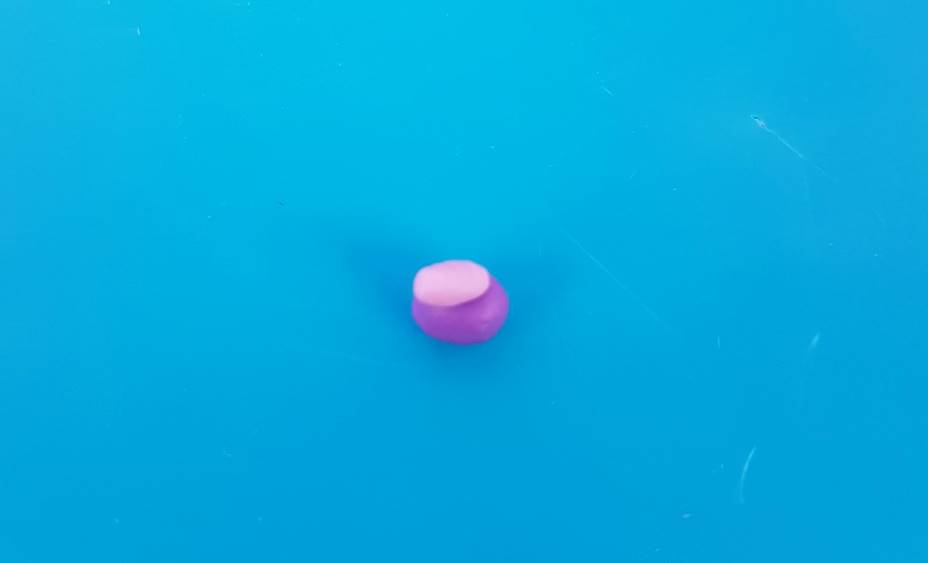
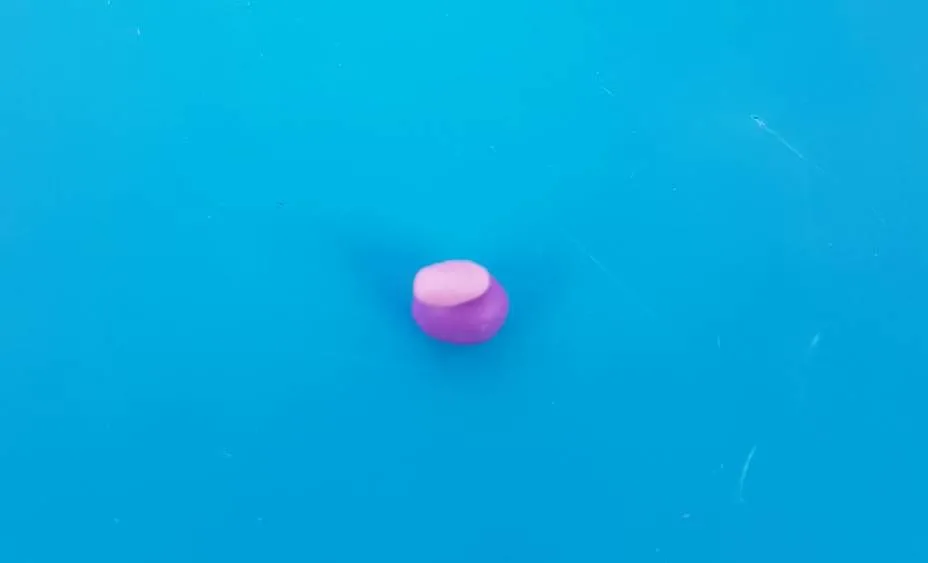
1. Condition your clay and divide into chunks
Mix together whatever colours of clay you would like to achieve your desired shade of roses, until they are well conditioned and form a smooth and supple ball.
Then roll out the ball until it forms a string, to cut your clay petals from. Divide the string into even chunks, as pictured below.
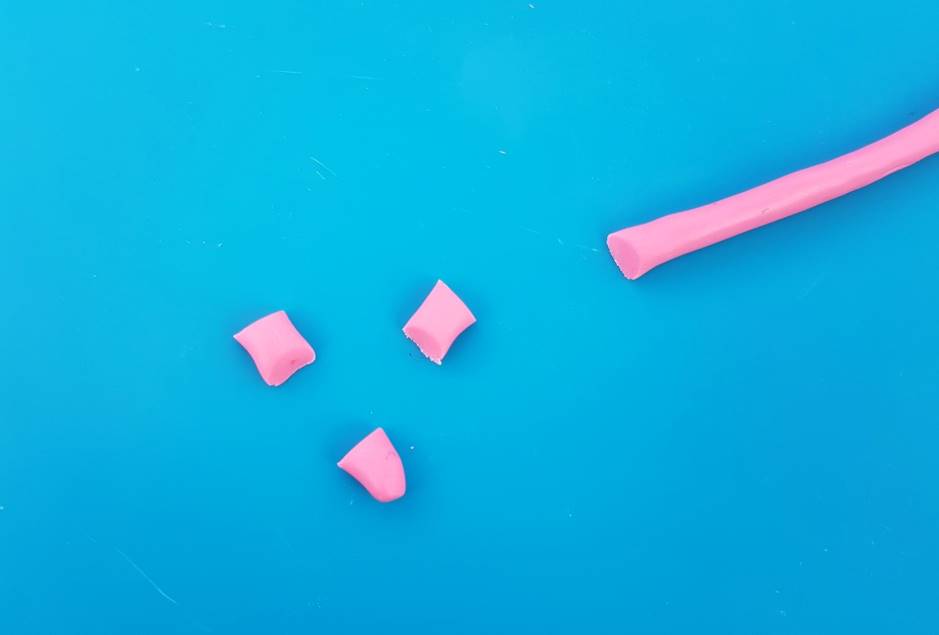

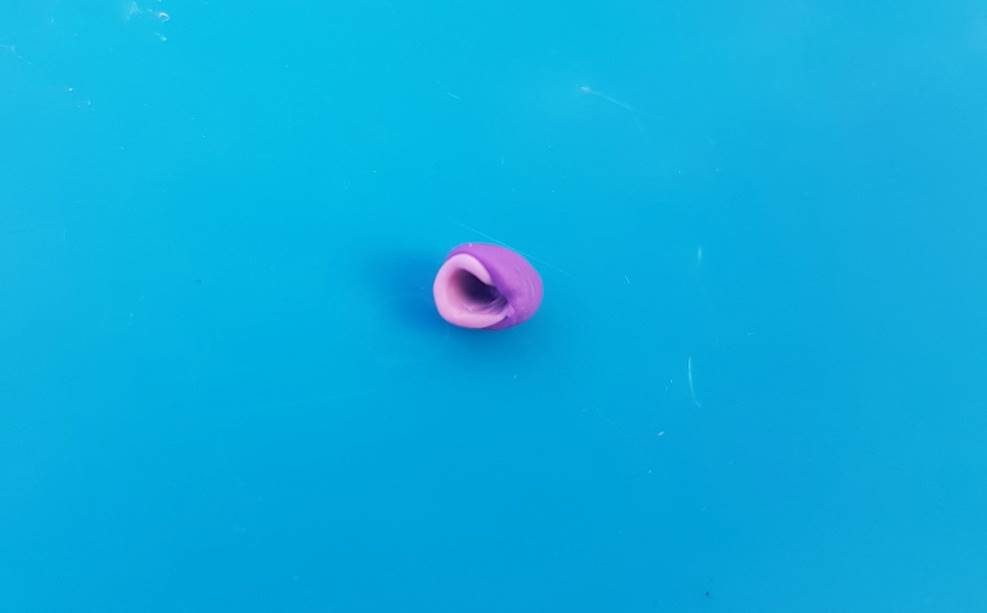
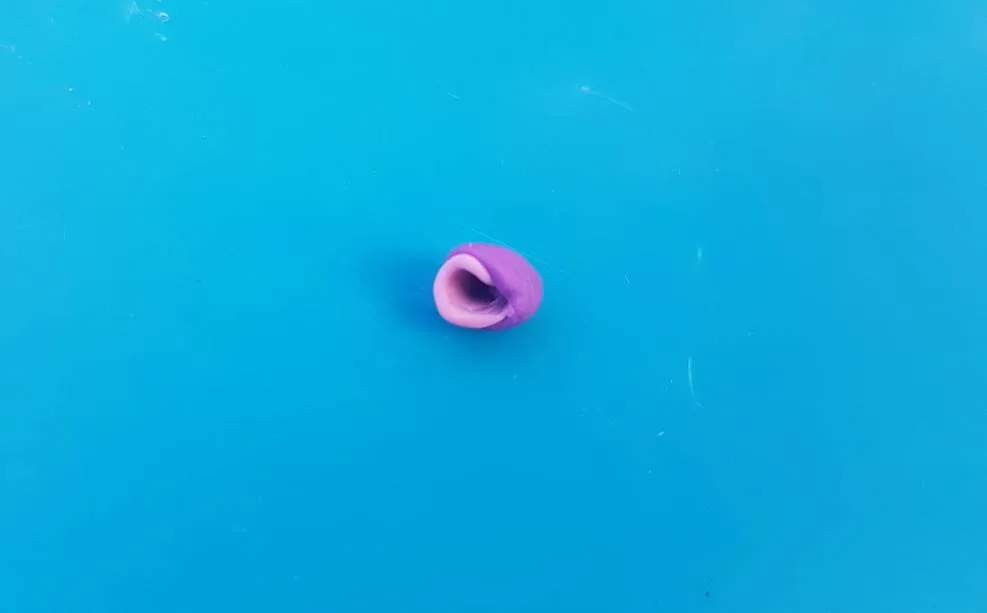
2. Create the rose petals
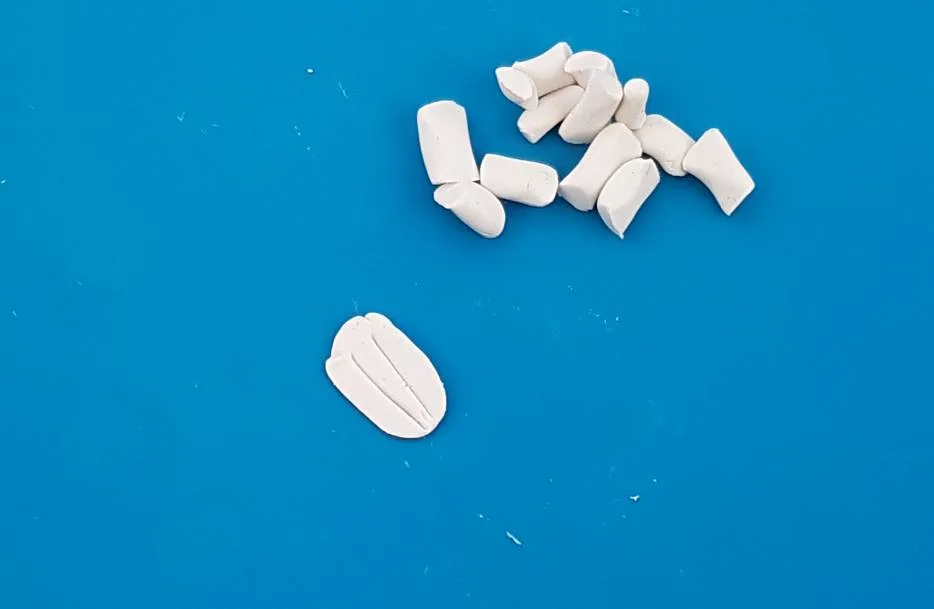
- Roll the chunks of clay until they form a group of little balls and place them to one side.
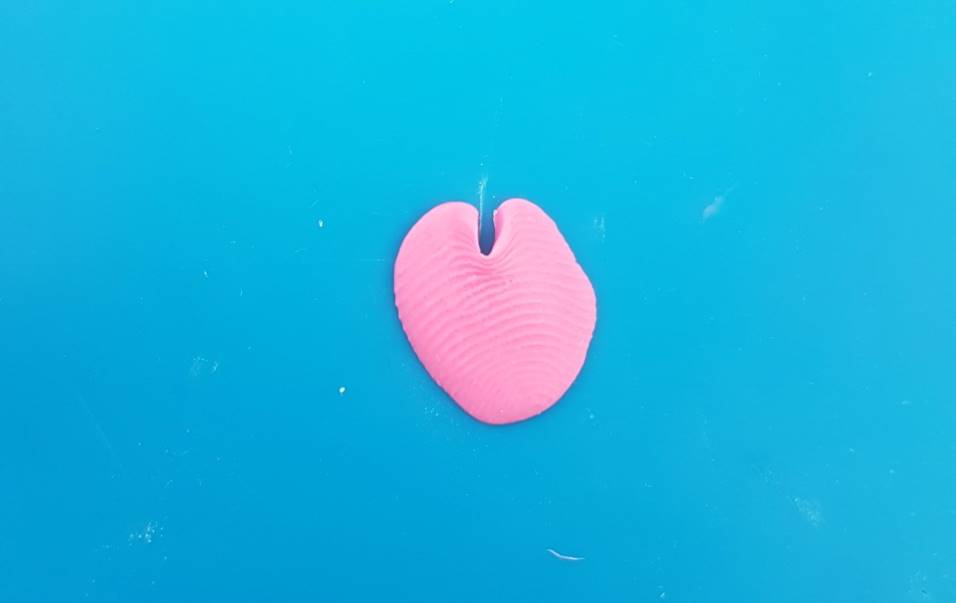
- Take one of the balls and roll it flat with an acrylic rolling pin, to form a petal.
- Make sure you take a pointed tool, such as a needle or a clay tool, and press it into the top of the petal to form a little textured indent, that mimics the appearance of a real petal, as pictured below.
Don’t worry if you get fingerprints on one side of your clay, it will be folding into the centre of the flower and shouldn’t be too noticeable.
However if you would like your design to be completely fingerprint free, here’s a top tip:
Top tip: wipe your polymer clay designs over with rubbing alcohol to remove the appearance of fingerprints in the clay.
Once your petal is complete, move on to the other little balls of clay and press them into petal shapes too.
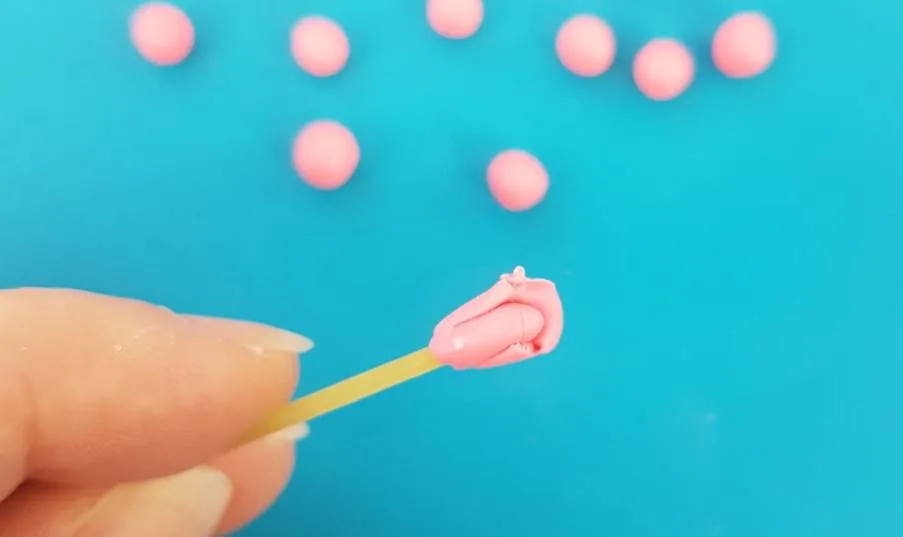
3. Create the first layer of petals
Take a pointed clay tool or something similar (I used a piece of dried spaghetti), and wrap one of the petals around it to form the centre of the rose, as pictured below. Then press another petal into some polymer clay glue and attach it to the centre piece.
Go around the rose following this technique until your have your first layer of petals done.


Next continue to add petals and press them into the design – don’t skip on the glue.
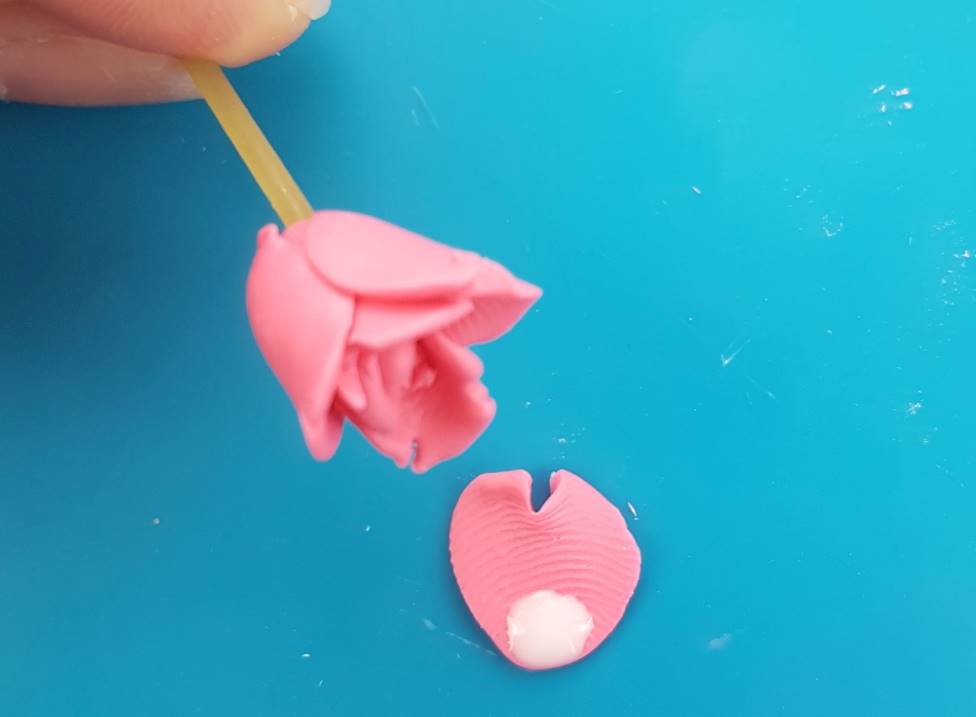
4. Form a second layer of petals
Add petals until your have formed a second, outer layer.
Once your second layer of petals is complete, the rose should look something like this:


Now your rose is complete make sure to add a hole in one of the petals for your jump ring and earring hook to attach to.
It’s easy to add a hole, either you can do it before baking with a simple pointed tool, or you can drill one through after the polymer clay has baked. I prefer adding one beforehand.
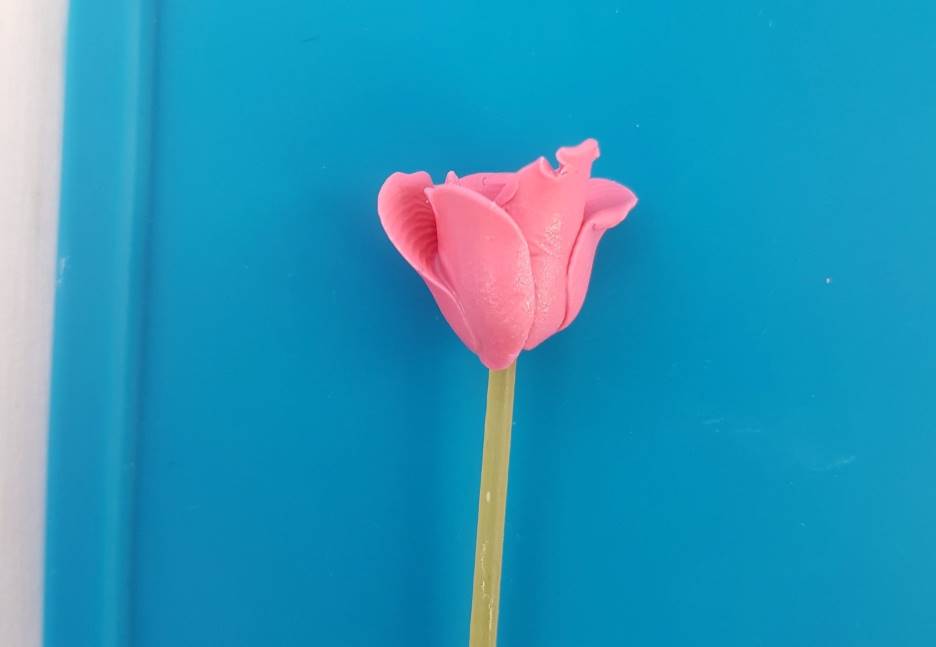
5. Bake the rose earrings and add the jewellery
Bake your roses according to the packaging instructions of your chosen brand of clay. I use FIMO, the baking instructions are as follows: maximum of 30 minutes at 110°C (230°F).
Once your clay has been allowed to properly cool, after 30 mins to a few hours or so, you can add your jump rings and jewellery hooks using a pair of jewellery pliers to open the ring and twist the hooks if needed.
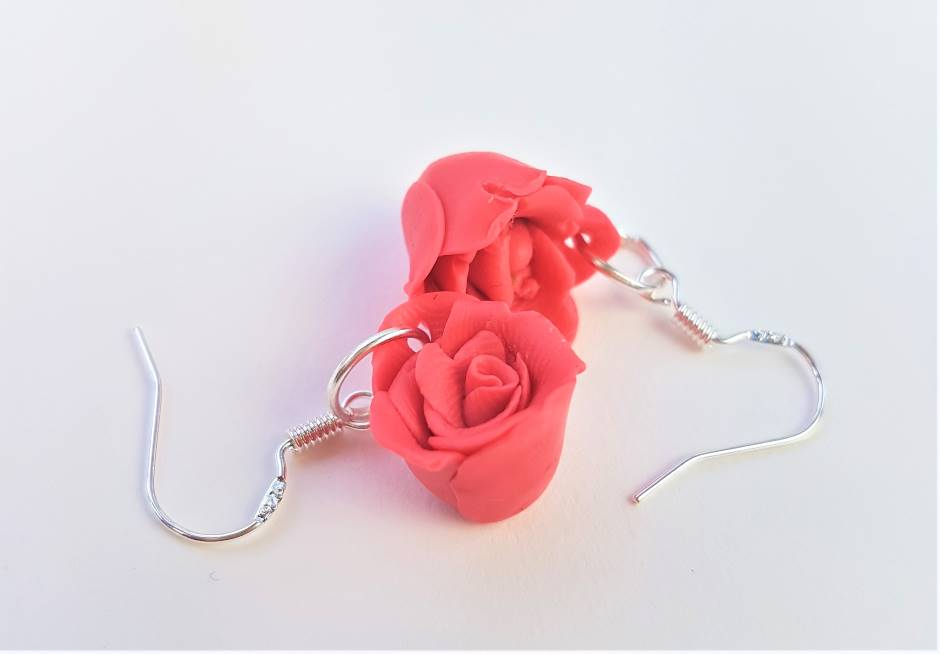
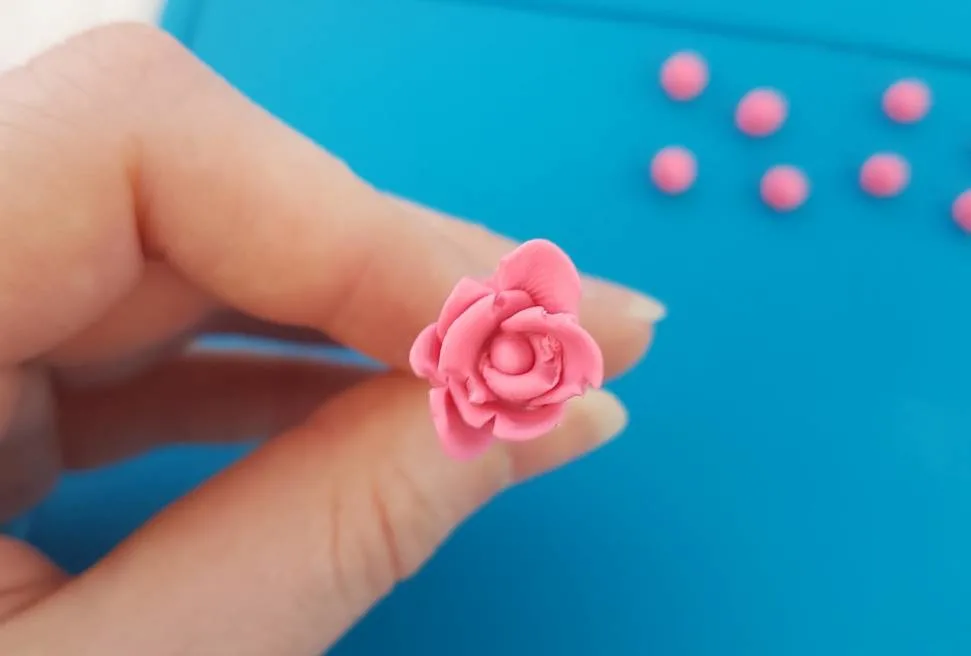
Now your rose flower polymer clay earrings are complete. Enjoy!
Here’s how they should look:


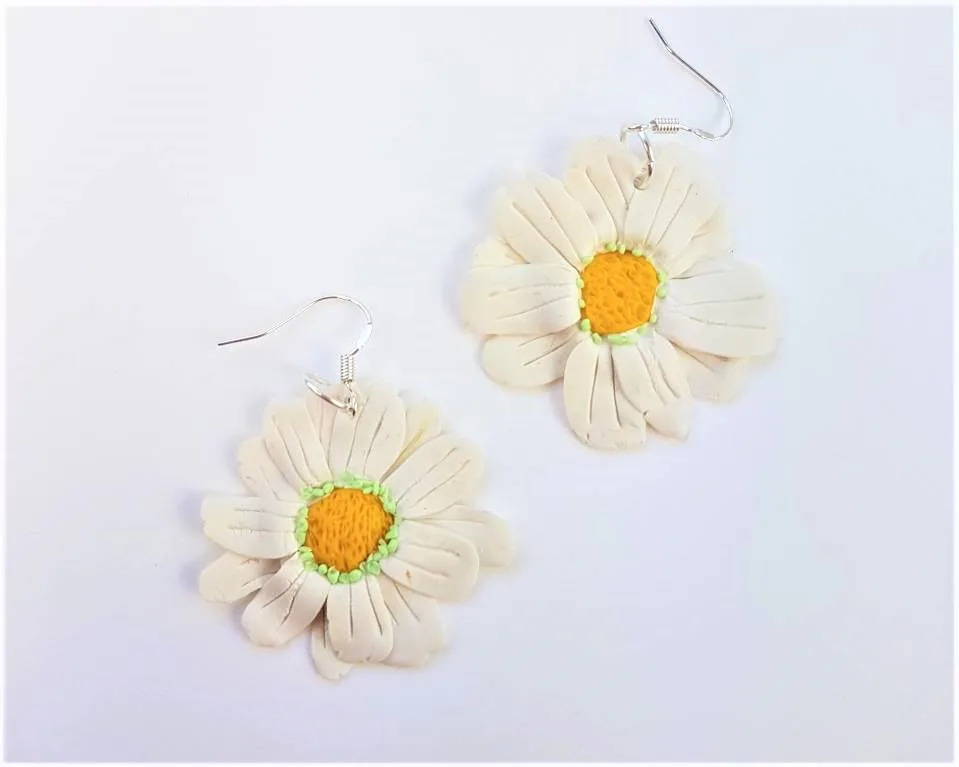
2. How to Make Polymer Clay Daisy Earrings
These daisy earrings are stunning, playful and cute, all wrapped up in a cluster of white petals. Another favourite flower for many, the daisies have a pretty feel and are sure to please everyone who wears them.
Here are the steps to make them…

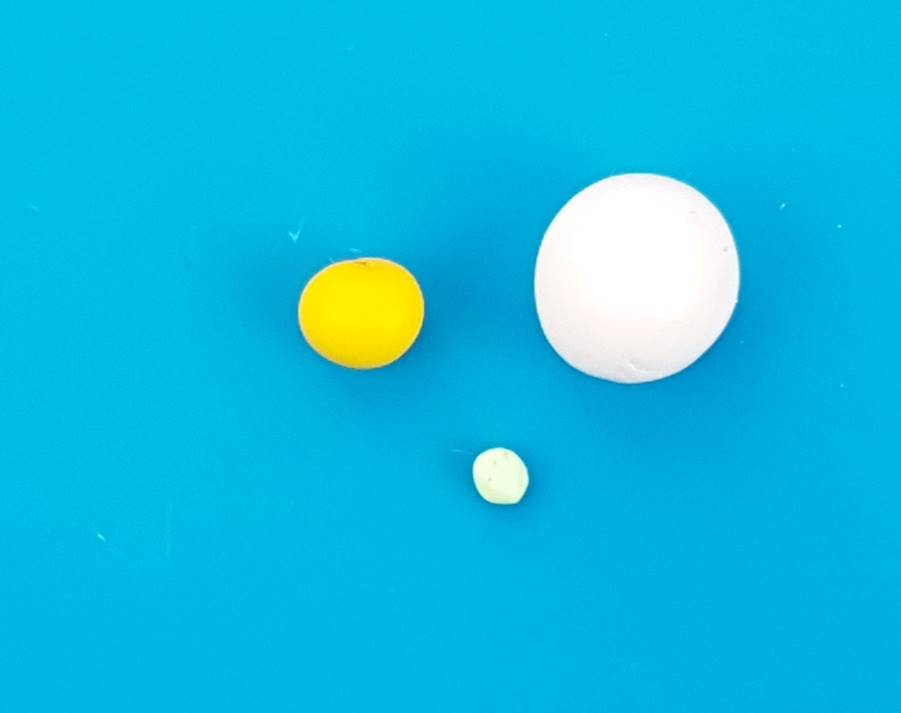
1. Condition your clay and divide it into chunks
Condition three balls of clay; one in white, one in yellow and one in a light green, as pictured below: Make the white ball much larger than the others, as this will form the petals.
You want to aim for the size ratio pictured below, so your centre piece isn’t too large or small compared to the amount of petals you will create. The green will be used to add small details around the centre of the daisy later.
Roll out your ball of white into a long stick or sausage, and start cutting it up to divide the clay for your petals – aim for around 17 to 20 petal pieces for each earring.


2. Create the daisy petals
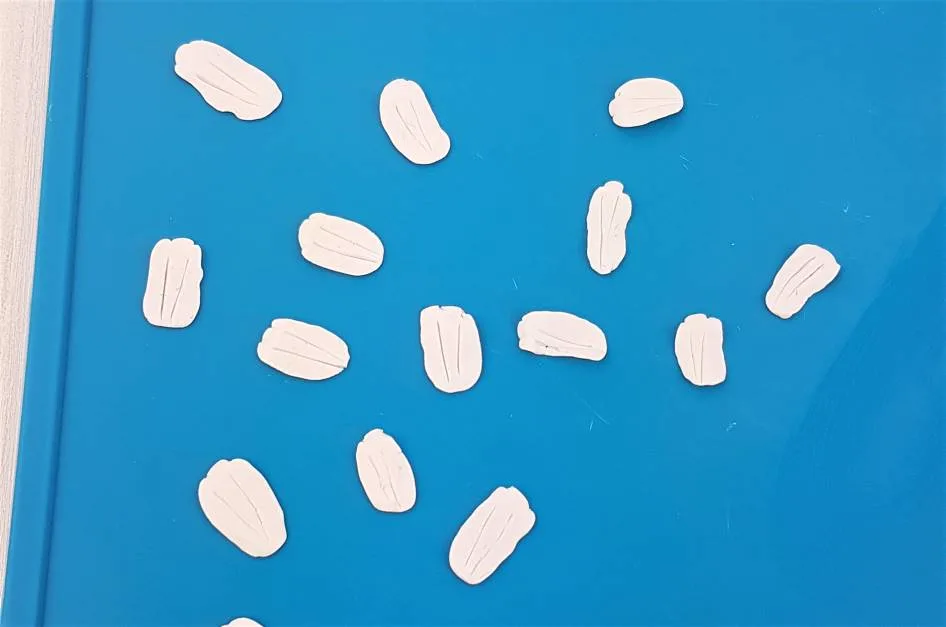
- Now your petal pieces are divided press them with your finger or with an acrylic rolling pin to form a long petal shape.
- Flip them over to the smooth underside, as this will be the right side up.
- Press a couple of indents into the top of the petal to add some realistic looking texture – if you look at a real daisy you’ll see the petals aren’t perfectly rounded.
- Use a pointed tool to press two lines through the petal, to add the detail, as pictured below…


Repeat the process for all of your divided chunks of clay until you have your petals ready.
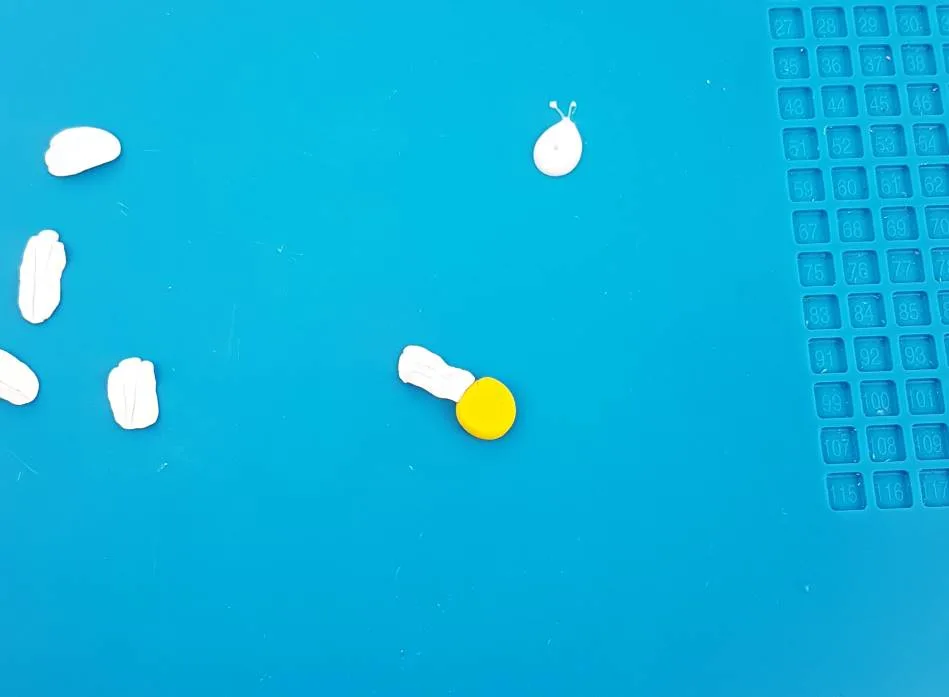
3. Form the centre of the daisy and attach the petals
Prepare your yellow centre piece for the daisy by pressing the yellow ball of clay you conditioned earlier with an acrylic rolling pin, until you have a disc like shape.
Then press the edges until the disc is rounded and there is a surface for the petals to stick to.
Grab your first petal and bend the end slightly, so it will adhere to the centre piece. Dip it into a little polymer clay clue and press it against your yellow disk until secure, as pictured below.
Continue on with this process until you have formed your first layer of daisy petals. Once this is complete, start your second layer until the daisy is formed as below.


Take a polymer clay tool and press it around the centre of the daisy to make sure all of your petals are secured, as above. Form a little trench around the centre of your daisy, as this is where we will be adding the little green details.
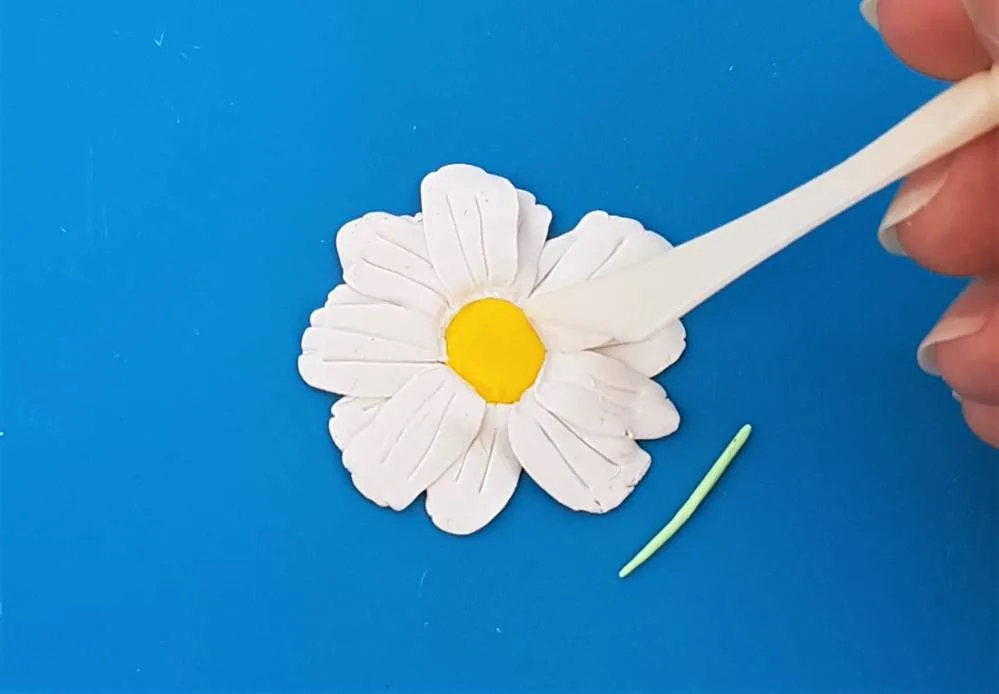
4. Add the light green details
It’s time to add the details.
Take your ball of conditioned light green clay and roll it out into a little string. Then slice it up into really tiny pieces, and roll them into balls.
Like this:
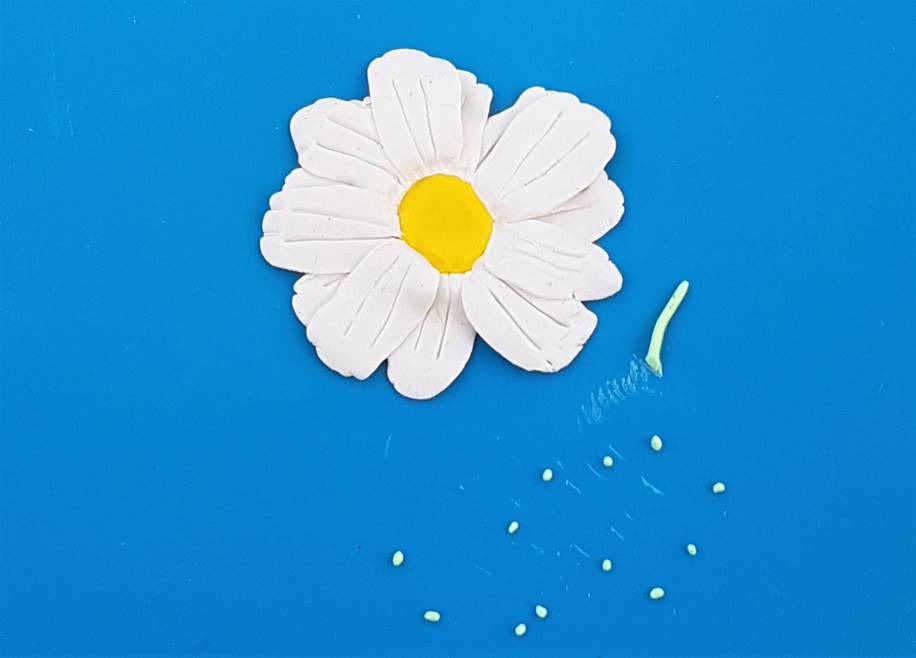

Use a pointed tool to pick up the little balls of green clay and start placing them in the trench around the centre of the daisy. These balls will add a nice bit of detail to the daisy and will add a touch of realism to the earrings.
Once you’ve placed these around the centre, it’s time to add the next bit of detail to add even more realism to the design.
Take your pointed tool again and press it into the yellow clay, to form indents in the centre, as pictured below:
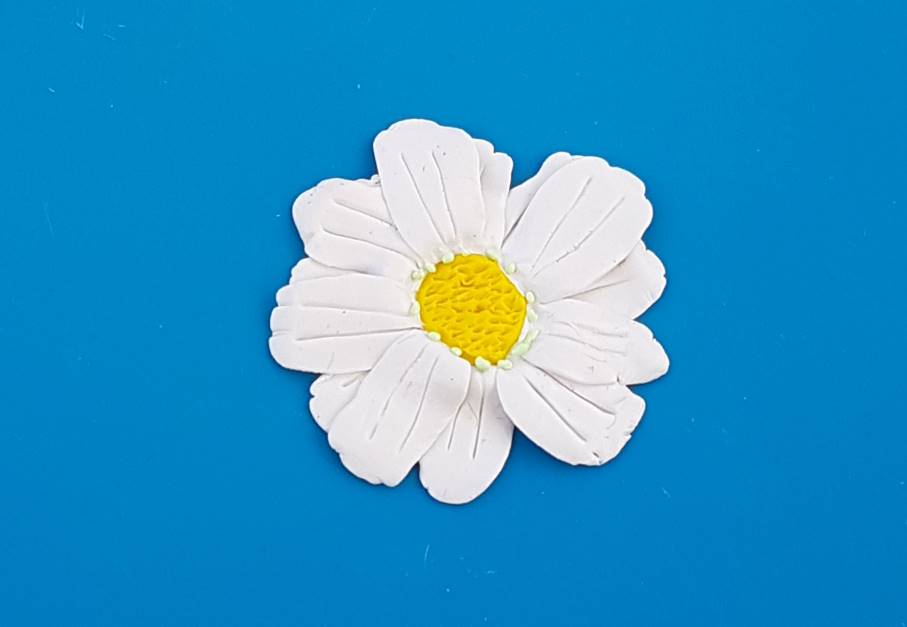
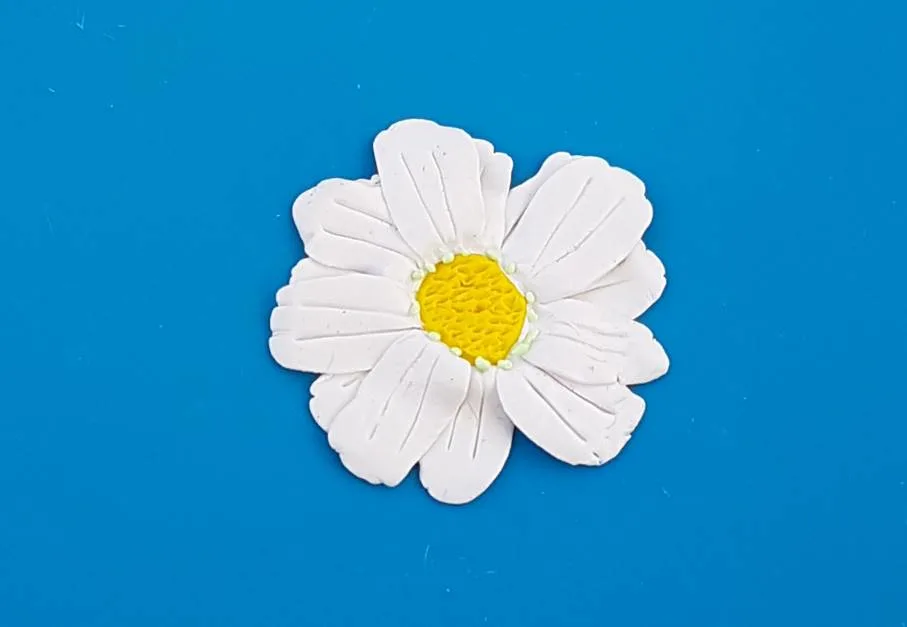
The daisies are looking great, just a couple more steps and they are done.
5. Bake the earrings and then add the jewellery
Add a hole into one of the daisy petals for your jump ring and earring hook to attach to.
Then, pop the earrings in the oven and bake them according to your chosen clay brand’s packaging instructions.
Once they’re baked and sufficiently cooled it’s time to add your jump rings and earring hooks, and your lovely daisy flower polymer clay earrings earrings are done.

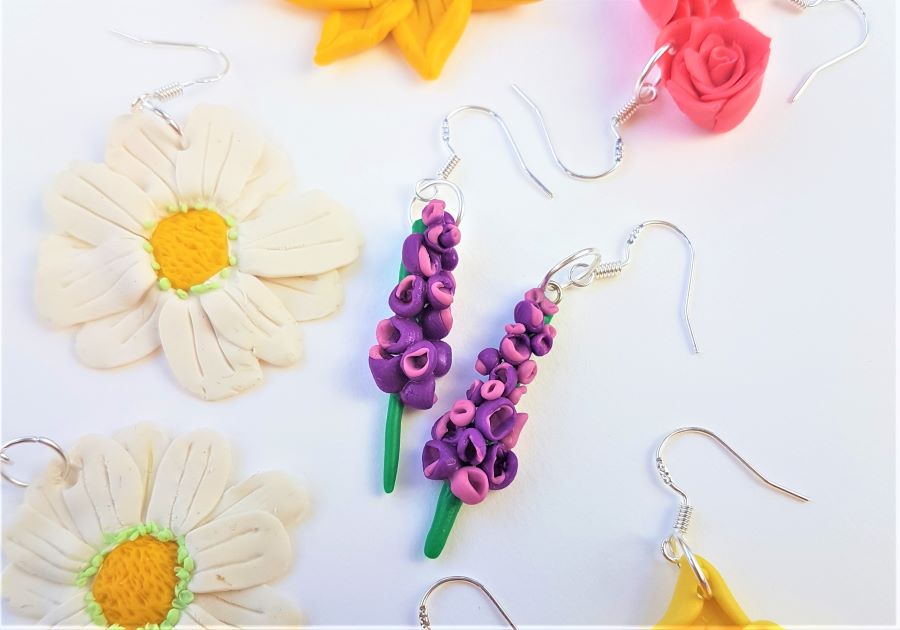
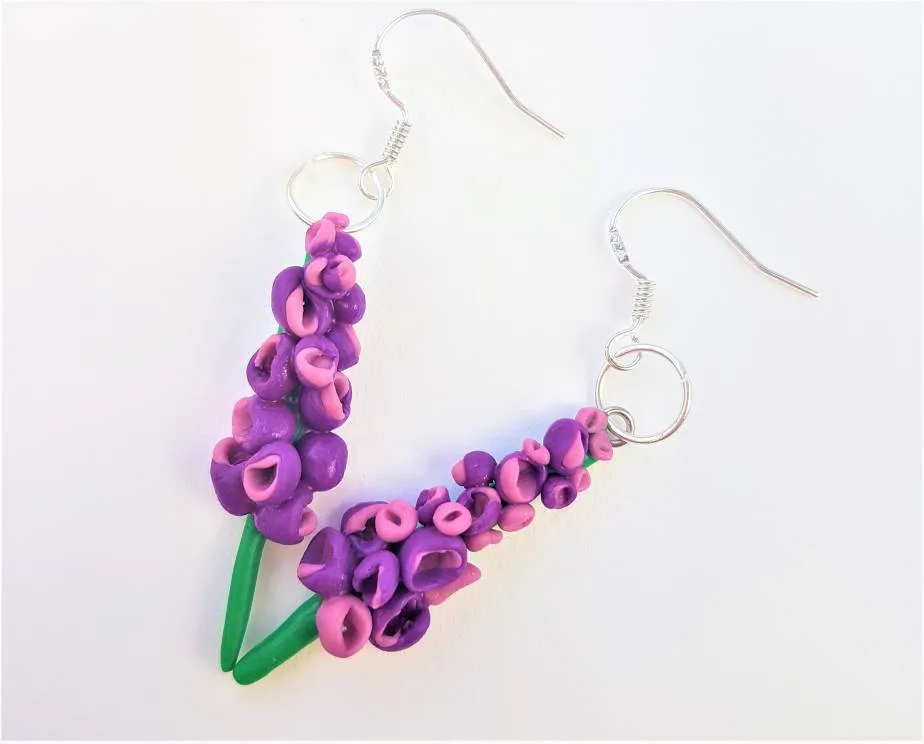
3. How to Make Polymer Clay Hyacinth Earrings
Hyacinths are beautiful plants that flower in a multitude of colours, from pink to blue, there’s a colour for everyone’s floral preferences. I’m going to show you how I made these lovely purple hyacinth earrings, in a few simple steps.

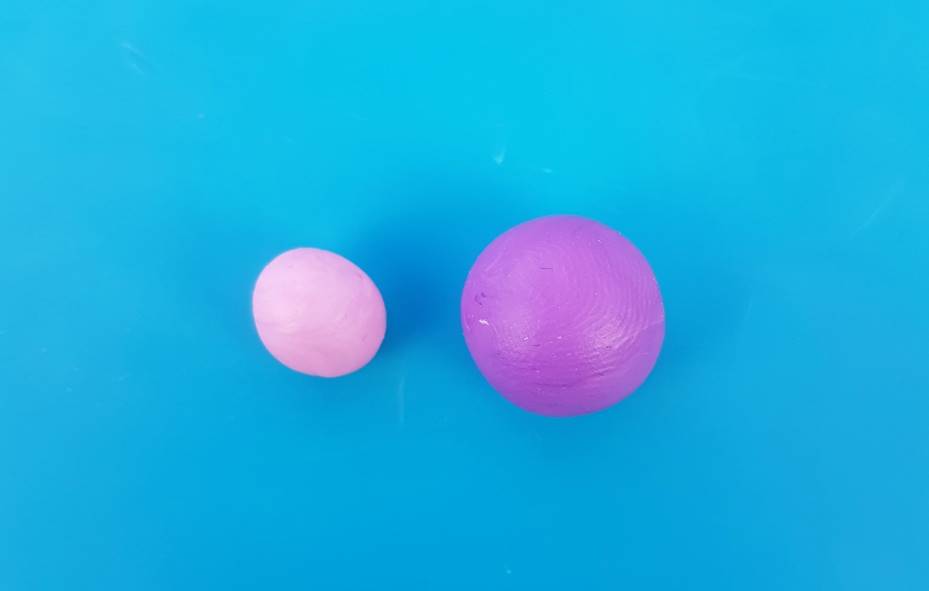
1. Condition your clay
First you need to condition your balls of clay after deciding which colour you would like your hyacinth earrings to be. I chose purple, so I created a darker purple blend of clay and a lighter purple blend to add accented details to the design.
Here are the colours I chose:

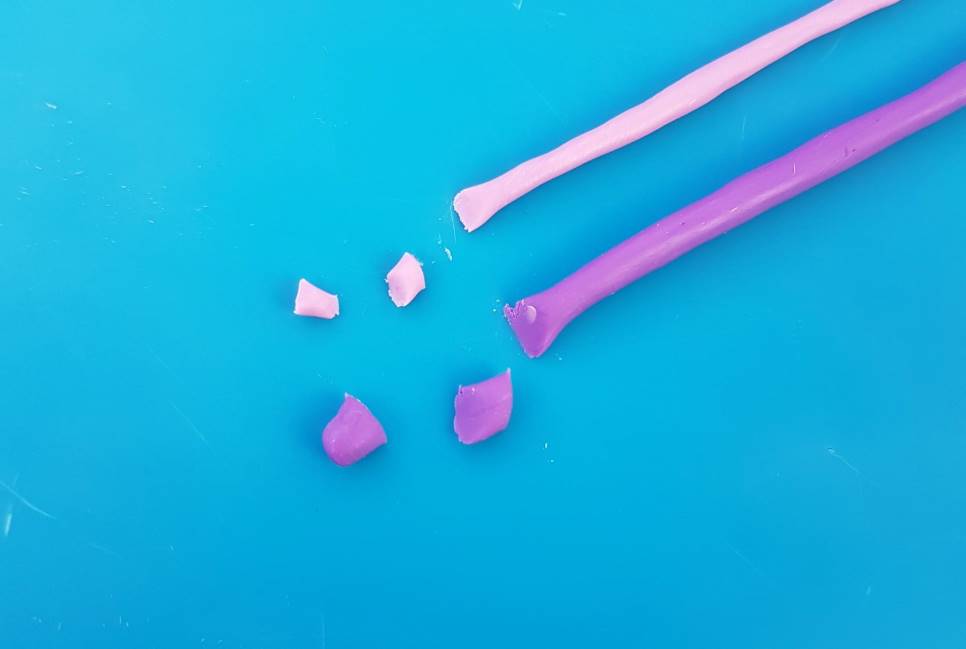
2. Divide the clay and create the flowers
- Take your conditioned balls of clay and roll them out into strings, and begin dividing the clay for the hyacinth flowers.
- Once your clay is separated, roll the chunks into balls, and stick a smaller amount of the lighter colour to the darker colour, as pictured below.
- Then take a pointed tool (I used a piece of dried spaghetti) and press it into the combined ball, until it forms a flower-like ‘pod’ shape.

3. Create the stem and begin adding the flowers
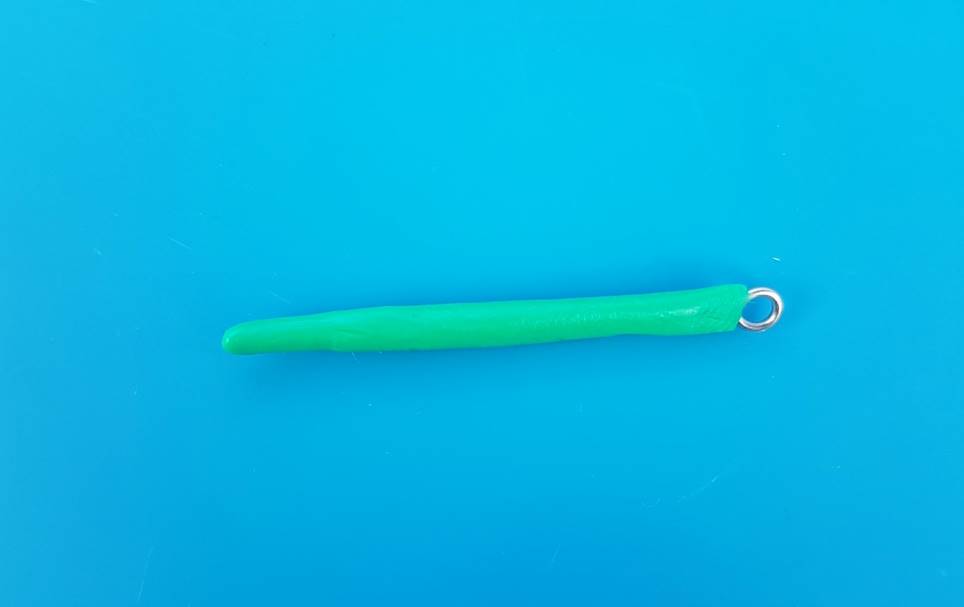
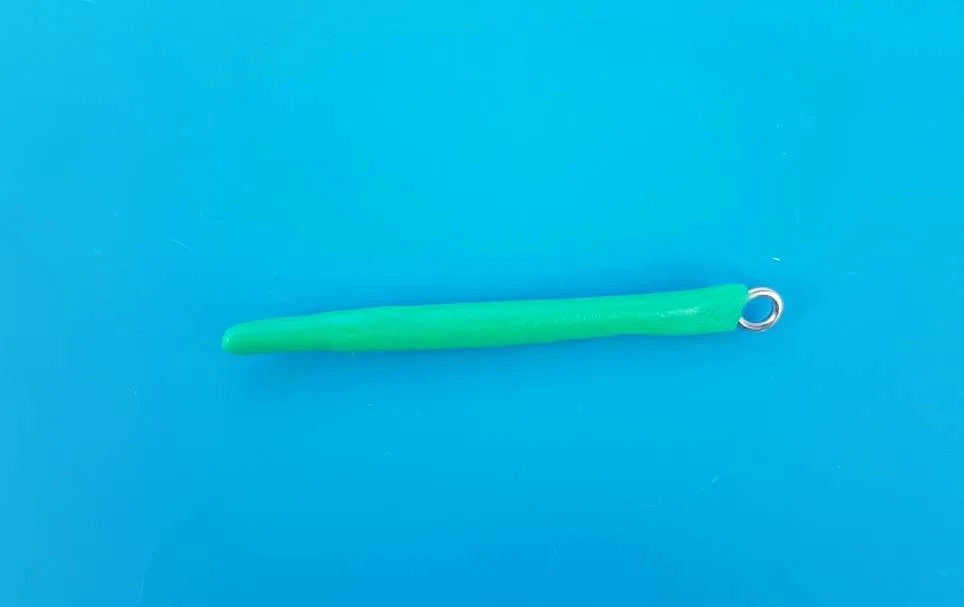
Take a long earring anchor and wrap it in a green polymer clay to form a stable hyacinth stem. You can do this without an earring anchor, but the stem might be a little bendy until you bake it.
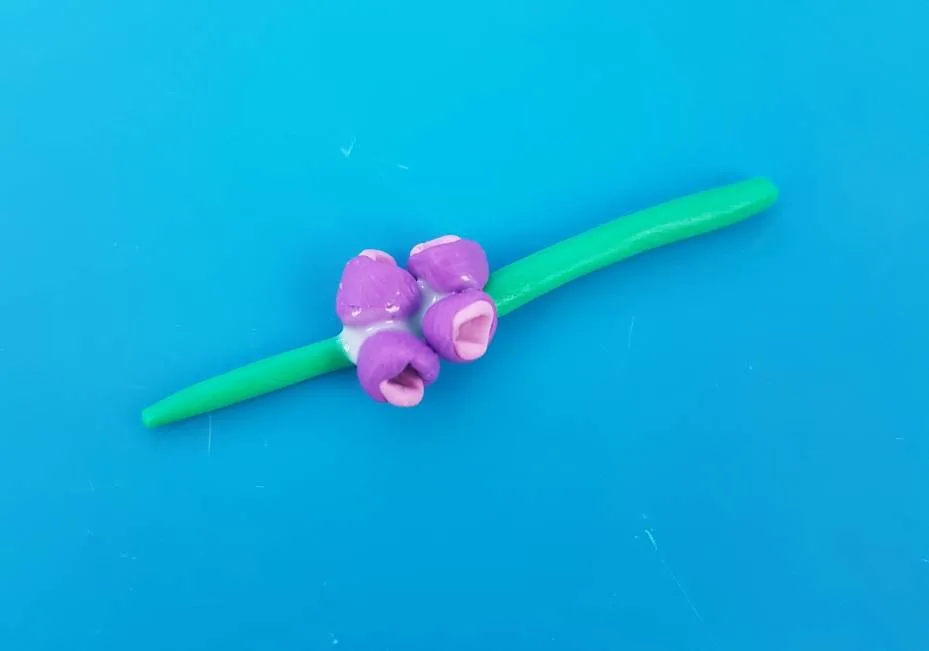
Then add a drop of polymer clay glue to your crafting mat and dip your hyacinth flower into it, before attaching it to the stem we just created.
Repeat this step with multiple flowers, until the hyacinth starts to take shape.


4. Bake the hyacinth earrings and then add the jewellery
Complete your hyacinth and pop it in the oven to bake, according to your chosen brand of clay’s packaging instructions.
To avoid flattening the little flowers whilst baking, here’s a top tip…
Top tip: bake your polymer clay earrings in a mound of cornflour to prevent flat sides from baking on an oven tray.
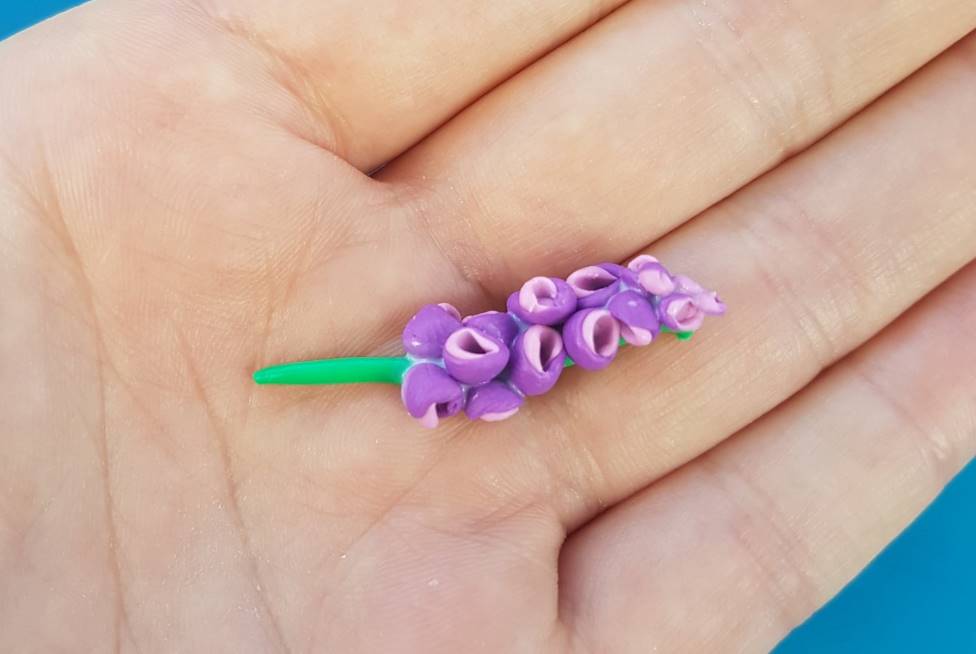
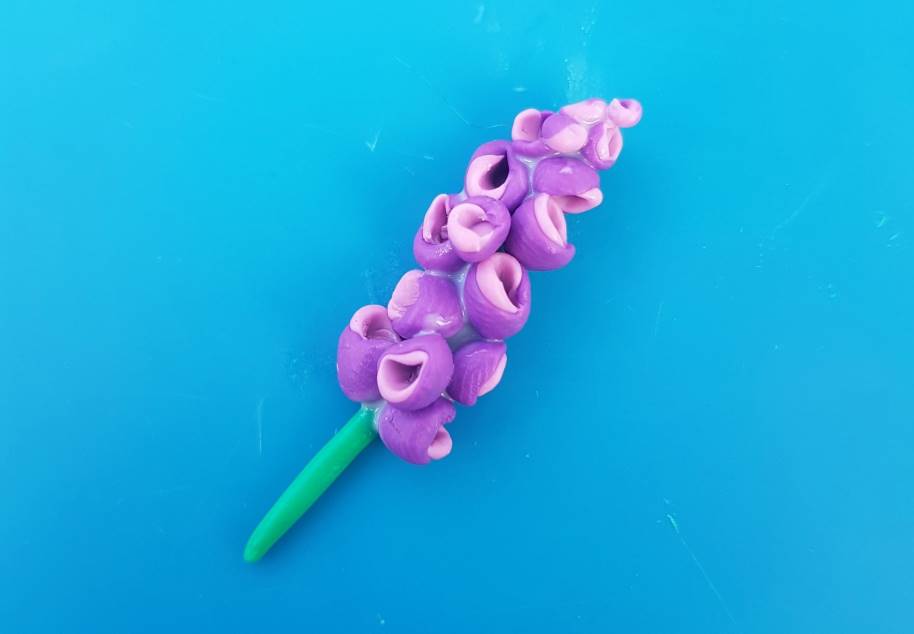
Once your hyacinth is baked add your jump rings and earring hooks and your hyacinth flower polymer clay earrings are done.
Here’s how they should look:
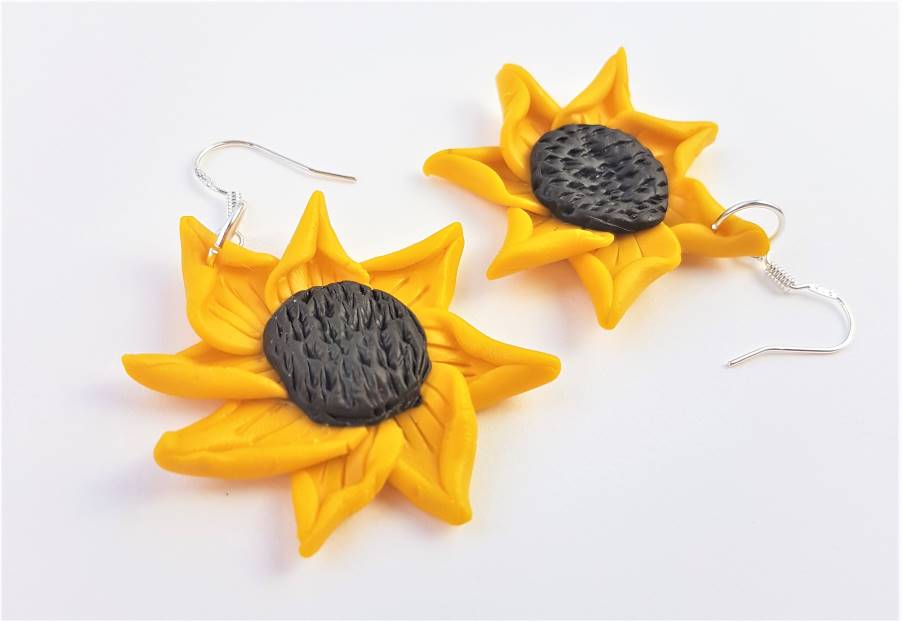
4. How to Make Polymer Clay Sunflower Earrings
Polymer clay sunflowers are a really popular earring choice, selling out on Etsy and depop alike.
Learn to make your own with this quick and easy tutorial.

These earrings are beginner friendly, and require very few tools and colours of clay to create.
Let’s get into the step by steps…
1. Condition your clay
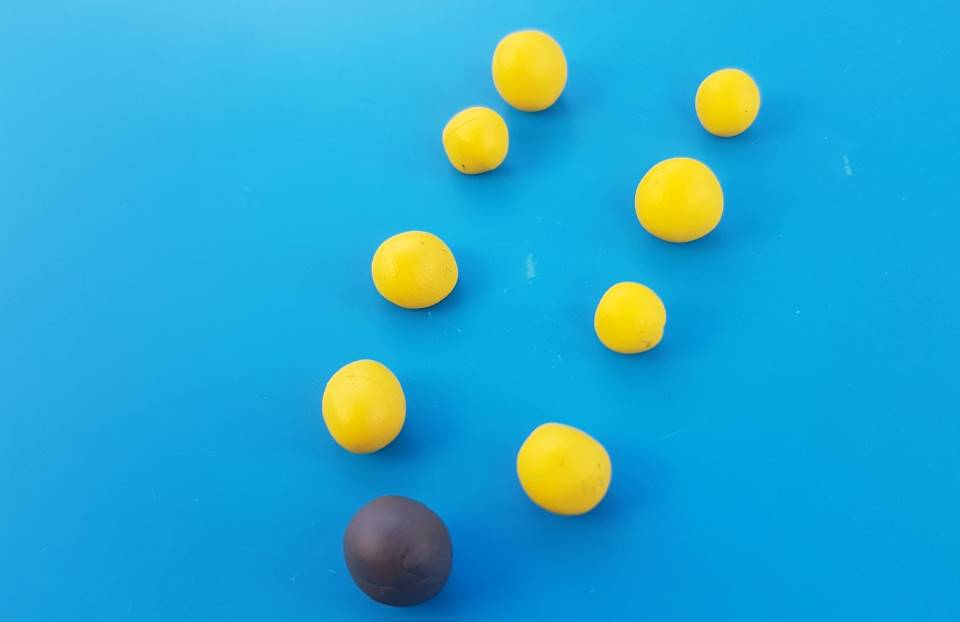
Condition a large ball of yellow clay for your sunflower petals, and a medium ball of dark brown clay for the centre of your sunflower.
Once you’ve sufficiently conditioned the clay, separate the yellow ball into multiple petals – I chose 7 for each flower, as pictured below:

2. Create the petals and add details
- Take one of the yellow clay petal balls and press it with an acrylic rolling pin until flattened.
- Pinch the top part of the circle until it forms a petal shape, as pictured below.
- Then take a pointed tool and add a few lines of detail into the clay.


Once your first petal is created, repeat this process for all of the separated balls of clay.
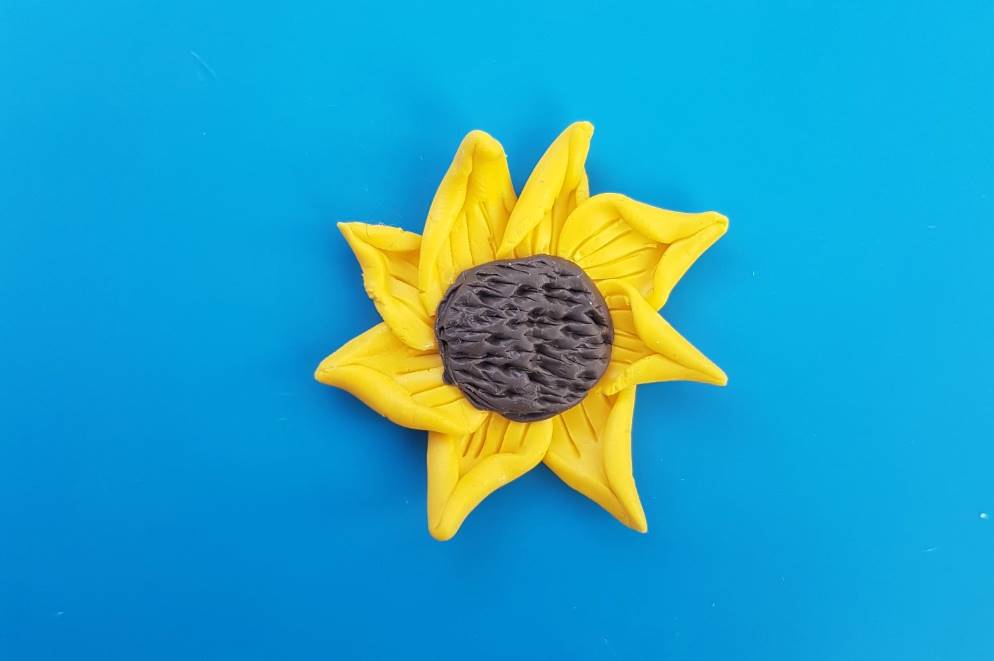
3. Glue to petals together to form the sunflower shape
Now your petals are ready take some polymer clay glue and start to press the petals together to form the sunflower shape, as pictured below.


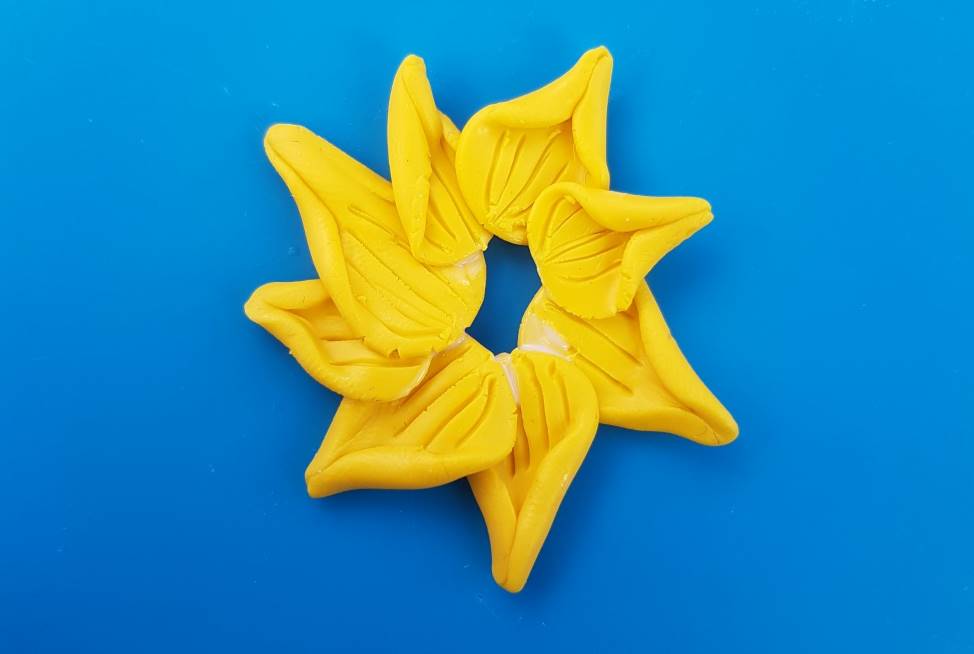
Finish your sunflower with a full ring of petals. You could add a second layer of petals at this point if you like, but I decided to keep my design simple and quick.
Your sunflower should take shape, as below:

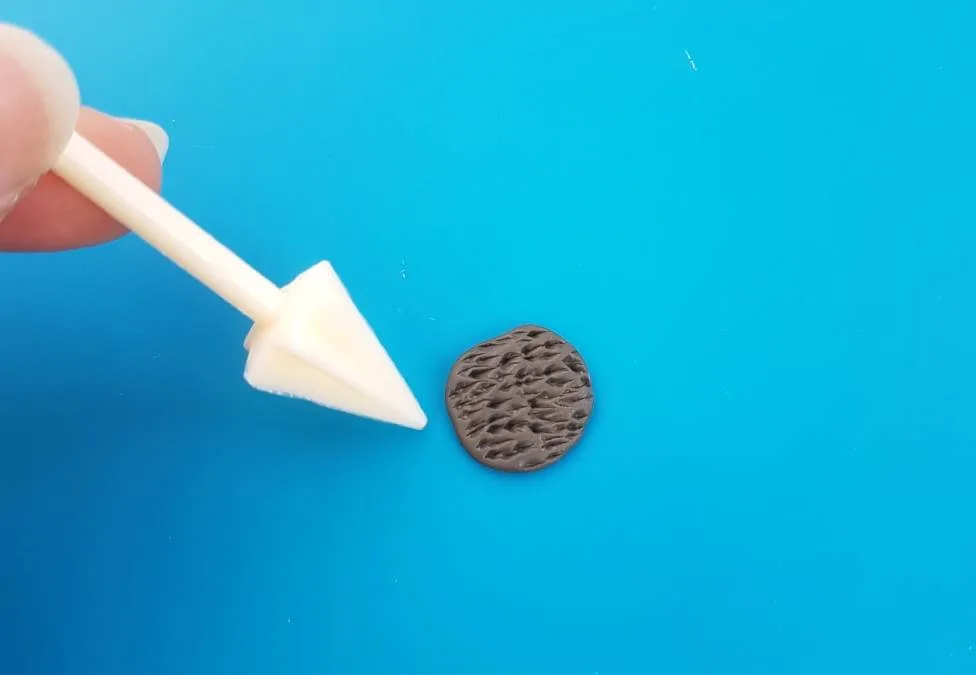
4. Create the brown centre of the sunflower
- Press out your conditioned ball of dark brown polymer clay with an acrylic rolling pin until it forms a nice circle to sit as the centre piece of your sunflower.
- Then, take a pointed tool and begin pressing it into your circle of clay, to create a dotted effect. This will add some realism to your sunflower, and create a nice detail for the earrings.
- Once you’ve sufficiently stippled your centre piece, add some polymer clay glue to the underside of it and press it against your petals to form your sunflower.
- Take a pointed tool and add a hole into one of your sunflower petals to create a hole for your jump ring to attach to.


5. Bake the sunflower earrings and then add the jewellery
Bake your sunflower earrings according to your chosen brand of clay’s packaging instructions.
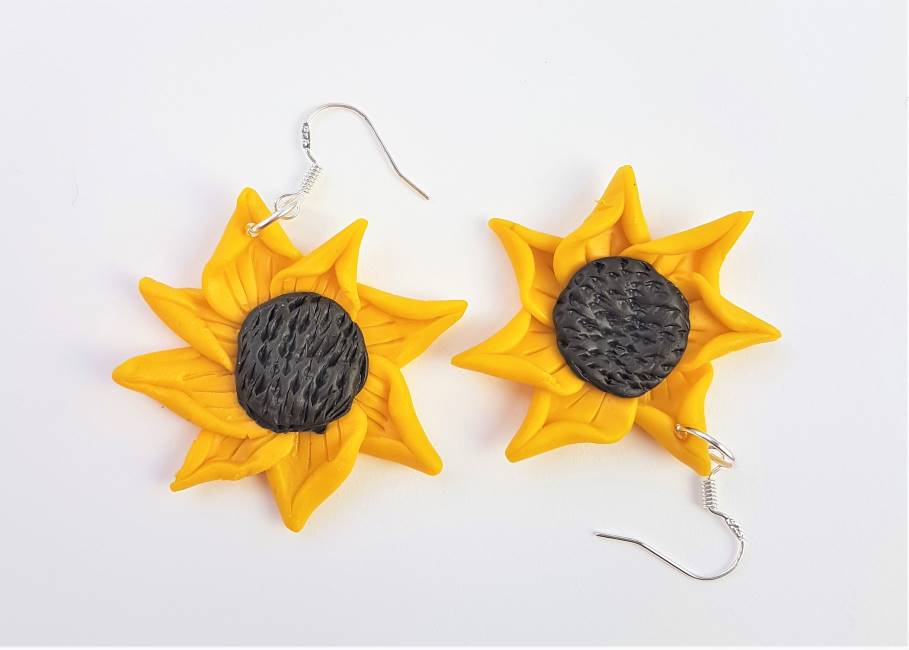
Once they have cooled, add your jump rings and hooks, and your sunflower earrings are done.
Here’s how they should look:
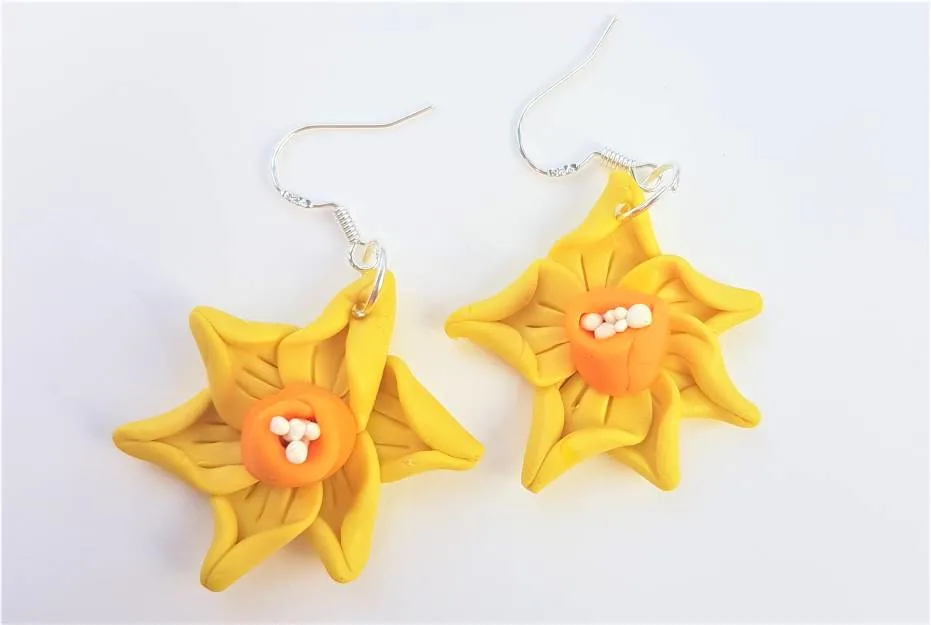
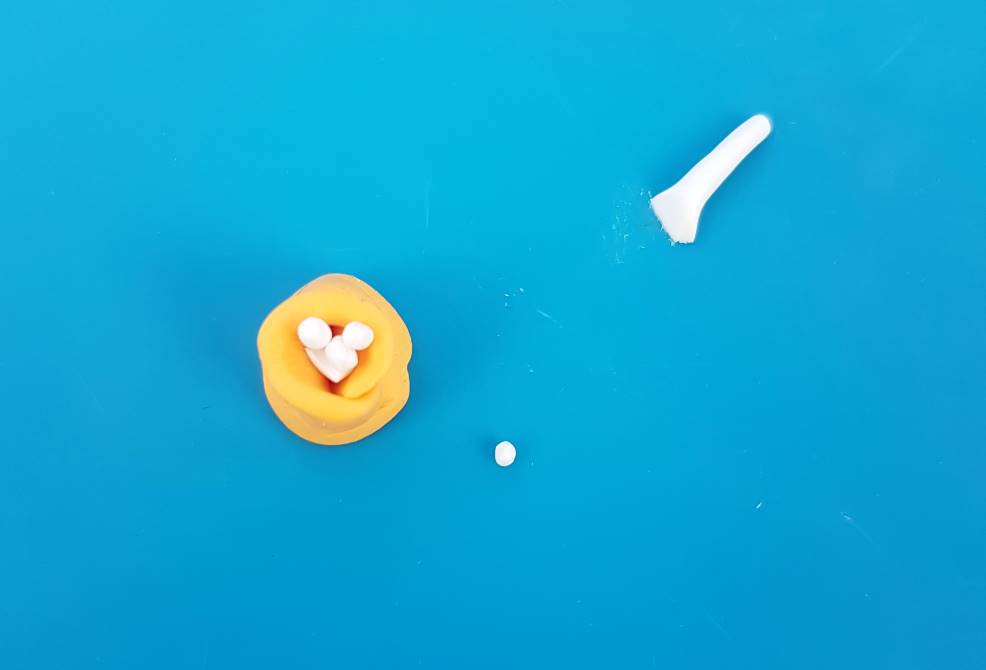
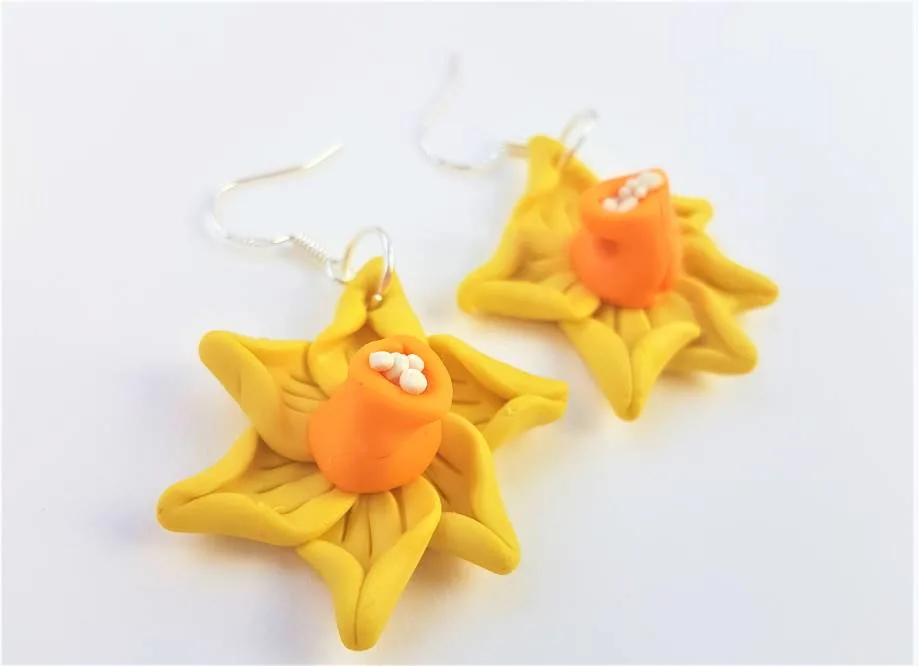
5. How to Make Polymer Clay Daffodil Earrings
Daffodils are a spring staple, and often bought for Easter decorations. Add these bright flowers to your earlobes with this simple tutorial.

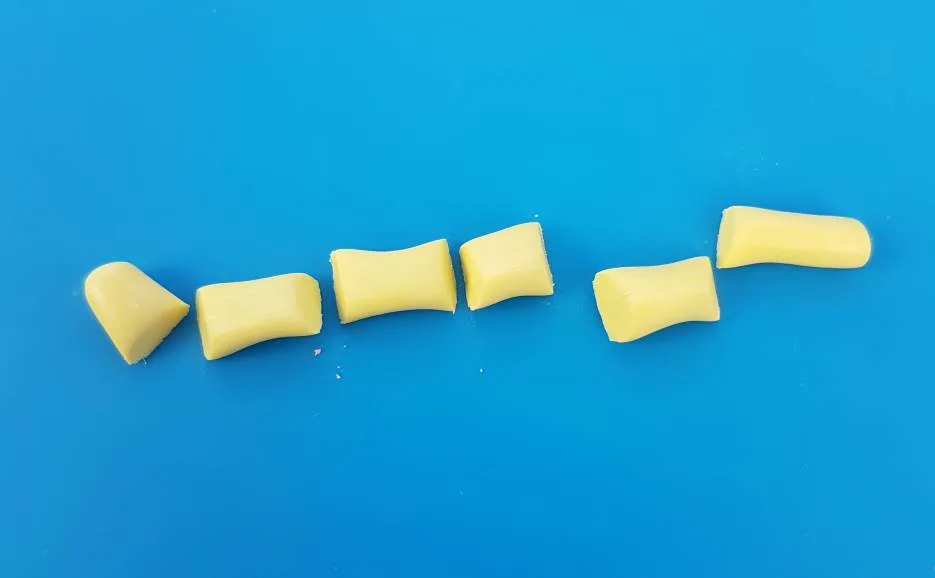
1. Condition your clay and divide it into chunks
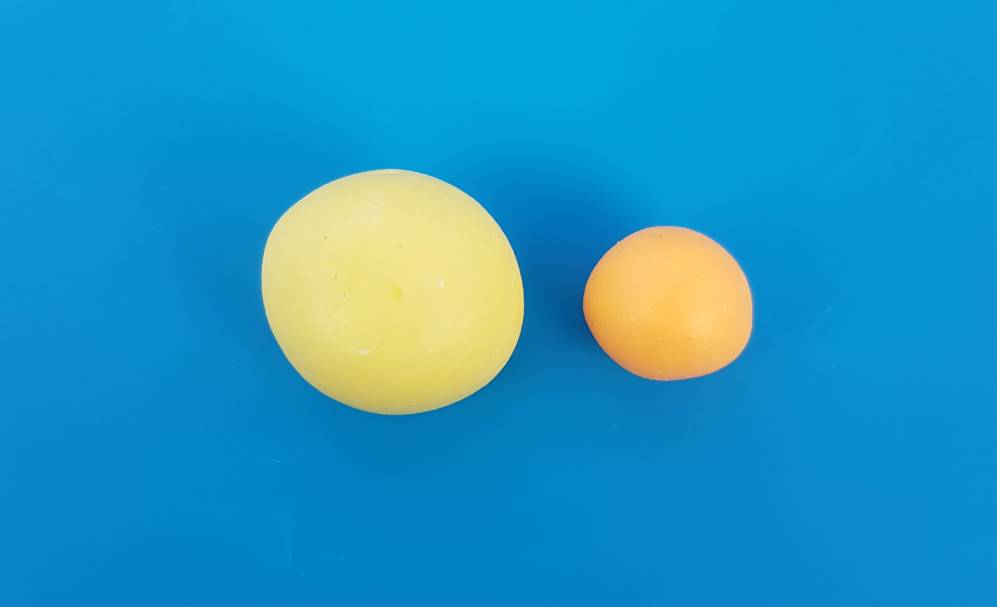
Roll out a conditioned ball of yellow clay, orange clay and white clay.
The yellow will form the petals, the orange will form the funnel in the centre of the daffodil and the white will add the little details in the funnel.

Once the balls are conditioned, start to separate your clay into chunks to form your petals, as below.

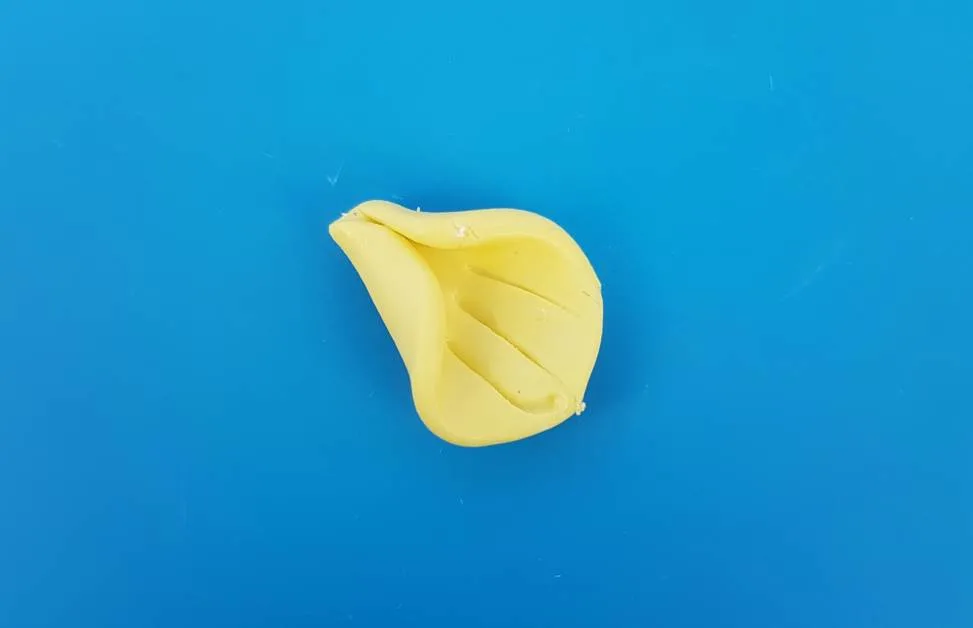
Press your petals flat with and acrylic rolling pin and then pinch the top of the circles to form as petal shape, as pictured below.
Add a few lines into the clay to form some details on the petals.

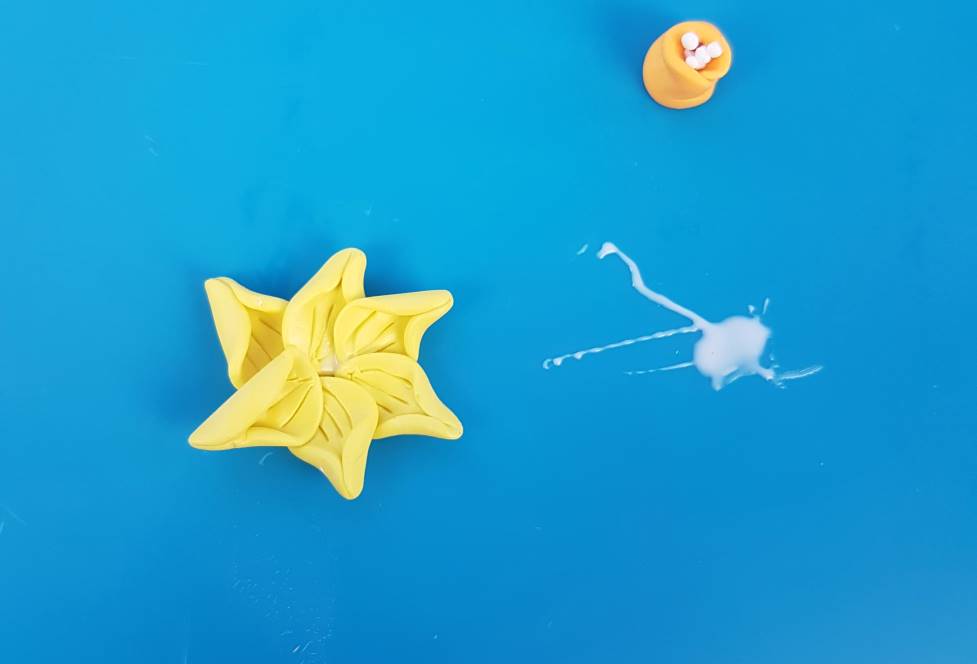
2. Create all of your petals and your centre ‘funnel’ piece
Repeat the process until you have all of your petals formed.
Then roll out your ball of orange clay into an oval shape.
- Roll your orange clay to create a funnel for the centre of the daffodil.
- Roll out your ball of white clay into a sausage, divide the clay and roll the pieces into balls.
- Add the balls into the centre funnel to create details.


3. Glue the petals together to form a daffodil shape, then add the funnel to the centre
Start to position your petals so they form a daffodil shape, and secure them with polymer clay glue.
Once you have all of your petals secure, they should look something like this:
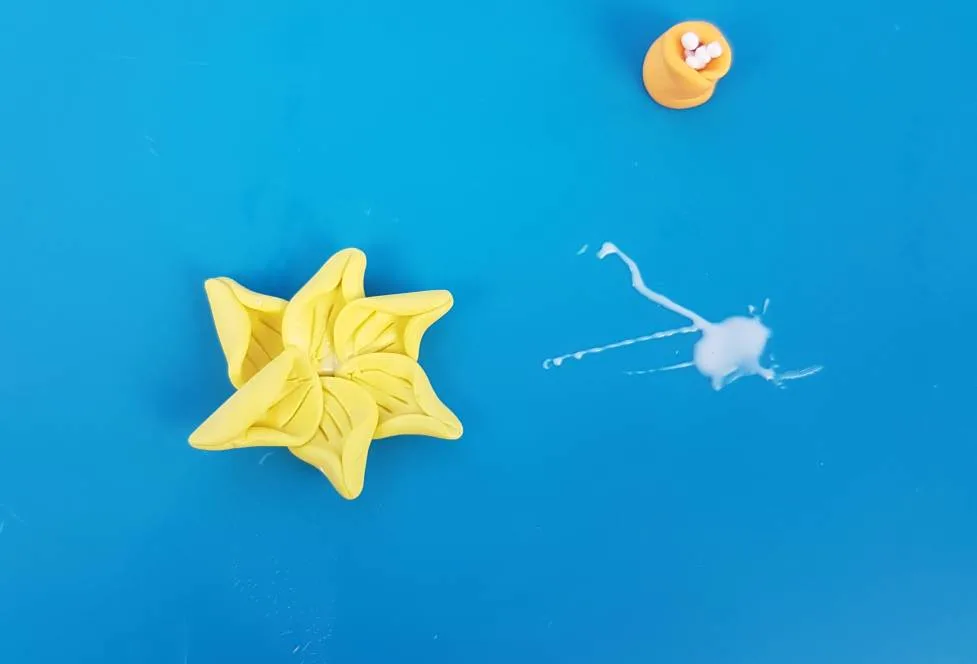
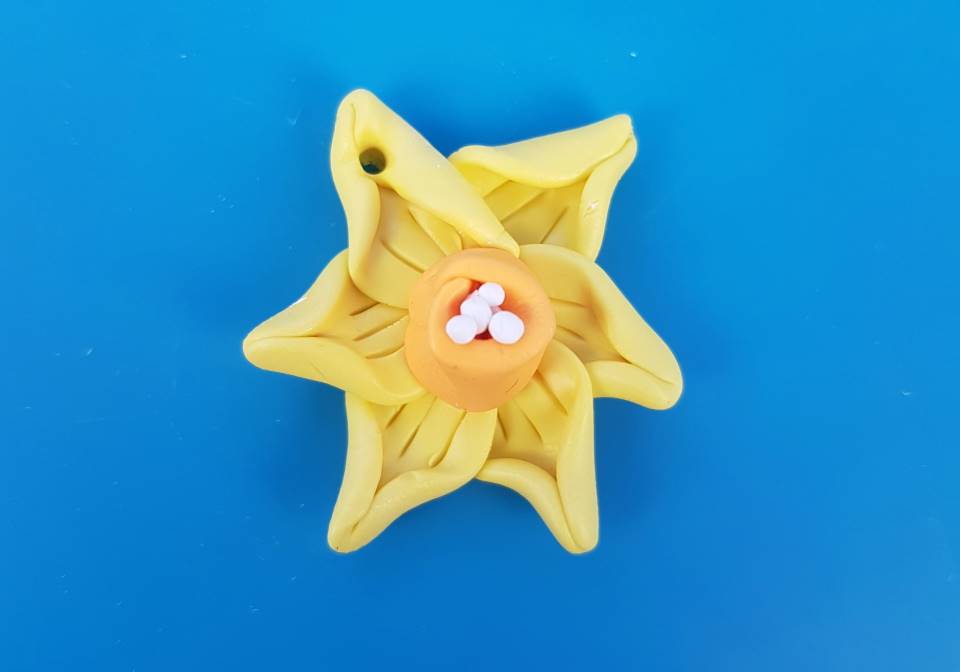
Then fasten your centre funnel to the middle of the petal circle. Once you’ve done this make a small hole with a pointed tool in one of the petals for your jump ring and earring hooks to attach to.
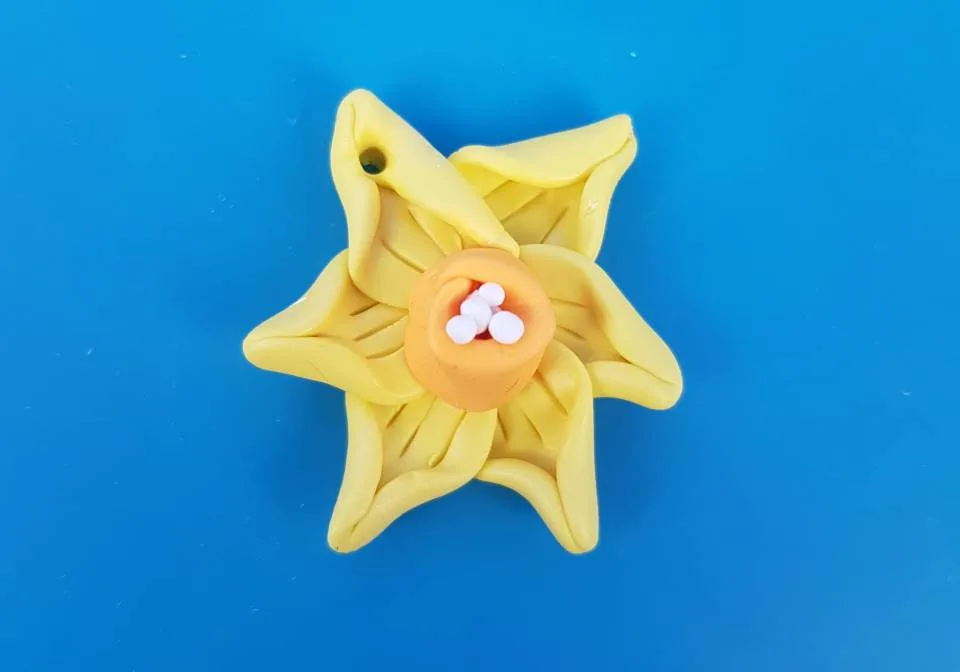
The daffodil should look as below:
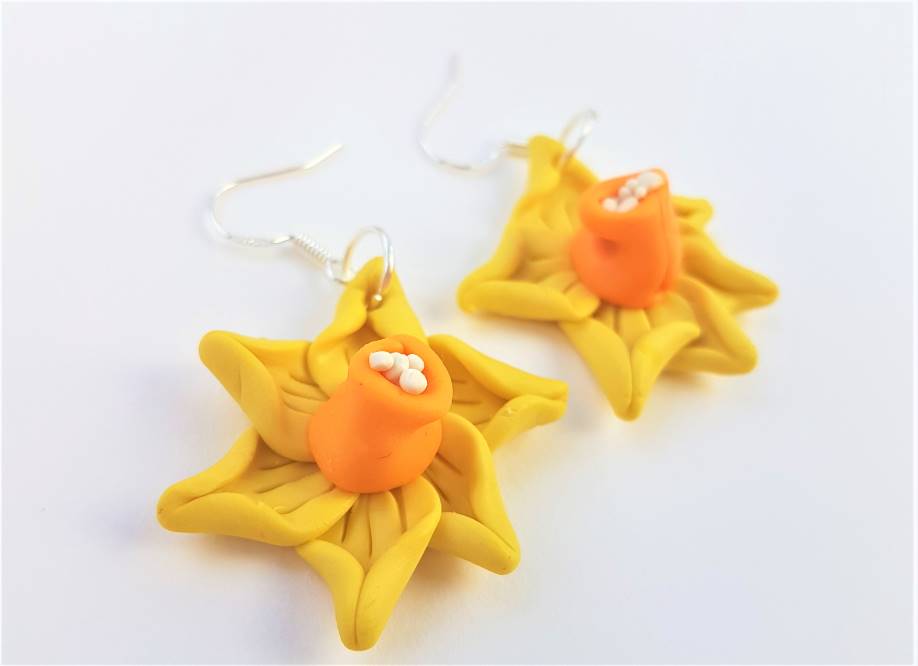
4. Bake the earrings and then add the jewellery
Bake your earrings according to your chosen brand of clay’s packaging instructions.
Allow them to cool and then add your jump rings and earring hooks.
Your daffodil flower polymer clay earrings are now done.
More Design Inspiration
If you’re looking for more flower polymer clay earrings designs inspiration, here’s a list of flowers, florals and plants to get your creative juices flowing.
Here are some ideas for flowers: bluebells, snowbells, freesia, lilies, roses, sunflowers, carnations, orchid, chrysanthemums, baby’s breath, daises, forget-me-nots, fox gloves, geranium, pansies, jasmine, hydrangea, amaryllis, anemone, gerbera
Here are some ideas for plants: ivy, ferns, four leaf clover, palm, monstera, maple tree, oak tree, willow tree, ash tree, bay tree, cactus, succulents
For even more inspo, check out:
Conclusion
I hope you enjoyed reading my ‘5 flower polymer clay earrings designs’ article and you’re feeling inspired to make some dangly floral creations of your own!
Polymer clay is such a versatile material, available in just about every colour you can think of. It’s great for beginners and there are endless designs to come up with.
For some FOOD earring design inspo, check out:
It’s my goal to make the world of polymer clay earrings as easy and accessible as possible for everyone who wants to get into crafting jewellery.
I also provide articles on: a How-to Guide to make polymer clay earrings for beginners, a Sales Guide for selling polymer clay earrings on Etsy, a comprehensive Cost Guide, and a bumper list of earring Design Ideas, so you’re never stumped by clay-makers block!
For more information on getting started with polymer clay earrings, check out:
How Much does it Cost to Make Polymer Clay Earrings?
Can You Paint Polymer Clay Earrings? A How-to Guide
How Long to Bake Polymer Clay Earrings – Quick Guide
How to Sell Polymer Clay Earrings on Etsy
How to Make Polymer Clay Earrings: the Basics
Design Ideas for Polymer Clay Earrings
Top Tips for Making Polymer Clay Earrings
Why Polymer Clay Breaks and How to Fix it
The Best Polymer Clay for Earrings and Other Jewellery

Lorna is a footwear geek and the founder of Wearably Weird. She created a YouTube channel in 2021 for fellow footwear fanatics, dedicated to detail-rich footwear reviews and info. She has a fashion media qualification (awarded in 2011).