
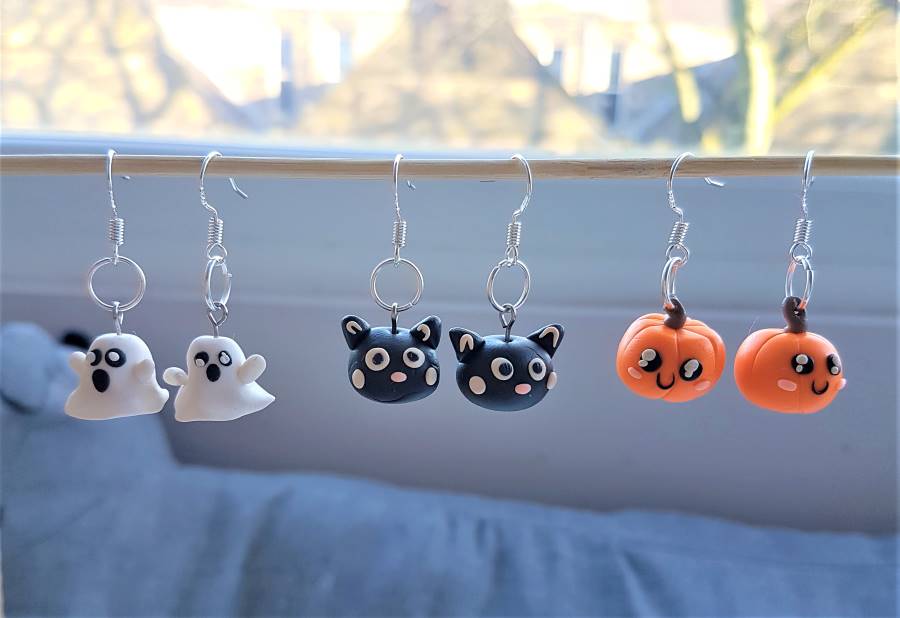
Halloween polymer clay earrings are a funky way to add spooky spirit to your earlobes. I have created three step-by-step tutorials for some scarily cute earring designs that are a sure conversation starter.
Read on for my simple beginner-friendly breakdown of how to create polymer clay pumpkin earrings, ghost earrings and black cat earrings…
This post may link to online stores. If you click a link and buy something, I may get a commission. Learn more.

1. Pumpkin Halloween Polymer Clay Earrings Tutorial

These pumpkin Halloween Polymer Clay Earrings are so cute and are a sweet take on the Halloween theme. Pumpkin polymer clay earrings tend to be really popular sellers on Etsy, so I decided to create a short tutorial on how to make them.
They would work great as stock for your own Etsy store, or as fun gifts for your friends and family. I know I love wearing mine, all year round in fact!
Here’s how to make them:
1. Condition your polymer clay
Conditioning your polymer clay is a crucial first step in working with the material, as warming it up will make it malleable, and prevent any cracks or flakes spoiling your design.
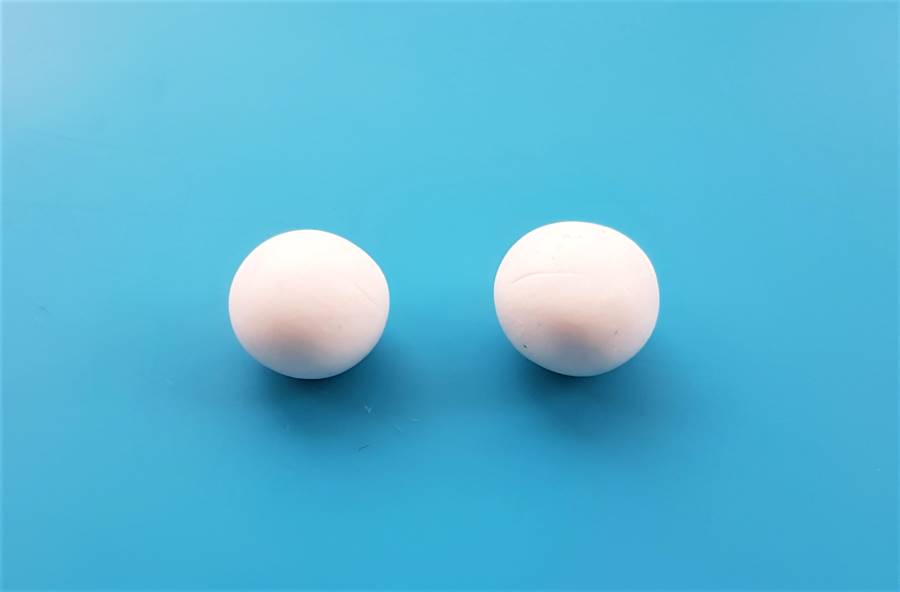
You want to create two balls of orange clay, which will form the body of each pumpkin. I cut two pieces of orange clay from my 2oz fimo block, of around 2 cubic cm a piece, and then began to conditioned them one at a time by rolling them between my palms until soft.
You will also need a small amount of brown, black and white polymer clay. I have included a picture below so you can judge the ratios of what you will require for two earrings.

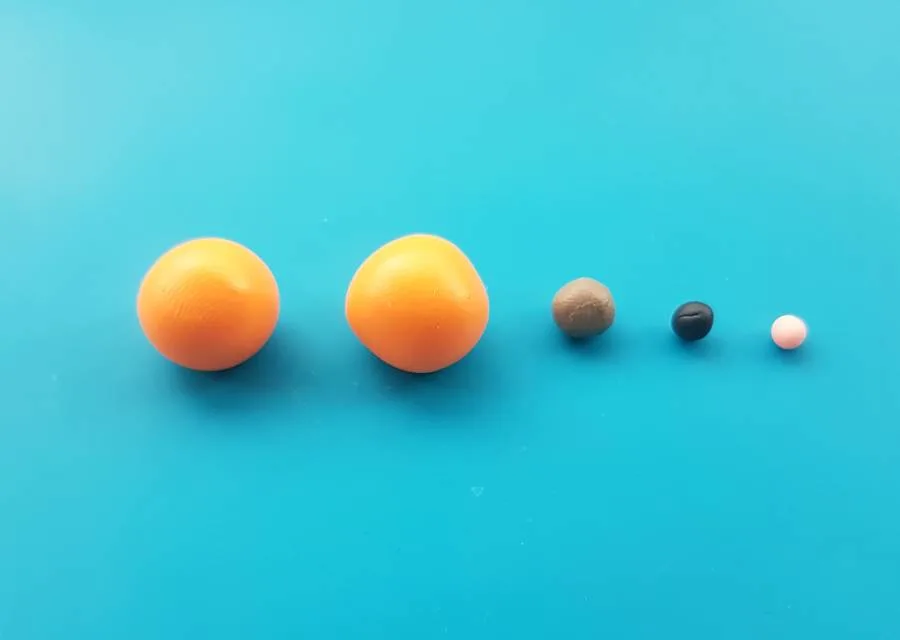
Once you have the above pairs prepared, set aside the clay and take one of the orange balls and a pointed tool, for the next step.
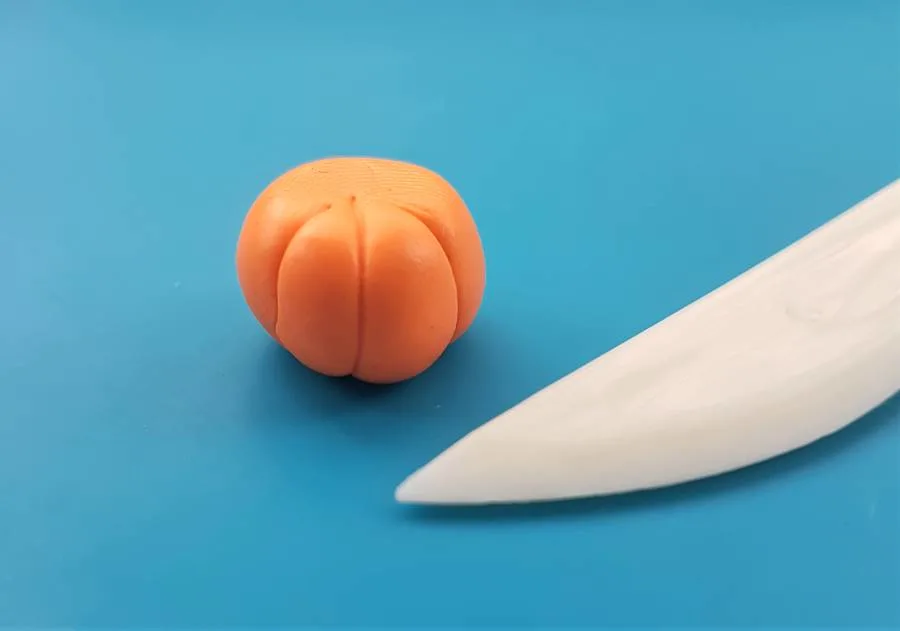
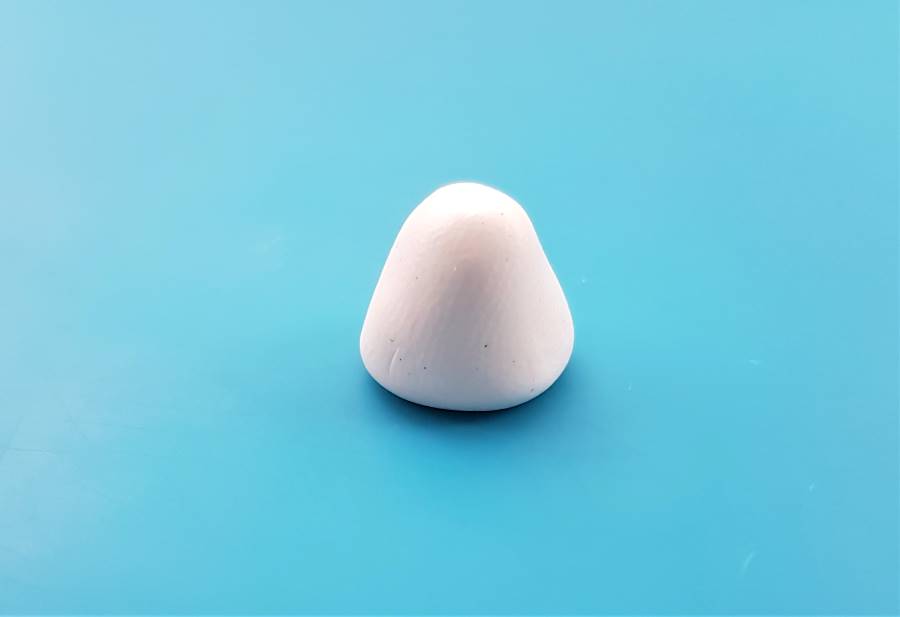
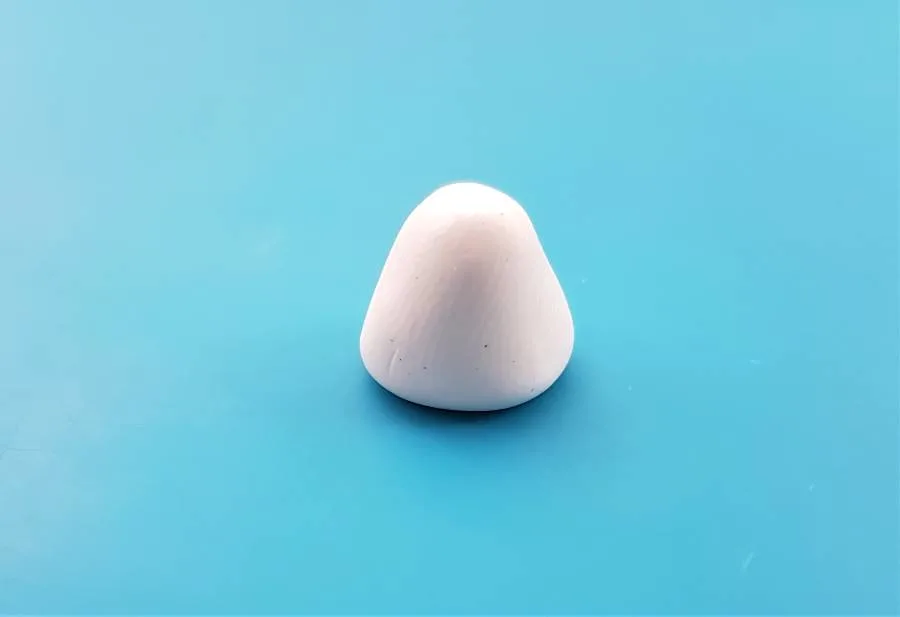
2. Score your orange clay with a pointed tool to create the pumpkin rind details
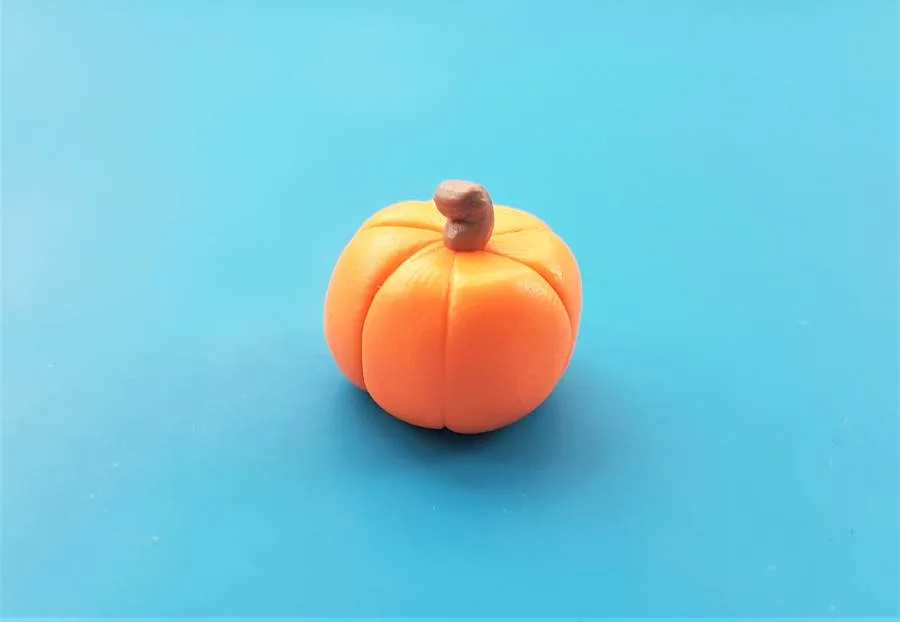
Take your ball of clay between your fingers and squash it slightly either end, to make a pumpkin-like shape.
Then, take a pointed crafting tool, as pictured below, and carefully begin to run lomng scored over the surface, to create a pumpkin rind effect.

If you don’t like your first attempt, don’t worry. Just roll the ball of clay between your palms again until smooth and start over. Keep going until your perfect the technique.
You could even use a spare ball of clay to practice the technique on.
Here are some tips for getting it right…
- I find it easiest to take the pointed tool and roll the pumpkin shape over it, whilst maintaining contact between the two.
- If the underside looks a little messy after you have added all the the rind details, you can smooth it over with your fingertip – nobody will really be able to see it anyway.
Top tip: If you leave fingerprints on the surface of the clay, just wipe over the design with a small amount of rubbing alcohol.
3. Add a brown stem to the polymer clay pumpkin
Adding a small stem adds a lovely bit of detail to the design, and also serves as the part we will hang the jump ring and earring hook from.
Take the small amount of brown clay we conditioned earlier and divide it into two pieces, setting one piece aside for the second earring.
Roll the remaining piece of clay into a short string and bend it slightly to form a stem effect, as pictured below. Then take a pointed tool and press a hole through the top part of it, to attach the jump ring to after baking. You can use a needle, a piece of dried spaghetti, or anything pointed and appropriately sized you can get your hands on to create a small hole.
Alternatively you can use a crafting drill to add the hole after baking, but I find for designs as delicate as this one adding the hole before baking works best.
Attaching the stem
Once your stem is ready it’s time to attach it to the top of the pumpkin.
- Take a small amount of polymer clay glue and add it to your wipeable crafting mat.
- Pick up your stem between your fingers and dip the tail end into the glue.
- Gently press the tail end of the stem to the top of the polymer clay pumpkin earring, until secure.
- Ensure the stem is shaped how you like it, and the hole for the earring jewellery is visible.

The glue will set during the baking process and bond the clay together to create a secure hold, that will provide a tether for the earring jewellery.
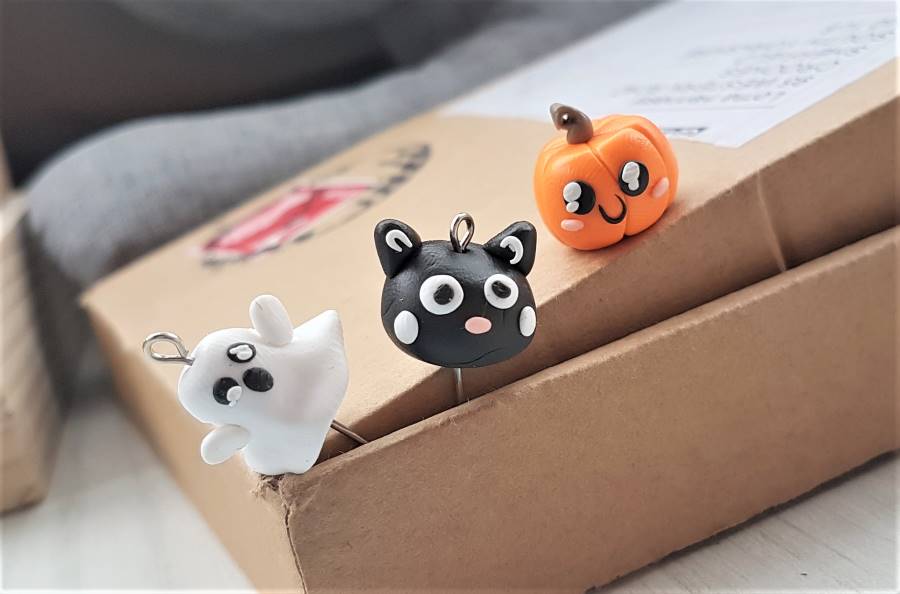
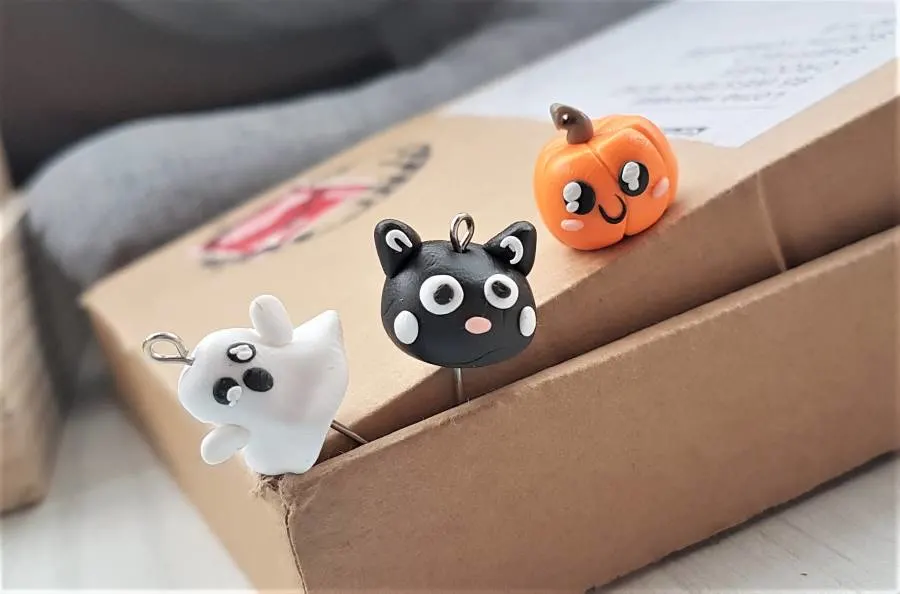
Here is a little shot of the earring gang (aren’t they adorable?) where you can make out the jump ring hole in the pumpkin’s stem.
Now your stem is attached it’s time to add the little face details…
4. Add the face details to the pumpkin
Take a small amount of the black clay we conditioned earlier and roll it into a string. Cut two equal sized pieces from it, to create the eyes.
Roll each piece into a small ball, and then press them flat with an acrylic rolling pin or your fingertip, until they form two small discs, as pictured below.
If you use your fingertip, make sure to stick the finger-printed side to the pumpkin!
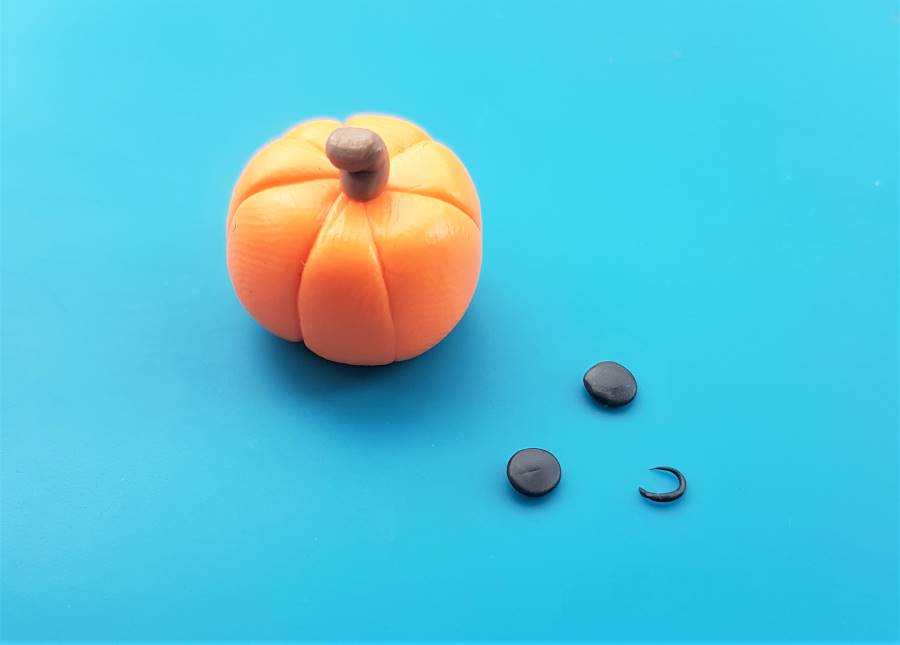

Next take another cutting of black clay from the string and roll it into a very fine line, to form the mouth.
Bend this with the pointed end of a tool, or with your fingertips if you have steady hands.
Now the base face details are ready, you can secure them to the body of the pumpkin. You can use polymer clay glue for this step if you wish, but I found the clay was sticky enough that they bonded easily.
With the black details added, it’s time to add a small amount of white to the eyes, and if you like, a small amount of light pink to create tiny cheeks, as pictured below.
Adding the white details
For the whites of the eyes, roll out a small amount of white polymer clay into a string, and take four cuttings from it (two of these need to be a little larger than the other two).
Use the picture above as reference for how much you will need.
Next, roll the tiny white pieces into balls and then flatten them with your fingertip. Take a needle or a very fine tool to pick them up, and stick them to the black eye bases, as above.
Creating cheeks
- For the tiny cheeks as pictured above, take a small amount of light pink polymer clay and roll it into two tiny balls.
- Next roll each ball slightly, to form an oval shape.
- Take a very fine pointed tool and pick up each cheek. Press the cheeks against the body of the pumpkin, and they should stick. If not, use a little polymer clay glue to help you.
Now the face details are added it’s time to bake the earrings and add the jewellery.
5. Bake the pumpkin earrings and then add the earring jewellery
Bake the polymer clay pumpkins according to the packaging instructions of your chosen brand of clay. Place them in the centre of your oven on a clean oven tray, lined with a sheet of baking paper.
Once they are done remove them from the oven and set them aside to cool. I suggest waiting a couple of hours, as this will ensure the clay has properly hardened.
When cool, take a pair of jewellery pliers and open two jump rings. Add your earring hooks to the jump rings, and then feed the jump rings through the little holes in the stem of each pumpkin. Close the jump rings with your pliers, and your polymer clay pumpkin earrings are complete!
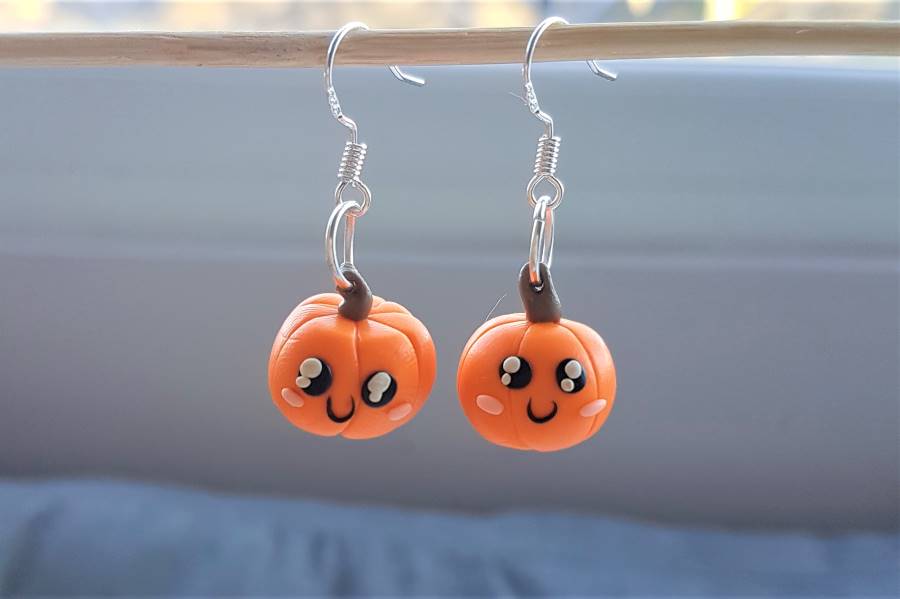
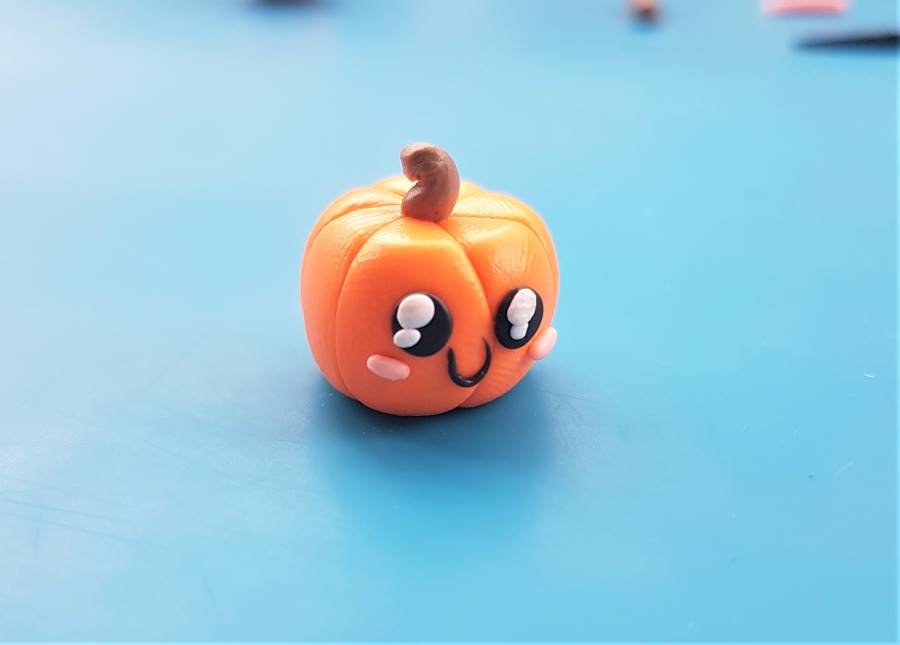
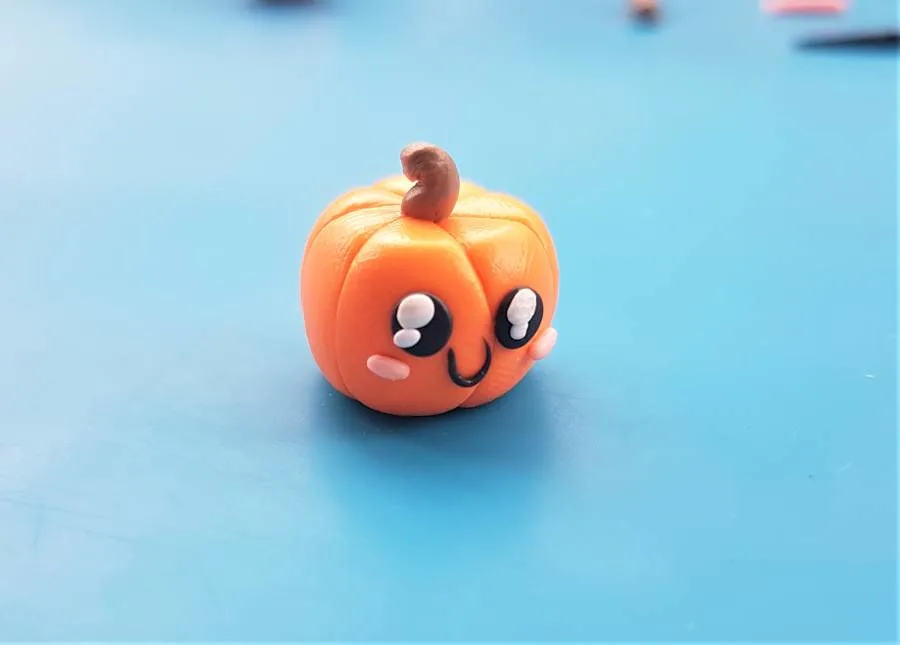
Here’s how they should look:
Absolutely adorable, these spooky cuties are a definite conversation starter.
Enjoy!
2. Ghost Halloween Polymer Clay Earrings Tutorial
Boo! Add these frightfully charming little ghost Halloween Polymer Clay Earrings to your earlobes, following this simple step-by-step tutorial.
Here’s how to make them…
1. Condition your clay
Take two 2 cubic cm of white clay from your block and condition each piece until they form a ball.
To do this rub them between your palms one at a time, until each has warmed up from your body heat and is now smooth and malleable. You’ll know they’re ready when no cracks or flakes can be seen and they are squishy to the touch.
Each brand of polymer clay conditions at a different rate, some take longer than others, and some end up quite sticky to the touch after conditioning, which is normal.
I use fimo as my preferred brand of clay (check out my clay buyers guide here for help with your shopping) and it takes around one and a half minutes for me to properly condition a 2cm ball of clay between my hands, so that should give you a reference point.

Once conditioned your clay should look something like the above.
2. Shape the clay into a cone
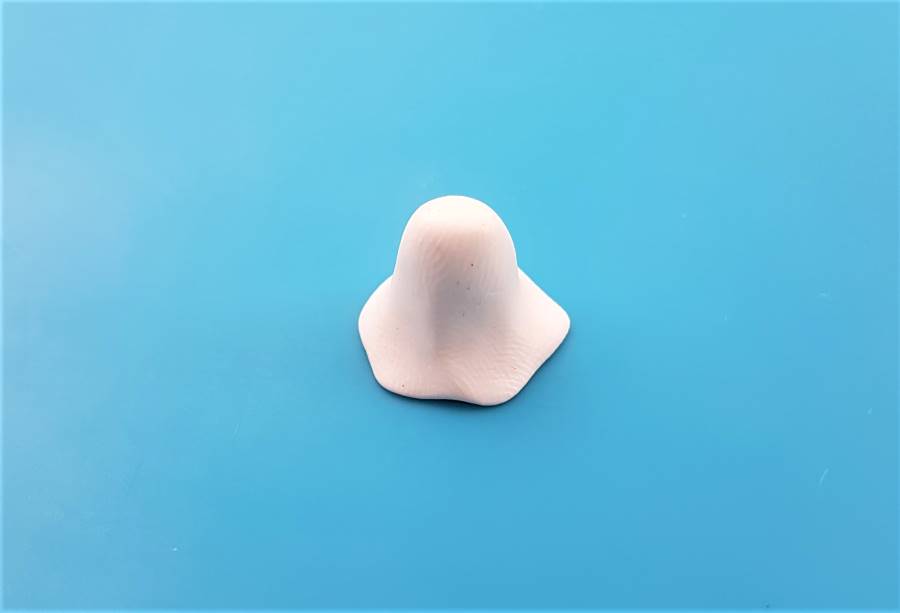
Set aside one of the balls of clay. Take the remaining ball and begin rolling it gently on your crafting mat, until one end becomes slightly pointed.
Use your fingertips and flatten the base of the cone until it resembles the below:
Once the above shape has been achieved, it’s time to add some flare to the base of the design.
3. Add a flared waving edge to the base of the cone
Take your cone between your fingers and with your free hand begin gently pinching at the base, to created a flared effect as pictured below.
Move your thumb and forefinger around the base as you pinch it, to create a slight wave in the flare, like the flowing edges of a ghost made from a white bedsheet.
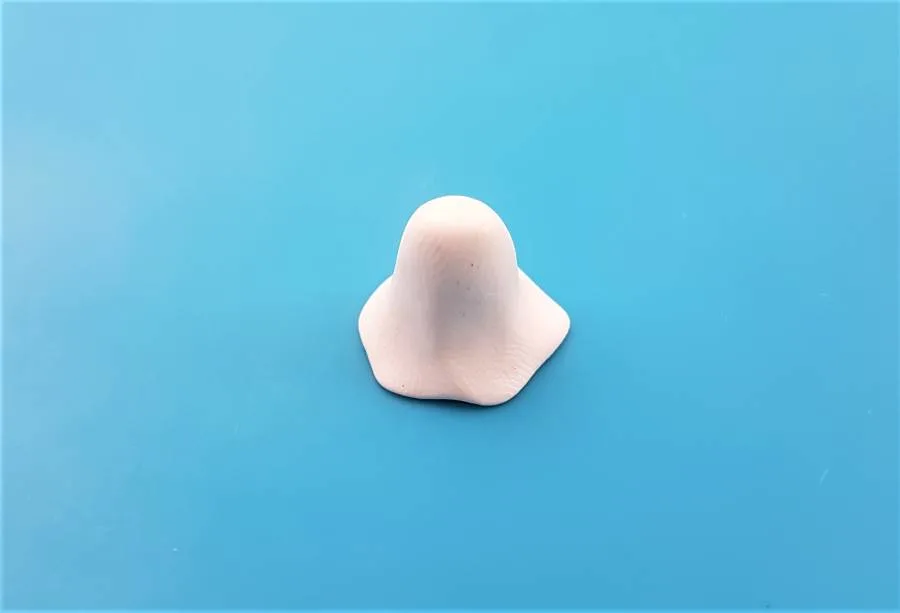
Now your ghost body is formed, it’s time to add the details and bring it to life… or death!
4. Add arms and a face to the ghost body
Let’s add some details and help our ghost take shape.
First take a small amount of additional white clay and roll it into two balls. Then gently roll the balls against your crafting mat until they form two arm shapes, that are scaled to your ghost body as pictured below.
Once you have your arms made, take a little polymer clay glue and dip the base of each into it, before pressing them against the sides of your ghost body. Once baked, the glue will effectively bond the clay together, for a strong hold. Check out my tools and supplies guide here for help choosing your brand of glue, and other tools.
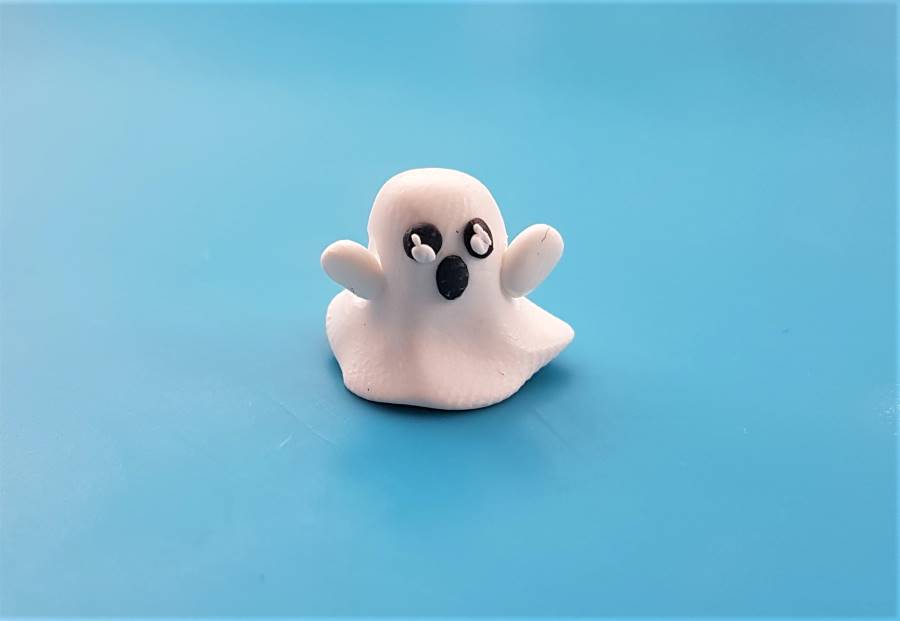
Next we want to make the ghost face details, as pictured above.
This is simple, here’s how to do it:
- Take three tiny balls of black clay and press them flat against your crafting mat. These will form the base of your ghost’s eyes and mouth.
- Use a fine pointed tool and lift the black details and press them to the ghost body, to form the face, as pictured above.
- Next roll a tiny amount of white clay out to form the whites of the ghost eyes. Use the same method as above and attach them to the black of the eyes, making sure the white clay details are much smaller than the black.
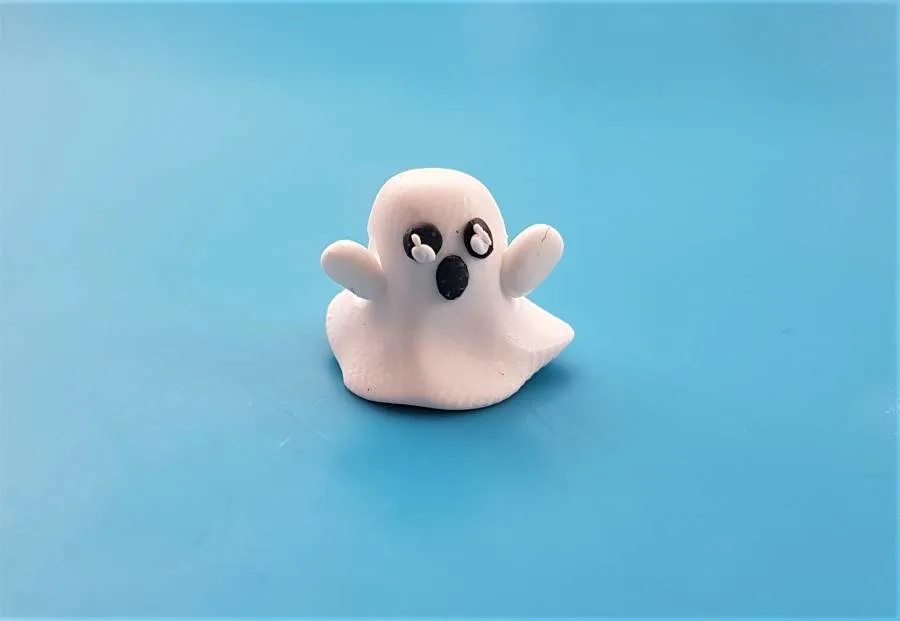
5. Attach the earring anchor and bake the earrings
Take an earring anchor, as pictured below, and begin to drive it down through the centre of the ghost, until the loop fits snugly against the top of the earring.
Don’t worry if it comes out the other side, like mine, we’ll be cutting that off with a pair of jewellery pliers after baking.
Now pop your earrings into the oven on a tray lined with baking paper (parchment paper if you’re in the US) and bake the designs according to the packaging instructions of your chosen brand of clay.
Top tip: If you want to avoid your design flattening on one side as it rests against the oven tray, I suggest baking the earrings in a mound of cornflour, as this prevents them from becoming flattened and brushes off easily after baking.
Once they’re done take them out of the oven and allow them to cool, before taking a pair of jewellery pliers and snipping off the excess earring anchor. The reason it’s best to do this after baking is the solid clay will provide a stable wedge either side on the anchor, preventing it from slipping when cutting. If you do this before it is baked it could jolt, and disfigure your earring design.
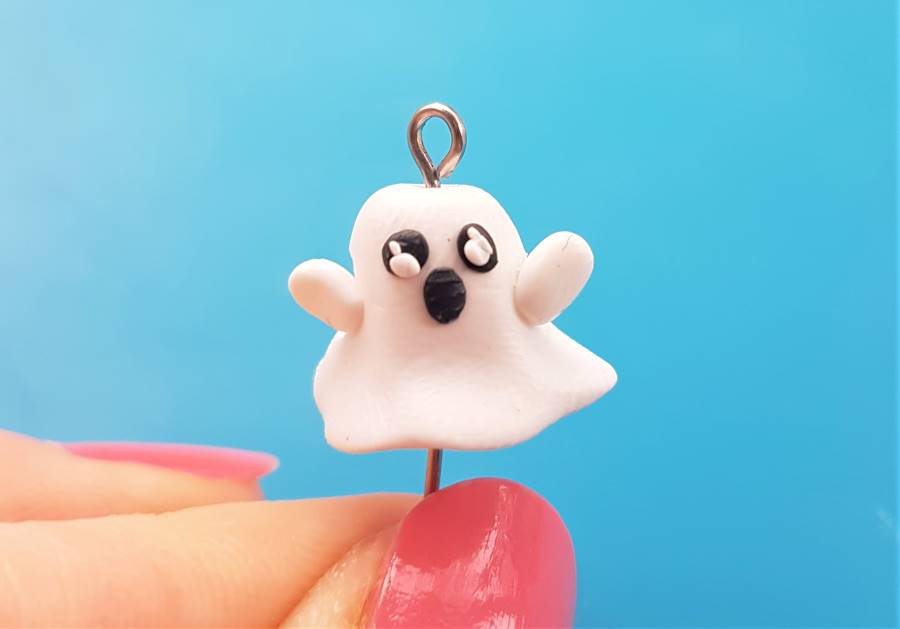
6. Add the earring jewellery
Take two jump rings and open them with a jewellery plier. Loop through your earring hooks and then feed the jump rings through the hoop of the earring anchors on top of the ghost heads. Once everything is gathered pinch closed the jump rings with the jewellery pliers and you are done!
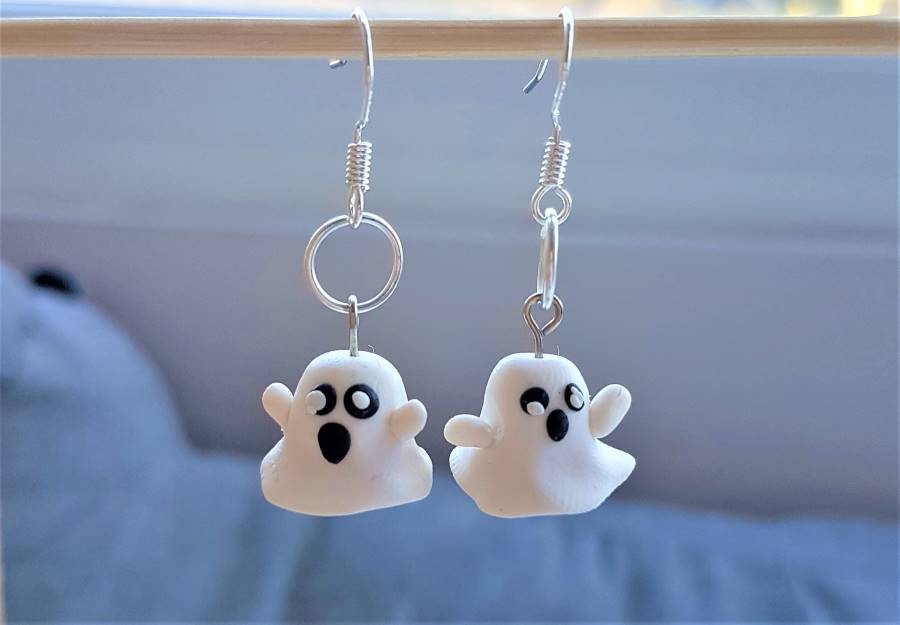
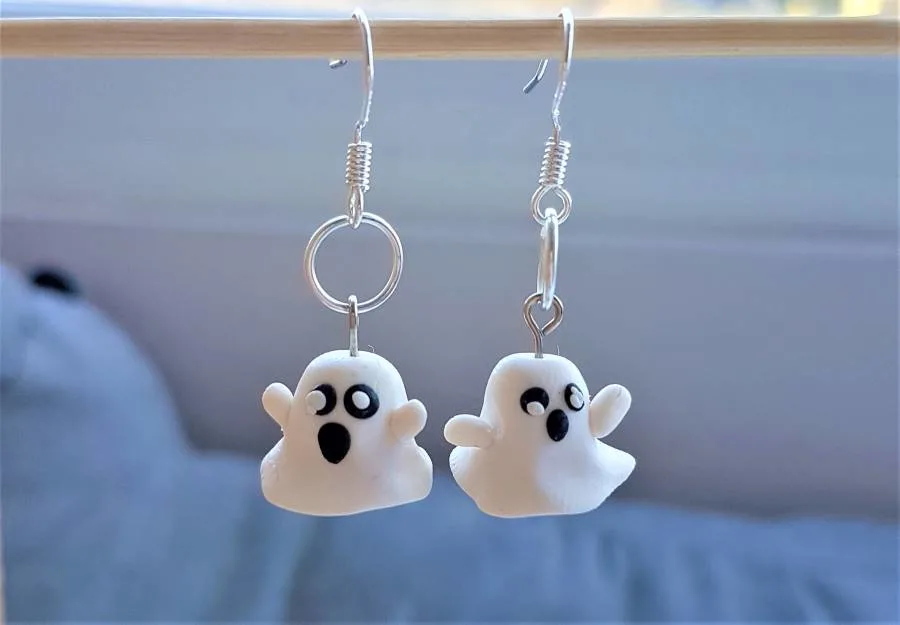
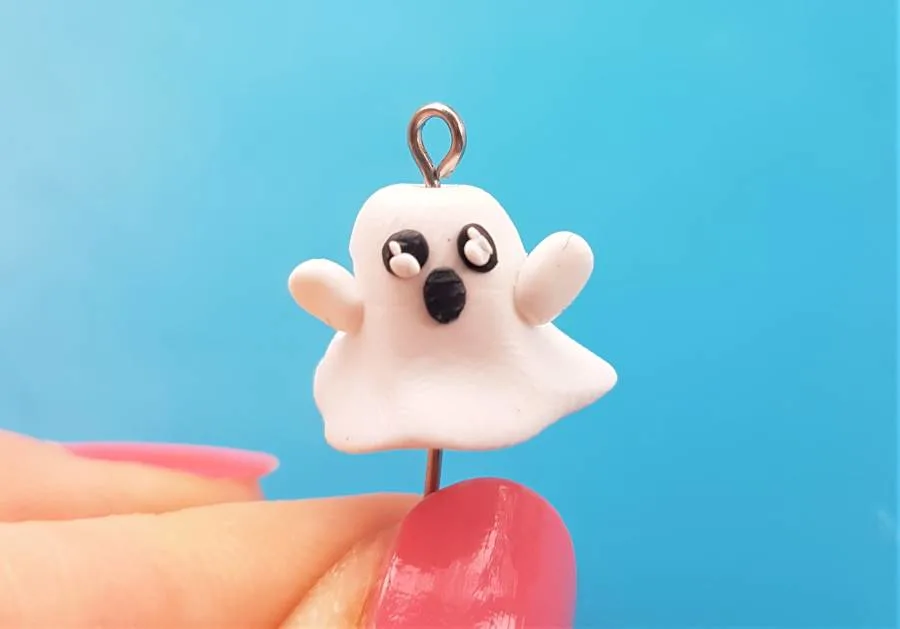
The earrings should look something like the below:
Spoooooky!
3. Black Cat Halloween Polymer Clay Earrings Tutorial
Meow! Add a feline touch to your jewellery box with these quirky black cat Halloween Polymer Clay Earrings – perfect for gifts.
Here’s how to make them:
1. Condition your clay
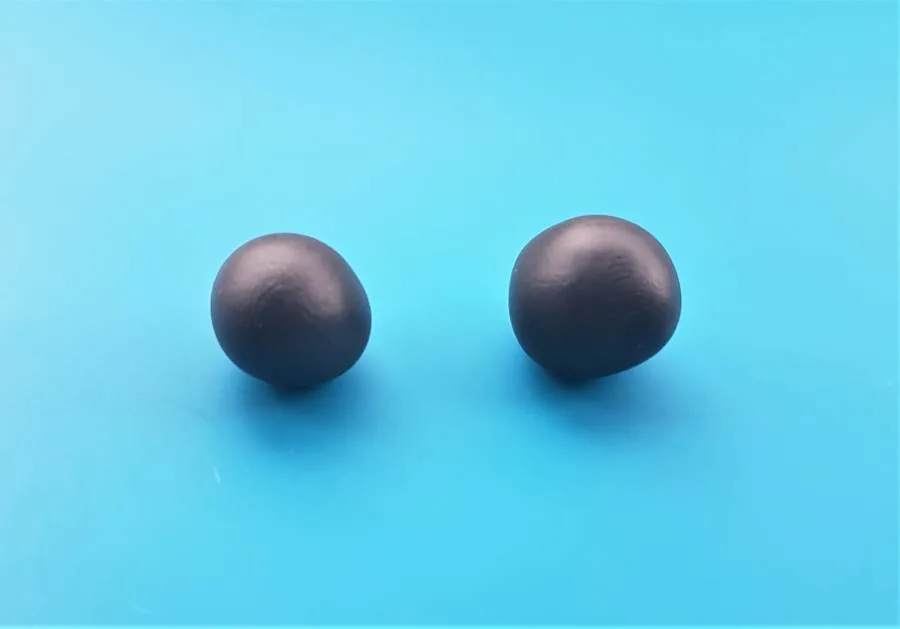
Cut two 2 cubic cm of black polymer clay from your block and roll each between your palms until conditioned.
You’ll know when they are properly conditioned when they are malleable and smooth, usually after a minute to a minute and a half of rolling them in your hands.

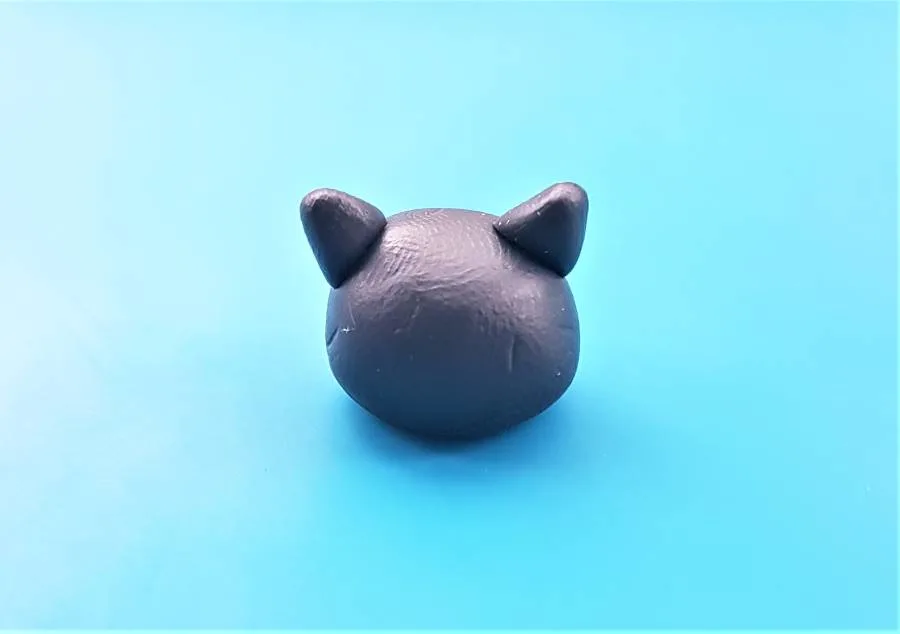
2. Cut two cat ears from black clay and add them to the conditioned ball
Set one of your balls aside for your second earring and keep the other on your crafting mat in front of you.
Then take some additional black polymer clay and begin to roll it into a little fat string, about 1cm long and 0.5cm wide. See the below image for scale.
Once the thick string is rolled, cut it neatly in half, and made sure the end of each piece is slightly pointed. These will form your cat’s ears.


Next take some polymer clay glue and add it to your crafting mat. Pick up each ear and dip the blunt ends into the glue, and then secure them either side of the cat head.
The result should look something like the below:

Now it’s starting to take shape it’s time to add the details…
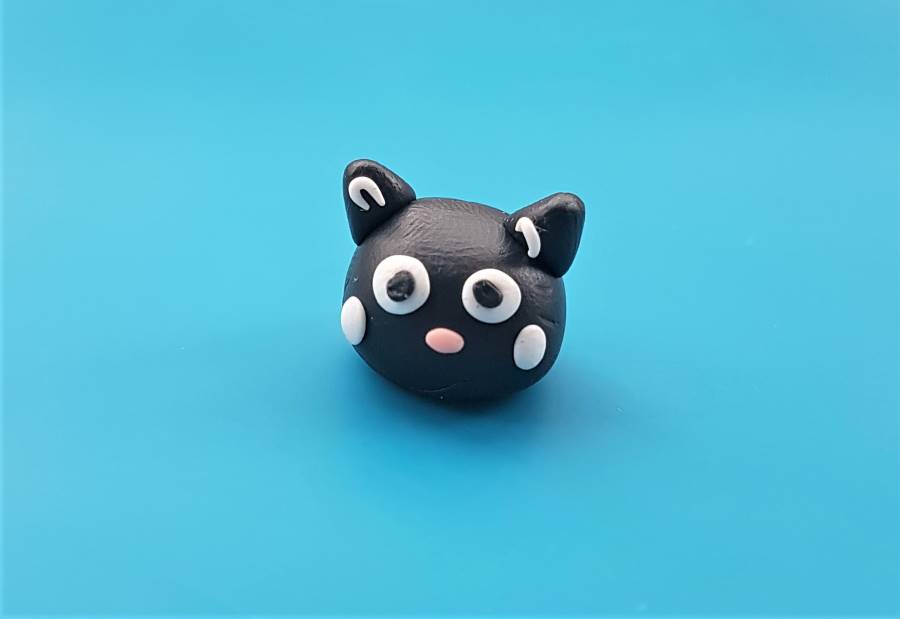
3. Add the cat face details
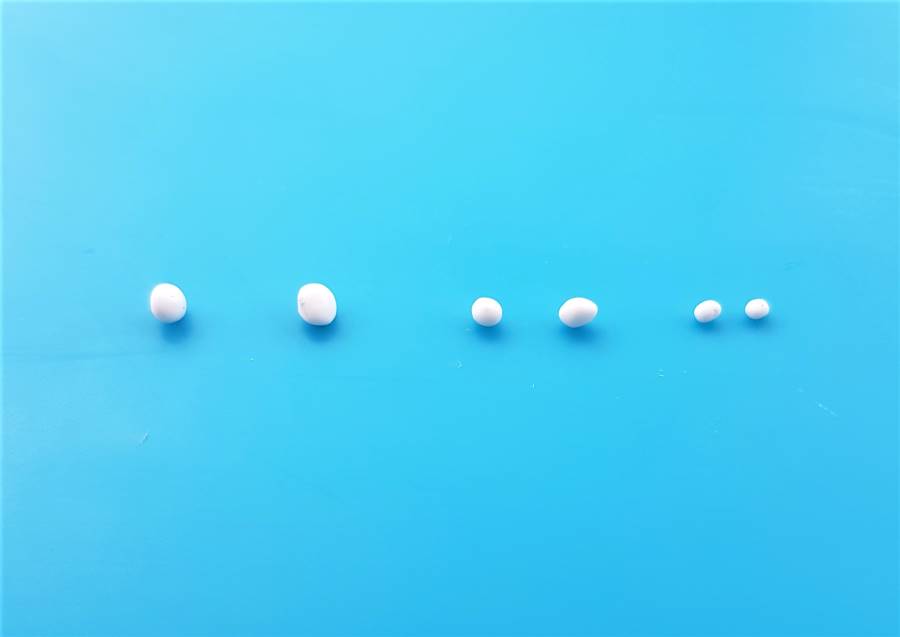
Roll out six tiny balls of white polymer clay, two each of 3mm, 2mm and 1mm, as pictured below.
Then press the 3mm and 2mm balls until they form flat discs,.
The 3mm white balls will form the eyes and the 2mm are for the cheeks.
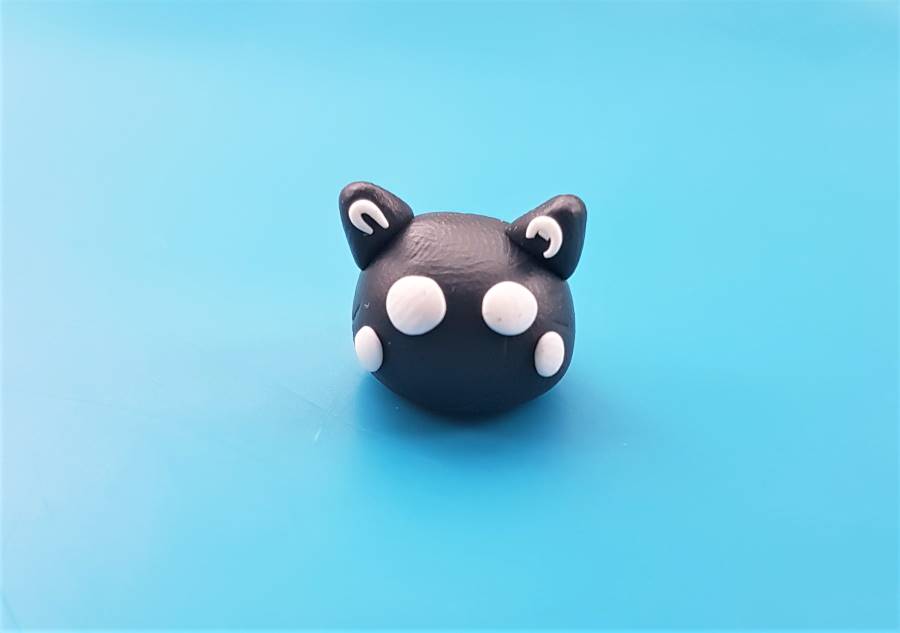
Take the flattened white discs and add them to the cat face, as pictured below, by lifting them with a pointed tool and gently pressing them against the black clay.
Then take the 1mm balls and roll them into tiny strings, which you will then bend into curved shapes for the ear details, as pictured below. Pick up each curved string with a finely pointed tool and carefully press them against each cat ear.

Once all of the white details are added take a tiny amount of black to form each pupil, and use a small ball of light pink to create the cat’s nose.
Create two 1mm balls of black and gently press each with your fingertip against your crafting mat to form a small flat pupil. Then using a finely pointed tool, pick up each pupil and add them to the centre of the white eyes.
Take a 2mm ball of light pink clay and roll it gently against your crafting mat, to create an oval shape for the cat nose. Add it to the cat’s face using a pointed tool to pick it up and adjust it against the black clay.
Once these are added your cat head should be complete, as below.
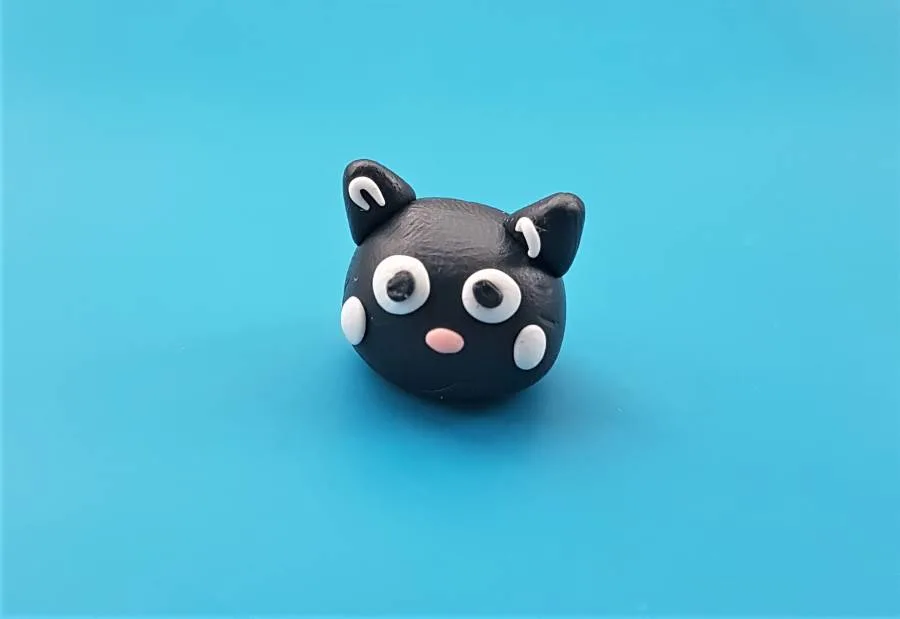
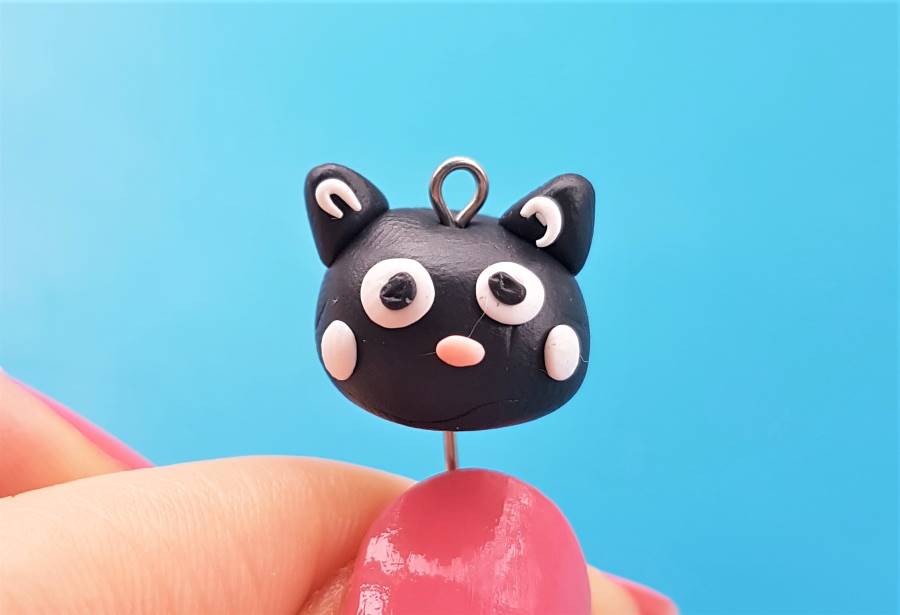
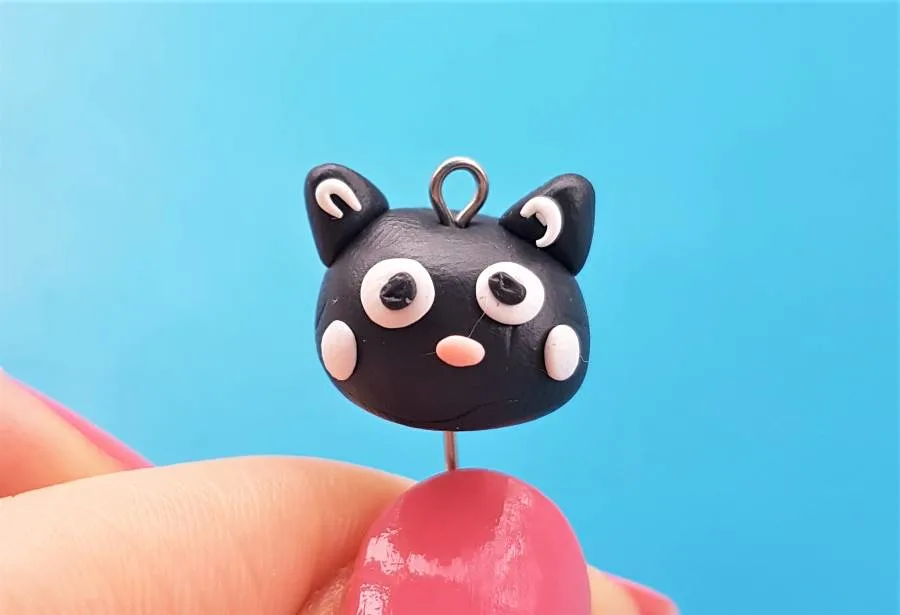
4. Insert the earring anchor and bake the black cat earrings
Take an earring anchor and insert it through the top of the cat head until the loop fits snugly against the top of the design.
Then bake the earrings according to the packaging instructions of your chosen brand of clay.
Once they are done, take them from the oven and allow them to cool and fully harden for a couple of hours. Now you can use your jewellery pliers to cut the excess earring anchor from the base of the earrings.
It’s best to do this step after the earrings are baked, as the earring anchor is less likely to slip or wiggle inside of the unbaked clay, which may distort your design. When baked, polymer clay becomes quite hard so the earring anchor shouldn’t jolt when cut as it will be held firmly in place.
Add your jump rings and earring hooks to the top loop of the earring anchors using your jewellery pliers to open and close the jump rings.
Open your jump rings first and then add your earring hooks to them. Make sure your earring hooks will be the right way round once the jump ring is inserted through the earring anchor hoop. It’s best to check before you close the jump ring, as opening and closing the metal to make corrections can make the jewellery weaker and more susceptible to snapping.
When your earring hooks are added feed the jump ring through the earring anchor hoop and then close it up with the earring pliers.
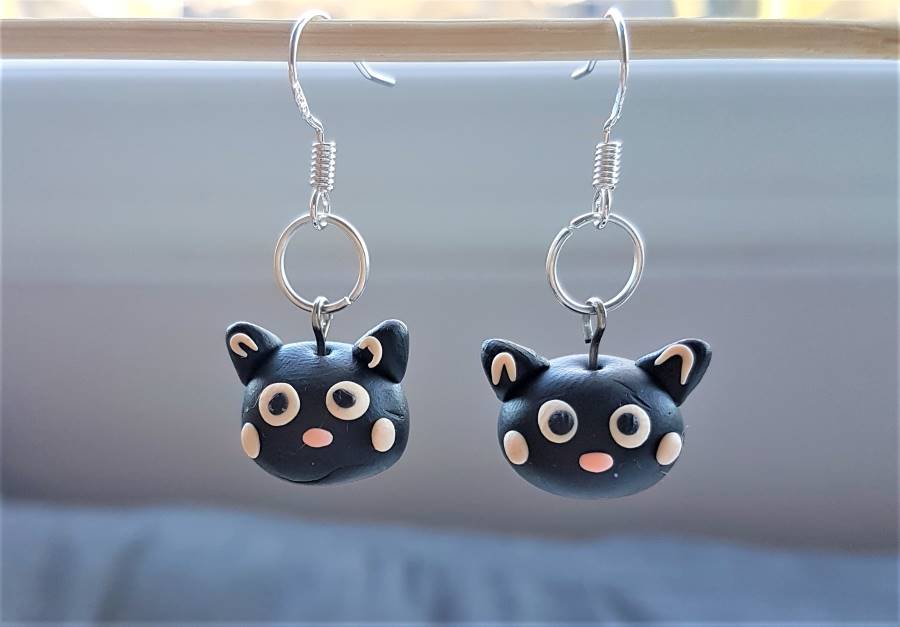
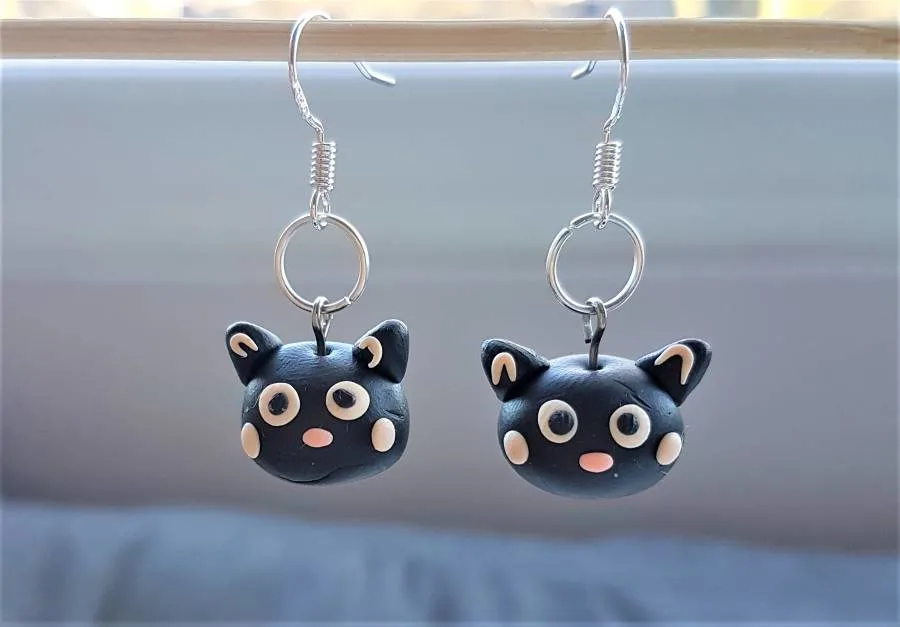
Now your earrings are done! They should look something like the below:
Enjoy your purrrrfect earrings!
Related articles
I hope you found this article on Halloween Polymer Clay Earrings helpful and you now feel confident to head to your crafting table and make some spooky creations of your own!
It’s my goal to make the world of polymer clay earring making as easy as possible for beginners. I provide tutorials, tips and FAQ guides to cover all bases and help you on your crafting journey.
For more polymer clay earring design idea tutorials, check out:
- 5 Polymer Clay Stud Earring Ideas – Tutorial
- 5 FRUIT Polymer Clay Earring Designs
- 5 FLOWER Polymer Clay Earrings Designs
Check out my instagram page for more inspo:

Lorna is a footwear geek and the founder of Wearably Weird. She created a YouTube channel in 2021 for fellow footwear fanatics, dedicated to detail-rich footwear reviews and info. She has a fashion media qualification (awarded in 2011).