
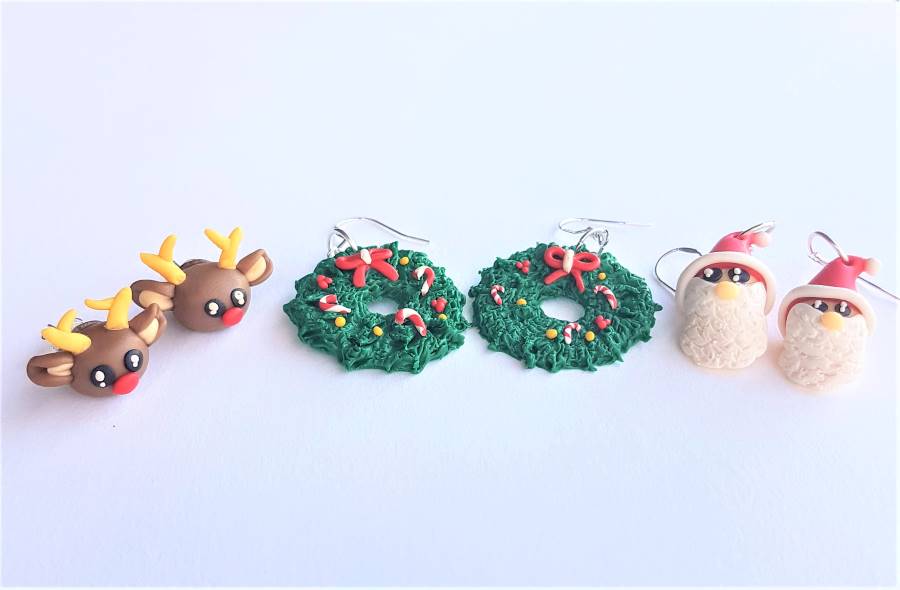
Christmas polymer clay earrings are an unusual way to add festive cheer to your earlobes. I have created step-by-step tutorials for three cute and seasonal earring designs that are a sure conversation starter.
I’ll be covering:
- Wreath Christmas Polymer Clay Earrings
- Santa Christmas Polymer Clay Earrings
- Reindeer Christmas Polymer Clay Earrings
Read on for my simple beginner-friendly tutorials, including tips and tricks to help you along the way.
This post may link to online stores. If you click a link and buy something, I may get a commission. Learn more.

What you will need for the following tutorials
I’ve provided a breakdown below of what I used for the following tutorials, but please don’t worry if you don’t have all of those things. I always find it best to use what you have to hand, and work with things around the house if you don’t have a full tool kit.
For example, if you don’t have an acrylic rolling pin, use a glass bottle! Or if you don’t have a pointed or ball-ended clay tool, use a toothpick, or something similar. Don’t let this shopping list hold you back from crafting, if you don’t have EVERYTHING on there. The main thing is getting the clay and giving it a go.
Here’s what I used to make the Christmas polymer clay earrings:
- Polymer clay of your choice, I always use FIMO
- Silver earring hooks
- Silver earring stud backs and fastenings (for the reindeer earrings)
- Silver jump rings
- An acrylic rolling pin
- A clay cutting tool
- A pointed/ball-ended tool
- A crafting mat
- An oven and a baking tray
- Baking paper
- Something to transfer the earrings to and from the oven (I used a plate)
- A clean workspace
If you need help with your shopping list I have a buyer’s guide here, which includes a breakdown of different clays, tools and cutters.
It’s really important that you research which clay to use, and go with the one that suits your project needs the best.
I like to use FIMO, as they are versatile and offer a full range of colours. For this tutorial I’m using two shades of pink and one white, but if you want something a bit more funky FIMO offer a range of pearlescent shades, metallic shades and more, it goes on and on. There’s a block of clay in just about any colour your can imagine!
Sculpey is also an excellent brand with a wide range, as are Pardo, Kato and Cernit. I personally prefer FIMO, but don’t let that stop you from going with the brand you like the look of. Or you can simply grab a starter kit, with some basic clay and tools – it’s up to you!
If a start kit sounds good to you, I recommend this one:
Feel free to check out my Clay Guide if you want some initial help, or have a browse online for yourself and take your time deciding.
Let’s get into the tutorials!
1. Wreath Christmas Polymer Clay Earrings Tutorial
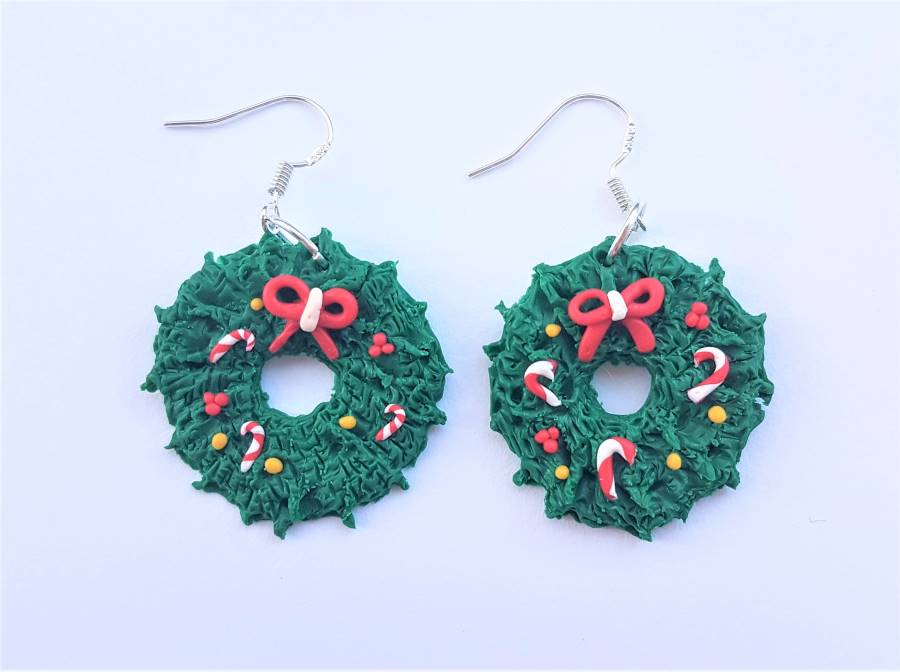
Adorn your ears with festive spirit with these lovely wreath earrings, complete with a bow, holly berries and candy cane details.
They are really lightweight, so don’t let the size fool you, they can be worn comfortably and are very simple to make, despite the details!
Here is my beginner-friendly tutorial:
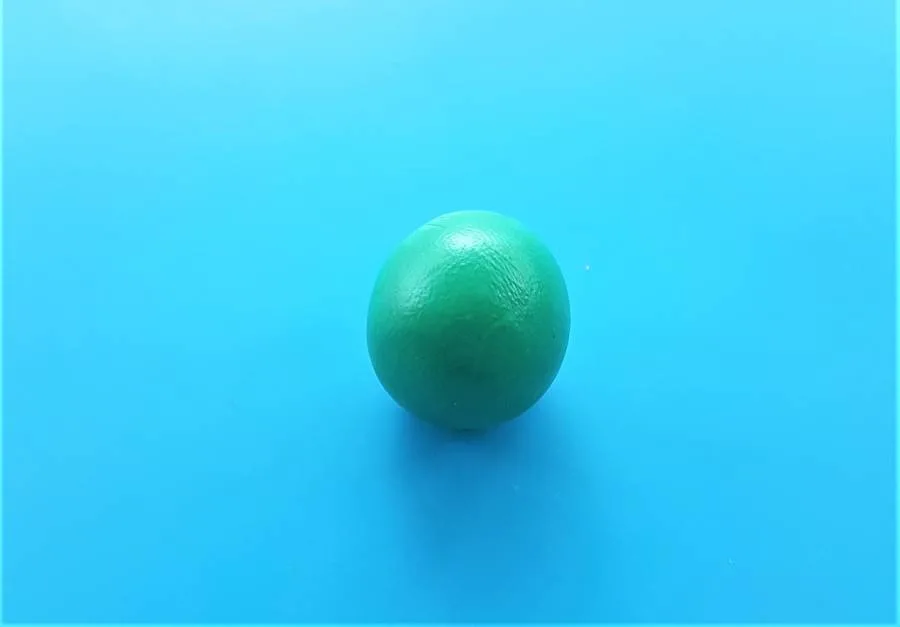
1. Condition your clay
Start by conditioning an inch wide ball of dark green polymer clay. I chose to blend a little brown into my green clay, to give it a closer colour to holly.
Take the clay between your palms and begin warming it up with your body heat. Slowly start to roll the clay, until it begins to soften.
You want to aim for a smooth and malleable ball, as pictured below. I use fimo clay, and an inch wide ball usually takes a minute to a minute and a half to properly condition this way.

2. Roll out and use a circle cutter on the clay
Next take an acrylic rolling pin and begin to roll out your clay, flipping it over to ensure the bottom is properly rolled also.
Top tip: always use an acrylic rolling pin, not a wooden one as it will leave wood grain imprints and stick to your clay.
When you are satisfied, make sure your circle cutter will be able to fit into the clay twice. I used a 5cm circle cutter, which you can see pictured below.
I had plenty of clay left over after cutting the below to roll into a ball again, roll out into a slab and create another earring from.

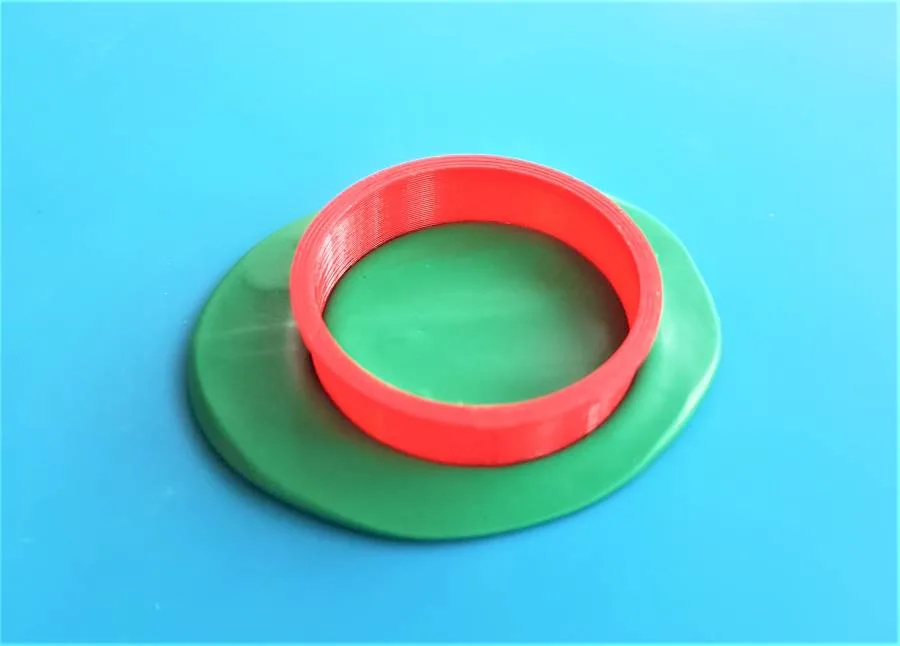
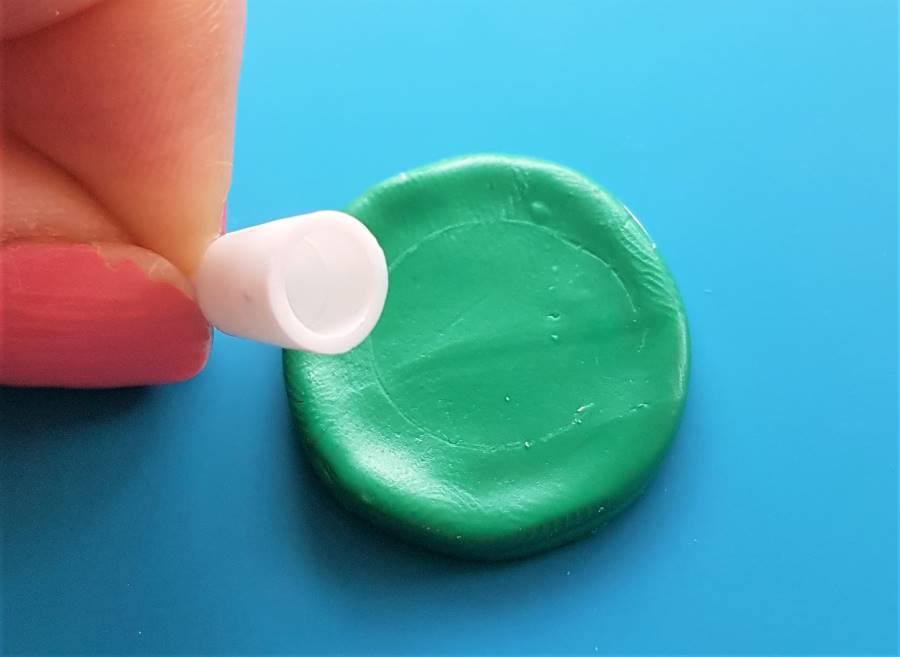
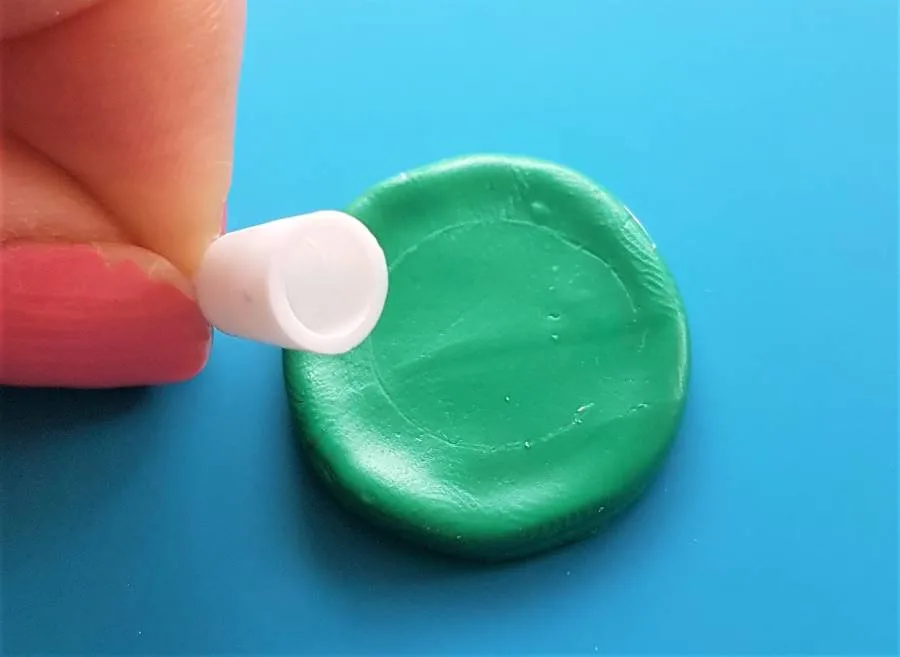
Now you have the base of your wreath ready take a small circle cutter of 1cm width, or any object that might work (I used a birthday cake candle holder!), and press it into the centre of the clay to form the hole in the wreath.
Add the discarded clay from the centre to your excess clay, to be rolled out again and formed into the second earring.
3. Stipple the clay to create the effect of leaves
Take a pointed cutting tool and begin to add the stipples to the clay to create realistic detail.
Stippling is an easy way to achieve texture, plus I find it quite therapeutic!
Here’s the technique:
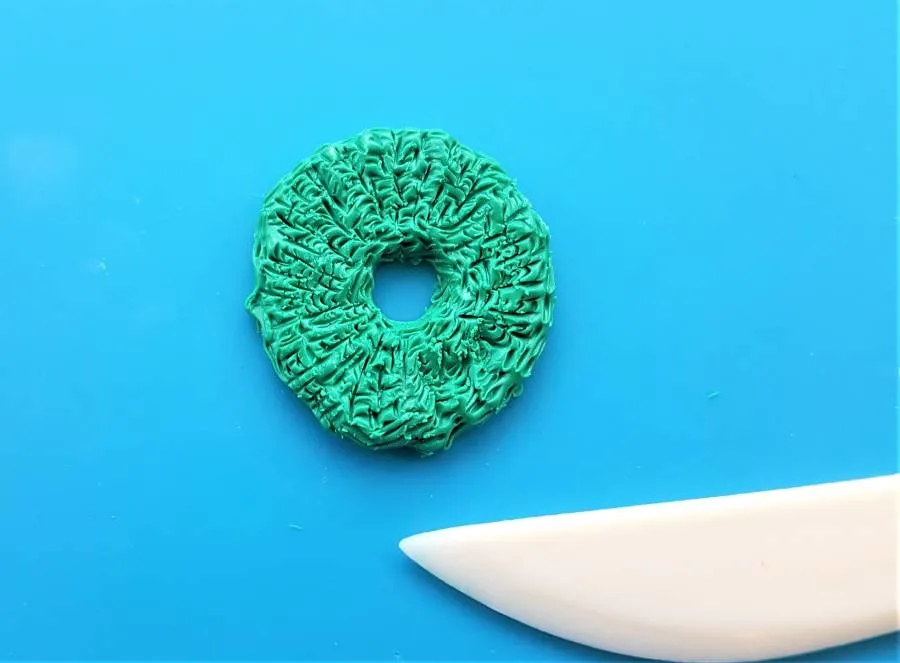
- Begin to draw 1mm lines in your clay in a vertical direction, until the entire wreath is covered.
- Then begin drawing 1mm lines in the opposite direction, so they cross over the original lines.
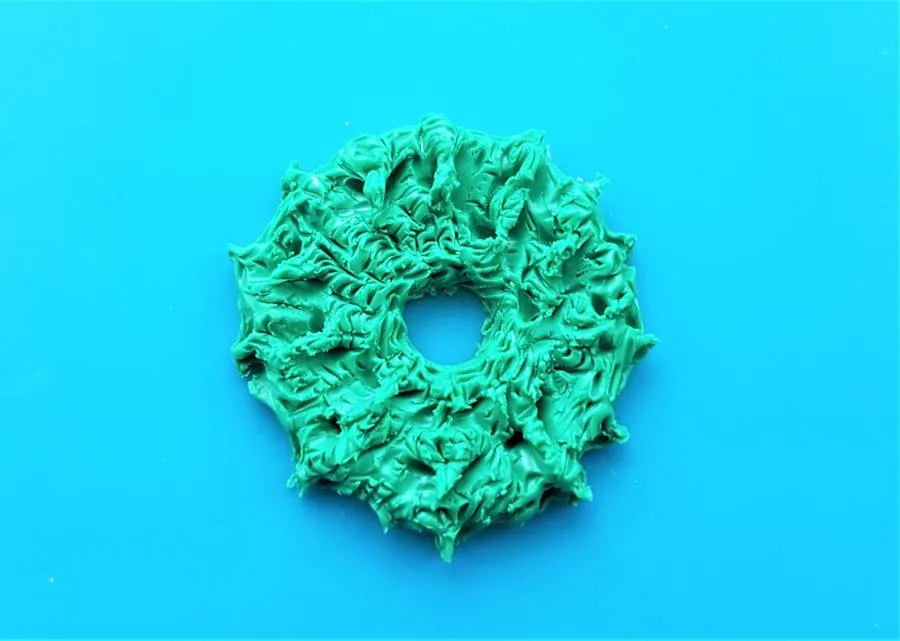
When done properly the result should look something like the below.

Next we need to add texture to the outer edge of the wreath, to transform it from a plain circle rim to a leafy edge.
To do this take your pointed tool and another similar tool and begin pinching 1mm outer sections of the clay on either side to form small ‘spikes’ that look like leaves, as pictured below.
Then take the two pointed tools and use the same pinching technique on the body of the wreath, to add a few leaf-like details.

4. Make and add the candy cane details
Time for the fun bit – adding the pretty details.
I decided to create miniature candy canes to add to the wreaths, as they embody Christmas for me!
Start by chosing two colours for your candy canes – I went with the classic red and white.
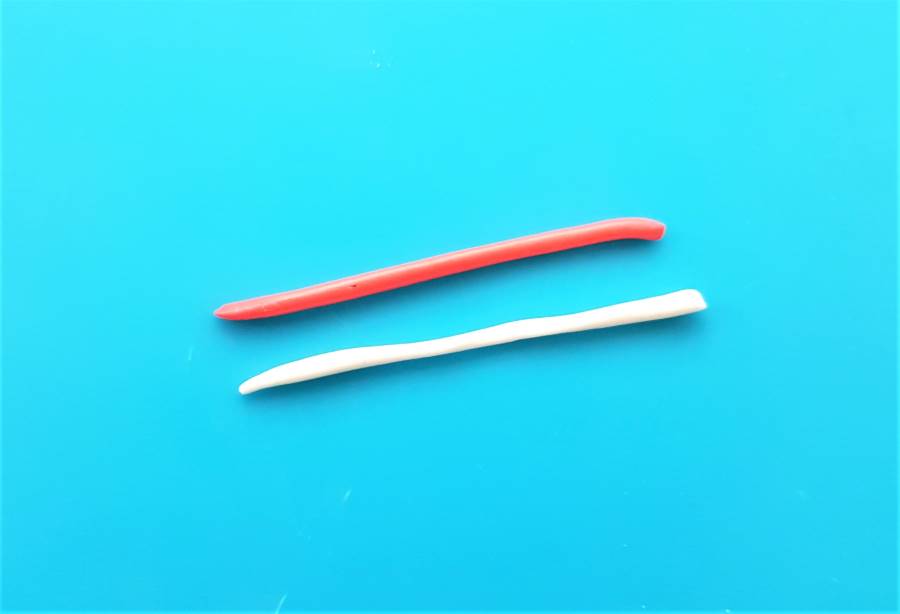
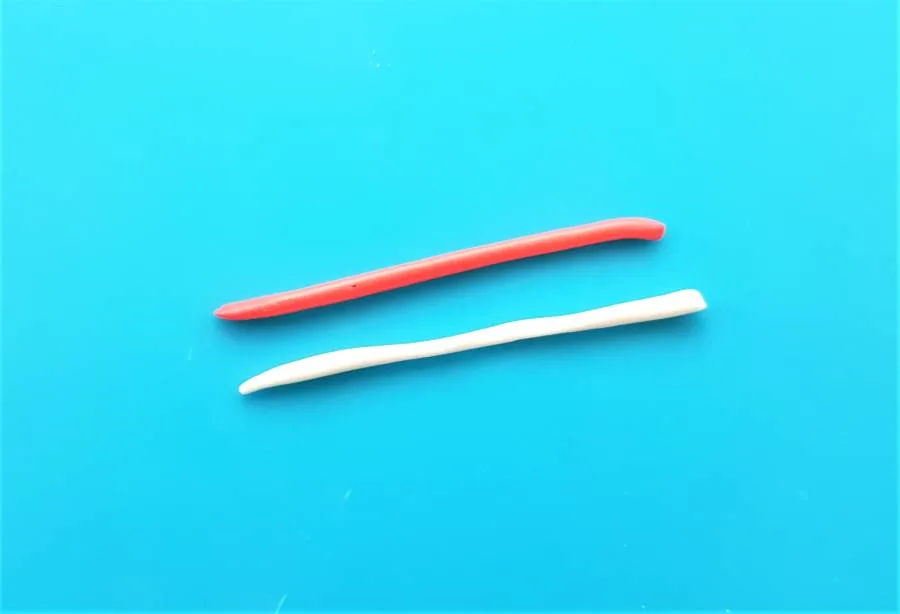
Condition two 5mm balls of your coloured clay and roll each out into a string of 1 to 1.5 inches long.
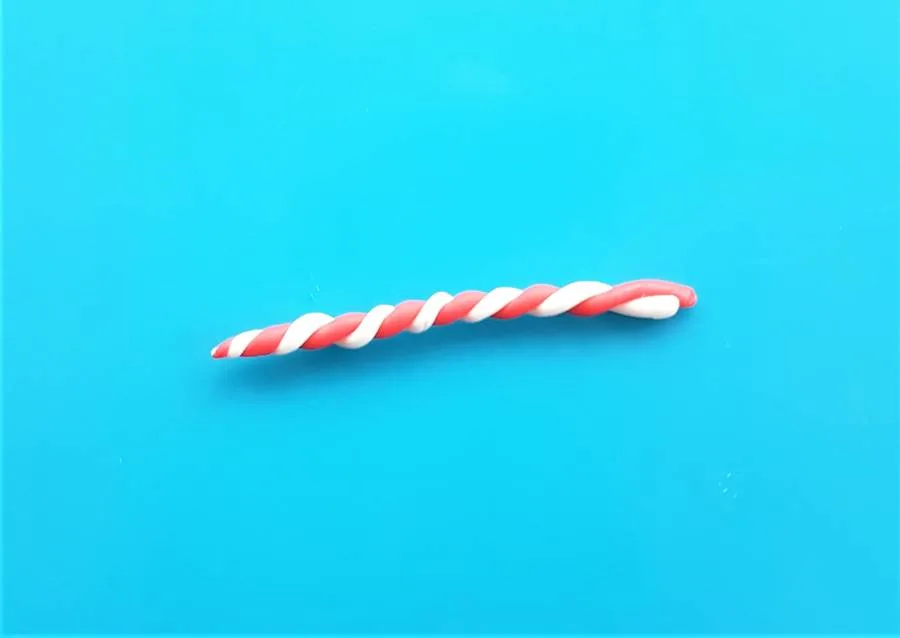
Then take your two strings of clay and begin to spiral them around each other.
Here’s how to get the technique right:
- Pinch one end of each string together to create a hold for the tip of your spiral.
- Next carefully begin to wind the coloured clay around each other.
- Gently tug at the clay as you do this, to ensure an even spiral is created. Then pinch the final ends closed.
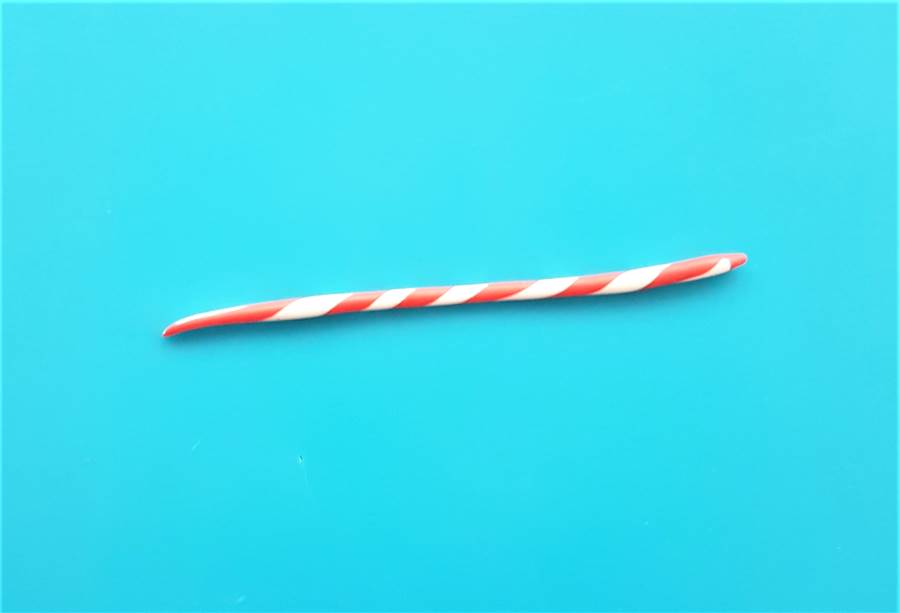
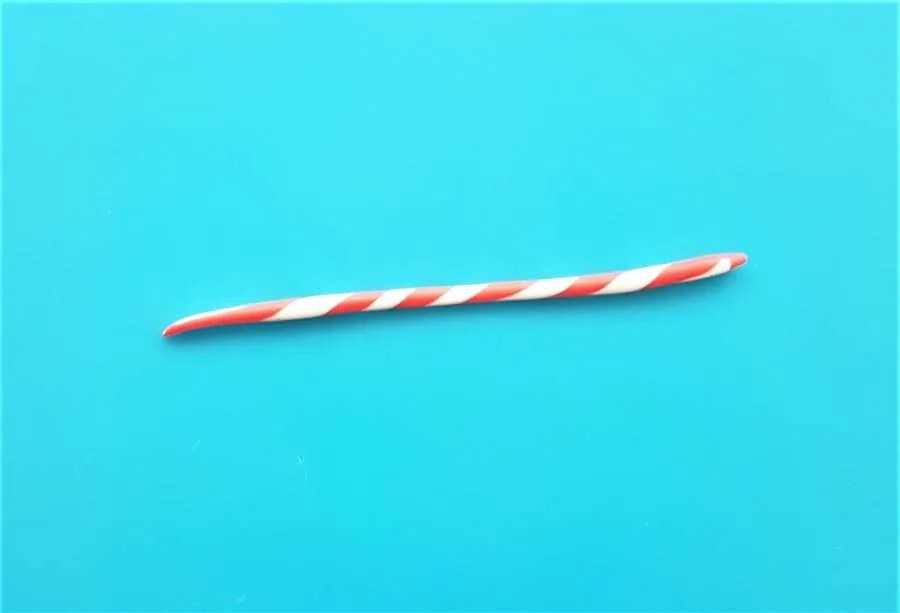
Now we have created our spiral it’s time to smooth it out, like a real candy cane.
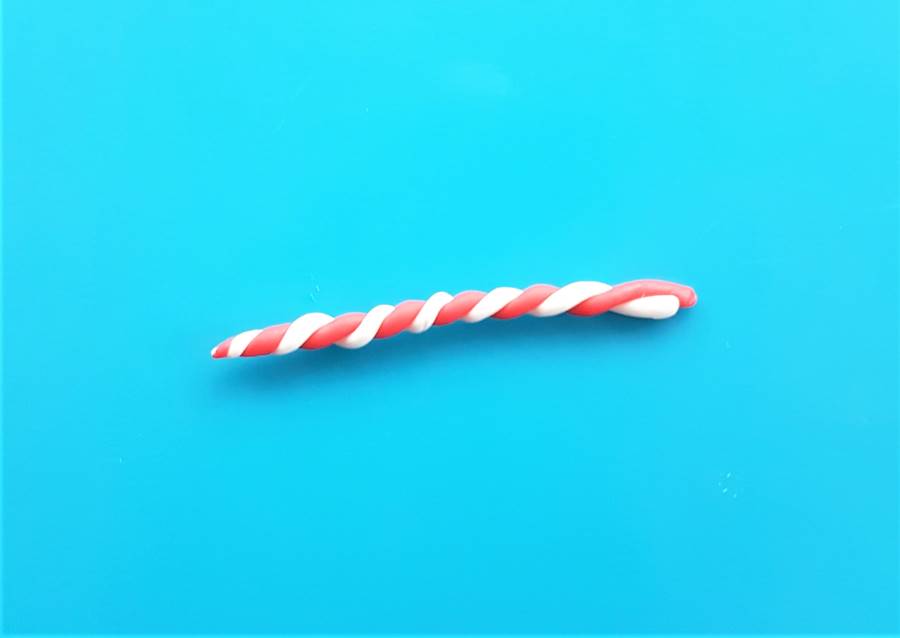
To do this gently roll your cane against your crafting mat, until all sides are smooth, as pictured below.
Take your time with this, and make sure the cane stretches to a length that you can comfortably divide into 3 little candy canes, with an even spiral running through each of them..
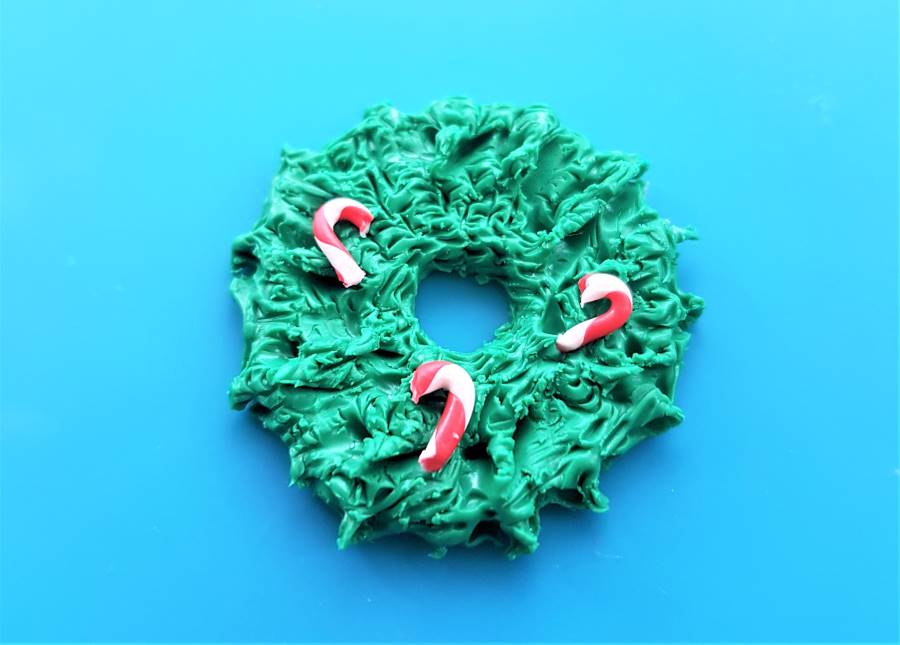
Once you are happy with your spiral, take a cutting tool and divide it into three equal pieces. Bend the tip of each piece using your fingertip if you have steady hands, or the end of your pointed tool, until each resembles a real candy cane.
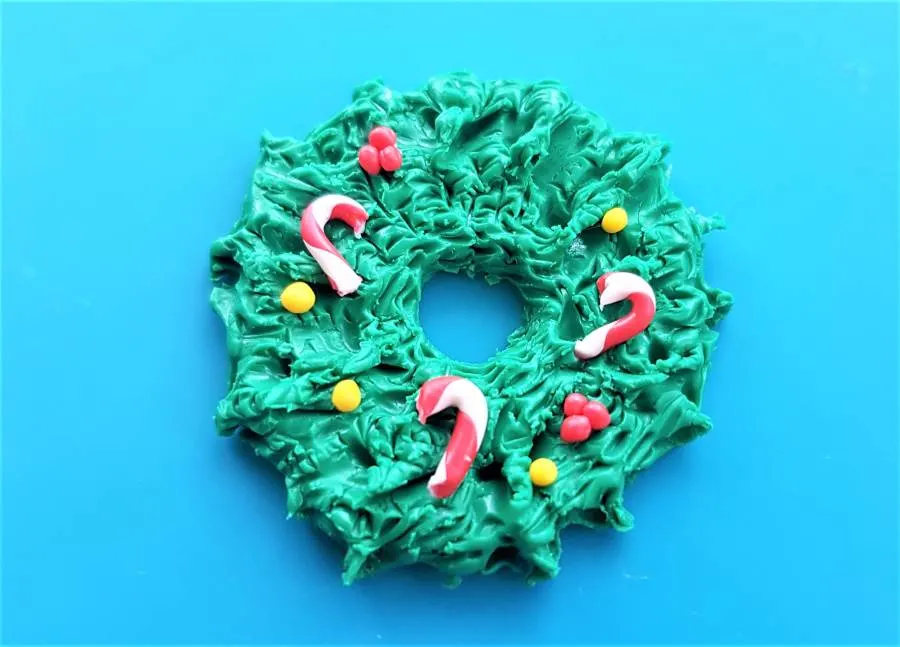
Then add a small amount of polymer clay glue to your crafting mat. Carefully pick up each candy cane and dip it in a small bit of the glue, before placing it onto the body of the wreath as pictured below.

5. Add the berries
With the candy canes added it’s time to continue on with the small details and add life to the design.
I decided to add red and yellow berries to my wreath earrings for a traditional look.
Here’s how I made the berries:
- Take a small amount of red clay, enough for 6 balls of 0.5mm in length (so approximately a 3mm piece of clay).
- Begin gently rolling it on your crafting mat in order to condition it.
- Roll out the clay into a string and divide it into 6 pieces.
- Roll each of these individual pieces with your fingertip against your crafting mat, until they are all shaped like berries.
- Then group them into two groups of three, and gently pick them up using a ball-ended tool or a pointed tool and transfer them onto the wreath, as pictured below.
Follow the same steps for the yellow berries. I only add four however, and spaced them out individually.
If you wish you could add a very small amount of polymer clay glue to the berries, for a more secure attachment.

6. Make and add a bow
A bow on top of a real wreath really finishes off the festive design, and our earrings are no exception!
Here’s how to add a lovely finishing touch, by making a bow.
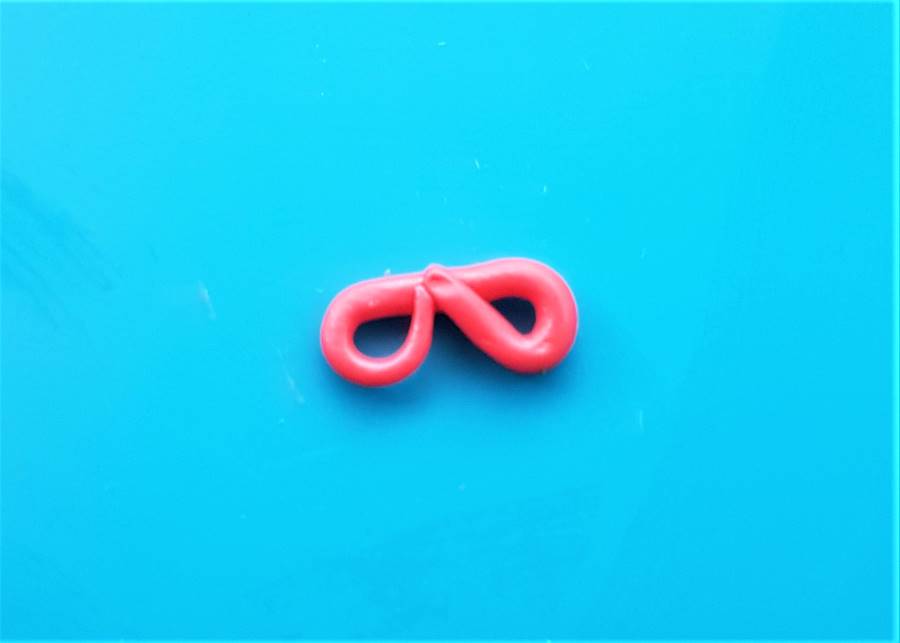
- Condition and roll out a string of red clay approximately 2cm long and 1mm wide.
- Bend it into a bow shape by curling each of the ends inwards to look like a pair of little glasses, as pictured below.

- Next condition a small amount of white polymer clay into a short string, approximately 5mm long and 1mm wide.
- Fold the white clay over the centre of the bow, to cover where the ends meet and form a neat middle section.
- Condition some additional red polymer clay to form the bow strings, into strings of about 5mm long and 1mm wide.
- Press one end of each bow string against each other to form a small ‘v’ shape, then pick up the main body of the bow and place it on top of the strings where they meet.
Your bow is now complete and can be added to the top of the wreath. Use a little polymer clay glue to secure the hold when baked, as pictured below.
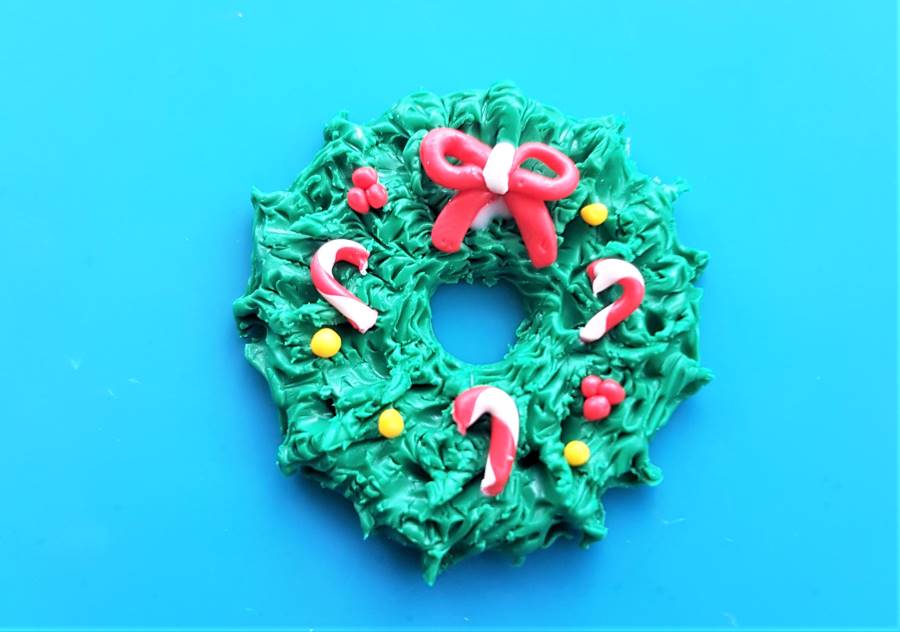
Before we move onto the next step make sure you add a small hole into the top of the wreath just above the bow, for the jump ring and earring hook to attach to.
You can do this by pressing a neat hole into the clay with a ball-ended tool (wiggle it out gently), or anything pointed and cylindrical – I’ve even used a piece of dried spaghetti in the past!
7. Bake the earrings and then add the jump rings and earring hooks
Pop your earrings into the oven and bake according to the packaging instructions of your chosen brand of clay.
Once they are done, remove them from the oven and allow them to cool and sufficiently harden for a couple of hours.
When you are sure they are cooled, it’s time to add your earring jewellery. Take a pair of jewellery pliers and open two jump rings. Attach your earring hooks and then feed the jump rings through the jewellery hole you added to the top of each wreath. Check your earring hooks will be hanging the right way around before using your jewellery pliers to carefully close the jump rings.
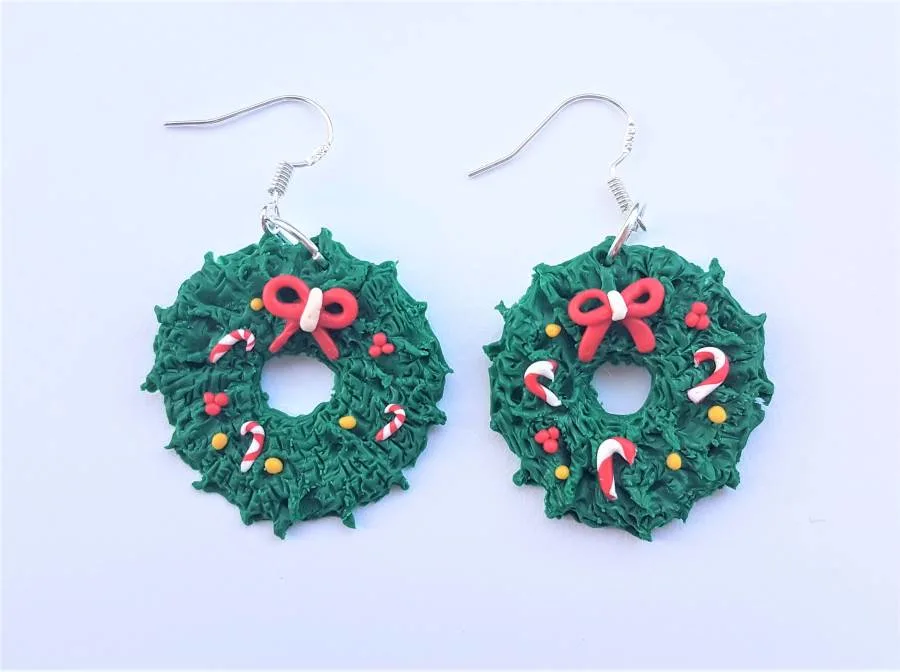
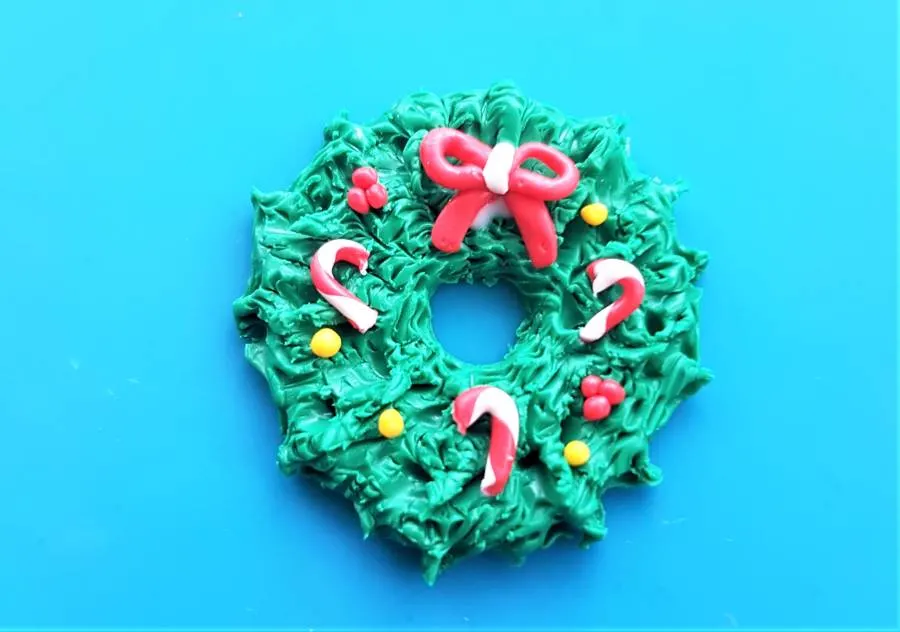
Your wreath polymer clay earrings are now done! They should look something like the below:
Enjoy!
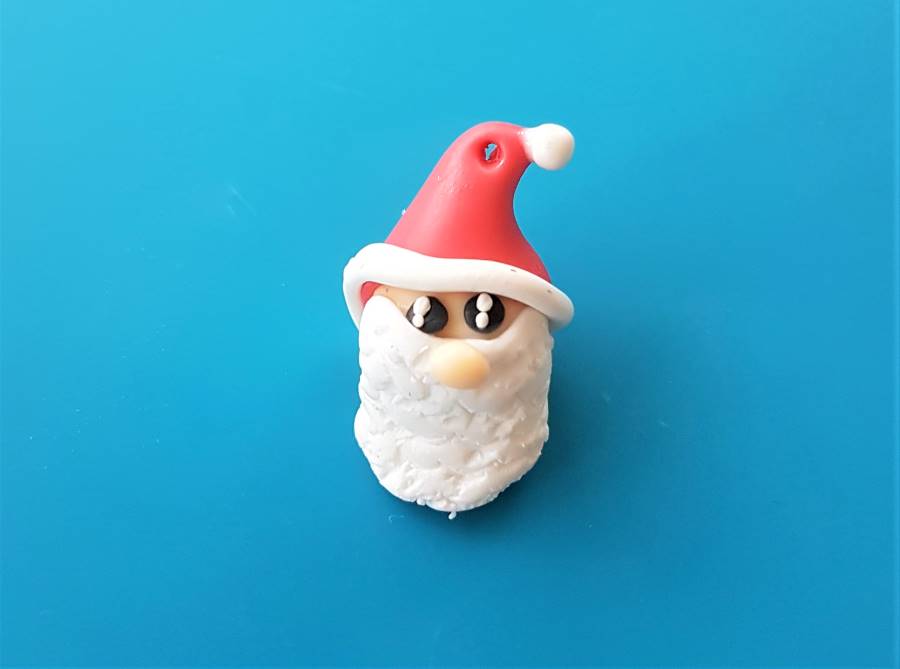
2. Santa Christmas Polymer Clay Earrings Tutorial
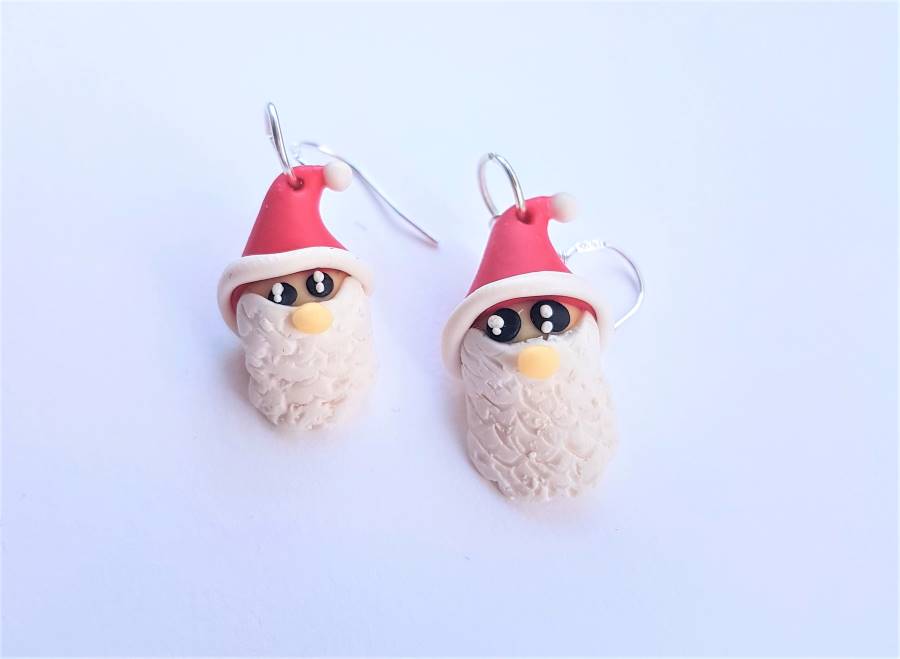

Ho-ho-how adorable are these little Santa earrings? Very cute and surprisingly simple to make, here’s a beginner friendly tutorial for Father Christmas/St. Nick/Santa polymer clay earrings!
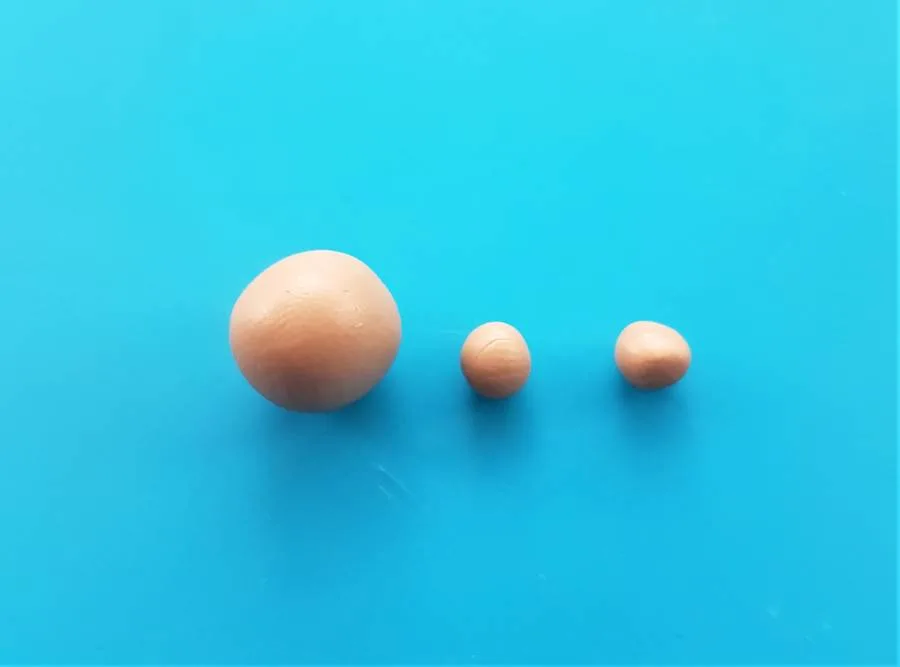
1. Condition your clay
Start by taking some peachy-toned, red, white and black clay (ratios needed pictured below), and conditioning each into a smooth and malleable ball.
You’ll know when your clay has been properly conditioned when there are no cracks or flakes in it’s surface.
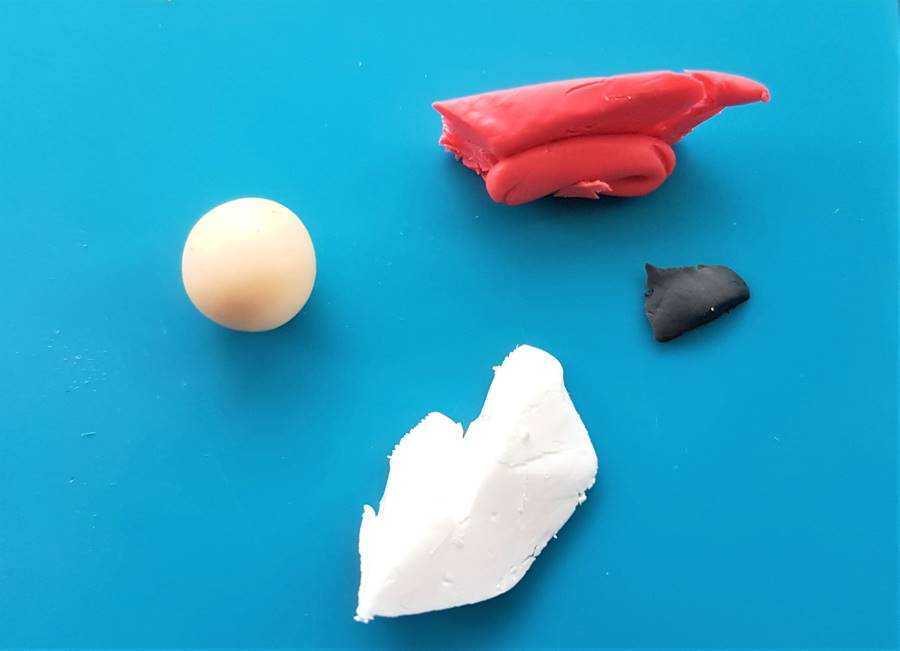

After conditioning set all of the colours aside apart from the peachy-skin toned clay.
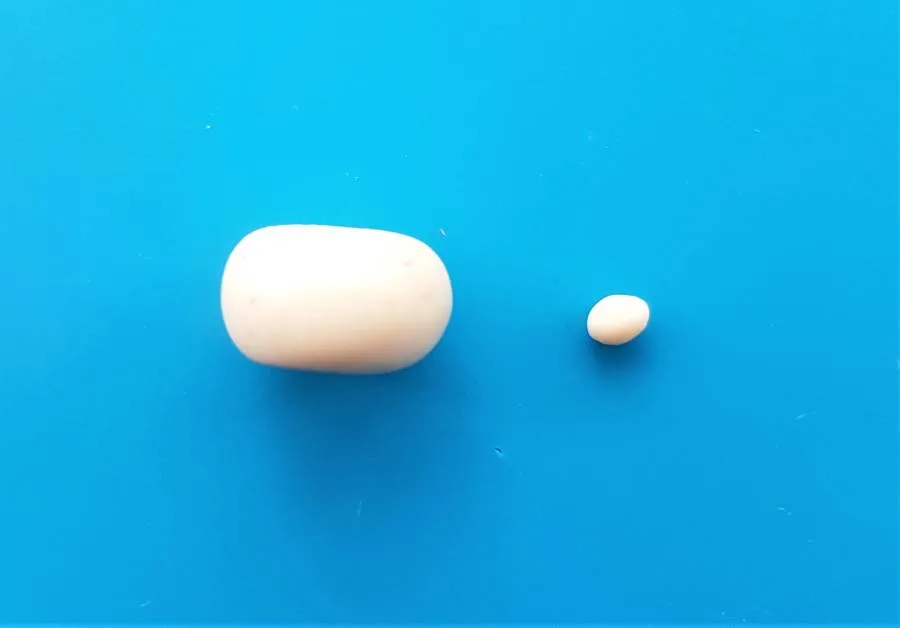
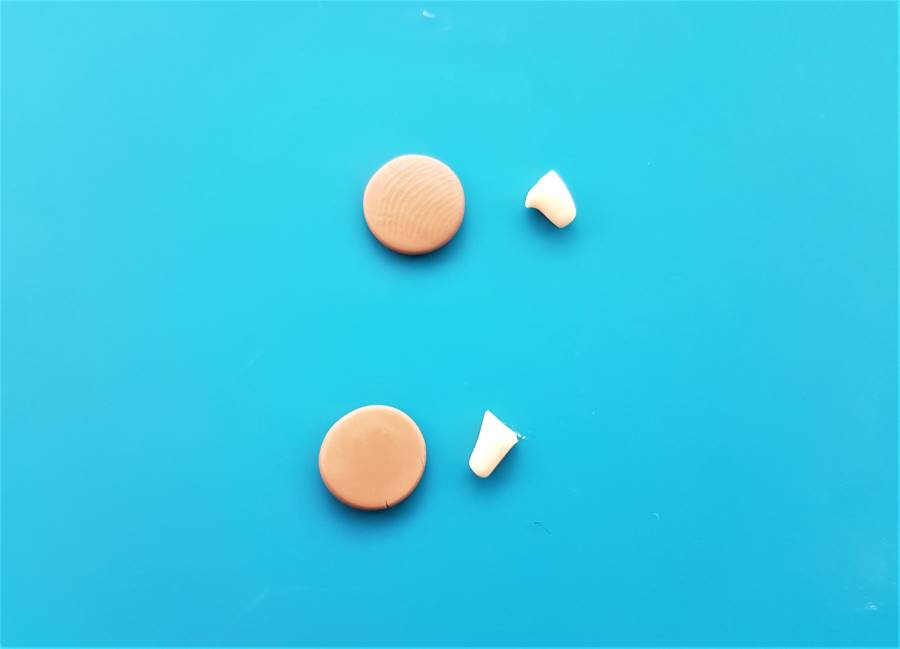
2. Form a head and nose with the peach-toned clay
The next step is to make the Santa head from peach-toned clay, along with a little nose that we will make and then keep to one side for later.
This is super easy to do – take your ball of conditioned clay and squash it slightly between your finger and crafting mat, until it looks something like the below. The head should be about 1.5cm wide.
Next take some additional peach clay and roll a small ball, about 2mm wide, to form the nose.
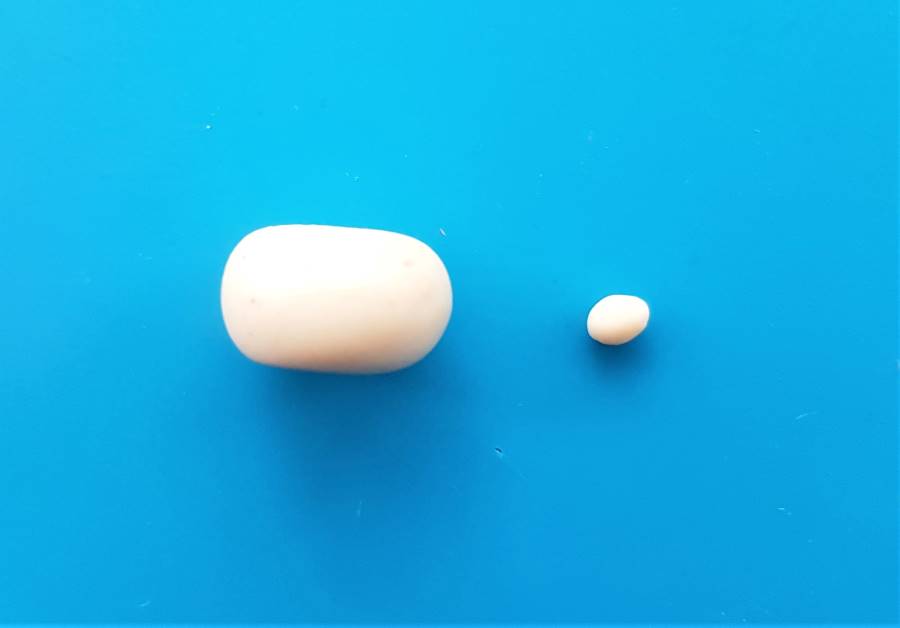
Place those to one side for now and we’ll move on to making the fluffy white beard.
3. Roll out white clay and add details to form the beard
Take the ball of white clay we conditioned earlier and divide it into 3 pieces.
Here are the approximate size divisions: one piece should be 1 cubic cm for the beard, the second 5 cubic mm for the hat trim and the third 2 cubic mm for the hat bobble.
Set aside the clay for the hat trim and hat bobble.
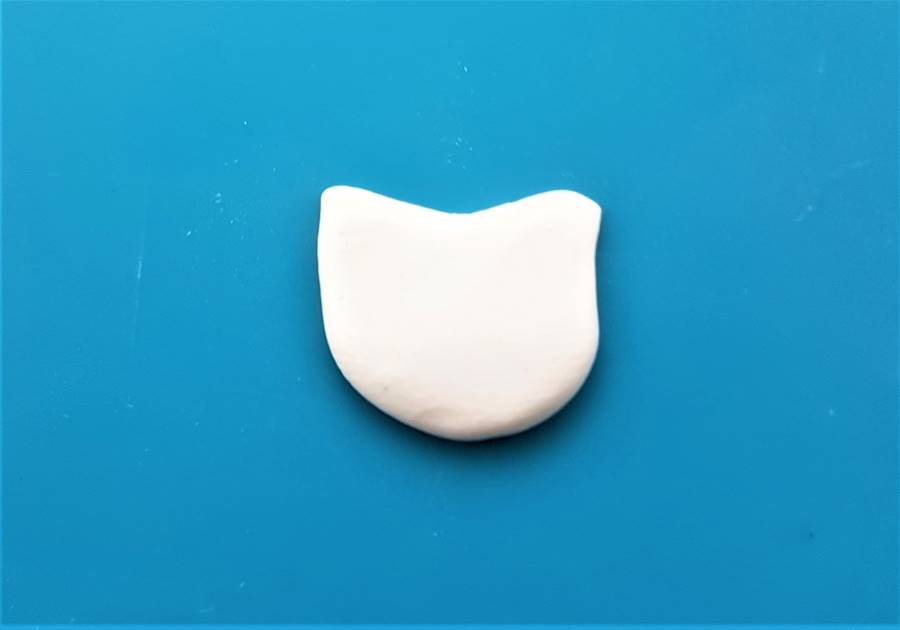
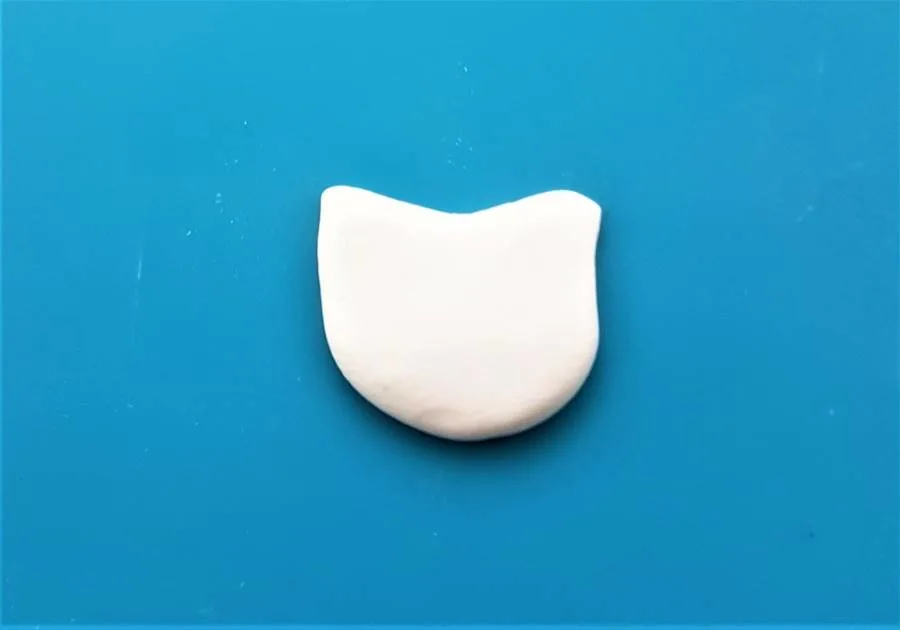
Roll out the clay for the beard with an acrylic rolling pin, until it forms an oval 2cm in height and 1.5cm in width.
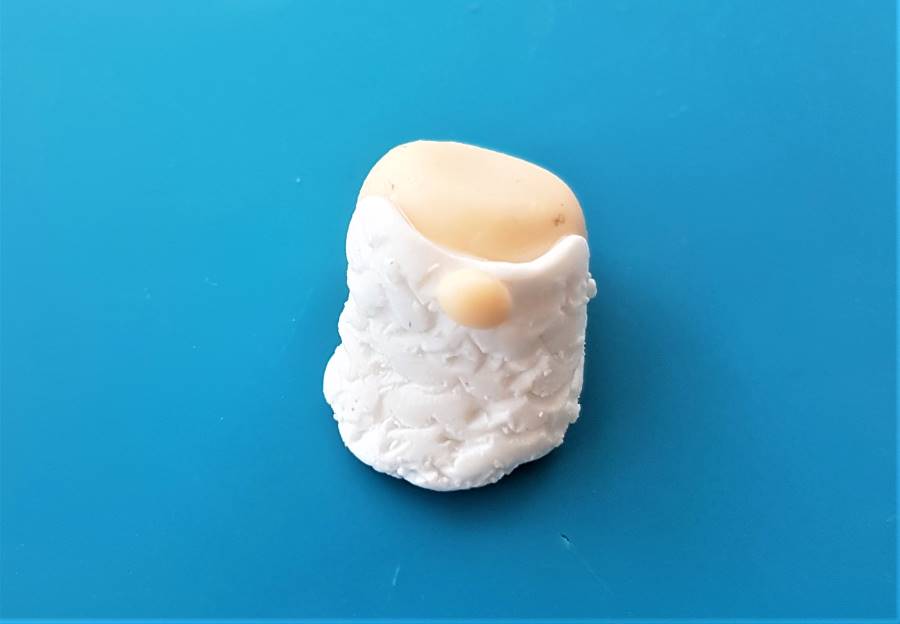
Bend the top of the oval inwards slightly, moulding the clay with your fingertips, until it resembles a beard shape, as pictured below.
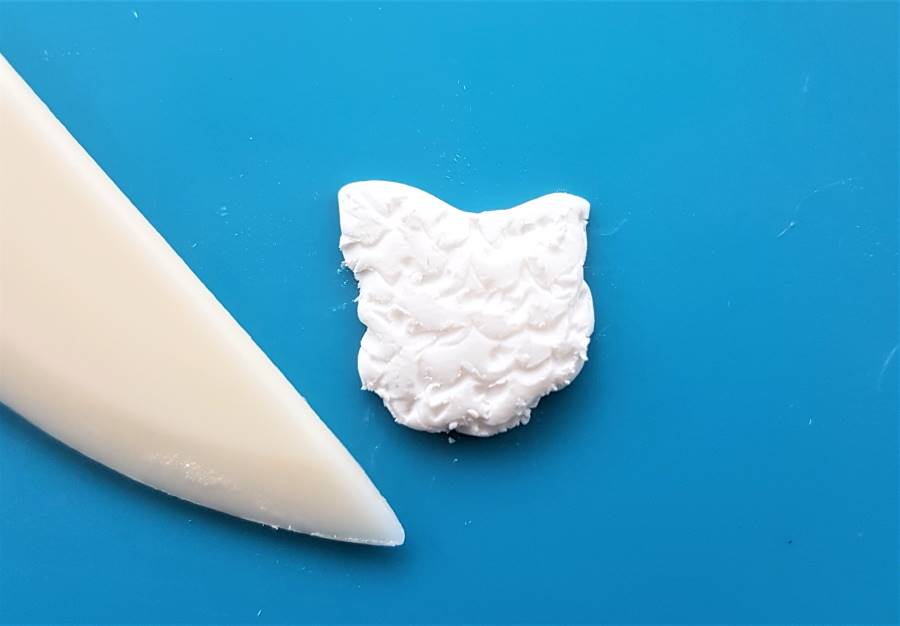
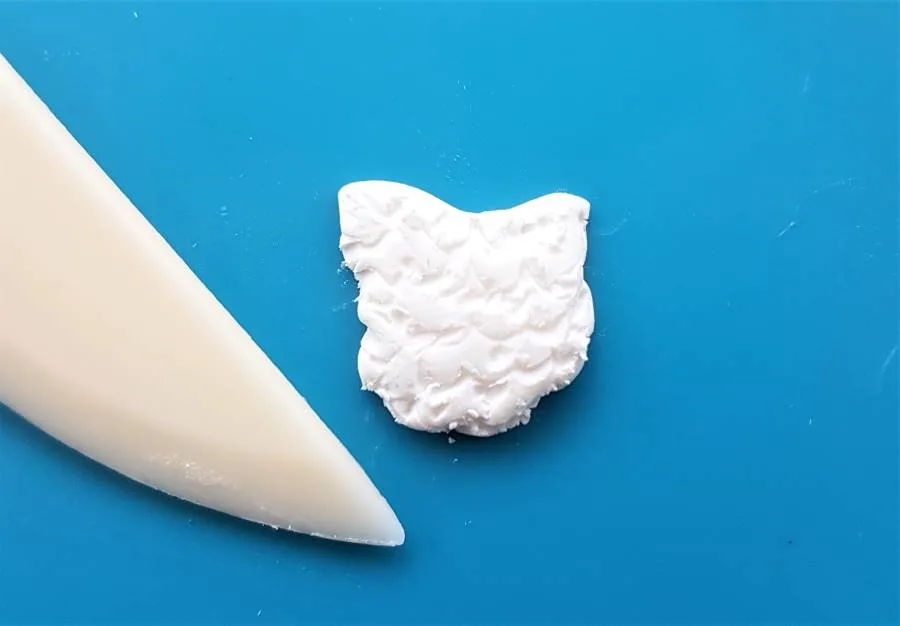
Next take a pointed tool like a clay cutting utensil and use the tip to begin adding a scalloped pattern over the surface of the clay, as though you were drawing a simple cloud.
Add several rows of the scalloped pattern, until the surface of the beard looks like the below.
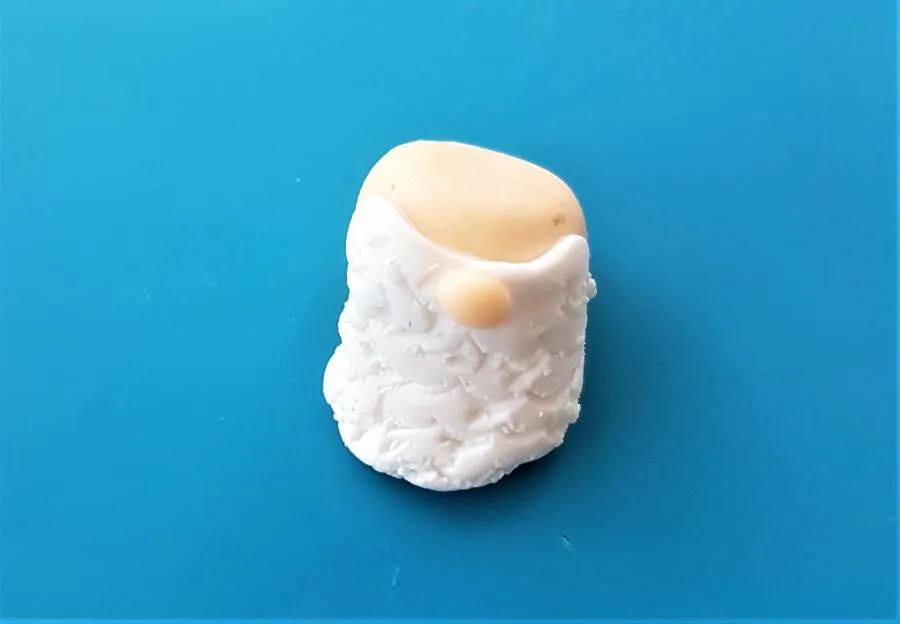
With the beard details complete it’s now time to attach it to the Santa head we made earlier.
Take a little polymer clay glue and add it to your crafting mat.
Roll the bottom half of the Santa head into the glue along the imaginary jawline, so the beard has something to stick to. Make sure you leave enough of the face exposed, as this is where we’ll be adding the eyes and attaching the hat.
Press the beard against the glued jawline and smooth with your fingertips until it is secure. Then add the nose, by dipping it into the glue and pressing this on top of the beard, as pictured below.
With the beard and nose added the face is starting to take shape. Next, let’s add the eyes.
4. Add the eyes
Take the small amount of black polymer clay we conditioned earlier and roll it gently into a string of 1mm thickness.
Take two cuttings from it at 1mm length each and roll these into little balls.
Press each ball flat with the pad of your fingertip, to form the black base of the eyes. Next using your pointed tool carefully lift each black pad and press them to the Santa face, just above the beard line. The clay should be fine and sticky enough to bond to the face, without the need for polymer clay glue.
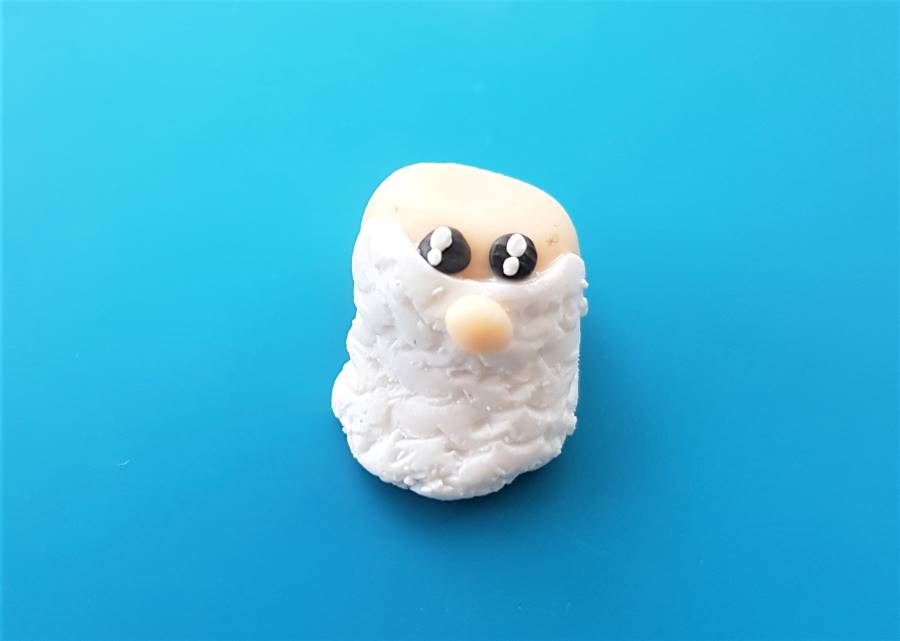
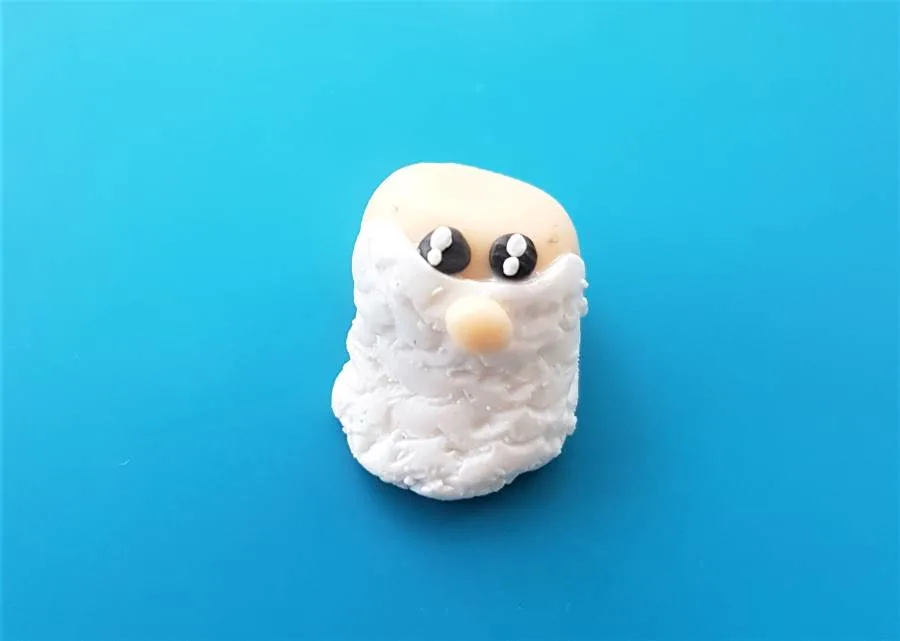
Now let’s add the white of the eyes:
- Roll 4 tiny balls of clay, two slightly bigger than the others.
- Use a pointed tool to carefully pick these white balls up and press them to the black of the eyes, with the larger on top.
- Please refer to the image below for scale/reference for placement.
With the eyes done it’s time to make the hat…
5. Make the hat and add the trimming and bobble
Making the hat seems daunting but it’s actually really easy.
Take the red clay we conditioned earlier and begin to roll it with an acrylic rolling pin, into a circle of 3mm in thickness and 2cm in length.
Then cut the bottom part off the circle, to create a flat hat base, as pictured below.
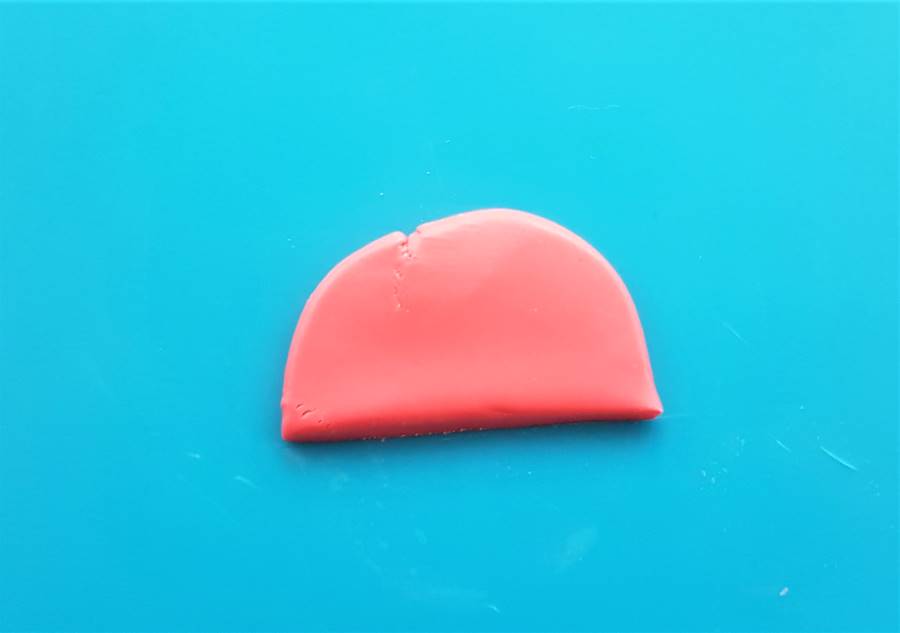
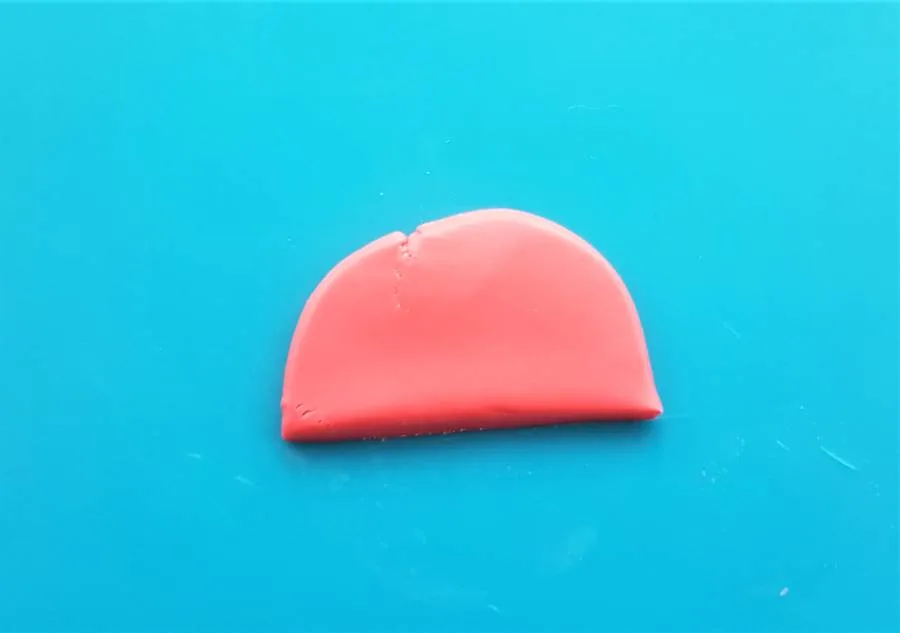
Next add a little polymer clay glue to the hairline of the Santa head, and press the rim of the hat to it. Gently fold the hat around the head, and then pinch the tip and bend to create the drooping ‘Santa hat’ effect.
See the below picture for the effect.
With the base of the hat attached you can now add the details.
To create the hat trim roll out a string of white clay to 2cm in length and 2mm in thickness. Wind this around the trim of the hat and press down lightly to ensure it sticks.
You shouldn’t need polymer clay glue to attach the trim, as it should be sticky enough to attach on it’s own.
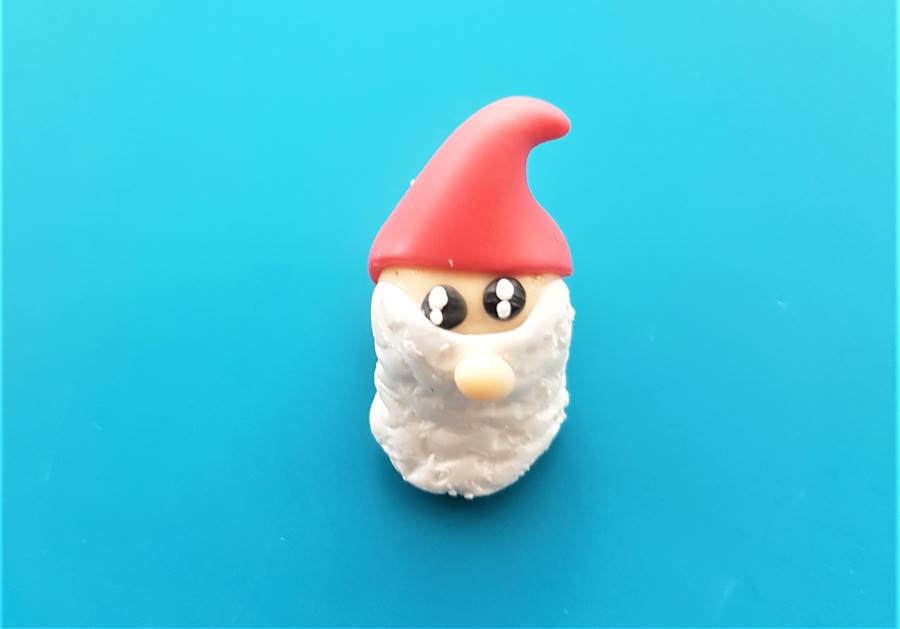
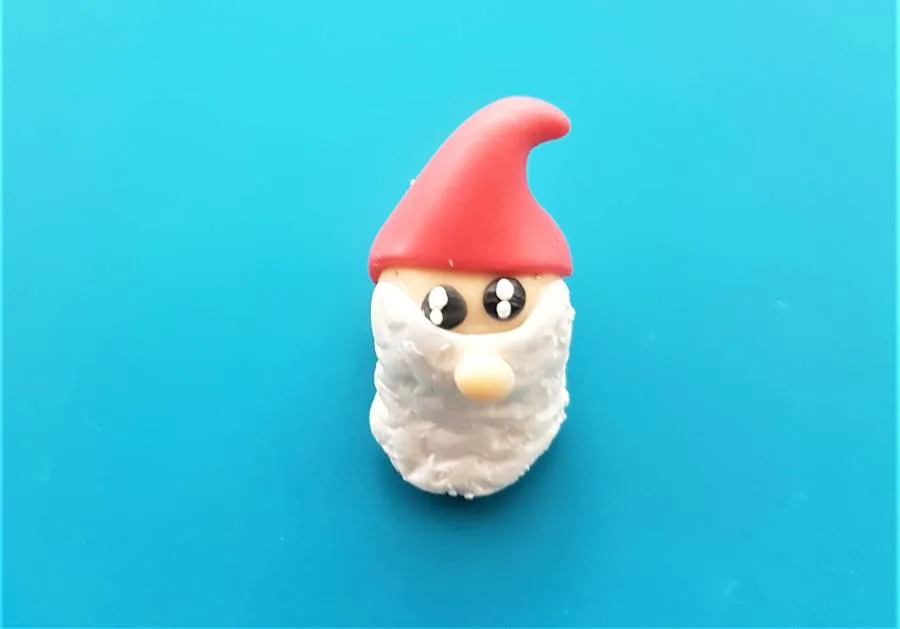
Next roll a small ball of white polymer clay to 2mm in width for the bobble. Dip this into a little polymer clay glue and secure it to the tip of the hat, as pictured below.

Take a ball-ended tool and press a hole through the top of the hat as above for the jump ring and earring hook to attach to.
Now it’s ready to bake…
6. Bake the earrings and then add the jump rings and earring hooks
Pop your Santa polymer clay earrings into the oven and bake them according to the packaging instructions of your chosen brand of clay.
Once they are done take them from the oven and allow them to cool and harden for a couple of hours.
When this time has passed you can proceed to adding your jump rings and earring hooks with a pair of jewellery pliers.
Now your earrings are done, enjoy!
3. Reindeer Christmas Polymer Clay Earrings Tutorial
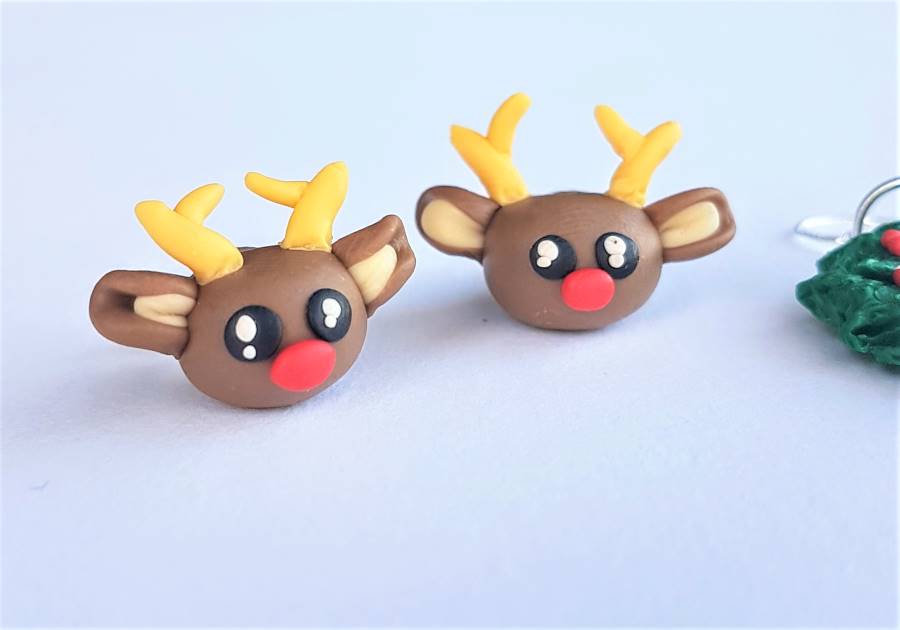

The sleigh bells are ringing and these Rudolph reindeer earrings are leading the way! (too cheesy?).
Really cute and easy to make, these beginner-friendly Christmas polymer clay earrings are a great starting point if you’re looking for your next jewellery crafting project.
Here’s how to make them…
1. Condition your clay
Make sure you start every project by conditioning the clay you will be using.
Begin by conditioning three balls of light brown clay, for the reindeer head and ears. For the head you need a 1.5cm ball, and for the ears two 5mm balls.
Roll the clay between your palms until it is warmed up, soft and malleable.

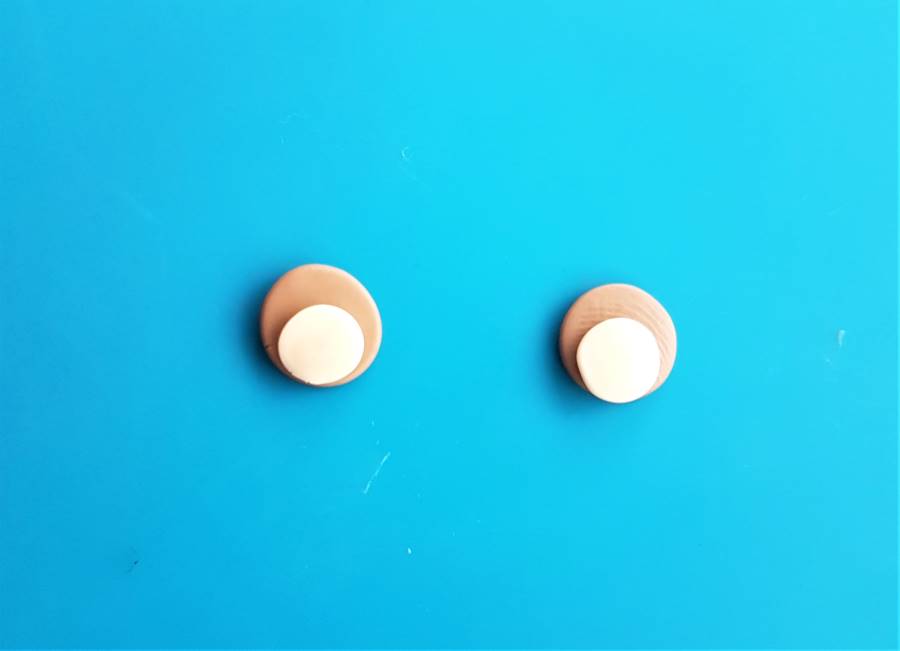
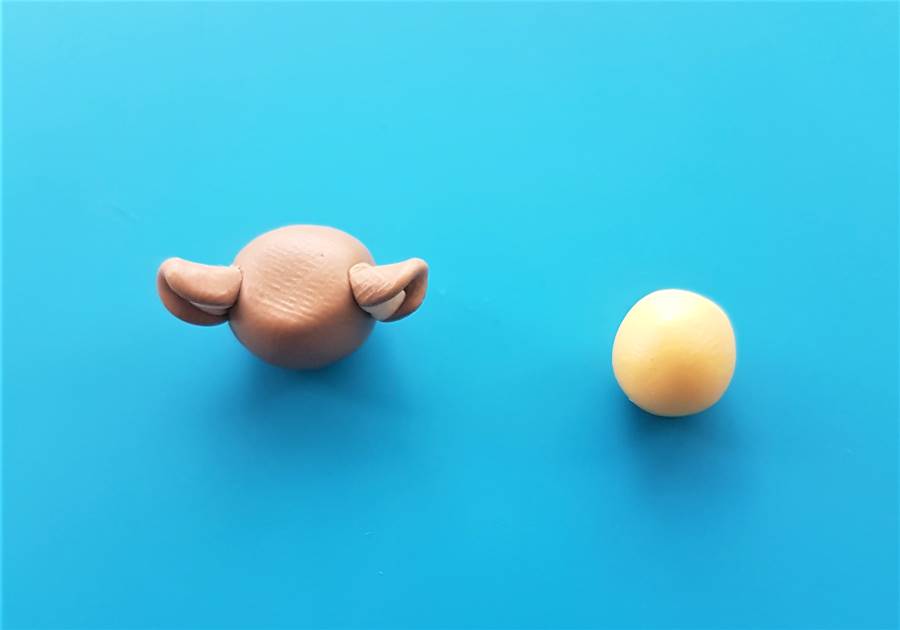
2. Make the reindeer ears using light brown and peach toned clay
Begin by making the ears.
Take your balls of light brown clay and gently press them with an acrylic rolling pin or your fingertips until they form two pads of clay.
Take a very small amount of peach toned polymer clay and divide it into two pieces of approximately 2.5mm in width.
Roll each of the peach toned pieces into balls, and then press those flat into two pads using the same method as for the light brown.

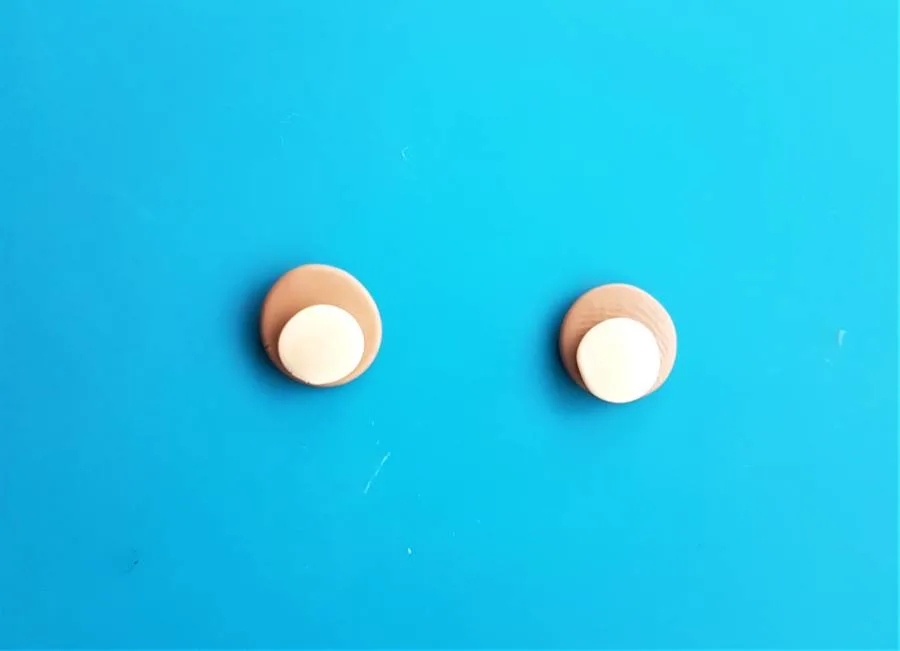
Next place the peach pads on top of the light brown, to create an inner ear effect, as pictured below.
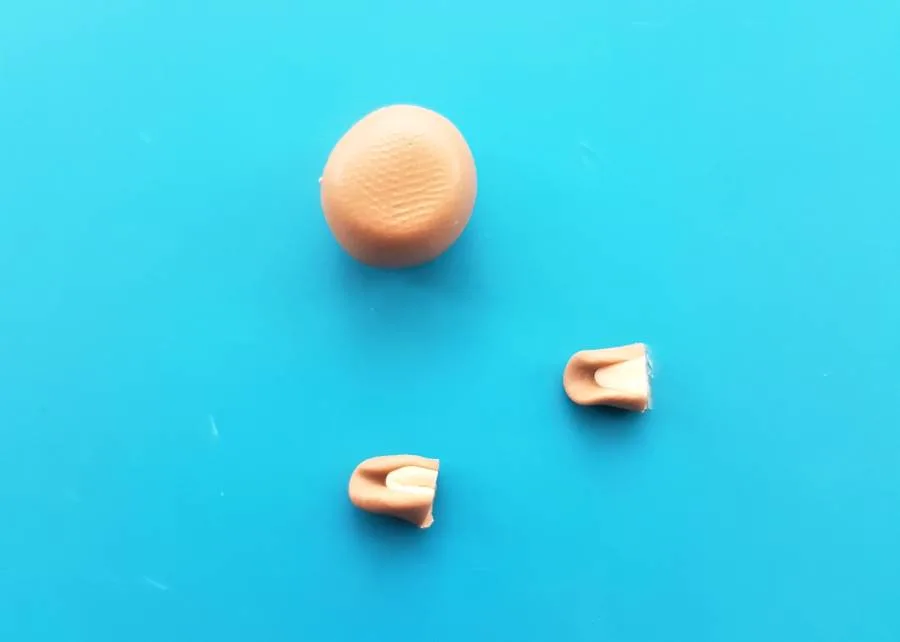
Bring back the large ball of clay for the reindeer head and press it slightly against the crafting mat to create more of a donut shape, as seen below.
Take each of the reindeer ears and curl them inwards, by pressing the base of each together between your fingertips. Then take a polymer clay cutting tool and carefully cut the base of the ears off, to create a flattened base, that will stick to each side of the reindeer head.

Pick up each ear and press them to the reindeer head, as pictured below. I didn’t need to use polymer clay glue for this step, as each of my clay pieces stuck together nicely, but if you are using a harder brand you may need to add a bit of glue at this step.
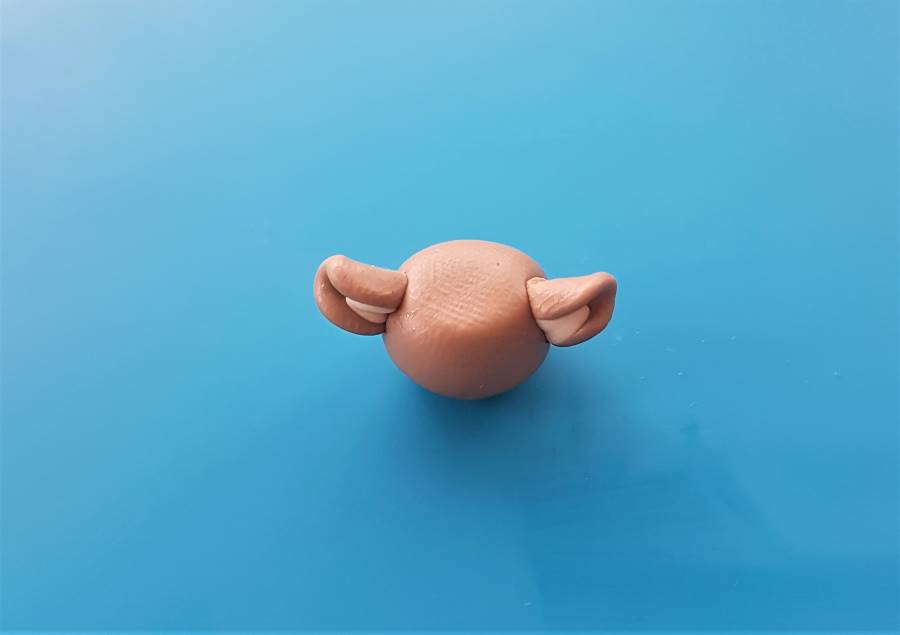

With the ears added it’s time to move on to the antlers.
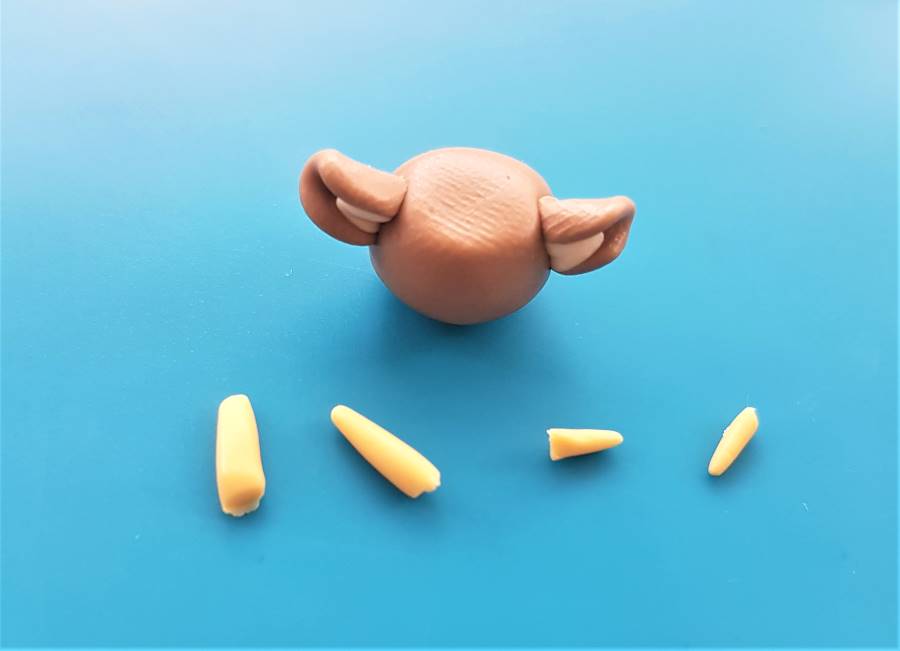
3. Make and add the antlers using light yellow polymer clay
Condition a ball of light yellow polymer clay. To achieve the colour I liked I blended white, peach, and yellow clay together, to get a colour I was happy with.
You could just use white if you like, it all depends on what colours you have available to hand.

Divide your yellow clay into two strings, one of 2cm in length and 3mm in thickness, and one of 1cm in length and 2mm in thickness.
Cut each string exactly in half. The thicker pieces will form the main stem of the antler, and the smaller pieces the branches.
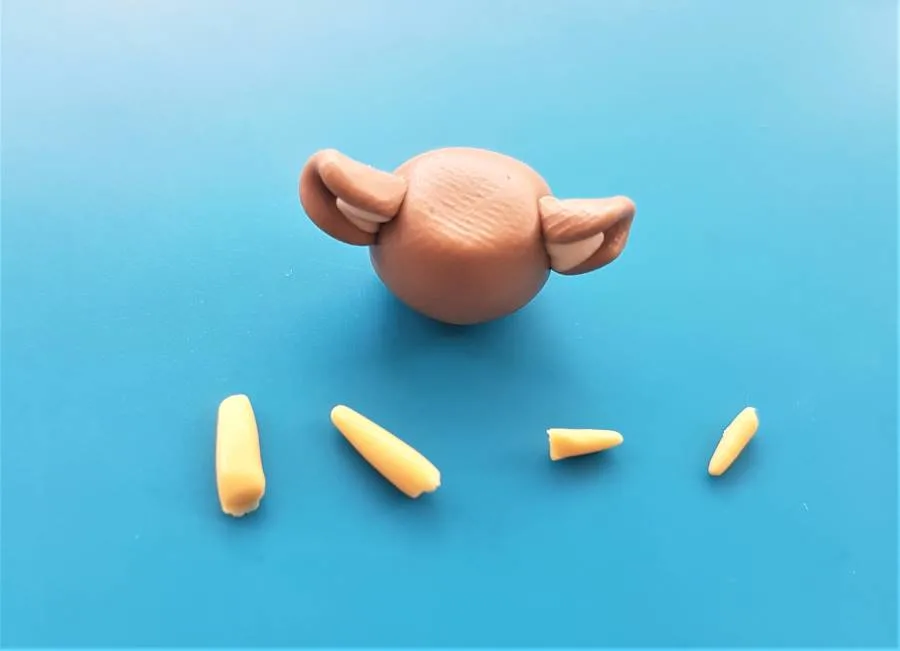
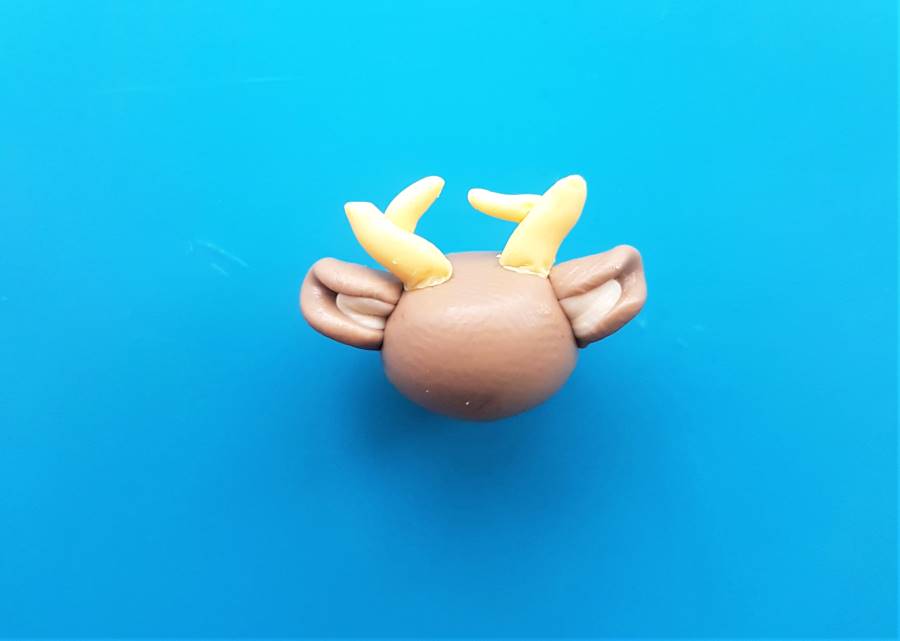
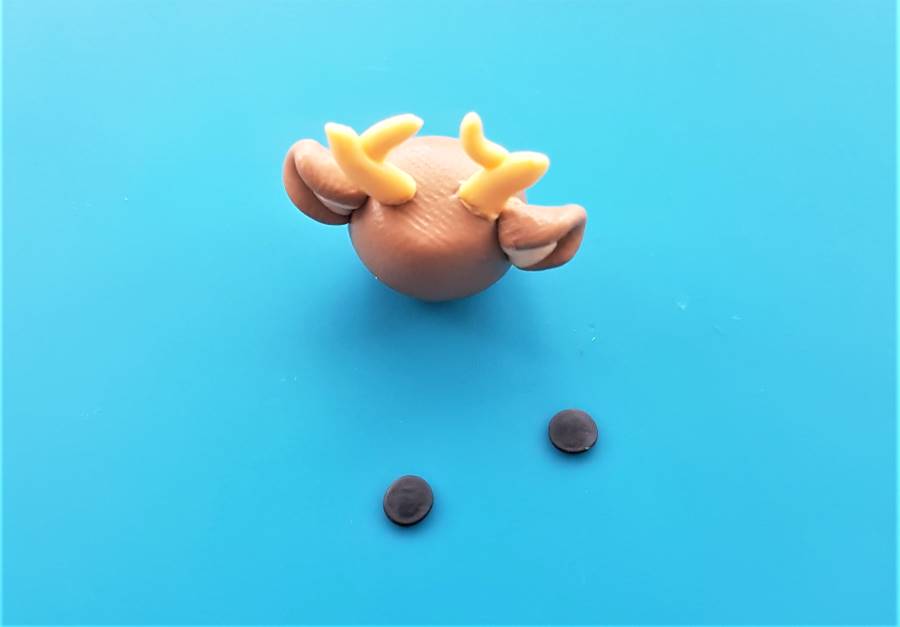
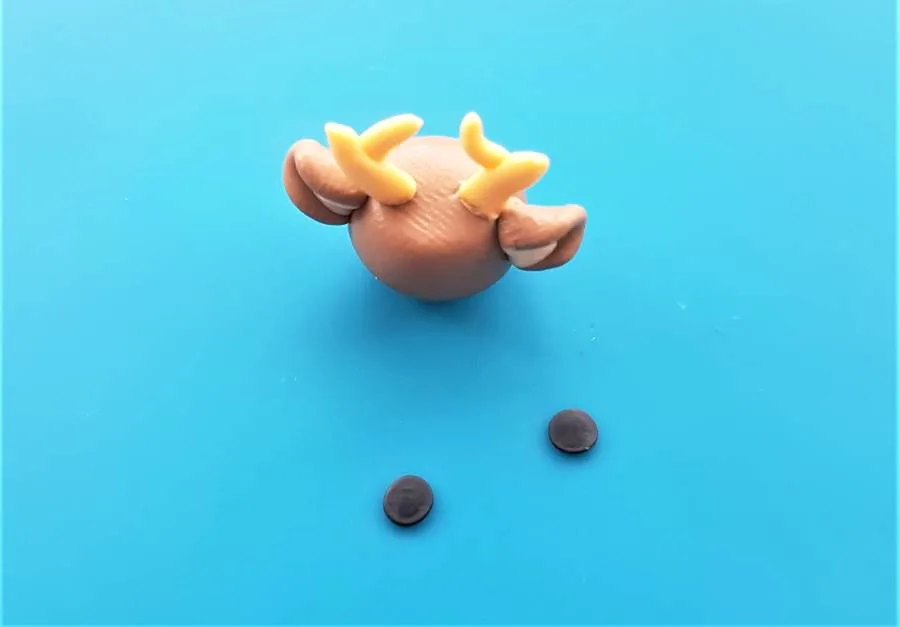
Place the smaller stems onto the thicker in a ‘Y’ shape to create antlers. Then secure the base of each antler to the reindeer head as pictured below.
If your brand of clay is a little harder, and doesn’t stick together easily, you can add some polymer clay glue to ensure the antlers will bond to the head during the baking process.

Let’s move onto the eyes…
4. Create the eyes and nose using black, white and red clay
Take a small amount of black polymer clay and roll it gently into a string of 1mm thickness.
Take two cuttings from it at 1mm in length each and roll these into little balls.
Press each ball flat with the pad of your fingertip, to form the black base of the eyes. Next using your pointed tool carefully lift each black pad and press them to the reindeer face The clay should be fine and sticky enough to bond to the face, without the need for polymer clay glue.
Now let’s add the white of the eyes:
- Roll 4 tiny balls of clay, two slightly bigger than the others.
- Use a pointed tool to carefully pick these white balls up and press them to the black of the eyes, with the larger on top.
- Please refer to the image below for scale/reference for placement.
At this point you also need to add the iconic red nose. Condition a small ball of red clay at 3mm in thickness.
Press it slightly to form an oval shape. Use a pointed tool to lift it and press it to the reindeer face, just underneath the eyes.
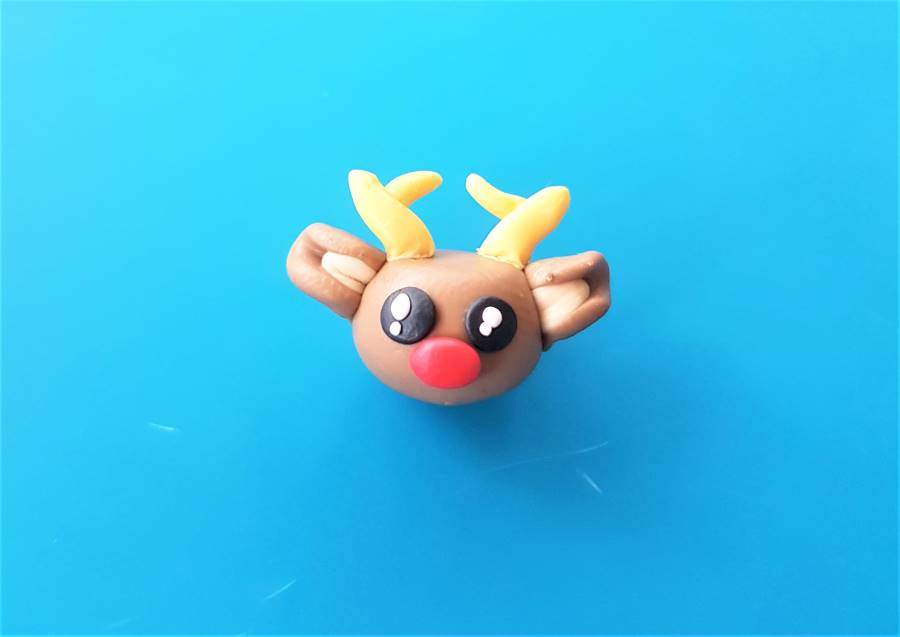

Now the reindeer head is complete! Let’s add the stud back.
5. Add the stud backs and bake the earrings
You can either attach stud backs to polymer clay earrings using super glue, baked on glue or by creating a mechanical hold with a second layer of polymer clay to secure the base of the stud back to the earring.
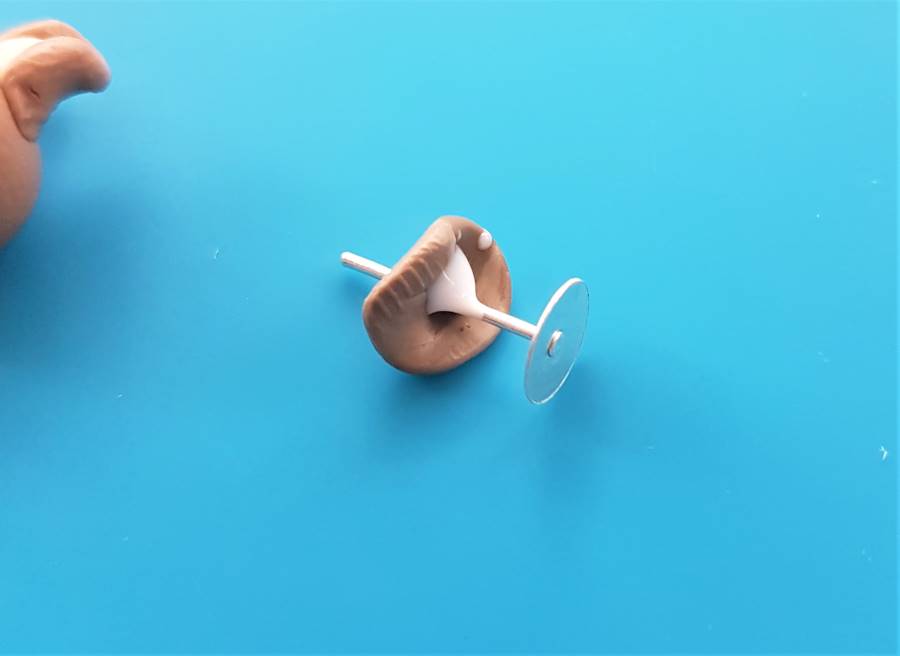
I prefer to make a mechanical hold, as it is stronger. Here’s how to do it:
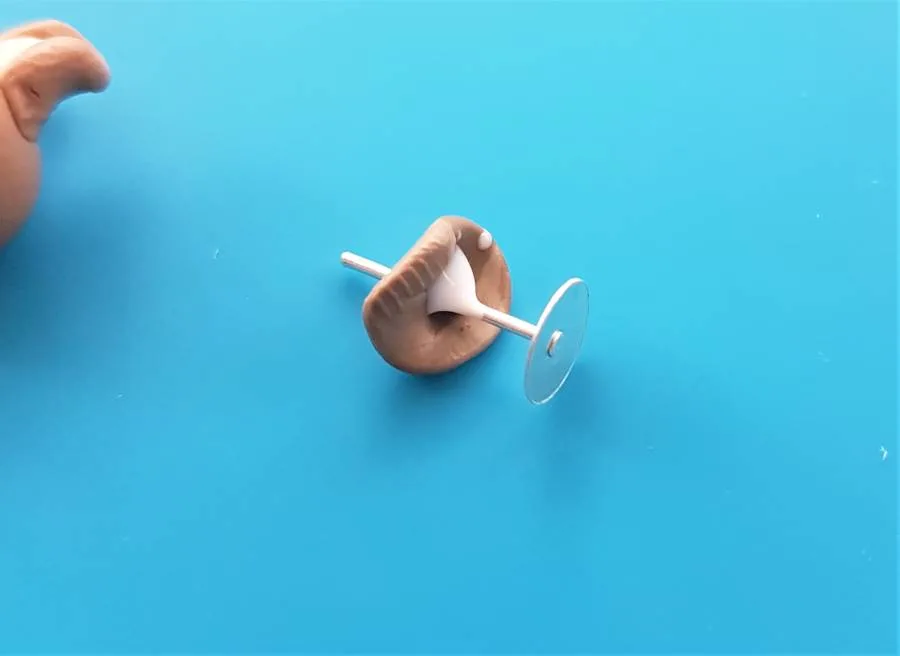
- Cut a little circle, smaller than the size your stud earring to cover the post back.
- Then skewer it onto the earring and push it down over the the stem of the earring, until it rests against the post back.
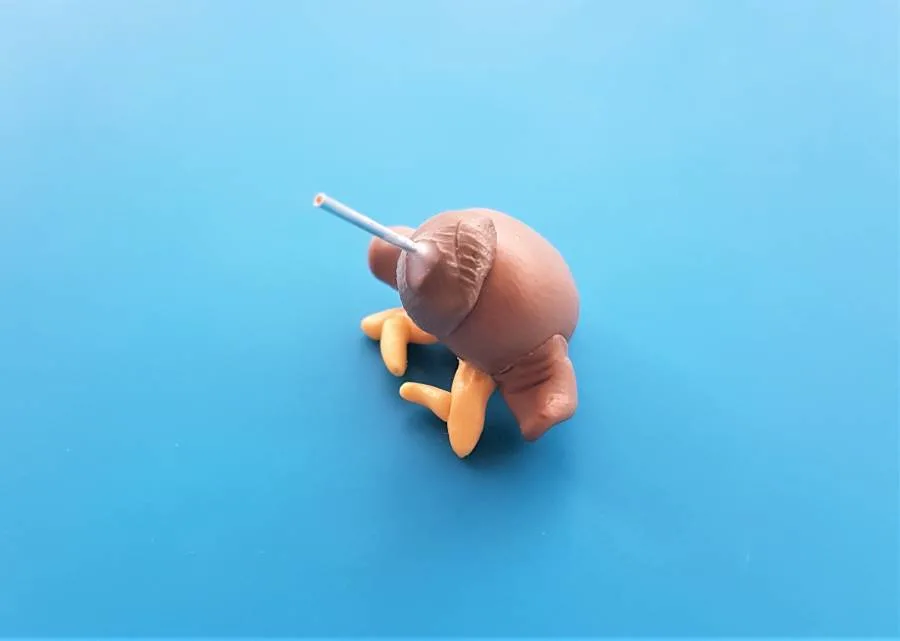
- Secure it with your fingertips, smoothing until the layer of clay has moulded with the stud earring, to completely enclose the stud back.
- If you like you can add a little polymer clay glue between the second layer and the earring, to ensure it’s fully secured.
- Bake the earring in your oven, according to the packaging instructions of your chosen brand of clay to seal the hold.

Now you’ve added your stud backs, bake the earrings according to the packaging instructions of your chosen brand of clay.
Allow them to cool, add the stud fastenings (I use butterfly fastenings over plastic backs) and your earrings are done.
Enjoy!
Related Articles
Thank you for reading, I hope you found the Christmas polymer clay earrings tutorials helpful!
For more polymer clay earring tutorials, check out:
HALLOWEEN Polymer Clay Earrings Design Ideas – Tutorial
5 Polymer Clay STUD Earring Ideas – Tutorial
5 FRUIT Polymer Clay Earring Designs

Lorna is a footwear geek and the founder of Wearably Weird. She created a YouTube channel in 2021 for fellow footwear fanatics, dedicated to detail-rich footwear reviews and info. She has a fashion media qualification (awarded in 2011).